目录
uiview
1.uiview的基础概念
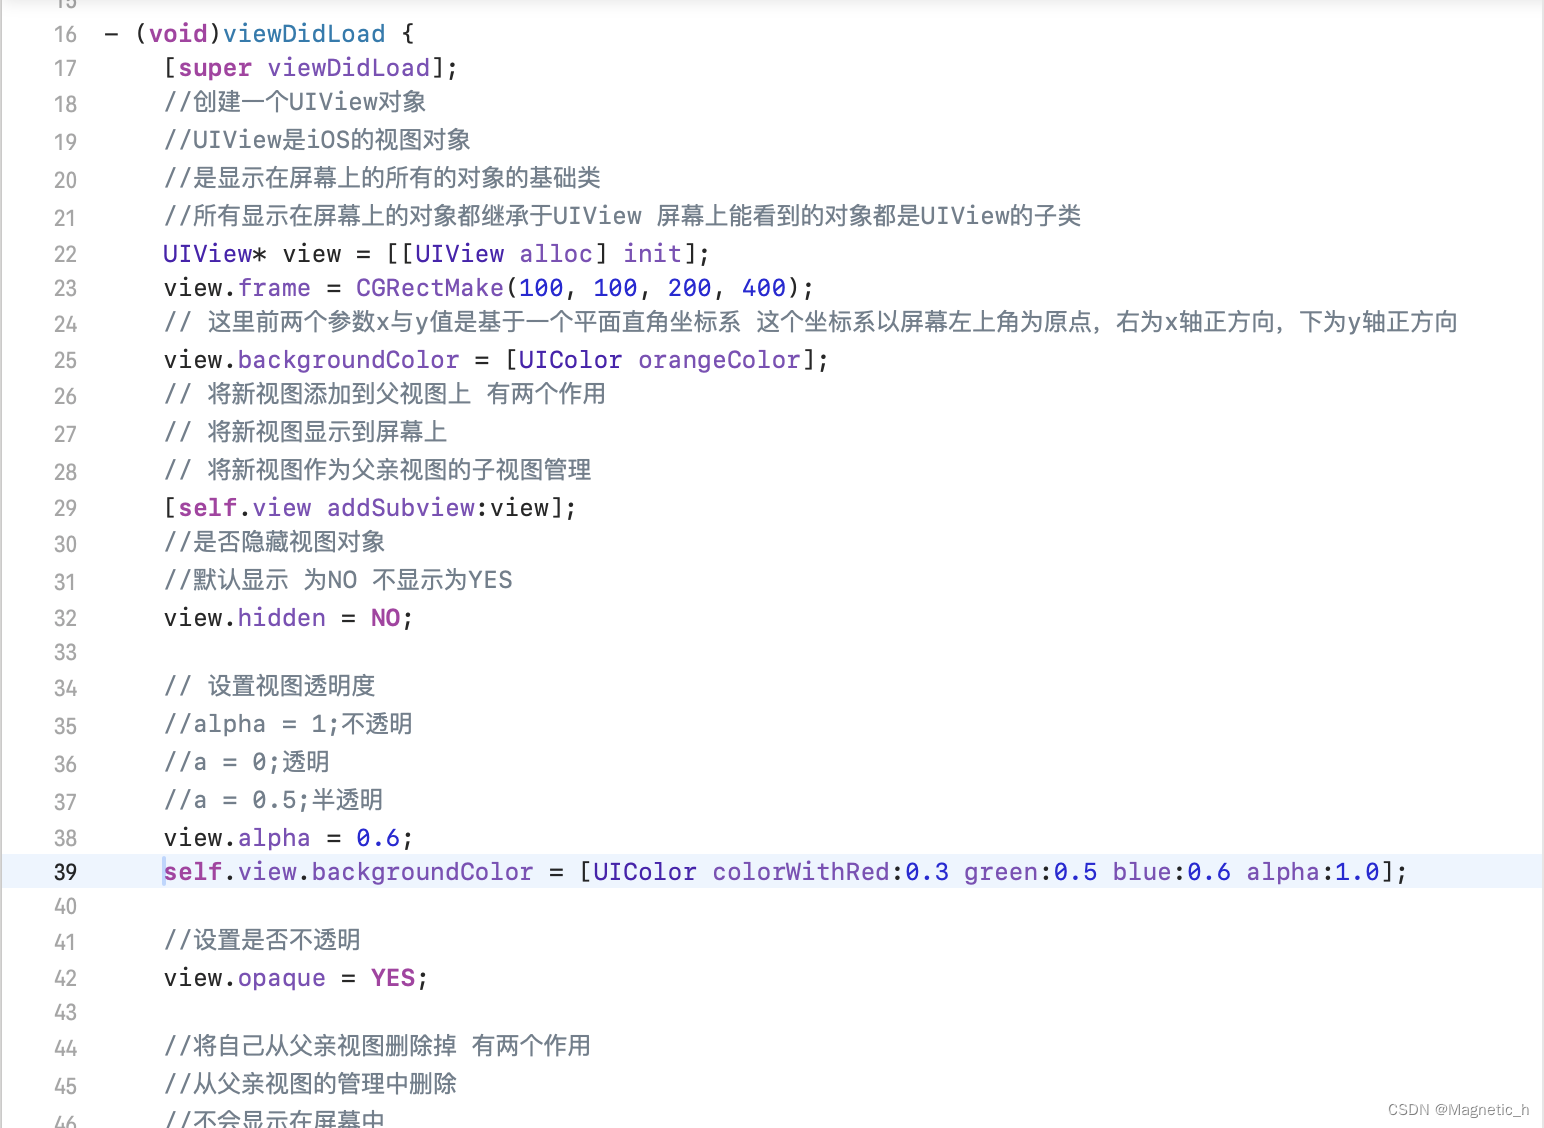
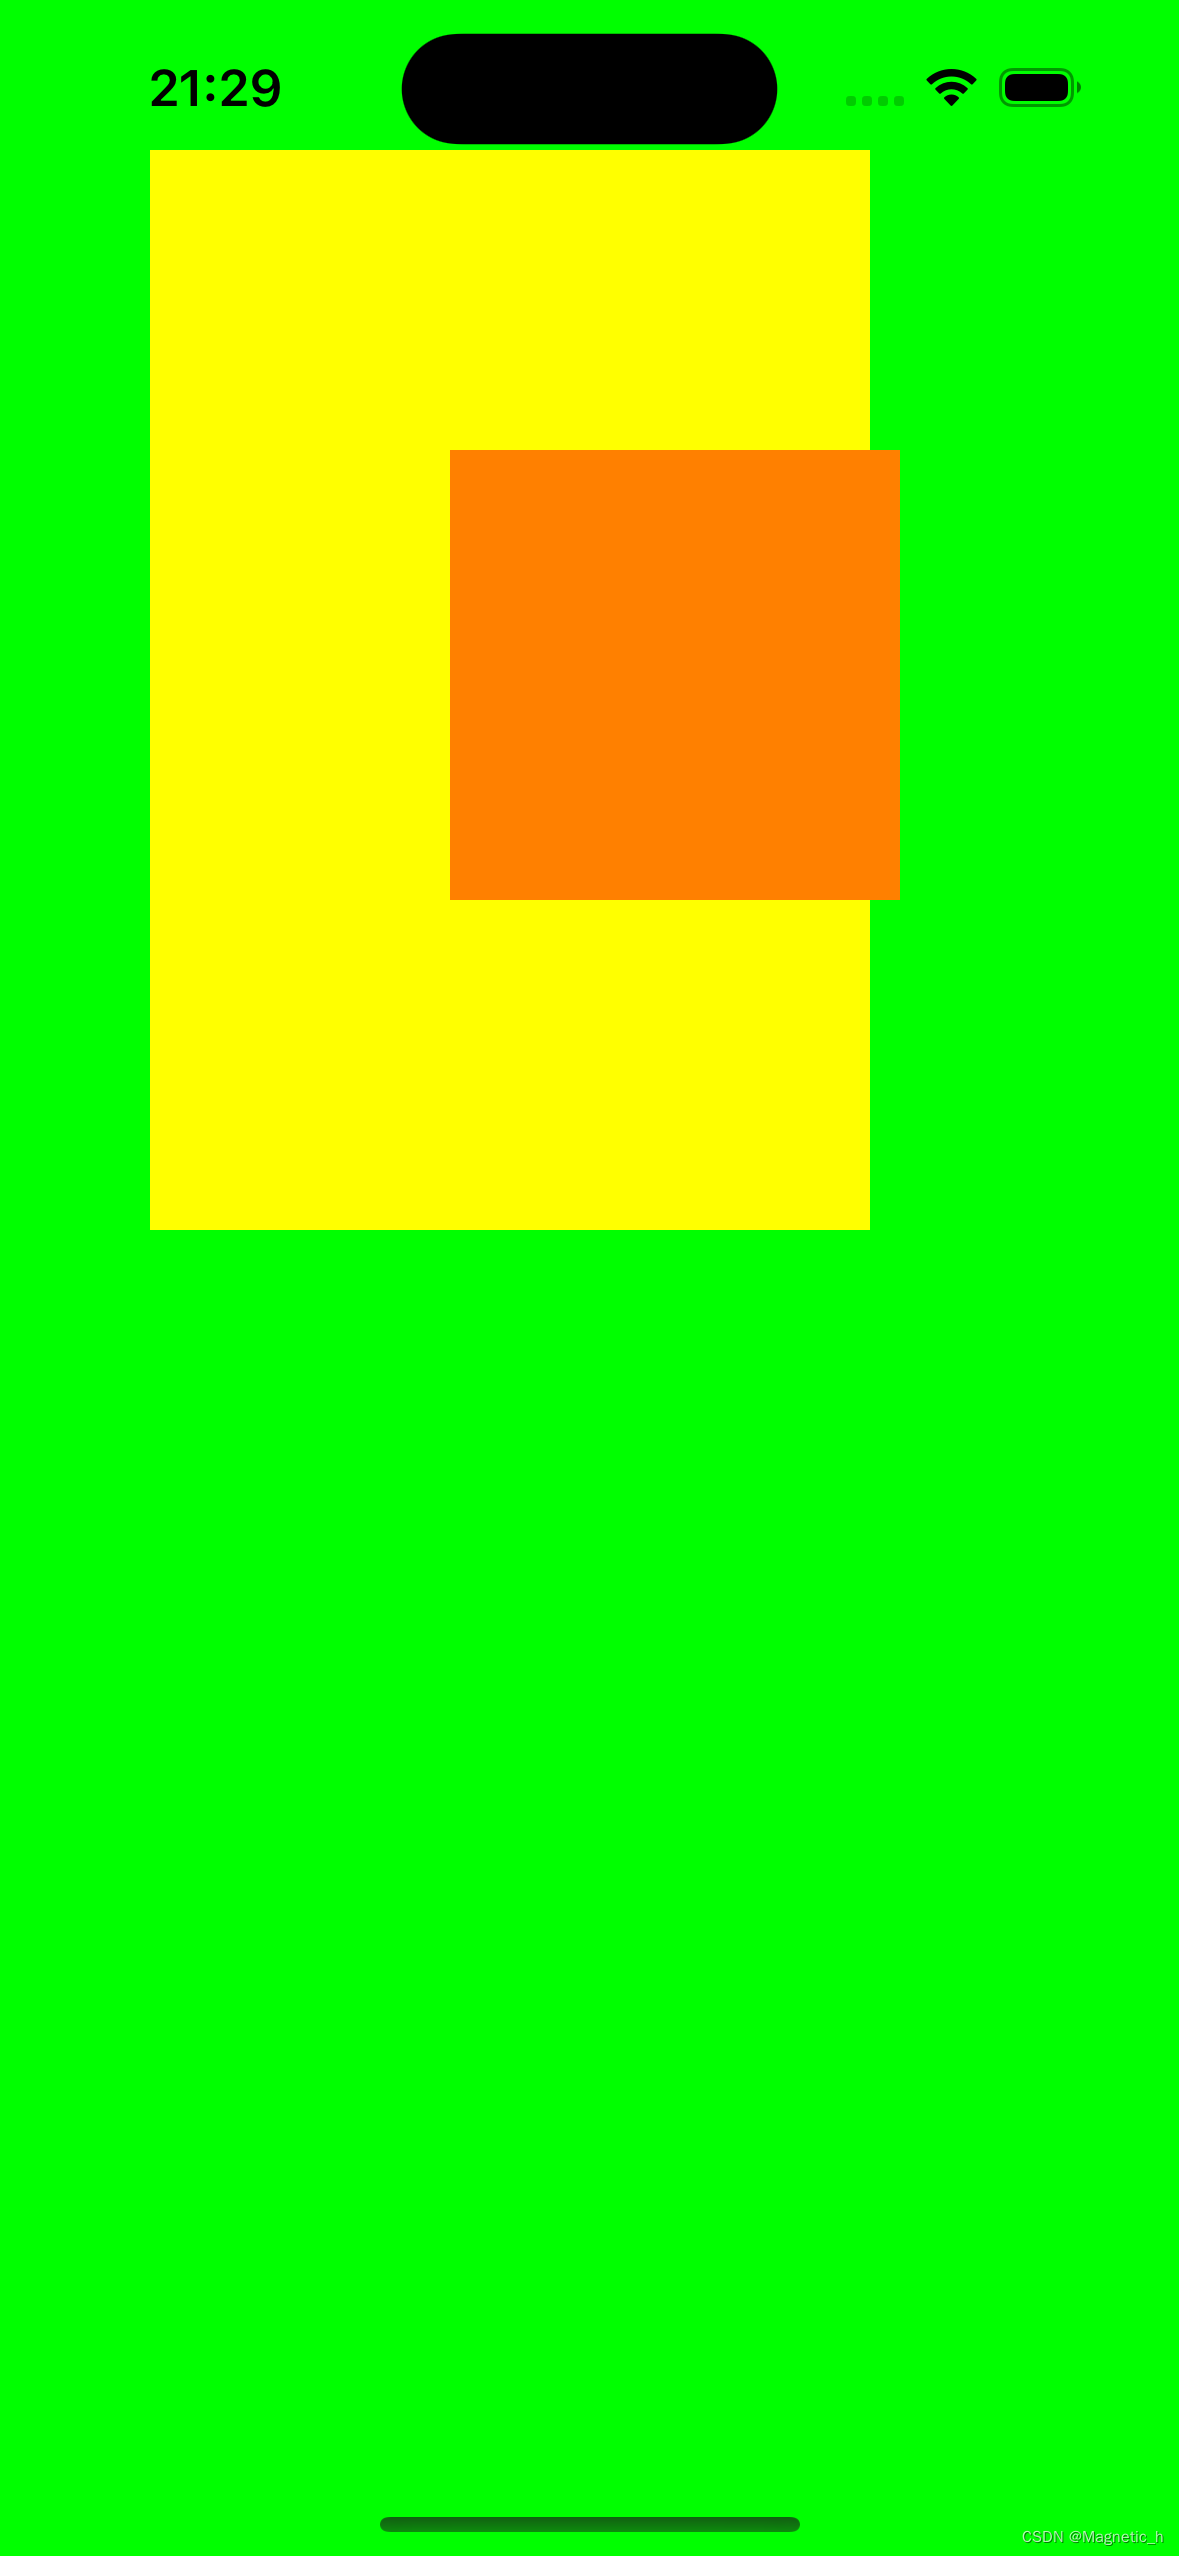
1.uiview也就是oc中的视图,他是显示在屏幕上的所有对象的父类
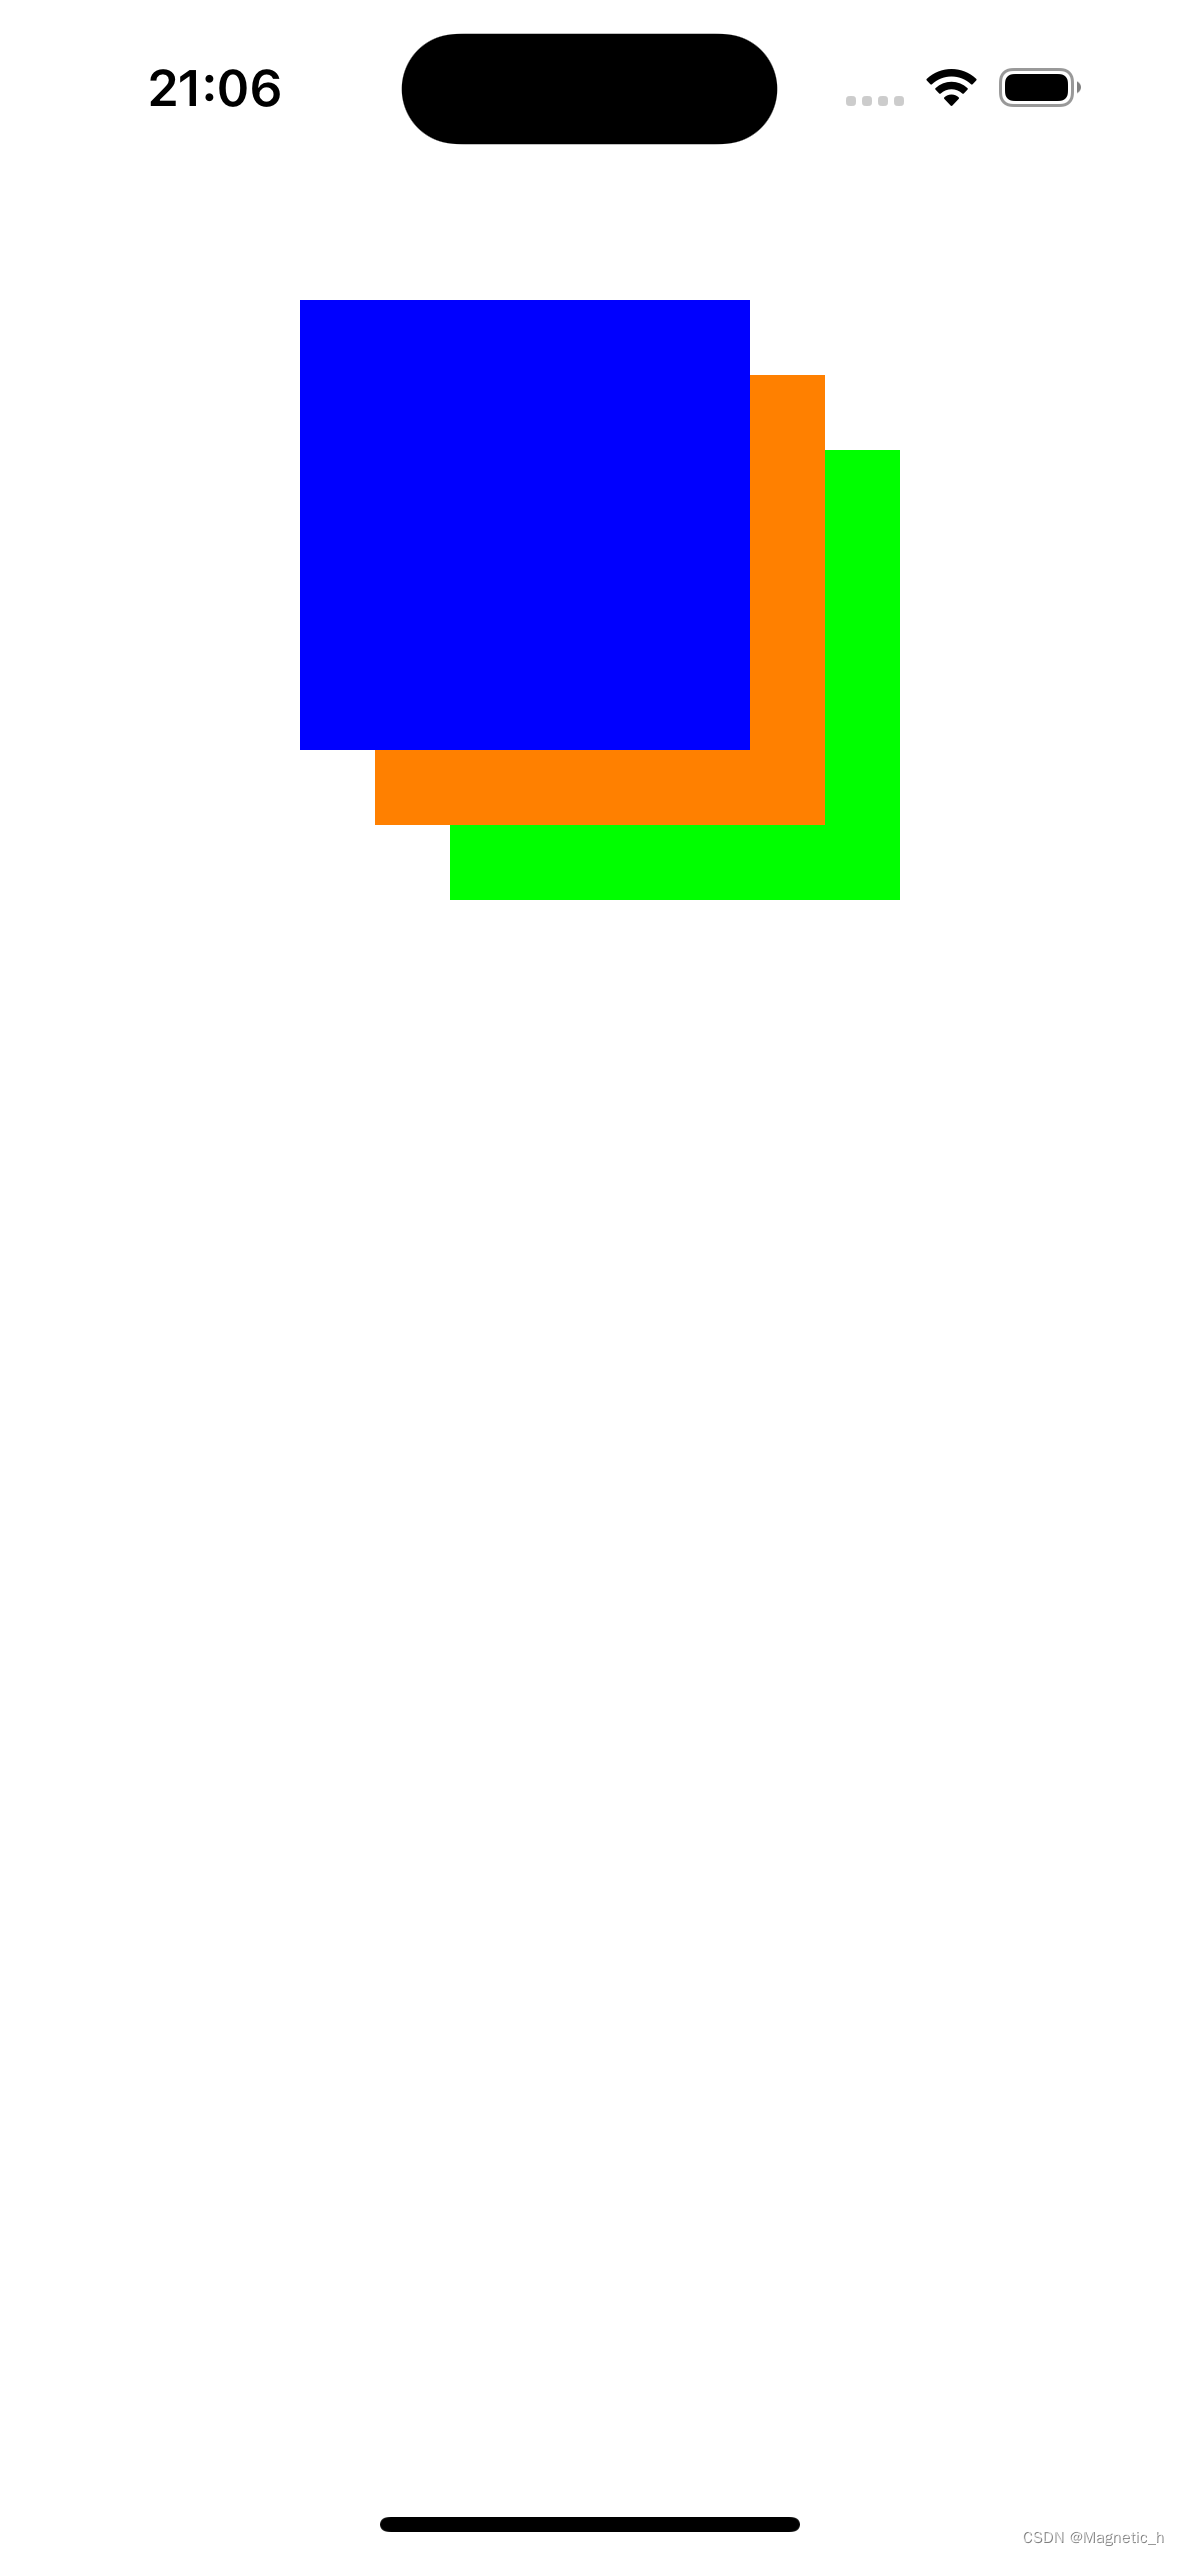
2.uiview是一个矩形,有背景颜色可以显示,有层级关系
3.将新建的视图加入到父视图中实现了两项功能:(1)将新建的视图显示到屏幕上(2)将新建的视图作为父视图的子视图来管理
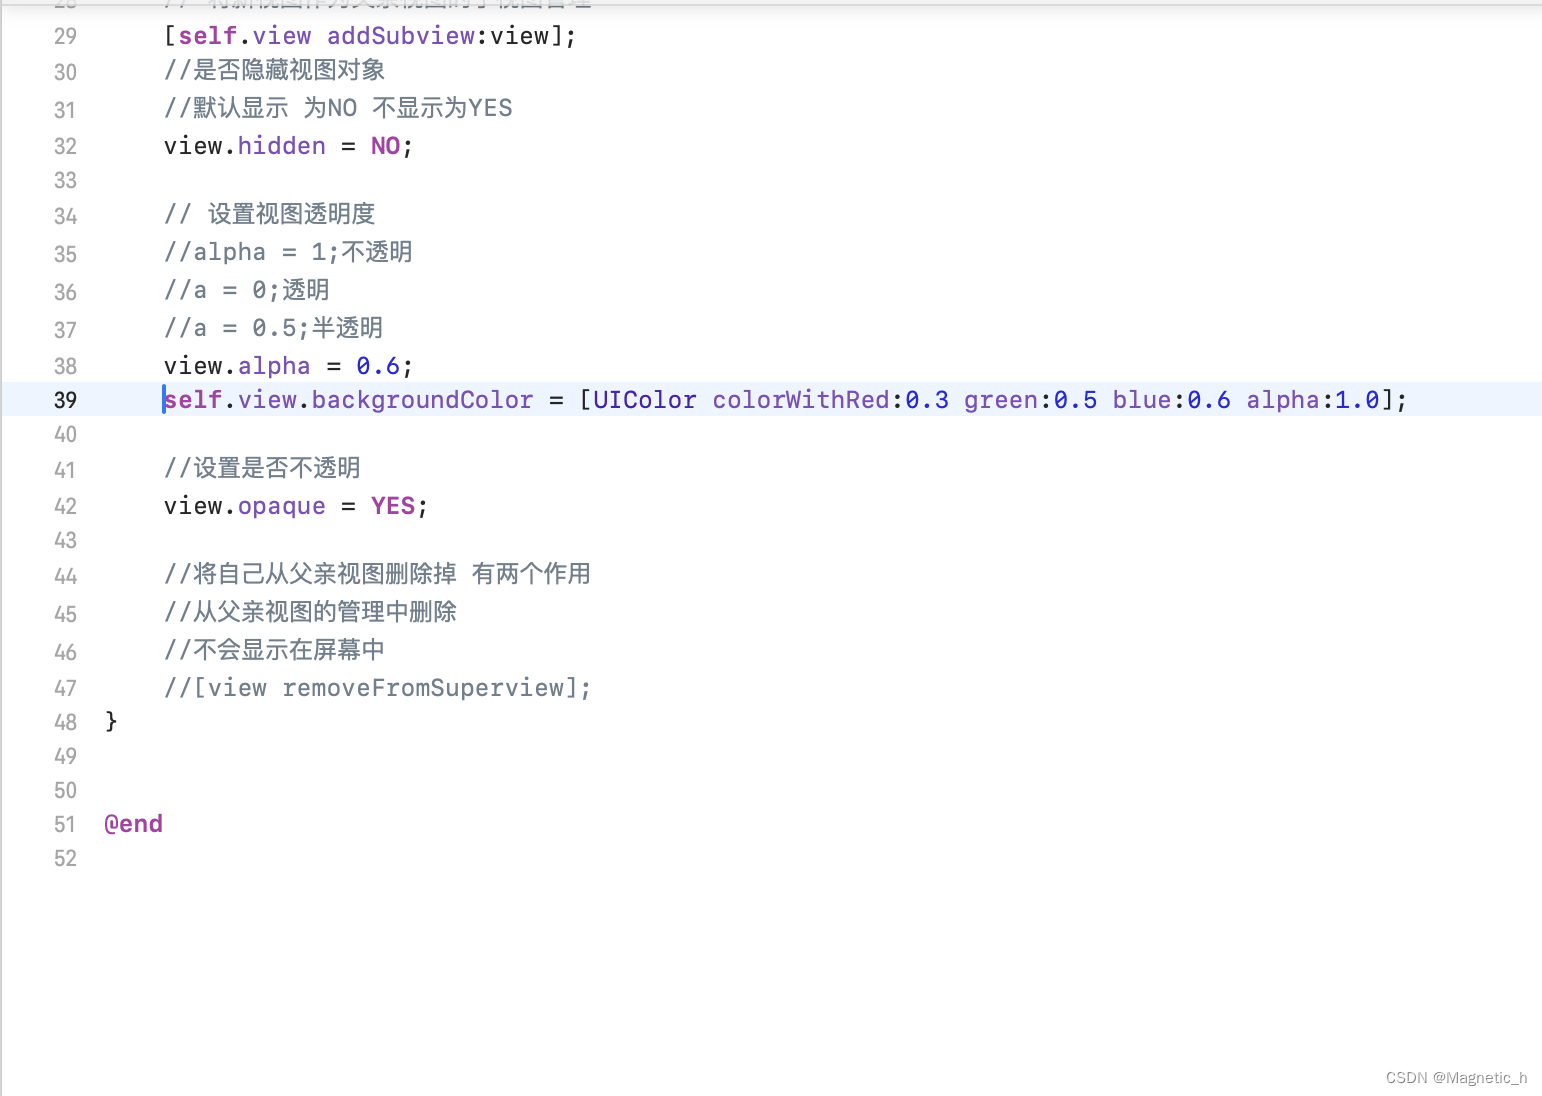
4.可以使用removefromsuperview来将视图从当前父视图中删除
下面用代码来演示一下uiview的基本功能和用法
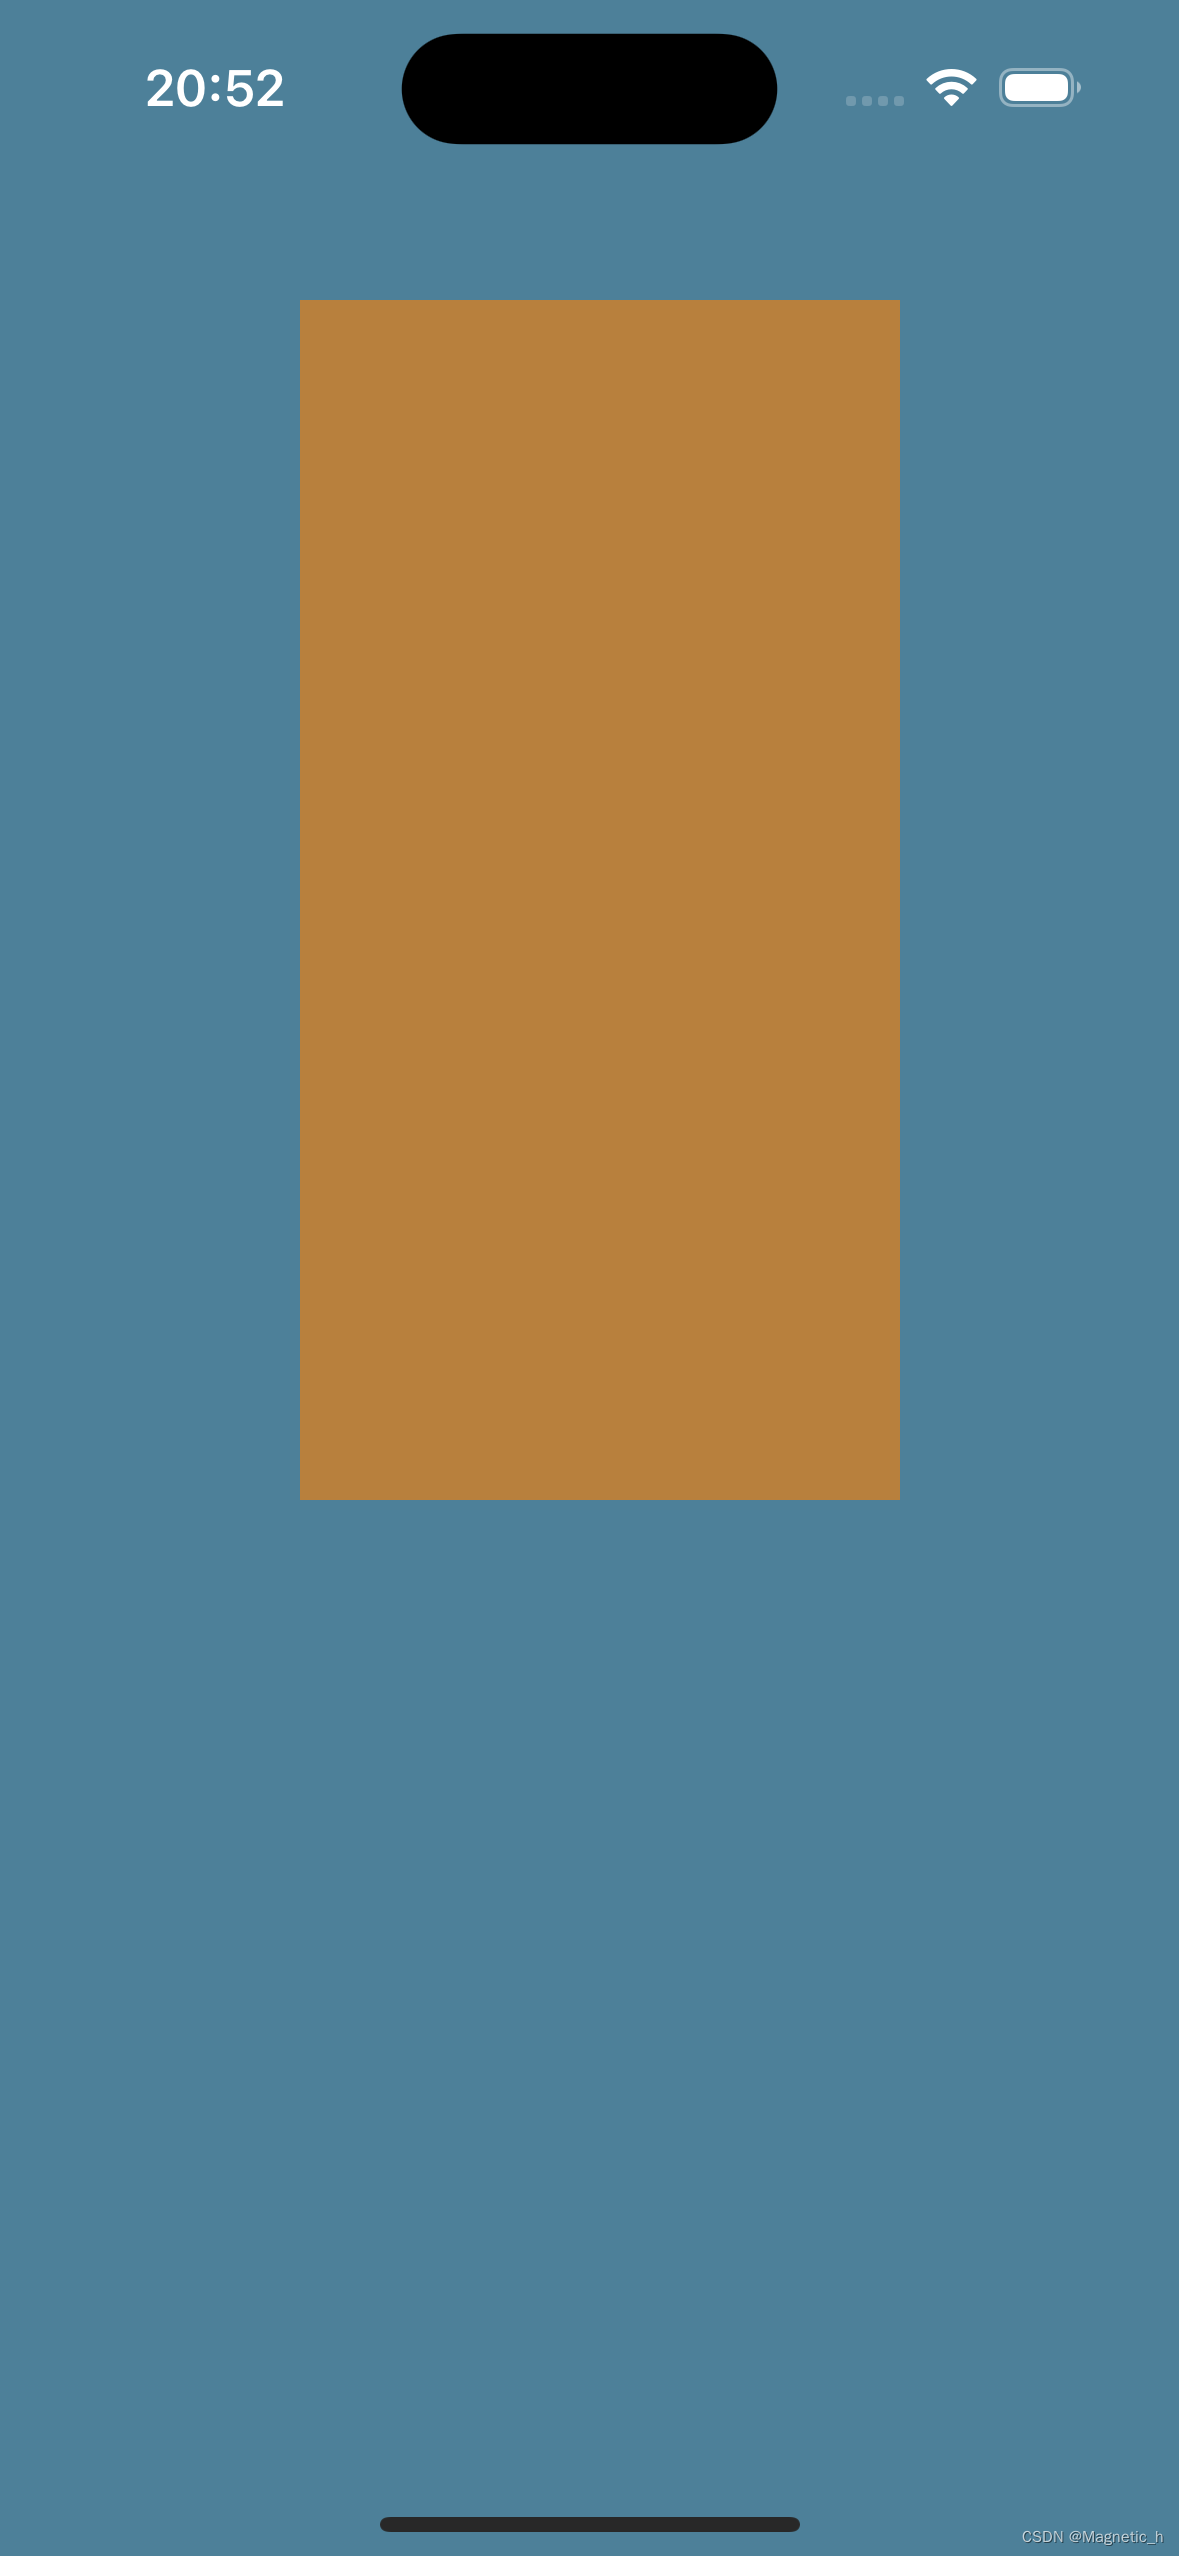
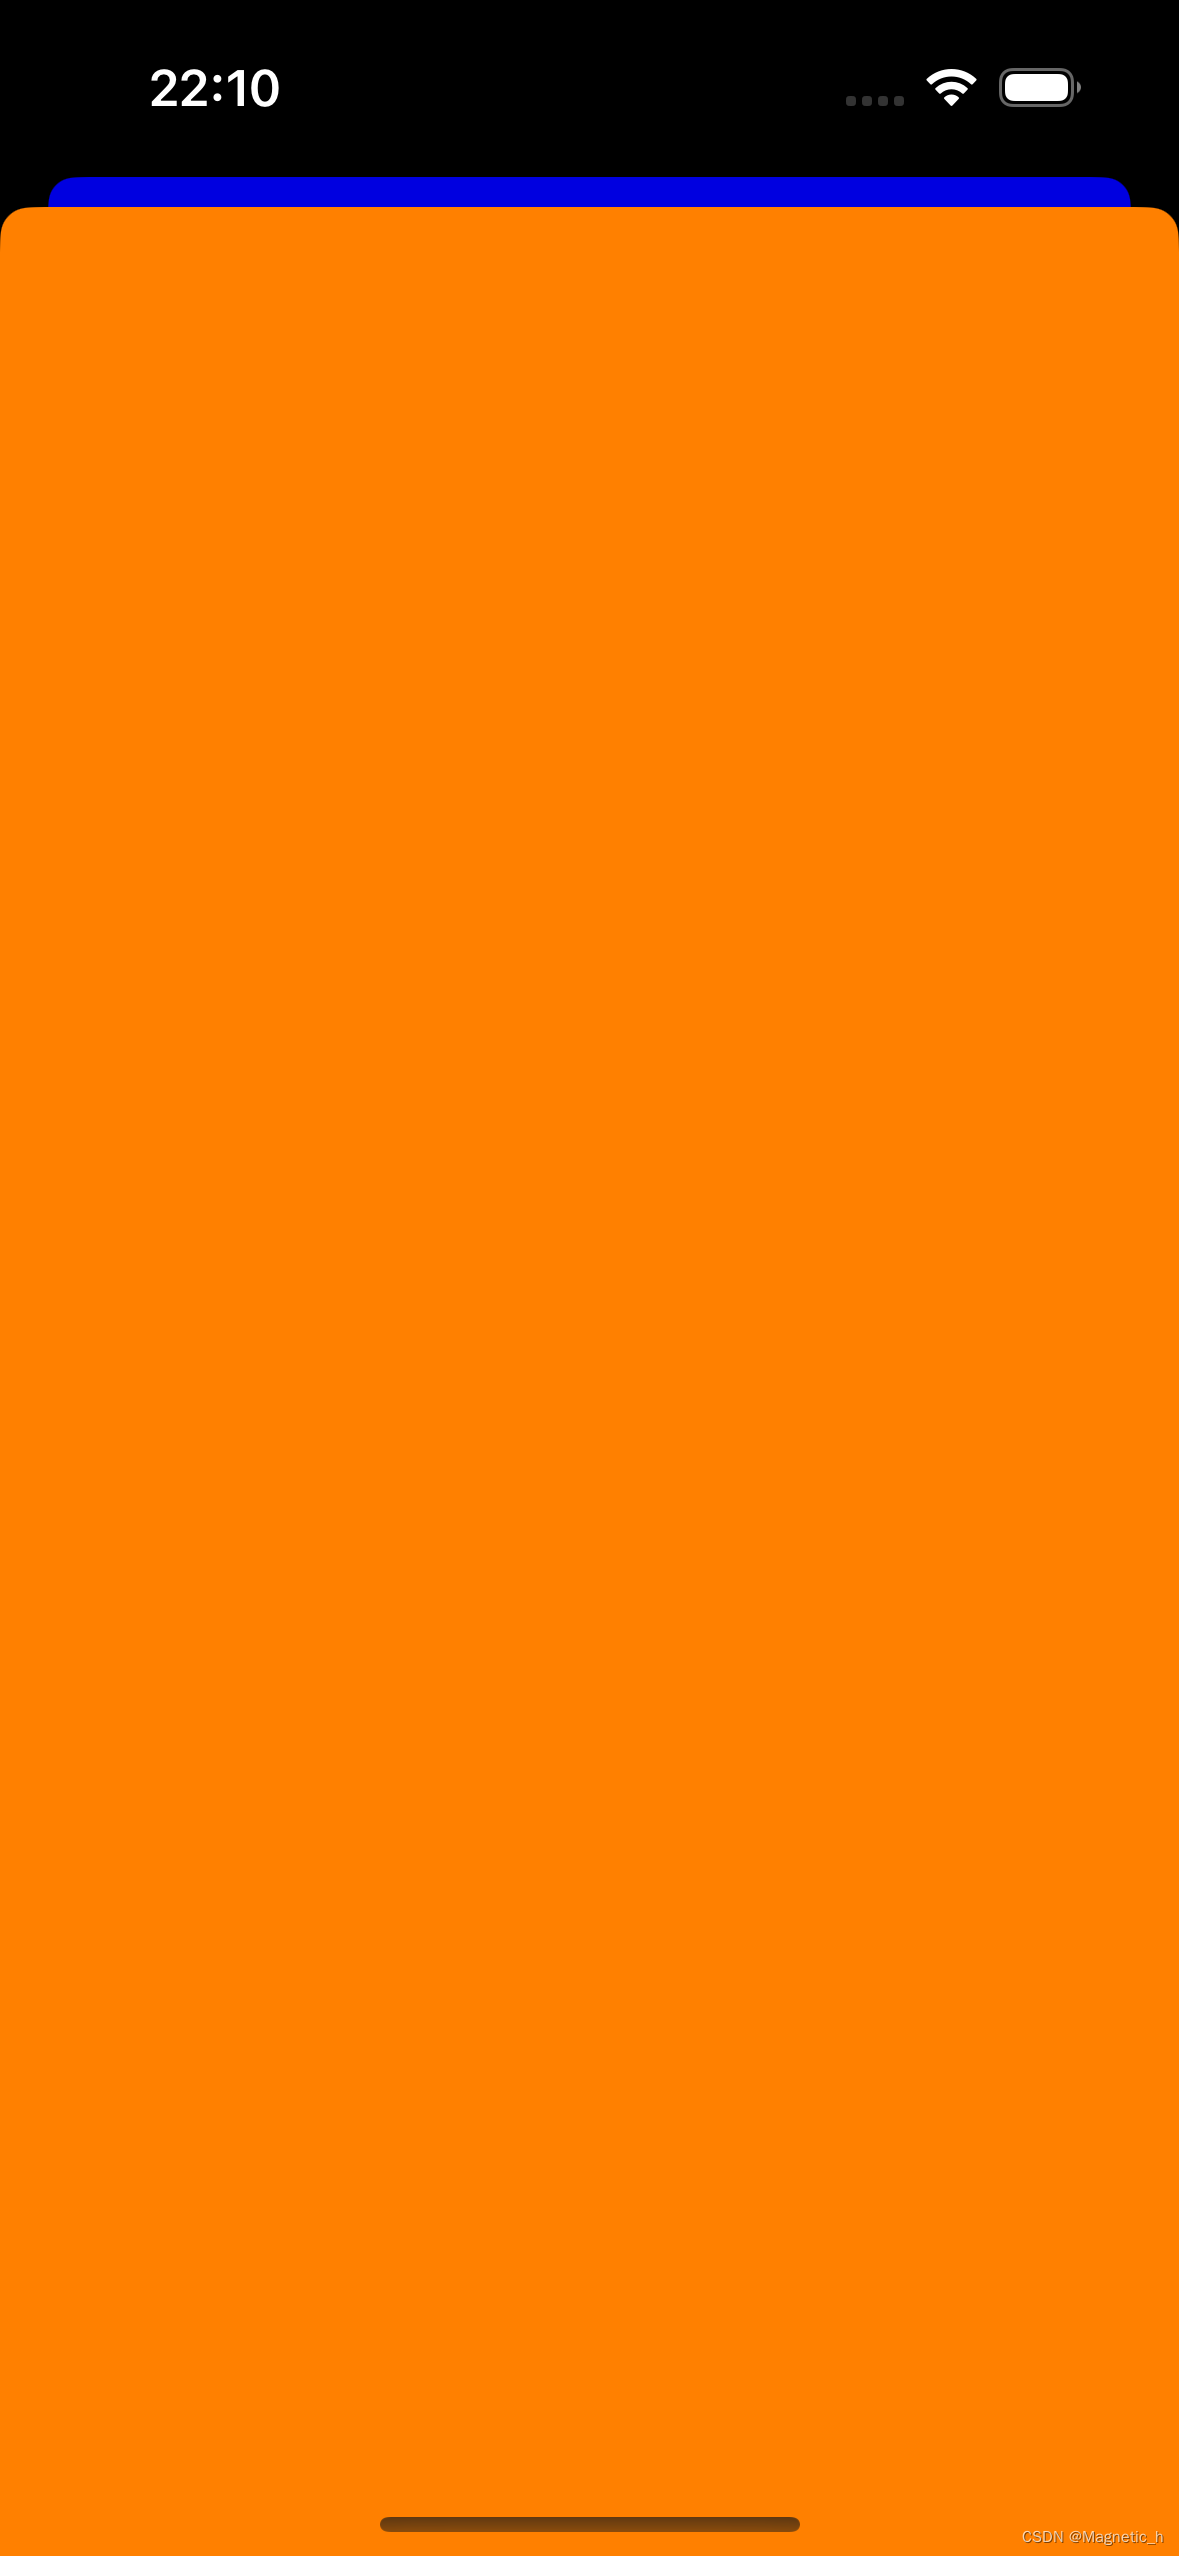
下面是效果图:
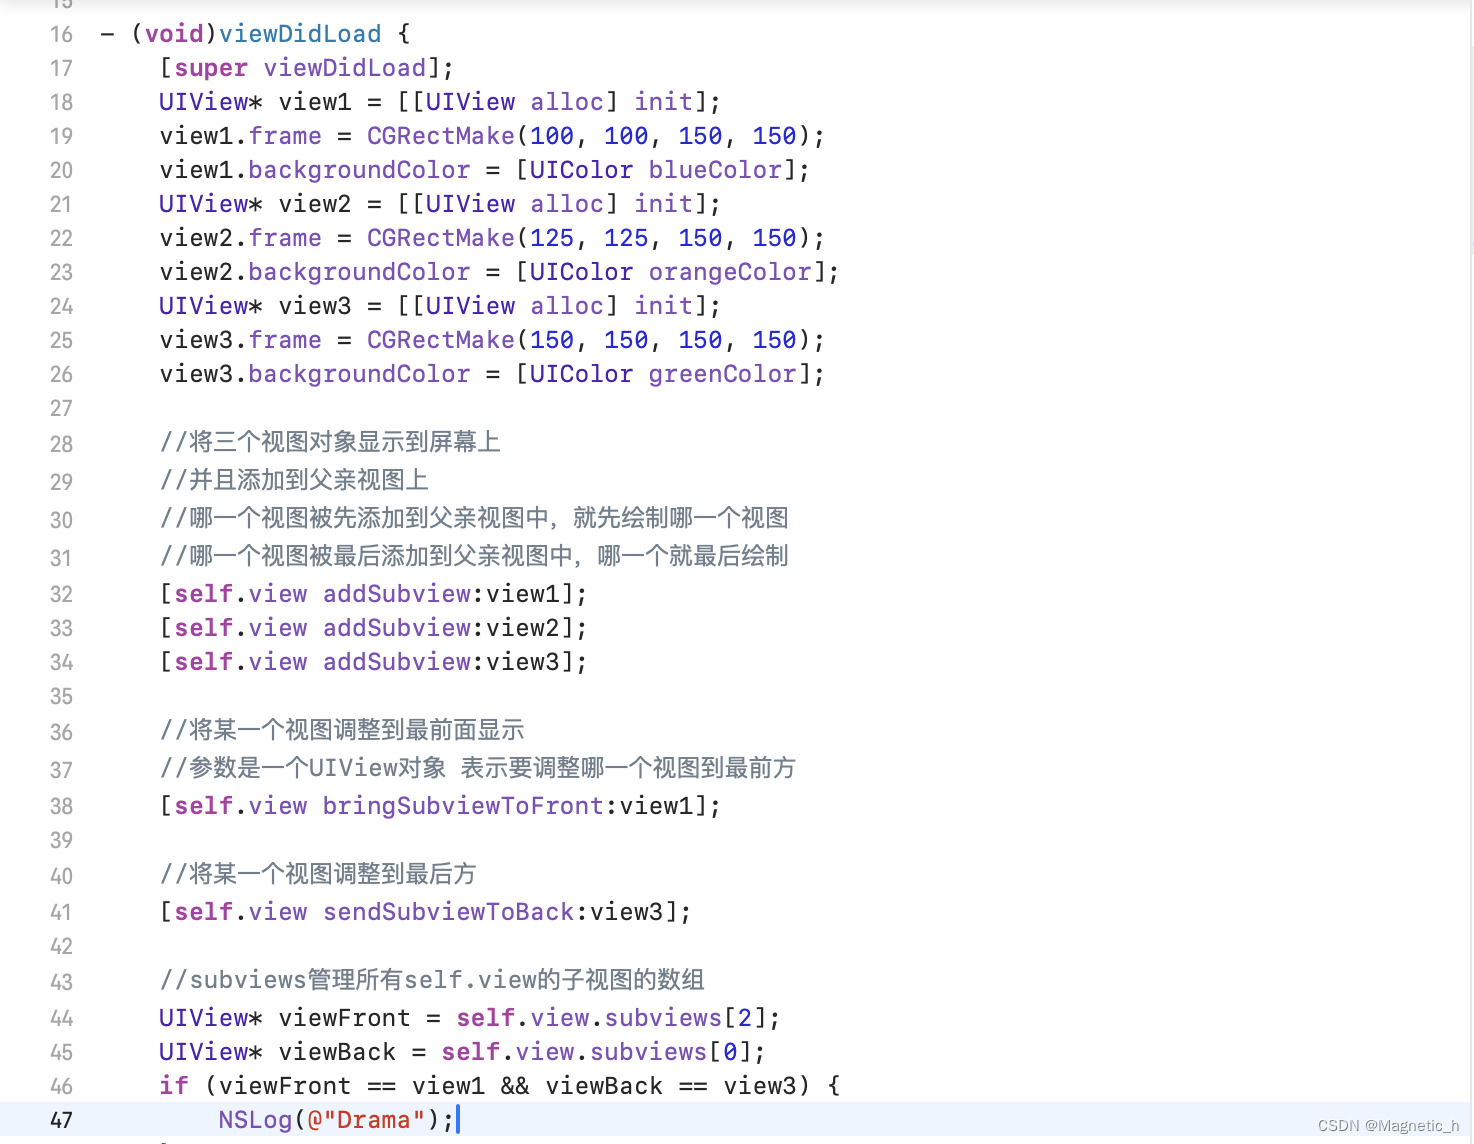
2.uiview的层级关系
1.uiview的层级关系表示的是几个视图之间的覆盖关系,一般来说,先添加的视图就会被后添加的视图盖住
2.如果想不改变添加顺序而该变视图的覆盖顺序,可以使用bringsubviewtofront、sendsubviewtoback等方法来调整
3.subviews是管理所有的self.view的子视图的数组,当将某视图添加到父视图上时,就将该视图作为元素添加进了这个数组;当想要将某个视图从这个数组中清除掉,只需要调用removefromsuperview即可
用代码来演示一下效果:
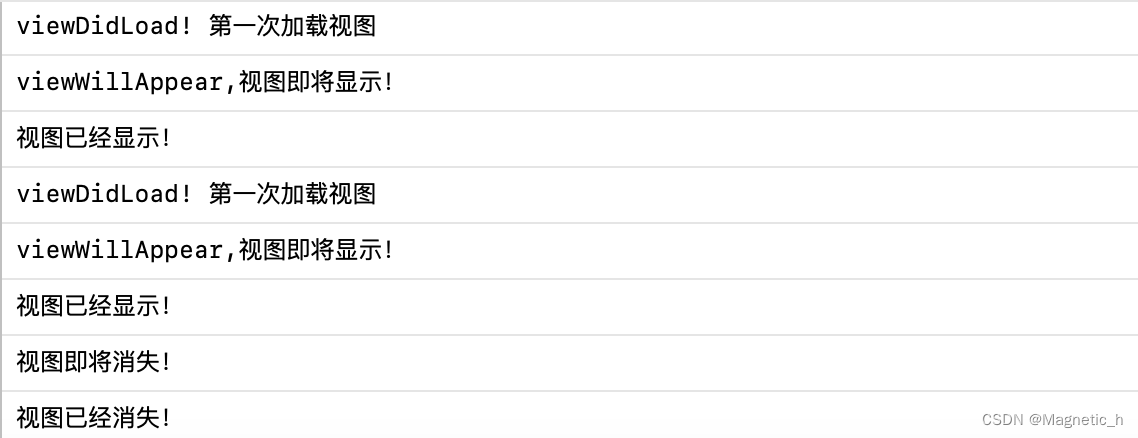
运行结果:

uiwindow
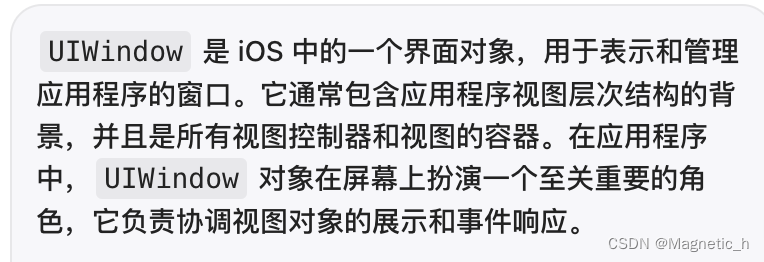
举一些uiwindow在实际生活中应用的情景来辅助理解:
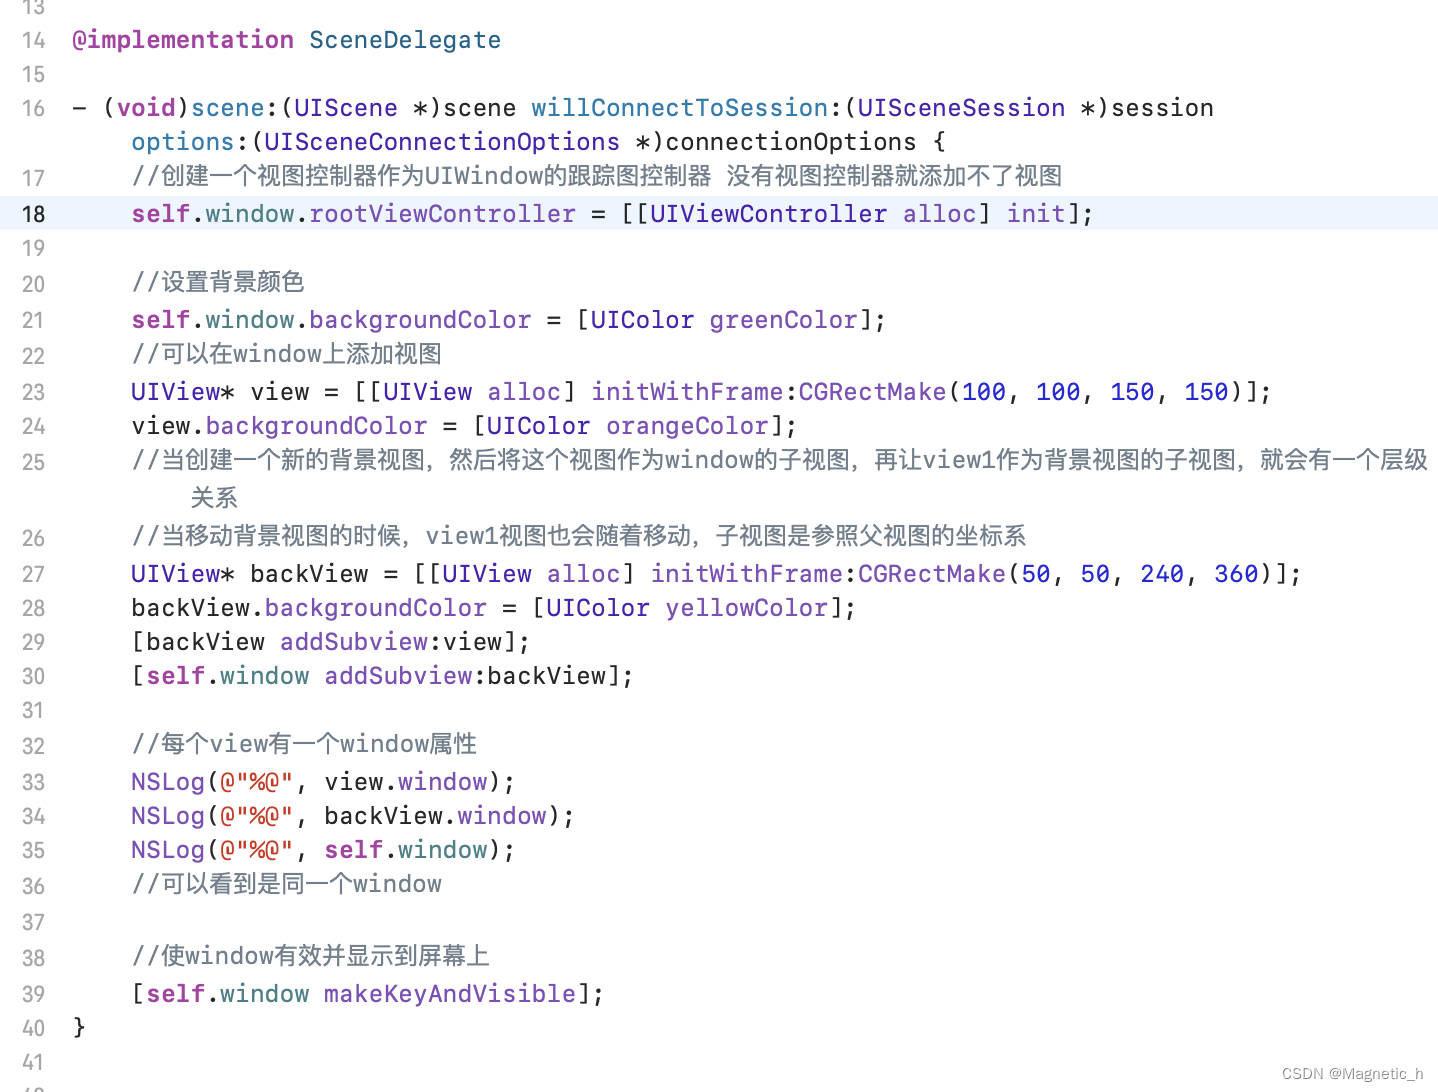
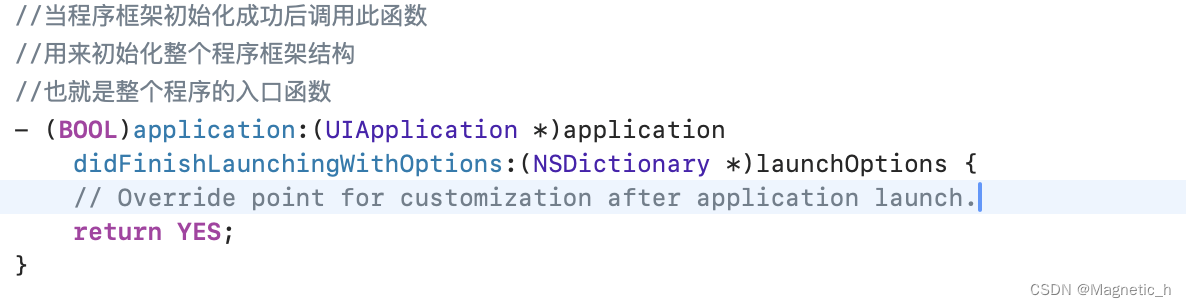
1.老版本uiwindow的代码写在“appdelegate.m”中,但是现在写到scenedelegate.m中,并且不需要手动创建uiwindow对象。
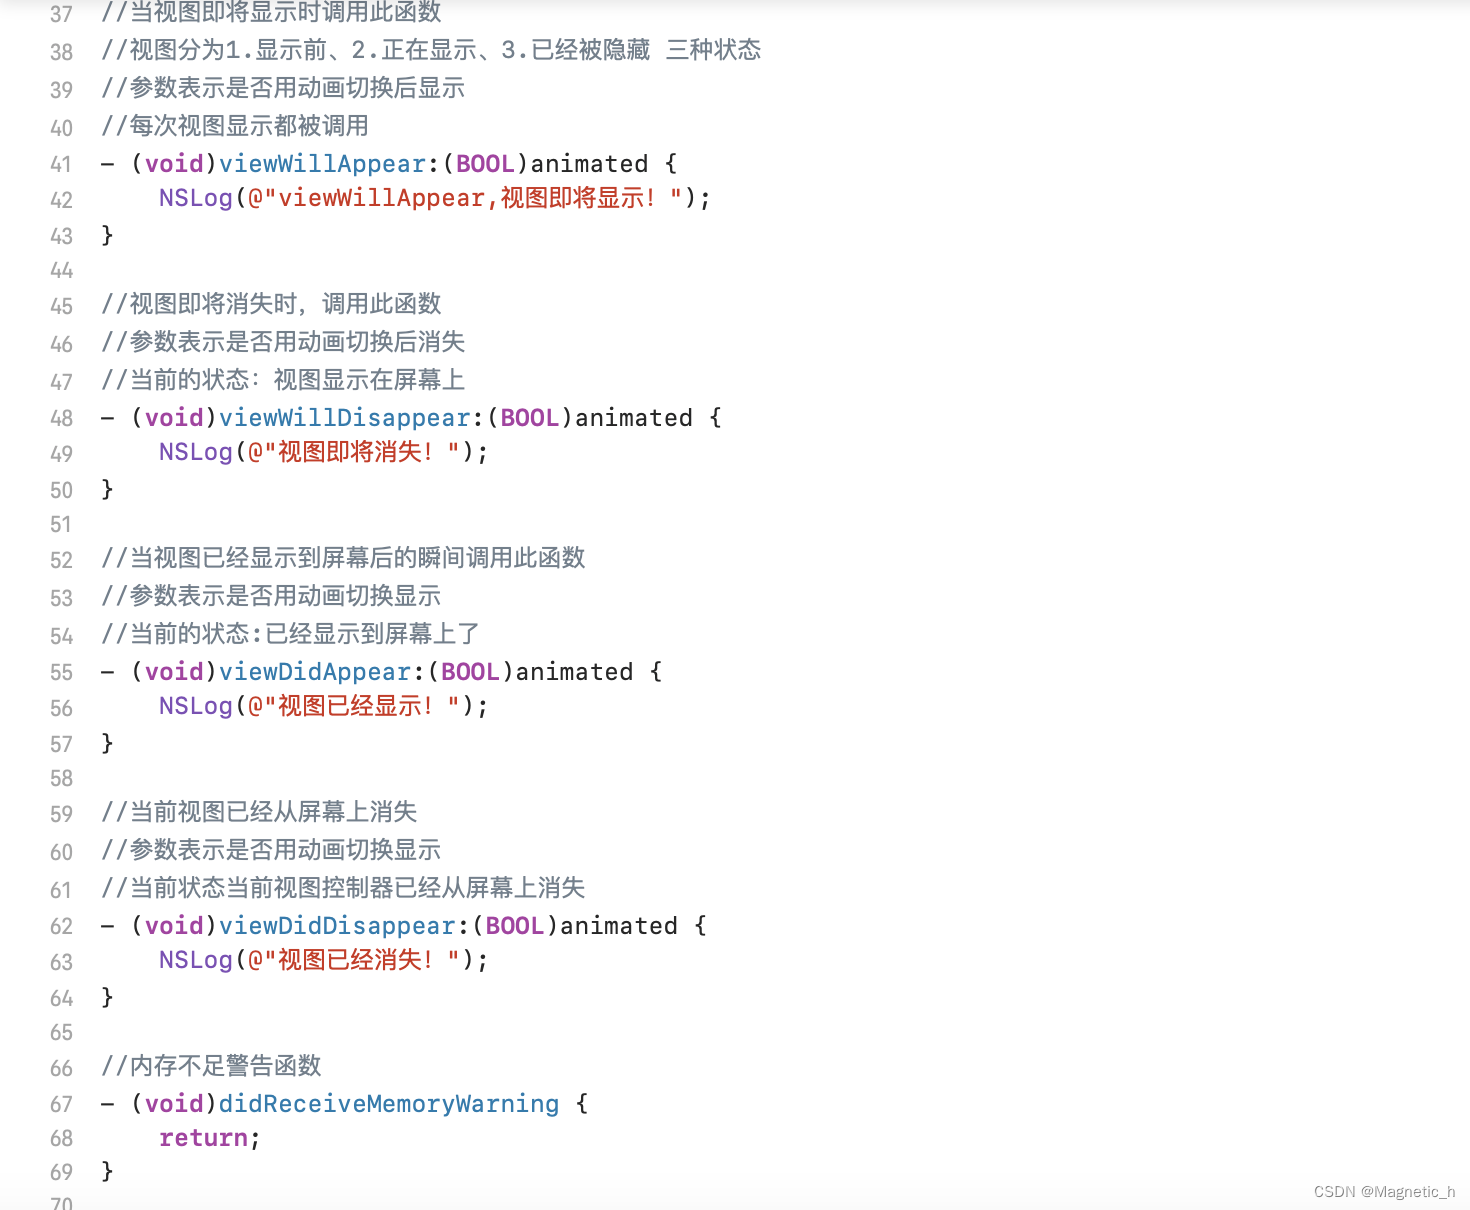
2. 当移动父视图的时候,子视图也会随之移动,因为子视图是参照父视图的坐标系的
3.每一个view都有一个window属性
4.uiwindow通过视图控制器uiviewcontroller与uiview产生联系
接下来用代码来演示一下:
运行结果:
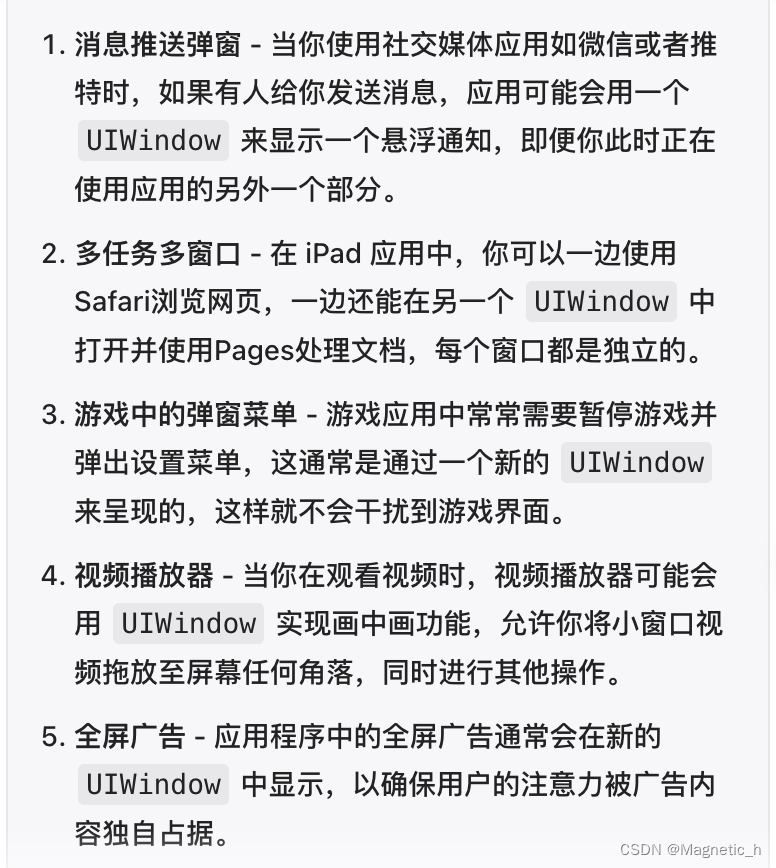
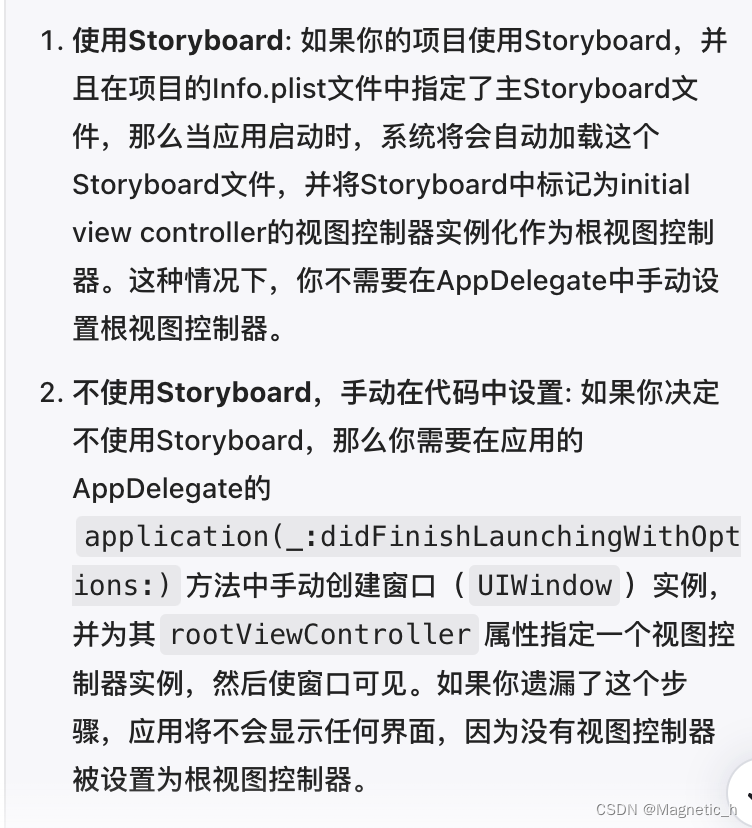
在学习老版本的uiwwindow的知识时,还涉及到了一个函数,与这个函数有关的知识如下图:
uiviewcontroller
1.uiviewcontroller基础
uiviewcontroller是一个视图控制器,创建完视图控制器对象后,要对它进行赋值操作。在整个uikit中只有一个根视图控制器,属于window的属性。视图控制器用来管理界面和处理界面的逻辑类对象,程序启动前必须对根视图控制器赋值。
所有的视图控制器都需要自定义来完成,继承于uiviewcontroller
视图控制器提供了许多控制器的基本功能,因为它是所有控制器的基类视图控制器负责创建和管理一组视图,它本身就提供了一个视图,称为该控制器的根视图(view),协调管理数据和视图之间的交互
2.uiviewcontroller的使用
可以通过多个uiviewcontroller来实现不同界面之间的切换。
新建类来创建新的视图控制器uiviewcontroller,并根据各视图控制器之间关系来确定父子类关系
设置好视图控制器后,在对应的视图控制器的实现部分写入操作函数,如touchesbegan表示触碰屏幕即调用
在对应的操作函数中,对对应的视图控制器对象调用presentviewcontroller(显示一个新的视图控制器在界面)、dismissviewcontrolleranimated(使当前视图控制器界面消失掉)等方法进行视图切换操作。
下面用代码来演示一下:
首先新建一个视图控制器类
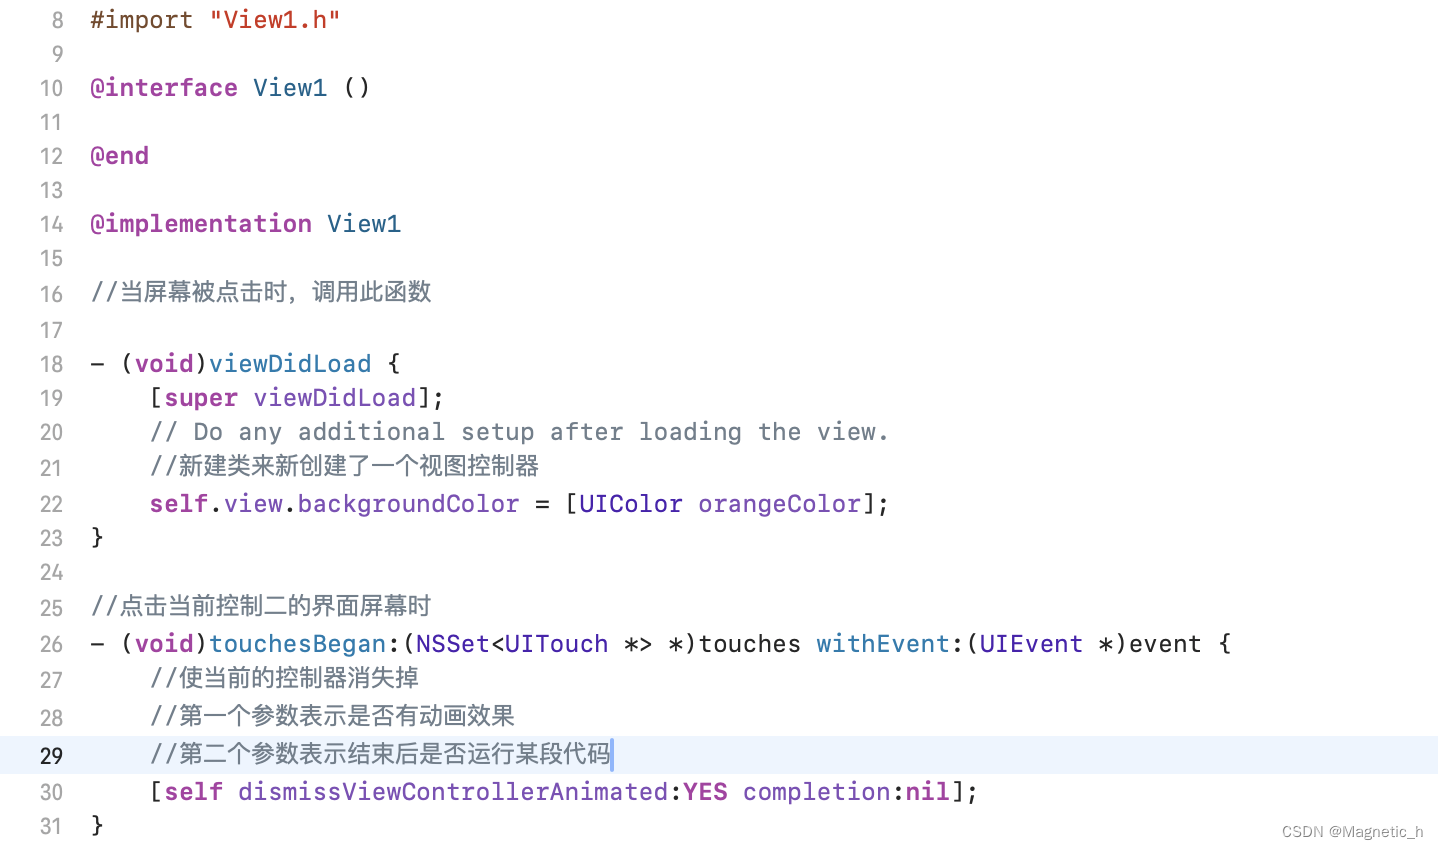
然后在viewcontroller中完成操作函数的实现
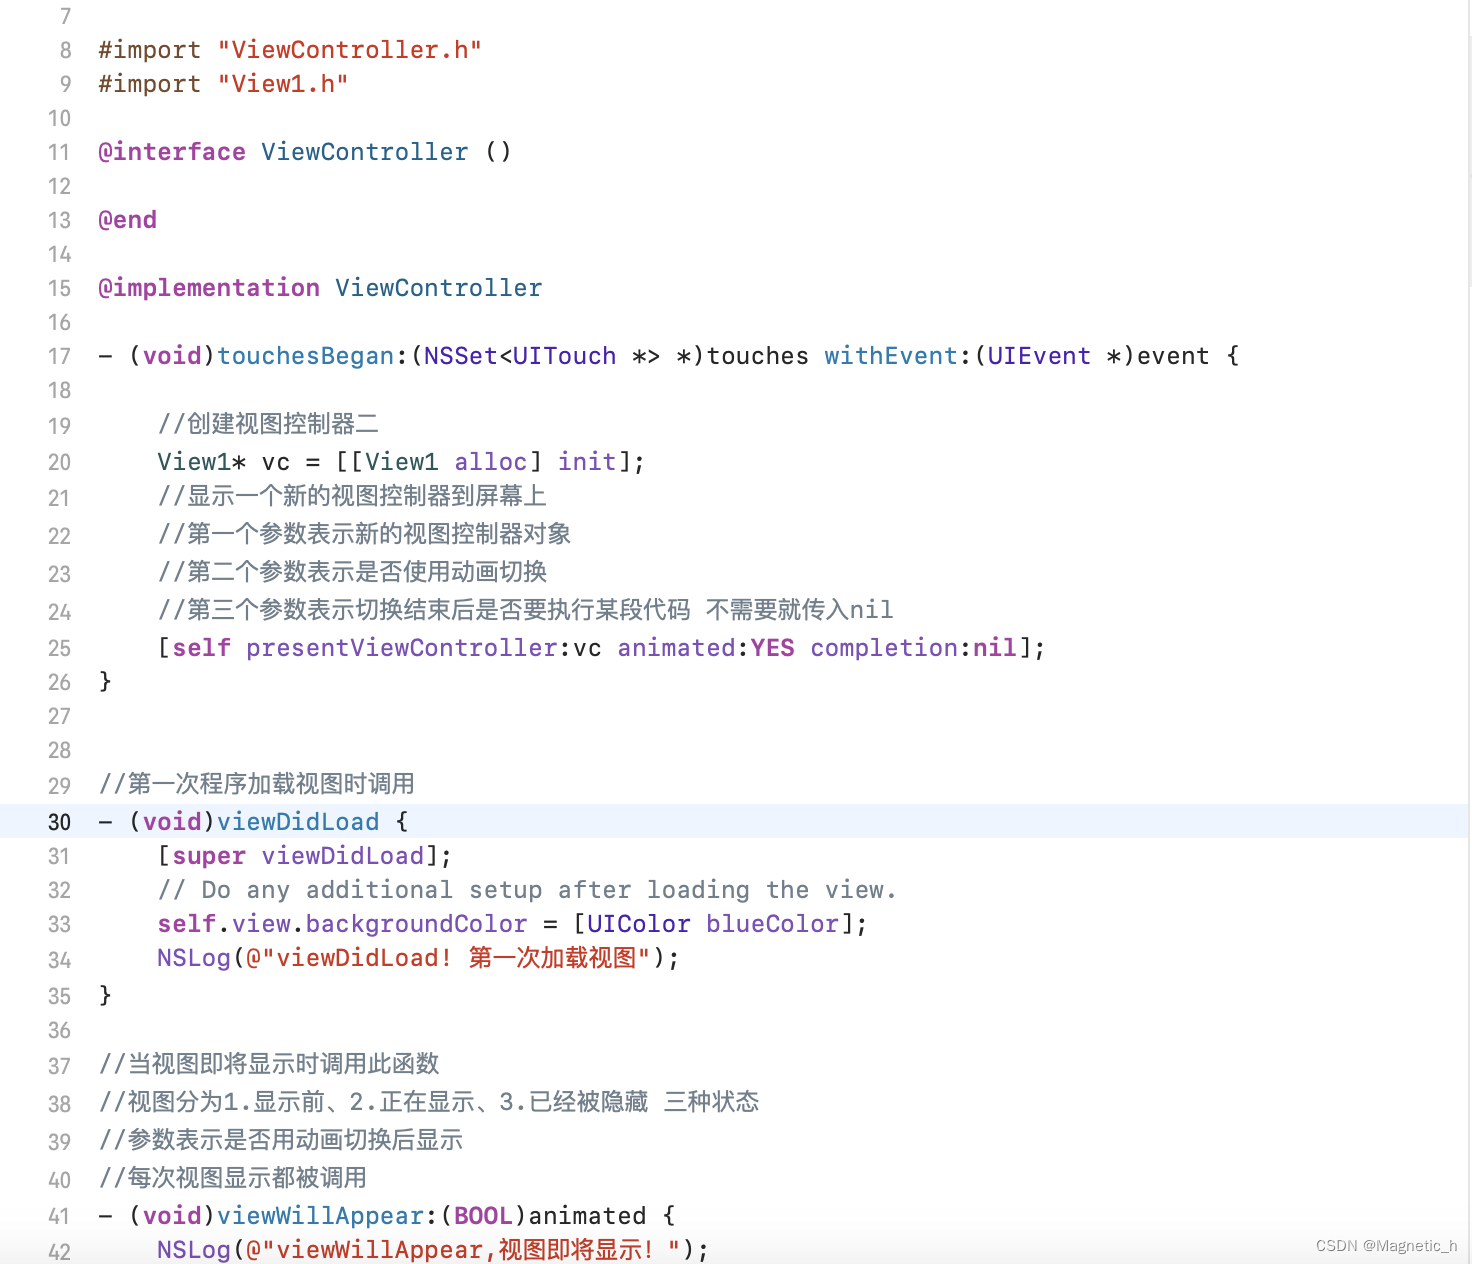
运行的结果如下:
点击后:
定时器和视图移动
可以在视图控制器中定义一个定时器属性 通过定时器来实现视图连贯的移动
使用如下方法来创建并启动定时器:

接下来用代码来演示一下如何通过定时器来实现视图连贯的移动:


1.这里移动视图时,需要用到视图标签这个属性(可以理解为指针),通过标签来改变视图的frame属性
2.停止定时器时,可以调用invalidate方法
3.视图的移动是通过定时器的方法里的事件函数实现的,也就是说,视图的移动要写在定时器调用的方法的事件函数里
运行结果:

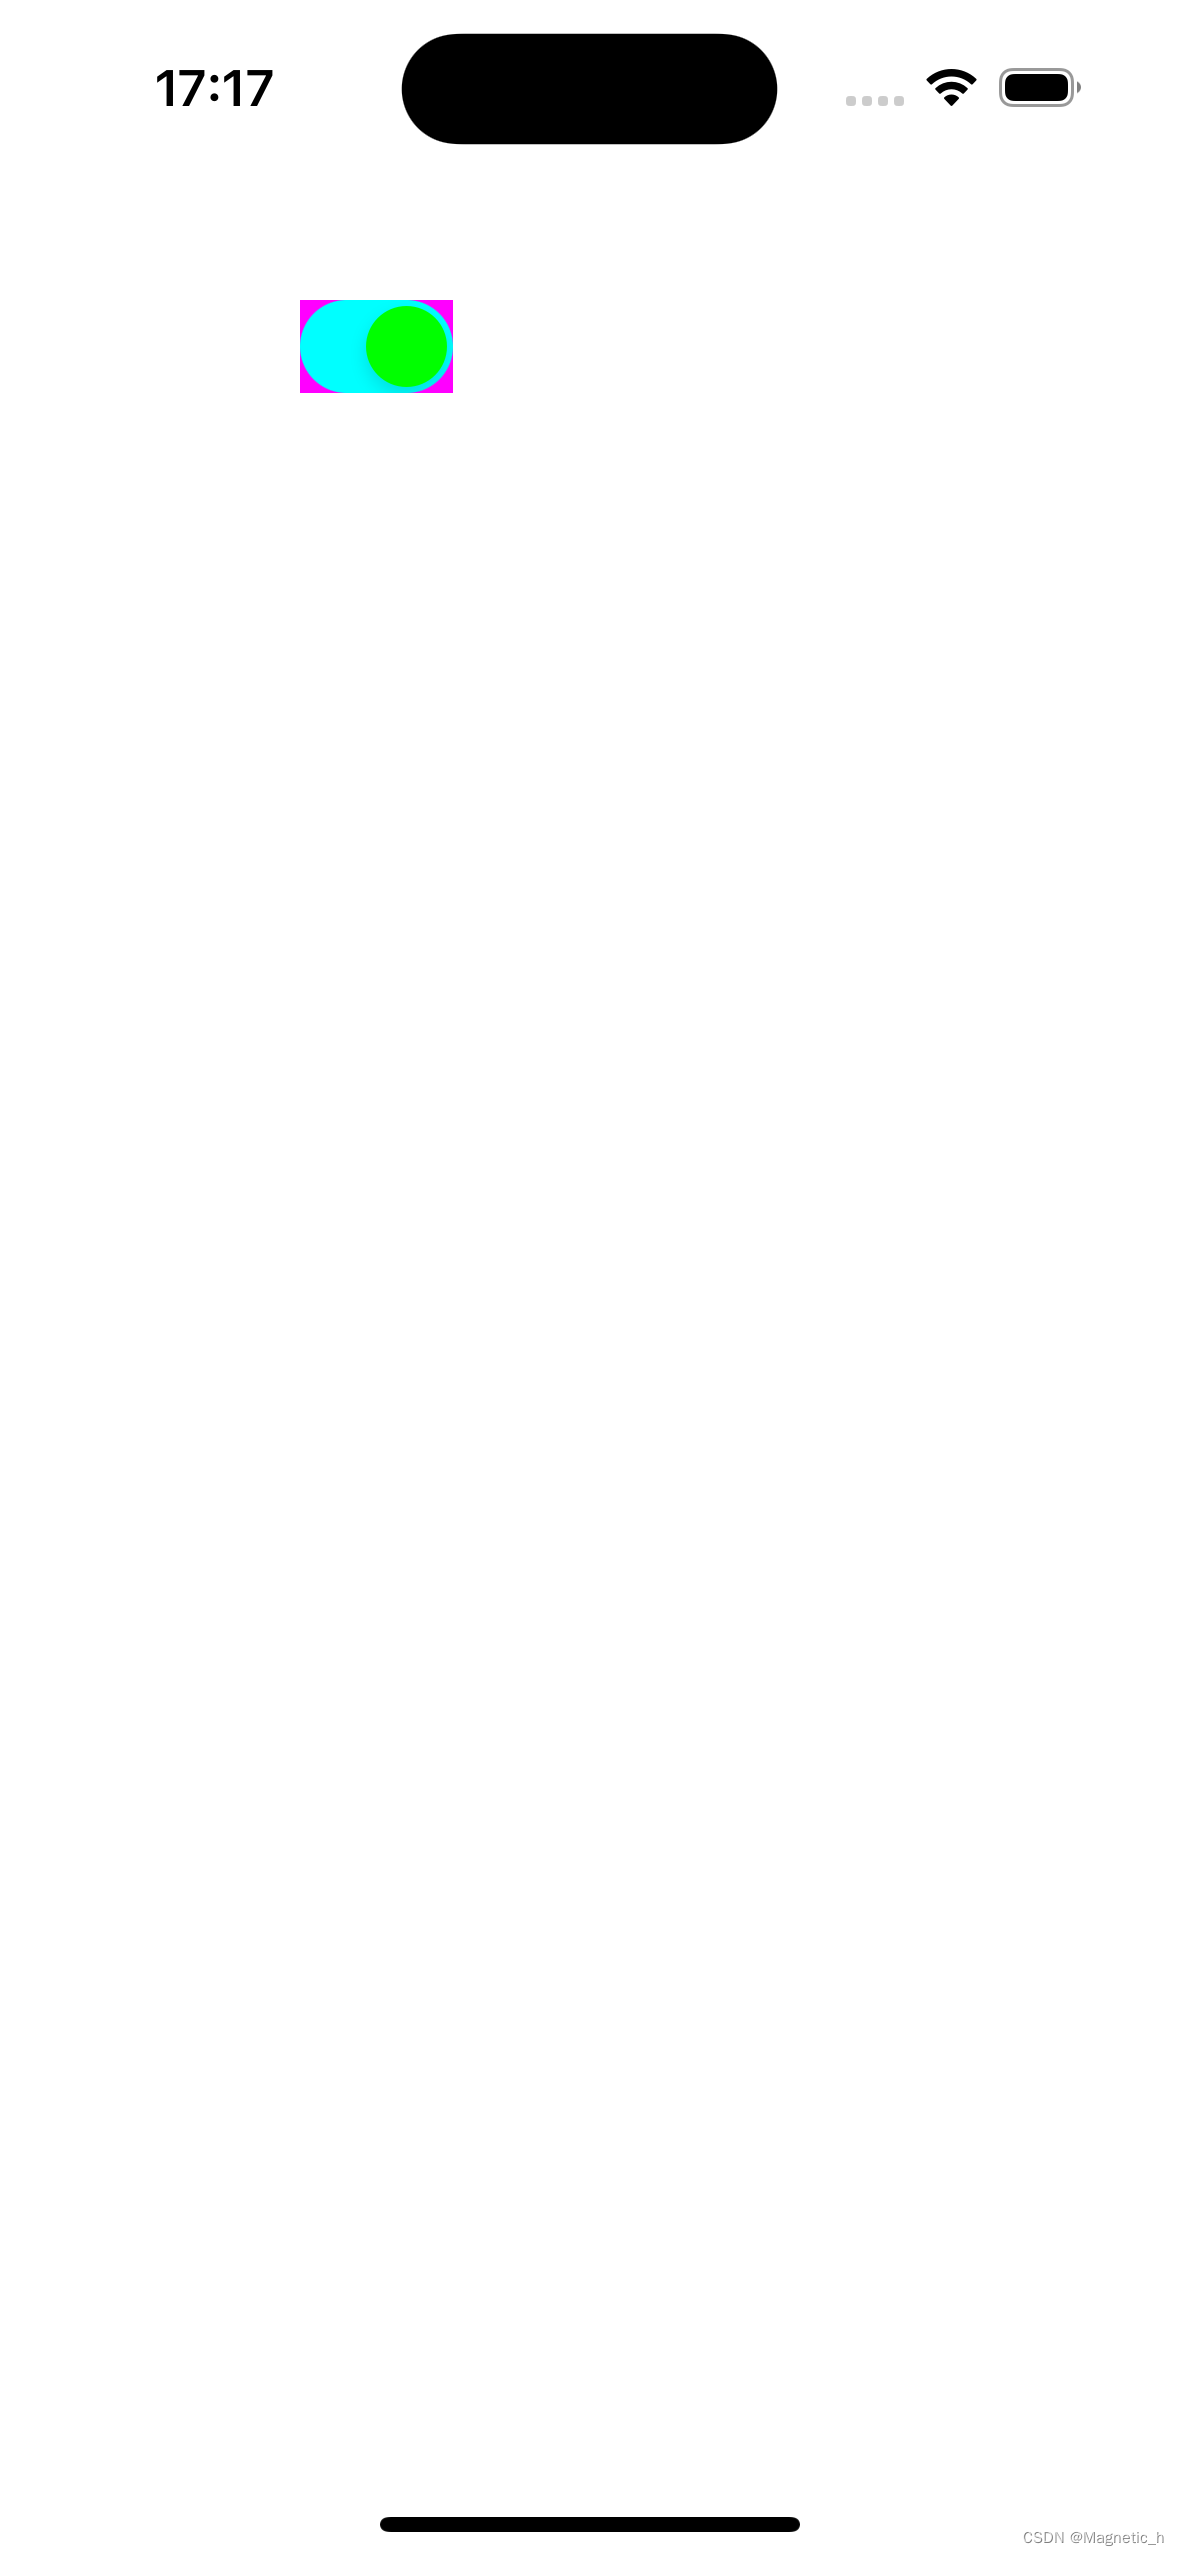
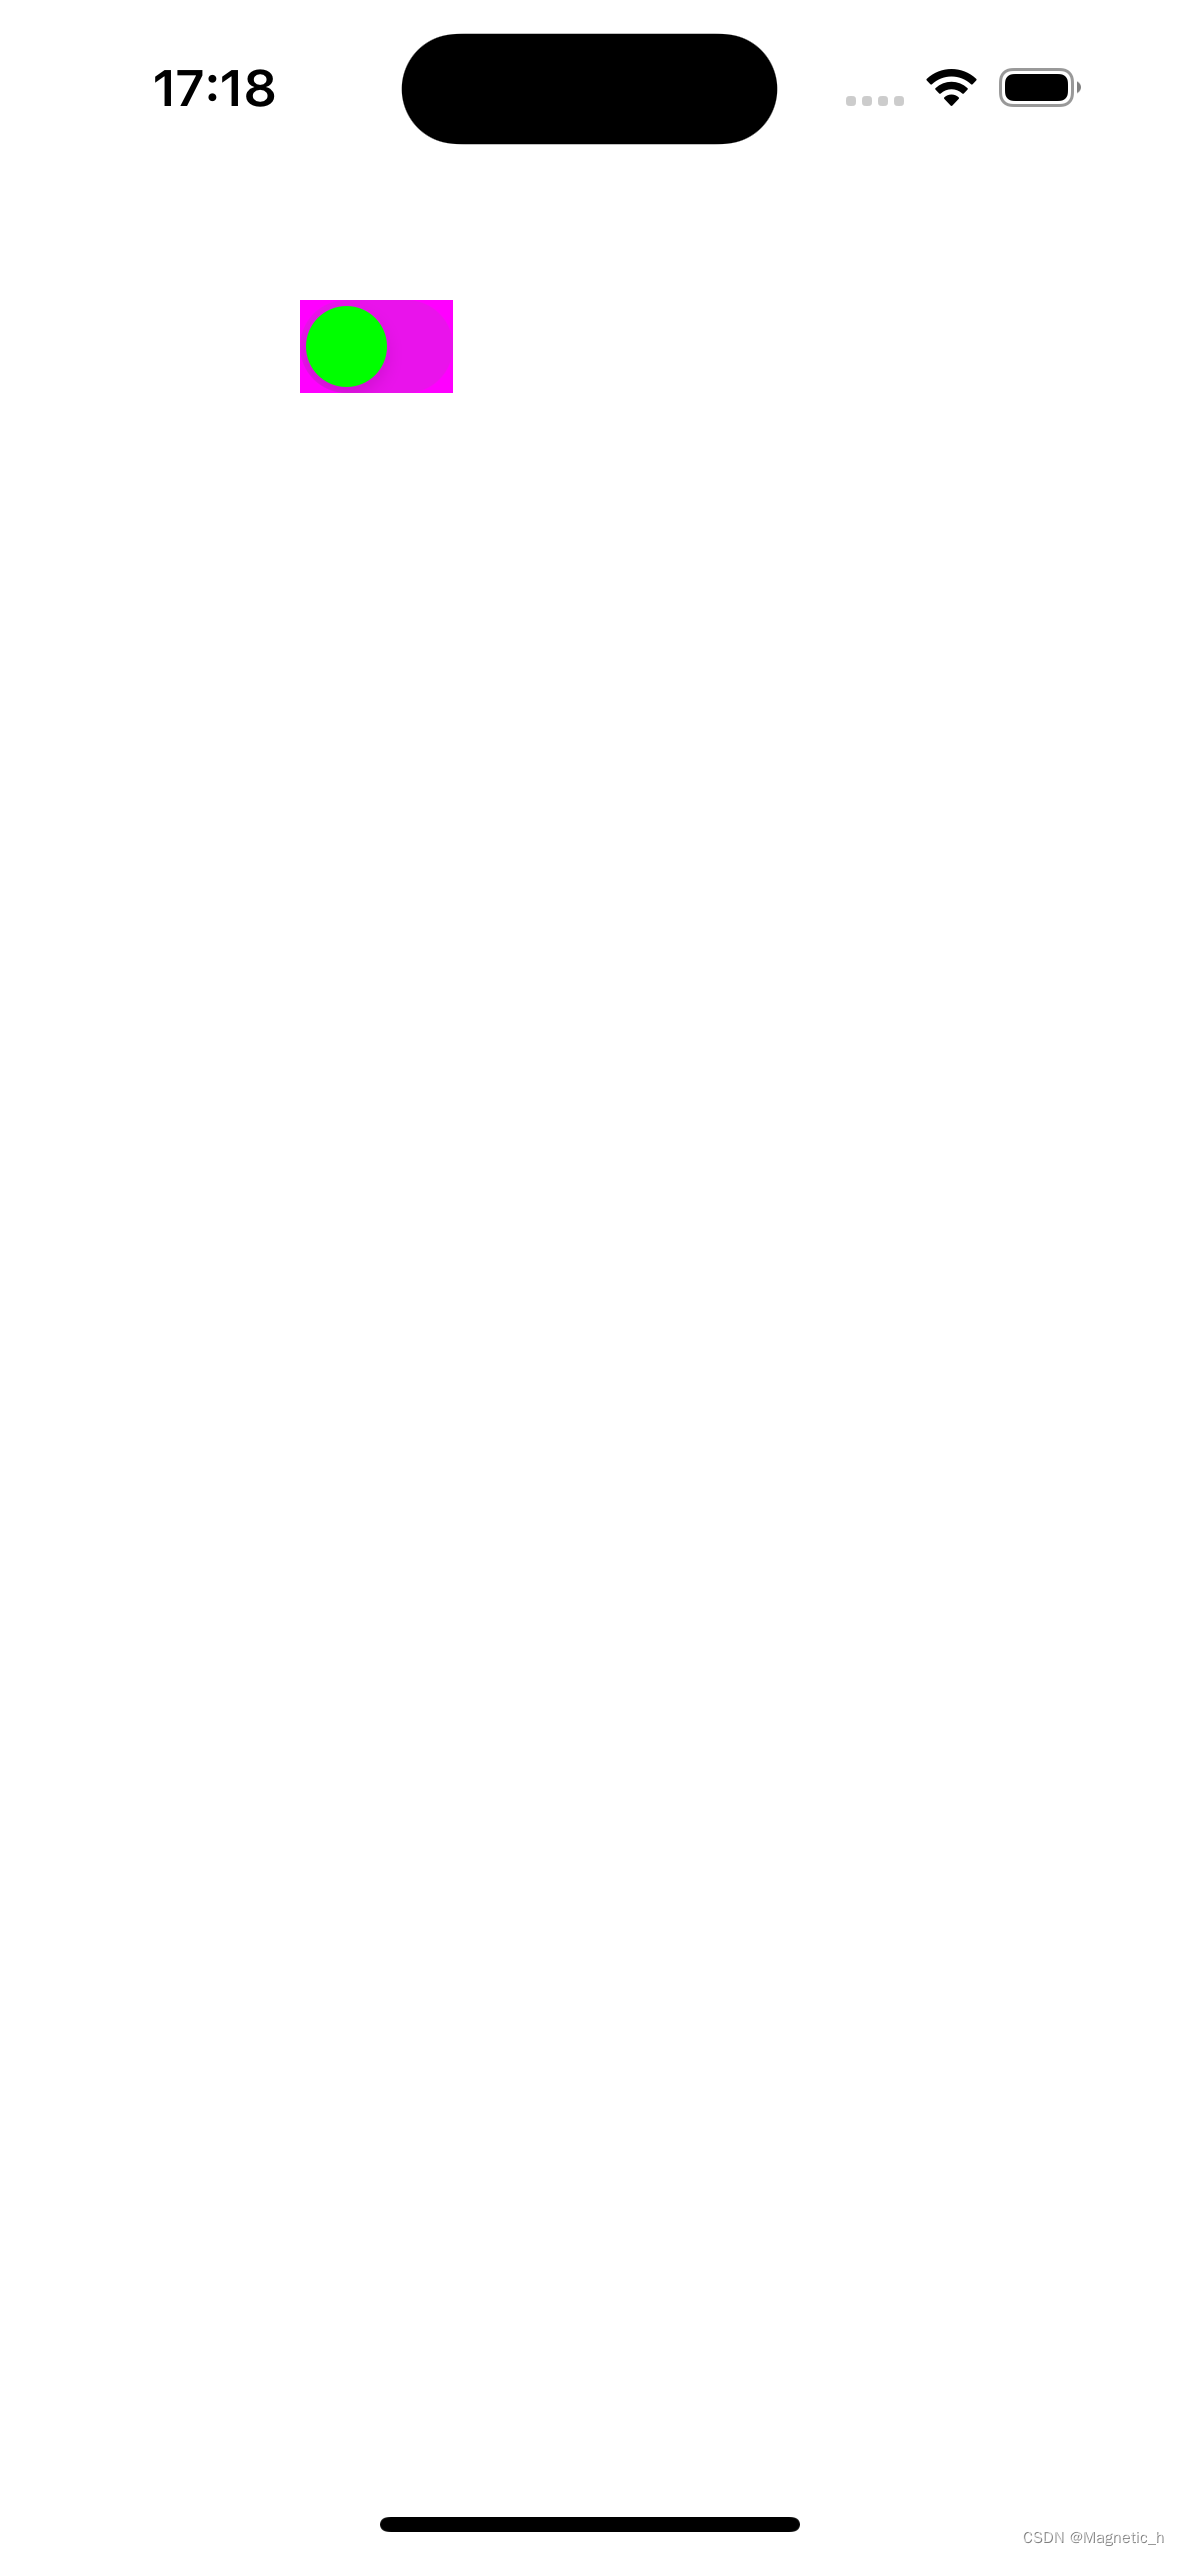
uiswitch控件
uiswitch是一个开关控件,可以切换开、关两种状态,是uikit库里的控件
uiswitch在使用时,可以先在接口部分声明属性,也可以直接在实现部分定义变量
uiswitch只能改变位置不能改变大小
uiswitch添加事件的操作与按钮类似,调用下图方法:

下面用代码来演示一下开关控件的功能与用法:
接口部分:
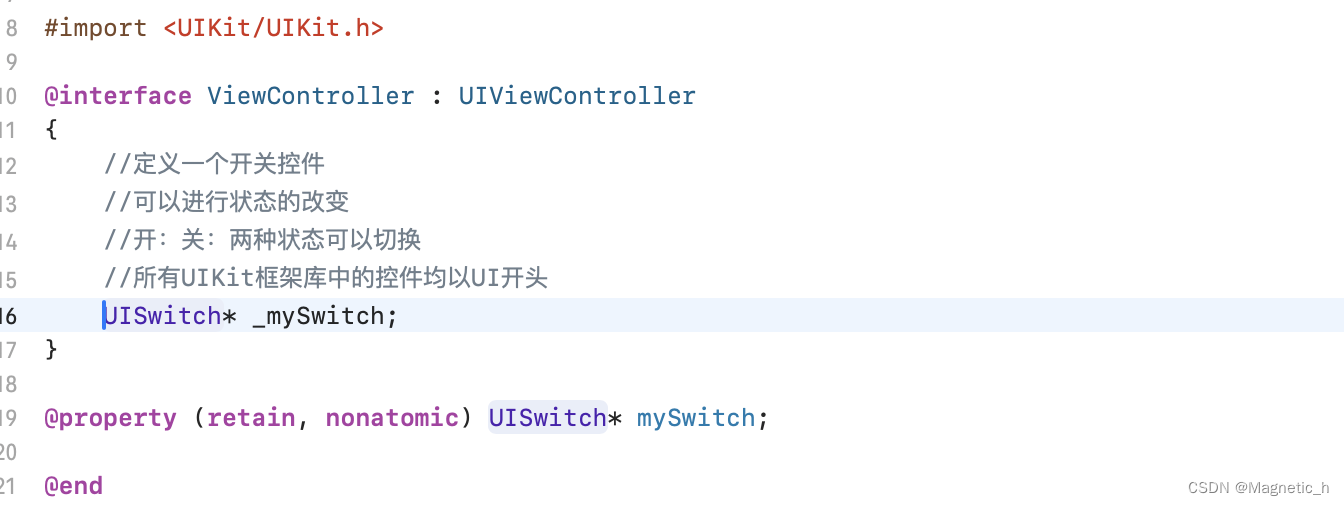
实现部分:
- (void)viewdidload {
    [super viewdidload];
    // do any additional setup after loading the view.

    //创建一个开关控件
    //继承于uiview
    _myswitch = [[uiswitch alloc] init];

    //苹果官方的控件的位置设置
    //位置x,y的值可以改变
    //宽度和高度值无法改变
    _myswitch.frame = cgrectmake(100, 100, 80, 40);
    _myswitch.backgroundcolor = [uicolor magentacolor];

    //开关状态设置属性
    //yes:开启状态
    //no:关闭状态
    _myswitch.on = yes;
    //也可以使用set函数
    [_myswitch seton:yes];

    //设置开关状态
    //第一个参数是状态设置
    //第二个参数是是否开启动画效果
    [_myswitch seton:yes animated:yes];

    [self.view addsubview:_myswitch];

    //设置开启状态的风格颜色
    [_myswitch setontintcolor: [uicolor cyancolor]];
    //设置开关按钮的风格颜色
    [_myswitch setthumbtintcolor:[uicolor greencolor]];

    //设置整体风格颜色
    [_myswitch settintcolor:[uicolor redcolor]];
    //(好像没用)
    //向开关控件添加事件函数
    //第一个参数是函数实现的对象
    //第二个参数是函数对象
    //第三个参数是事件响应时的事件类型uicontroleventvaluechanged:状态发生变化时触发函数
    [_myswitch addtarget:self action:@selector(swchange:) forcontrolevents:uicontroleventvaluechanged];
    self.view.backgroundcolor = [uicolor whitecolor];
}

//参数穿入开关对象本身
- (void)swchange:(uiswitch*) sw{
    if (sw.on == yes){
        nslog(@"开关被打开");
    } else {
        nslog(@"开关被关闭!");
    }
    nslog(@"开关状态发生变化!");
}
运行结果如下:
点击后:

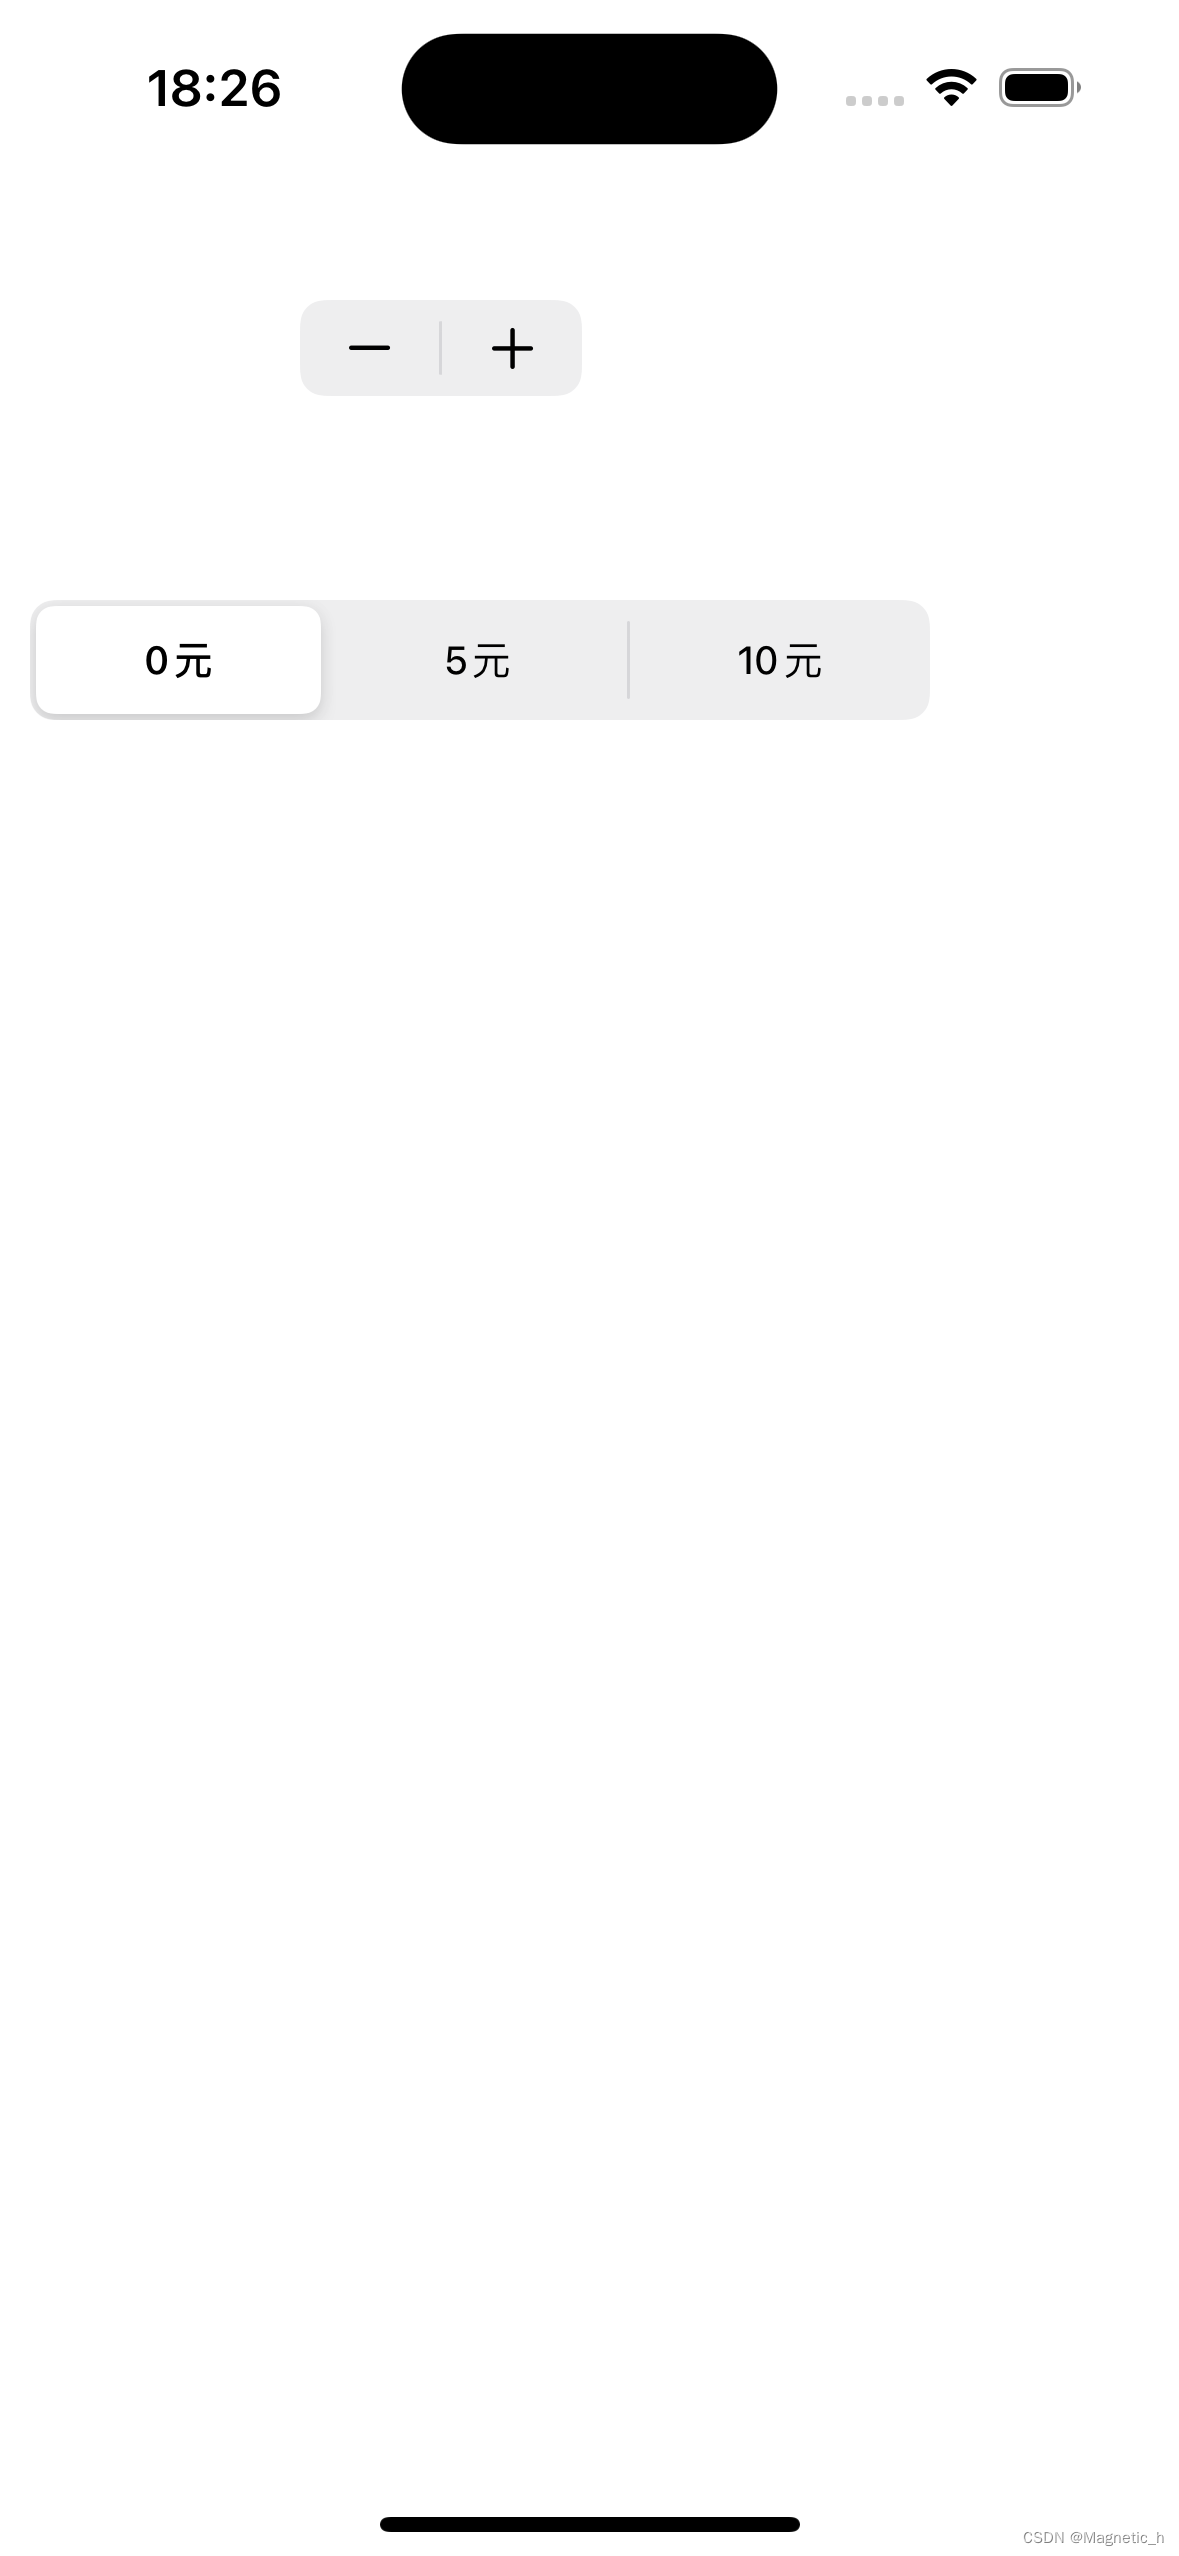
步进器和分栏控件
步进器是一种用来增加或减少固定值的控件,分栏控件是一种用来选择栏目的控件,比如在打车软件中选择价位
下面用代码来演示一下步进器和分栏控件的功能与用法
接口部分:
#import <uikit/uikit.h>

@interface viewcontroller : uiviewcontroller
{
    //定义步进器对象
    //按照一定的数值来调整某个数据
    uistepper* _stepper;
    uisegmentedcontrol* _segcontrol;
}

@property (retain, nonatomic) uistepper* stepper;
@property (retain, nonatomic) uisegmentedcontrol* segcontrol;

@end
实现部分:
#import "viewcontroller.h"
@interface viewcontroller ()
@end
@implementation viewcontroller
@synthesize stepper = _stepper;
@synthesize segcontrol = _segcontrol;
- (void)viewdidload {
[super viewdidload];
// do any additional setup after loading the view.
//创建步进器对象
_stepper = [[uistepper alloc] init];
//设置位置,宽高不可改变
_stepper.frame = cgrectmake(100, 100, 80, 40);
//设置步进器的最小值
_stepper.minimumvalue = 0;
//设置步进器的当前值,默认为0
_stepper.value = 10;
//设置步进值,每次向前或向后步进的步伐值
_stepper.stepvalue = 1;
//是否可以重复响应时间操作
_stepper.autorepeat = yes;
//是否将步进结果通过事件函数响应出来
_stepper.continuous = no;
//添加一个事件函数
//第一个参数是函数实现体
//第二个参数是函数题
//第三个参数是事件值改变状态
[_stepper addtarget:self action:@selector(stepchange) forcontrolevents:uicontroleventvaluechanged];
[self.view addsubview:_stepper];
//创建分栏控件
_segcontrol = [[uisegmentedcontrol alloc] init];
//设置控件位置,宽度可变,高度不可变
_segcontrol.frame = cgrectmake(10, 200, 300, 40);
//添加一个按钮元素
[_segcontrol insertsegmentwithtitle:@"0元" atindex:0 animated:no];
//第一个参数是按钮选项文字
//第二个参数是按钮的索引位置
//第三个参数是是否有插入的动画效果
[_segcontrol insertsegmentwithtitle:@"5元" atindex:1 animated:no];
[_segcontrol insertsegmentwithtitle:@"10元" atindex:2 animated:no];
//当前按钮默认索引位置
_segcontrol.selectedsegmentindex = 0;
[_segcontrol addtarget:self action:@selector(segchange) forcontrolevents:uicontroleventvaluechanged];
[self.view addsubview:_segcontrol];
}
- (void)segchange {
nslog(@"%ld", _segcontrol.selectedsegmentindex);
}
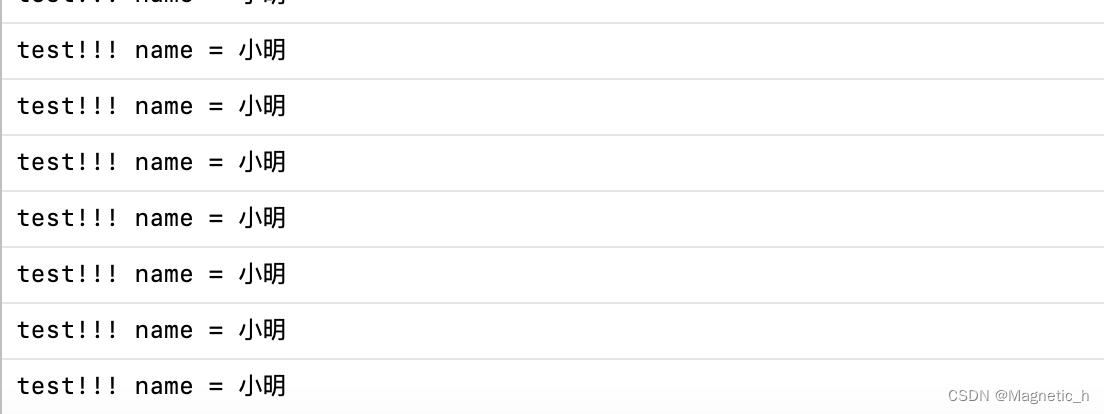
- (void)stepchange {
nslog(@"step change! value = %f", _stepper.value);
}
@end
效果图:
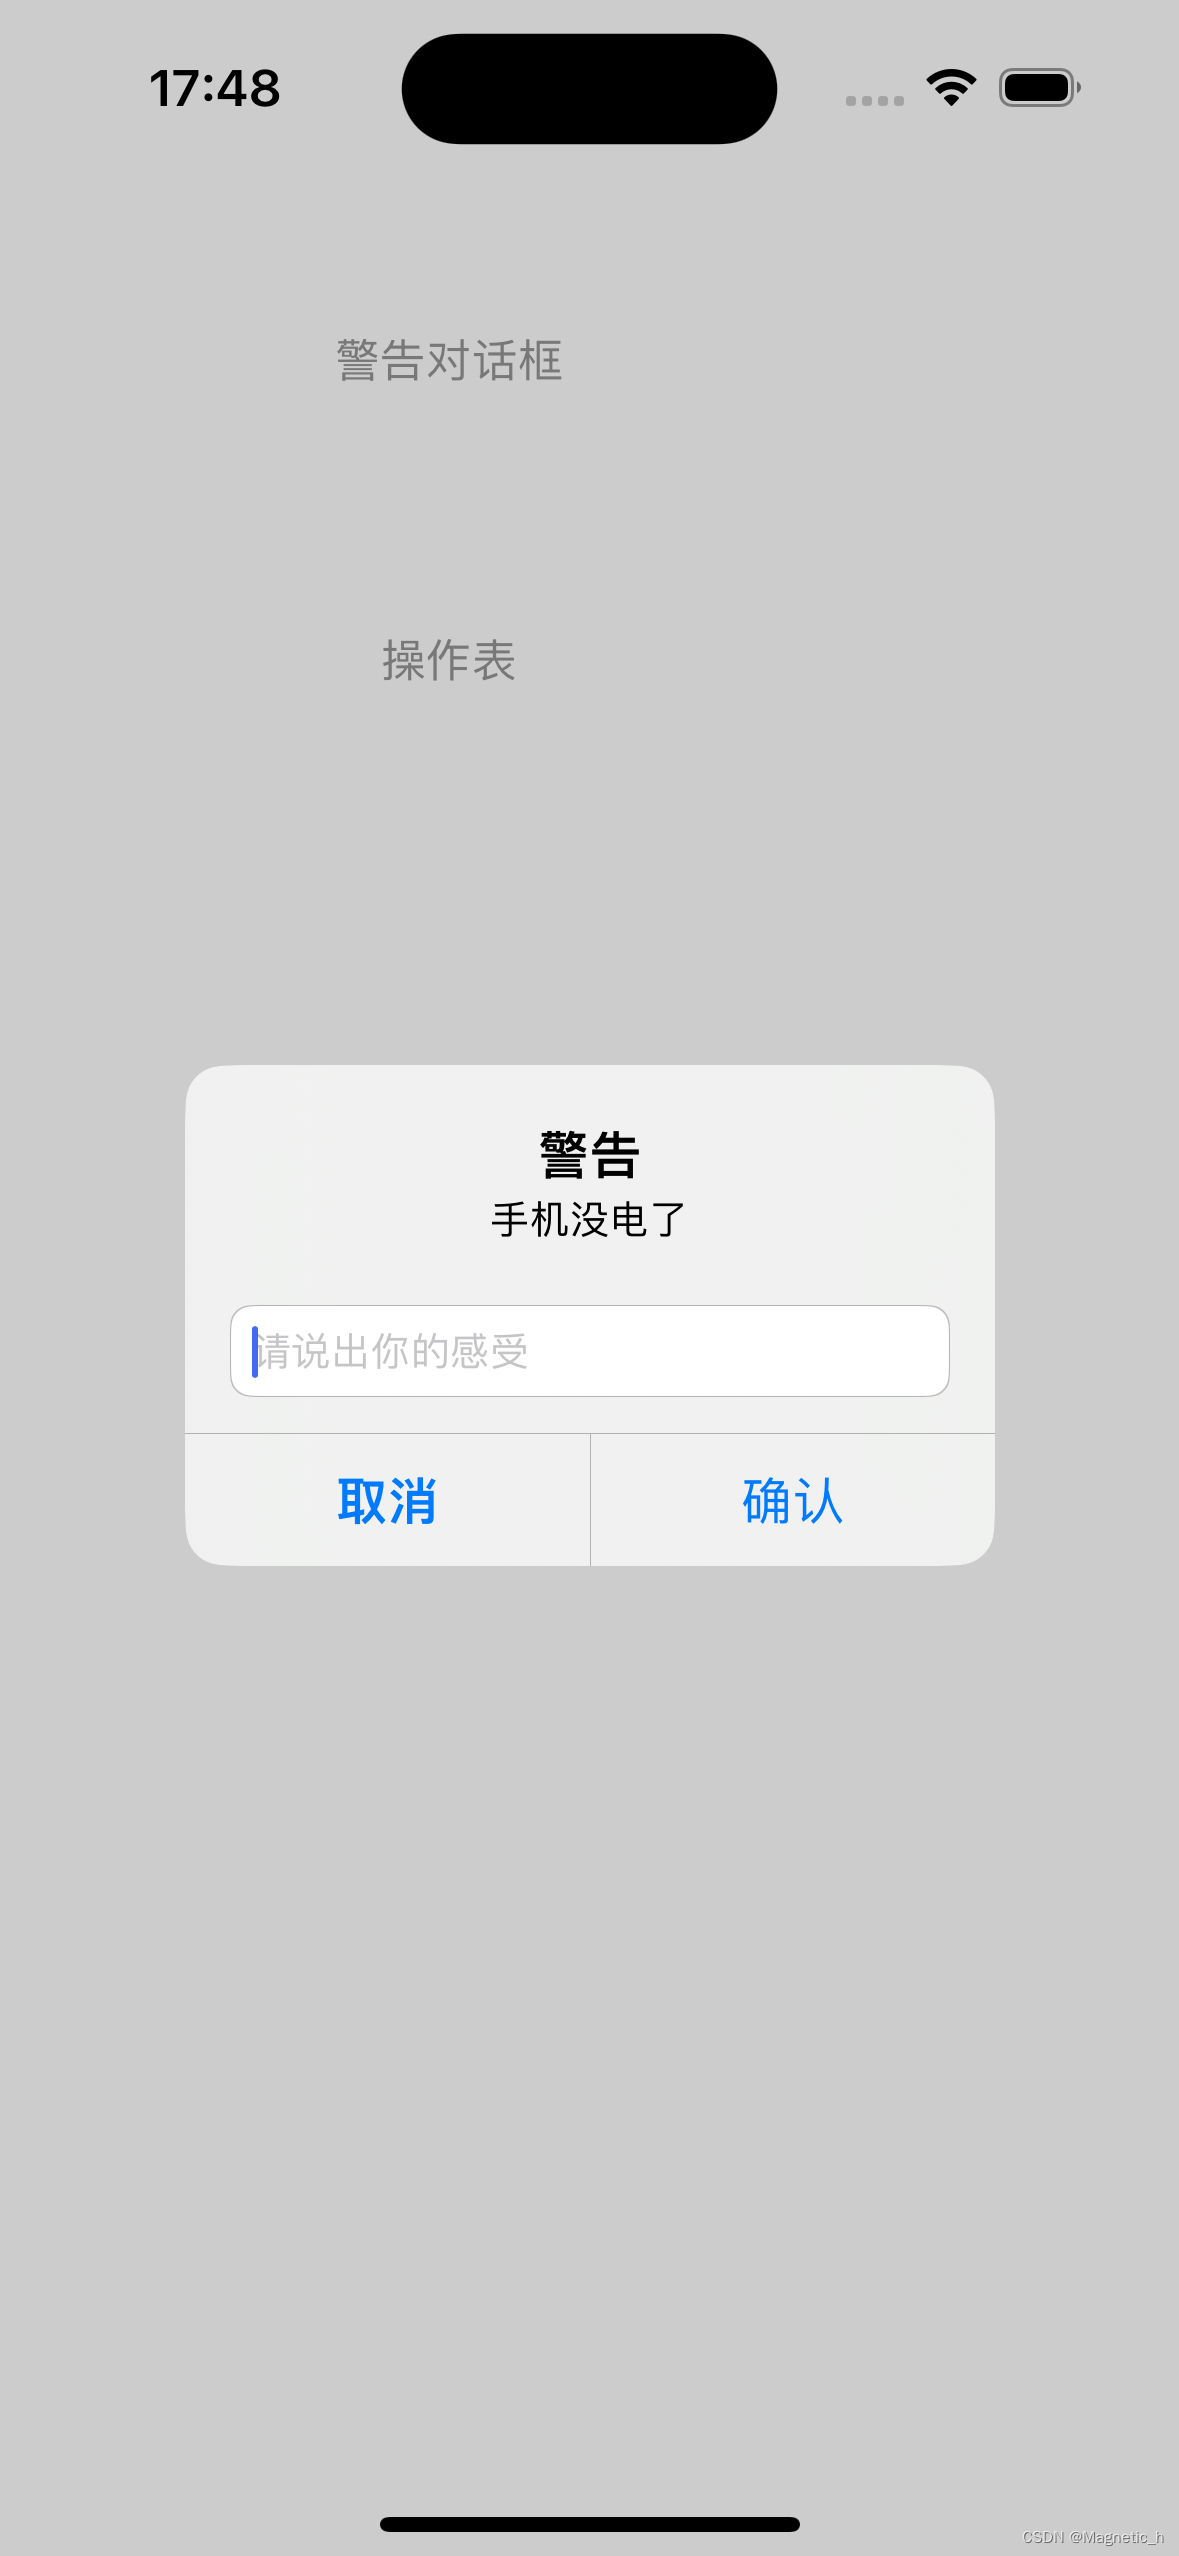
警告对话框和操作表
uialertcontroller有两种形式,一种是警告框,一种是操作表
通过不同的preferredstyle来创建两种控件
- 警告框的是uialertcontrollerstylealert
- 操作表的是uialertcontrollerstyleactionsheet
取消按钮的style的就是uialertactionstylecancel
默认按钮的style就是uialertactionstyledefault
下面用代码演示一下:
#import "viewcontroller.h"

@interface viewcontroller ()

@end

@implementation viewcontroller

@synthesize alertcontroller = _alertcontroller;
@synthesize activityindicatorview = _activityindicatorview;

- (void)viewdidload {
    [super viewdidload];
    // do any additional setup after loading the view.

    for (int i = 0; i < 2; i++) {
        uibutton* btn = [uibutton buttonwithtype:uibuttontyperoundedrect];
        btn.frame = cgrectmake(100, 100 + 100 * i, 100, 40);
        if (i == 0) {
            [btn settitle:@"警告对话框" forstate:uicontrolstatenormal];
        } else if (i == 1) {
            [btn settitle:@"操作表" forstate:uicontrolstatenormal];
        }
        btn.tag = 101 + i;
        [btn addtarget:self action:@selector(pressbtn:) forcontrolevents:uicontroleventtouchupinside];
        [self.view addsubview:btn];
    }
}

- (void)pressbtn:(uibutton*)btn {
    //警告对话框创建
    if (btn.tag == 101) {
        //创建警告框
        uialertcontroller *alertcontroller = [uialertcontroller alertcontrollerwithtitle:@"警告" message:@"手机没电了" preferredstyle:uialertcontrollerstylealert];
        //添加操作按钮
        uialertaction* action = [uialertaction actionwithtitle:@"确认" style:uialertactionstyledefault handler:^(uialertaction * _nonnull action) {
            nslog(@"已确认");
        }];
        [alertcontroller addaction:action];
        //添加取消按钮
        uialertaction* cancelaction = [uialertaction actionwithtitle:@"取消" style:uialertactionstylecancel handler:nil];
        //将取消按钮添加到我们的警告框中
        [alertcontroller addaction:cancelaction];
        //在视图控制器中呈现警告框(通过这个方法将其弹出)
        [self presentviewcontroller:alertcontroller animated:yes completion:nil];
        //这里可以在警告框里添加我们的文本框
        [alertcontroller addtextfieldwithconfigurationhandler:^(uitextfield * _nonnull textfield) {
            textfield.placeholder = @"请说出你的感受";
        }];
    } else if (btn.tag == 102) {
        //创建操作表
        self.alertcontroller = [uialertcontroller alertcontrollerwithtitle:@"操作表" message:@"来做一些操作吧" preferredstyle:uialertcontrollerstyleactionsheet];
        //其实alertsheet唯一与警告对话框的区别就是我们的preferredstyle的样式不同
        //这里default就是选择默认的选项
        uialertaction* action1 = [uialertaction actionwithtitle:@"操作1" style:uialertactionstyledefault handler:^(uialertaction * _nonnull action) {
            nslog(@"点击了项目1");
        }];
        uialertaction* action2 = [uialertaction actionwithtitle:@"操作2" style:uialertactionstyledefault handler:^(uialertaction * _nonnull action) {
            nslog(@"点击了项目2");
        }];
        //创建取消操作
        uialertaction* cancel = [uialertaction actionwithtitle:@"取消" style:uialertactionstylecancel handler:^(uialertaction * _nonnull action) {
            nslog(@"取消了");
        }];
        [self.alertcontroller addaction:action1];
        [self.alertcontroller addaction:action2];
        [self.alertcontroller addaction:cancel];
        //注意alertcontroller时viewcontroller的子类 不能直接添加为子视图
        [self presentviewcontroller:self.alertcontroller animated:yes completion:nil];
    }
}


@end
运行的效果如下:

警告对话框:
操作表:

uitextfield
textfield是一个文本输入的控件,它用于从键盘上输入文本文字,它有一个特性是只能输入单行的文本,而不能输入或显示多行。
uitextfield是继承于uicontrol的,uicontrol是继承于uiview的。
可以用一个borderstyle选择文本框的四种风格:
1.圆角风格(默认)uitextborderstyleroundedrect;
2.线框风格uitextborderstyleline;
3.bezel线框uitextborderstylebezel;
4.无边框风格uitextborderstylenone;
还可以选择键盘的风格:
1.默认风格uikeyboardtypedefault;
2.字母和数字组合风格uikeyboardtypephonepad;
3.纯数字风格 uikeyboardtypenumberpad;
可以设置输入时视为密码输入,输入时就会将输入的东西转化为星号
可以使用touchesdown点击函数来实现点击空白处收起键盘
uitextfield有一个uitextfielddelegate协议,在声明后可以使用一些协议中的函数
1、- (void) textfielddidbeginediting:在手机键盘弹出的一瞬间开始调用,在这里可以为开始输入时添加动作
2、- (void) textfielddidendediting:在手机键盘收回的一瞬间开始调用,在这里可以为结束输入时添加动作
3、- (bool) textfieldshouldbeginediting:表示是否可以进行输入,返回值为yes的时候可以输入,反之不能输入,默认为yes
4、- (bool) textfieldshouldendediting:表示是否可以结束输入,返回值为yes的时候可以结束,反之不能结束,默认为yes
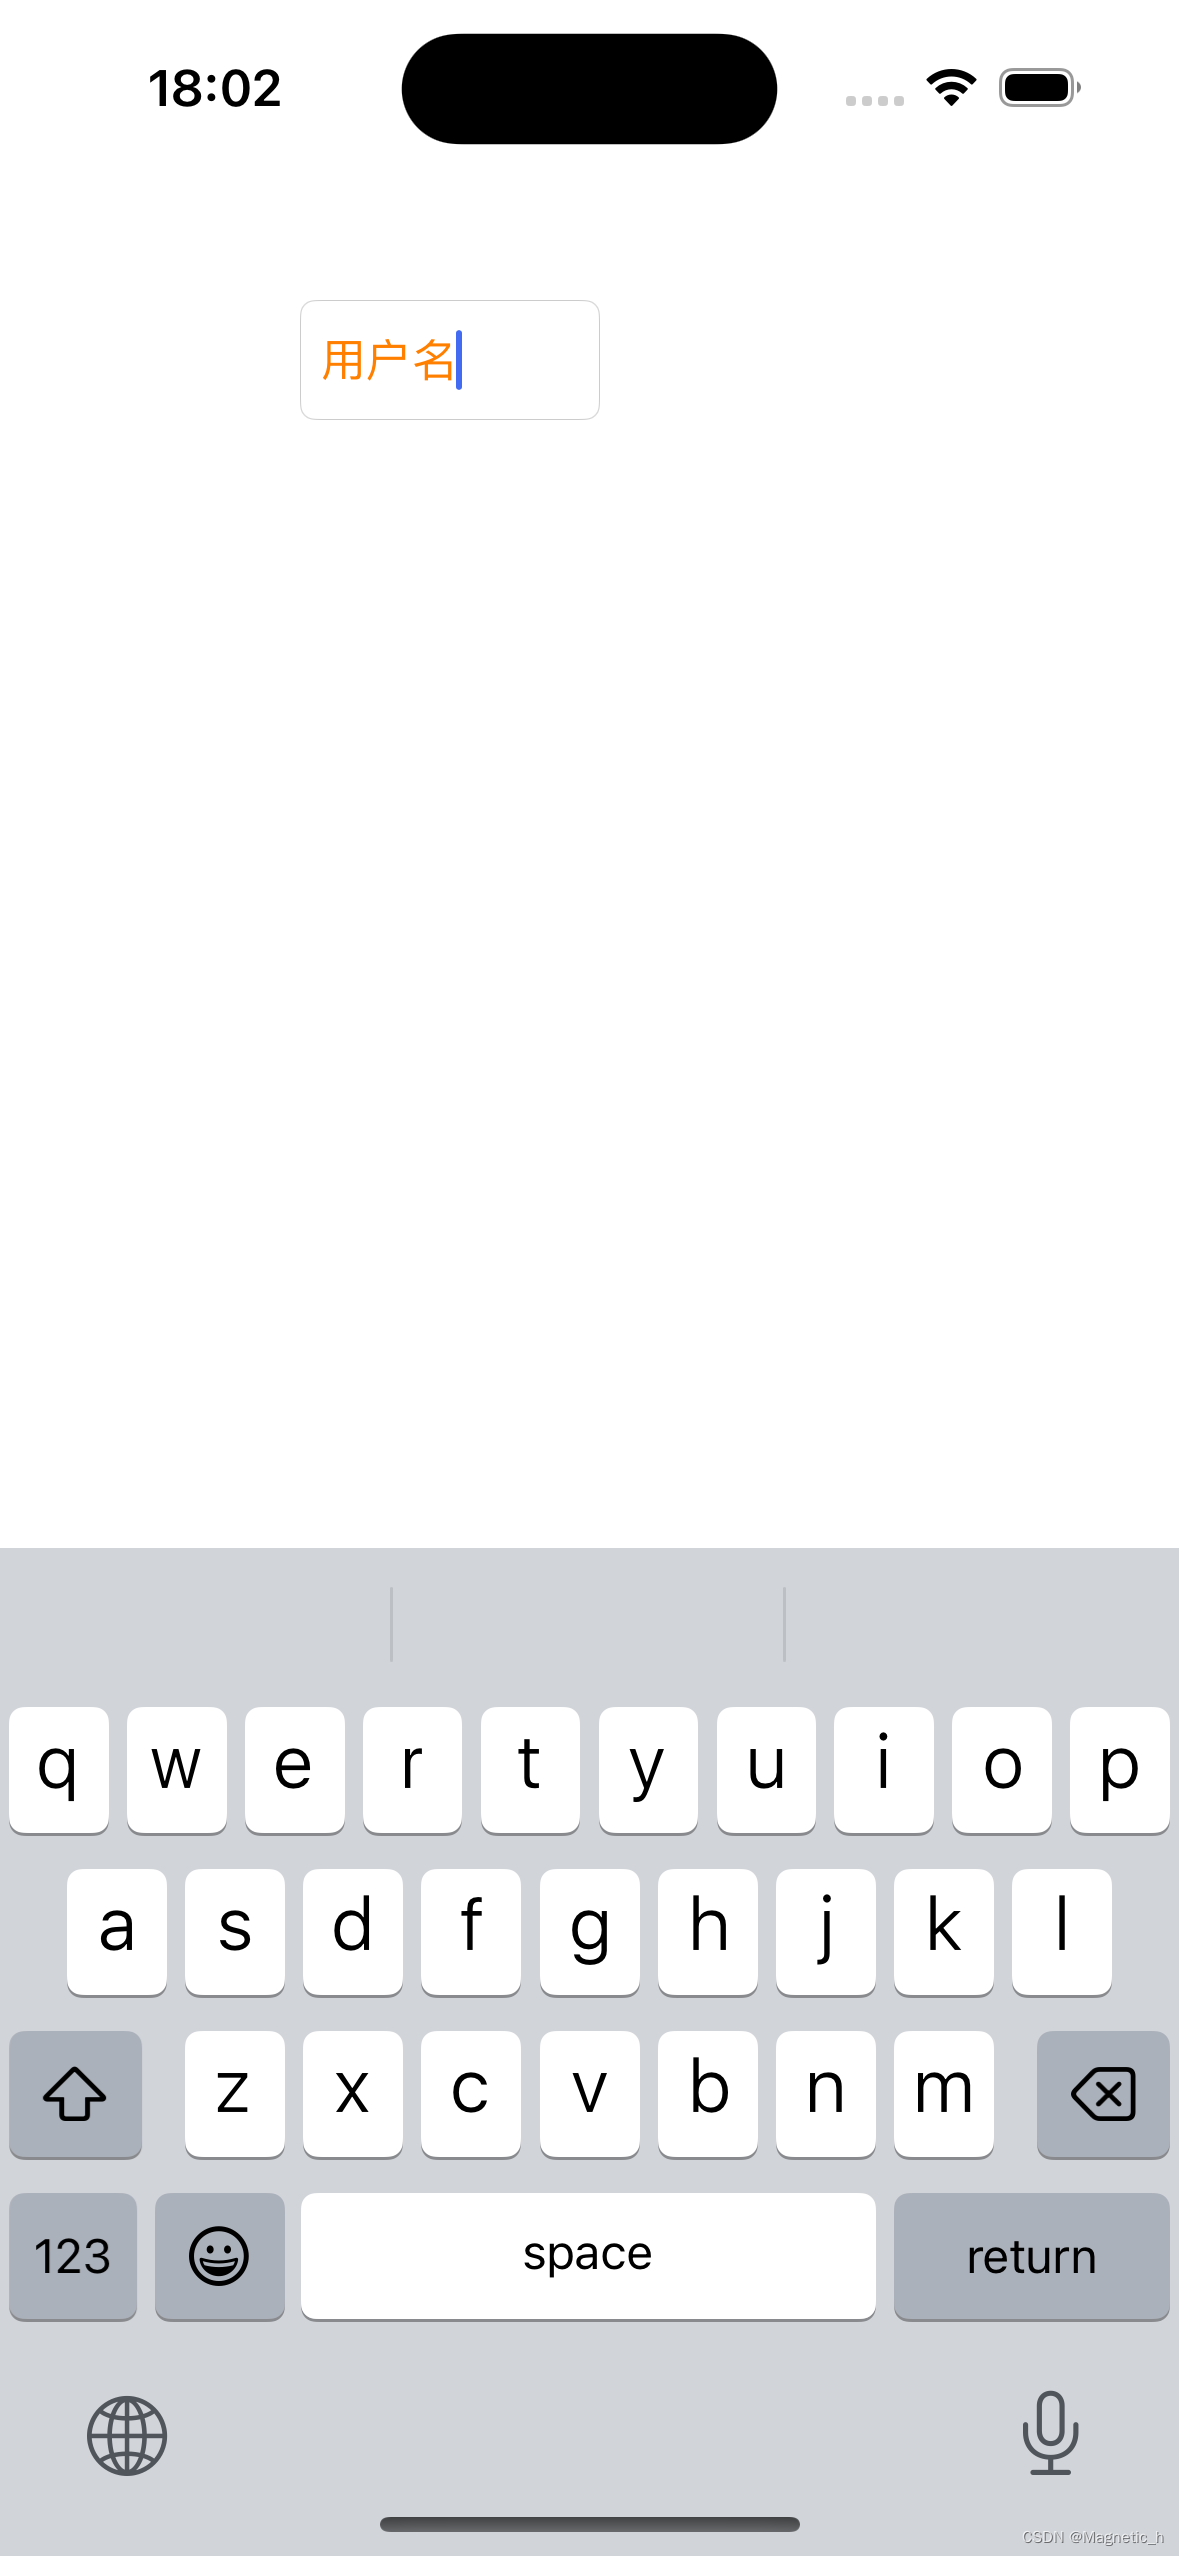
下面用代码演示一下:
#import "viewcontroller.h"

@interface viewcontroller () <uitextviewdelegate>

@end

@implementation viewcontroller

@synthesize textfield = _textfield;

- (void)viewdidload {
    [super viewdidload];
    // do any additional setup after loading the view.
    self.textfield = [[uitextfield alloc] init];
    self.textfield.frame = cgrectmake(100, 100, 100, 40);
    //设置内容文字
    self.textfield.text = @"用户名";
    self.textfield.font = [uifont systemfontofsize:15];
    self.textfield.textcolor = [uicolor orangecolor];
    //设置边框风格
    //uitextborderstyleroundedrect:圆角风格
    //uitextborderstyleline:线框风格
    //uitextborderstylebezel:bezel:bezel线框
    //uitextborderstylenone:无边框风格
    //默认为圆角风格
    self.textfield.borderstyle = uitextborderstyleroundedrect;
    //设置虚拟键盘风格
    //uikeyboardtypedefault:默认风格
    //uikeyboardtypenamephonepad:字母和数字组合的风格
    //uikeyboardtypenumberpad:纯数字风格
    self.textfield.keyboardtype = uikeyboardtypedefault;
    //提示文字信息
    //当text属性为空,显示此条信息
    //浅灰色提示文字
    self.textfield.placeholder = @"请输入用户名...";

    //是否作为密码输入
    //yes:作为密码处理,圆点加密
    //no:显示输入的文字
    self.textfield.securetextentry = no;
    [self.view addsubview:self.textfield];
}

- (void) textviewdidbeginediting:(uitextview *)textview {
    nslog(@"开始编辑了!");
}

- (void) textviewdidendediting:(uitextview *)textview {
    self.textfield.placeholder = @"";
    nslog(@"编辑输入结束!");
}

//是否可以进行输入
//如果返回值为yes,可以进行输入,默认为yes
//no:不能输入文字
- (bool) textviewshouldbeginediting:(uitextview *)textview {
    return yes;
}

//是否可以结束输入
//如果返回值为yes,可以结束输入,默认为yes
//no:不能结束输入文字
- (bool) textviewshouldendediting:(uitextview *)textview {
    return yes;
}

//点击屏幕空白处调用此函数
- (void)touchesbegan:(nsset<uitouch *> *)touches withevent:(uievent *)event {
    //使虚拟键盘回收,不再作为第一消息响应
    [self.textfield resignfirstresponder];
}


@end
运行结果:
uiscrollview基础
uiscrollview就是一个可以滚动的视图,比如说微信的聊天界面,就是一种uiscrollviewde的应用
用代码来演示一下滚动视图的功能和用法:
#import "viewcontroller.h"

@interface viewcontroller ()

@end

@implementation viewcontroller

- (void)viewdidload {
    [super viewdidload];
    // do any additional setup after loading the view.

    //定义并创建一个滚动视图
    //可以对视图内容进行滚屏查看功能
    uiscrollview* sv = [[uiscrollview alloc] init];
    //设置滚动视图的位置,使用矩形来定位视图位置
    sv.frame = cgrectmake(0, 0, 320, 576);

    //是否按照整页来滚动
    sv.pagingenabled = no;
    //是否可以开启滚动效果
    sv.scrollenabled = yes;
    //设置画布的大小,显示在滚动视图内部,一般大雨frame的大小
    sv.contentsize = cgsizemake(320 * 5, 576);
    //是否可以边缘弹动效果
    sv.bounces = yes;
    //开启横向弹动效果
    sv.alwaysbouncevertical = yes;
    //开启纵向弹动效果
    sv.alwaysbouncehorizontal = yes;
    //显示横向滚动条
    sv.showshorizontalscrollindicator = yes;
    //显示纵向滚动条
    sv.showshorizontalscrollindicator = yes;
    //设置背景颜色
    sv.backgroundcolor = [uicolor yellowcolor];

    for(int i = 0; i < 5; i++) {
        nsstring* strname = [nsstring stringwithformat:@"%d.jpg",i + 1];
        uiimage* image = [uiimage imagenamed:strname];
        uiimageview* iview = [[uiimageview alloc] initwithimage:image];
        iview.frame = cgrectmake(320 * i, 0, 320, 576);
        [sv addsubview: iview];
    }
    [self.view addsubview:sv];
}


@end
运行结果如下:

滚动视图的高级功能
滚动视图有一个叫做uiscrollviewdelegate,如同文本框的协议,我们在声明滚动视图的协议后,可以调用里面的一些函数
#import "viewcontroller.h"

@interface viewcontroller ()

@end

@implementation viewcontroller

- (void)viewdidload {
    [super viewdidload];
    // do any additional setup after loading the view.
    //创建滚动视图
    _scrollview = [[uiscrollview alloc] init];
    //设置位置
    _scrollview.frame = cgrectmake(10, 50, 300, 400);
    //设置背景颜色
    _scrollview.backgroundcolor = [uicolor redcolor];
    //取消弹动效果
    _scrollview.bounces = no;
    //是否允许通过点击屏幕让滚动视图响应事件
    //yes:滚动视图可以接受触碰事件
    //no:不接受触屏事件
    //_scrollview.userinteractionenabled = no;

    //设置画布大小,纵向效果
    _scrollview.contentsize = cgsizemake(300, 400 * 9);
    for (int i = 0; i < 9; i++) {
        nsstring* strname = [nsstring stringwithformat:@"%d.jpg",i + 1];
        uiimage* image = [uiimage imagenamed:strname];
        //创建图像视图对象
        uiimageview* iview = [[uiimageview alloc] init];
        //图像赋值
        iview.image = image;
        //设置图像视图在滚动视图画布中的位置
        iview.frame = cgrectmake(0, 400 * i, 300, 400);
        [_scrollview addsubview:iview];
    }

    [self.view addsubview:_scrollview];
    //取消按页滚动效果
    _scrollview.pagingenabled = no;
    //滚动视图画布的移动位置,也就是偏移位置
    //功能是决定画布现实的最终图像结果
    _scrollview.contentoffset = cgpointmake(0, 0);

    //将当前视图控制器作为代理对象
    _scrollview.delegate = self;
}

//当滚动视图移动时,只要offset坐标发生变化,就会调用此函数
//参数是调用此协议的滚动视图对象
//可以使用此函数来监控滚动视图的位置
- (void)scrollviewdidscroll:(uiscrollview *)scrollview {
    nslog(@"y = %f", scrollview.contentoffset.y);
}

//当滚动视图结束拖动时调用此函数
- (void)scrollviewdidenddragging:(uiscrollview *)scrollview willdecelerate:(bool)decelerate{
    nslog(@"did end drag");
}

//当滚动视图即将开始被拖动时
- (void)scrollviewwillbegindragging:(uiscrollview *)scrollview {
    nslog(@"willbegindrag!");
}

//当滚动视图即将结束拖动时调用
- (void)scrollviewwillenddragging:(uiscrollview *)scrollview withvelocity:(cgpoint)velocity targetcontentoffset:(inout cgpoint *)targetcontentoffset {
    nslog(@"即将结束拖动");
}

//视图即将减速时调用
- (void)scrollviewwillbegindecelerating:(uiscrollview *)scrollview {
    nslog(@"will begin decelerating");
}

//视图停止的瞬间调用
- (void)scrollviewdidenddecelerating:(uiscrollview *)scrollview {
    nslog(@"视图停止移动!");
}
@end
运行效果如下:


发表评论