一、先看效果
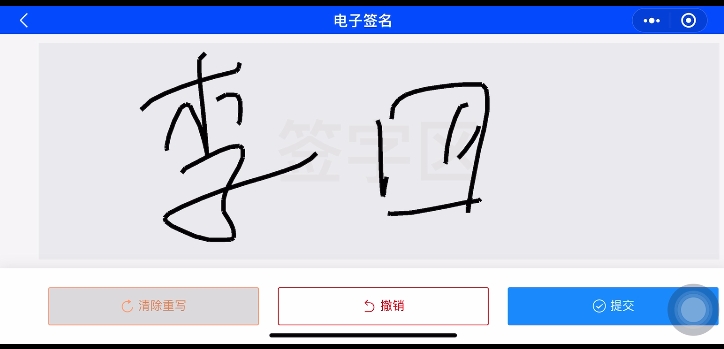
小程序canvas电子签名
二、文档
三、分析
1、初始话canvas容器
2、canvas触摸事件,bindtouchstart(手指触摸动作开始)、bindtouchmove(手指触摸后移动)、bindtouchend(手指触摸动作结束)、bindtouchcancel(手指触摸动作被打断,如来电提醒,弹窗)
3、记录每次从开始到结束的路径段
4、清除、撤销
四、代码分析
1、页面的布局、canvas容器的初始化
先将屏幕横过来,index.json配置文件,“pageorientation”: “landscape”
wx.getsysteminfosync() 获取可使用窗口的宽高,赋值给canvas画布(注意若存在按钮区域、屏幕安全区之类的,需要减去)
 // 获取可使用窗口的宽高,赋值给canvas(宽高要减去上下左右padding的20,以及高度要减去footer区域)
 wx.createselectorquery()
   .select('.footer') // canvas获取节点
   .fields({node: true, size: true}) // 获取节点的相关信息,node:是否返回节点对应的 node 实例,size:是否返回节点尺寸
   .exec((res) => {
     // 获取手机左侧安全区域(刘海)
     const deviceinfo = wx.getsysteminfosync()
     const canvaswidth = deviceinfo.windowwidth - 20 - deviceinfo?.safearea?.left || 0
     const canvasheight = deviceinfo.windowheight - res[0].height - 20
     console.log('canvaswidth', canvaswidth);
     console.log('canvasheight', canvasheight);
     this.setdata({
       deviceinfo,
       canvaswidth,
       canvasheight
     })
     this.initcanvas('init')
   })
通过wx.createselectorquery()获取到canvas节点,随即可获取到canvas的上下文实例
  // 初始话canvas画布
  initcanvas() {
    let ctx = null
    let canvas = null
    // 获取canvas画布以及渲染上下文
    wx.createselectorquery()
      .select('#mycanvas') // canvas获取节点
      .fields({node: true, size: true}) // 获取节点的相关信息,node:是否返回节点对应的 node 实例,size:是否返回节点尺寸
      .exec((res) => { // 执行所有的请求。请求结果按请求次序构成数组
        // canvas 对象实例
        canvas = res[0].node
        // canvas 对象上下文实例(动画动作绘图等都是在他的身上完成)
        ctx = canvas.getcontext('2d')
        // canvas 画布的实际绘制宽高
        const width = res[0].width;
        const height = res[0].height;
        // 获取设备像素比
        const dpr = wx.getwindowinfo().pixelratio;
        // 初始化画布大小
        canvas.width = width * dpr;
        canvas.height = height * dpr;
        // 画笔的颜色
        ctx.fillstyle = 'rgb(200, 0, 0)';
        // 指定了画笔(绘制线条)操作的线条宽度
        ctx.linewidth = 5
        // 缩小/放大图像
        ctx.scale(dpr, dpr)
        this.setdata({canvas, ctx});
      })
  },
2、线条的绘制
通过canva组件的触摸事件bindtouchstart、bindtouchmove、bindtouchend、bindtouchcancel结合canvas的路径绘制的方法moveto(x,y)、lineto(x,y)、stroke()来实现一段线条的绘制
bindtouchstart手指触摸动作开始,结合moveto(x,y) 用来设置绘图起始坐标的方法确定线段的开始坐标
  // 手指触摸动作开始
  bindtouchstart(event) {
      let {type, changedtouches} = event;
    let {x, y} = changedtouches[0];
    ctx.moveto(x, y); // 设置绘图起始坐标。
  },
bindtouchend手指触摸动作结束,结合lineto(x,y) 来绘制一条直线,最后stroke()渲染路径
  // 手指触摸动作结束
  bindtouchend(event) {
      let {type, changedtouches} = event;
    let {x, y} = changedtouches[0];
     ctx.lineto(x, y);
     // 绘制
     ctx.stroke();
  },
但这只是一条直线段,并未实现签名所需的曲线(曲线实质上也是由无数个非常短小的直线段构成)
bindtouchmove事件会在手指触摸后移动时,实时返回当前状态
那么可否通过bindtouchmove 结合 moveto ==> lineto ==> stroke ==> moveto ==> … 以上一次的结束为下一次的开始这样的方式来实时渲染直线段合并为一个近似的曲线
  // 手指触摸后移动
  bindtouchmove(event) {
      let {type, changedtouches} = event;
    let {x, y} = changedtouches[0];
    // 上一段终点
    ctx.lineto(x, y) // 从最后一点到点(x,y)绘制一条直线。
    // 绘制
    ctx.stroke();
    // 下一段起点
    ctx.moveto(x, y) // 设置绘图起始坐标。
  },
归纳封装
  // 手指触摸动作开始
  bindtouchstart(event) {
    this.addpathdrop(event)
  },
  // 手指触摸后移动
  bindtouchmove(event) {
    this.addpathdrop(event)
  },
  // 手指触摸动作结束
  bindtouchend(event) {
    this.addpathdrop(event)
  },
  // 手指触摸动作被打断,如来电提醒,弹窗
  bindtouchcancel(event) {
    this.addpathdrop(event)
  },
  // 添加路径点
  addpathdrop(event) {
    let {ctx, historyimag, canvas} = this.data
    let {type, changedtouches} = event
    let {x, y} = changedtouches[0]
    if(type === 'touchstart') { // 每次开始都是一次新动作
      // 最开始点
      ctx.moveto(x, y) // 设置绘图起始坐标。
    } else {
      // 上一段终点
      ctx.lineto(x, y) // 从最后一点到点(x,y)绘制一条直线。
      // 绘制
      ctx.stroke();
      // 下一段起点
      ctx.moveto(x, y) // 设置绘图起始坐标。
    }
  },
3、上一步、重绘、提交
主体思路为每一次绘制完成后都通过wx.canvastotempfilepath生成图片,并记录下来,通过canvas的drawimage方法将图片绘制到 canvas 上
五、完整代码
1、inde.json
{
  "navigationbartitletext": "电子签名",
  "backgroundtextstyle": "dark",
  "pageorientation": "landscape",
  "disablescroll": true,
  "usingcomponents": {
    "van-button": "@vant/weapp/button/index",
    "van-toast": "@vant/weapp/toast/index"
  }
}
2、index.wxml
<!-- index.wxml -->
<view>
  <view class="content" style="padding-left: {{deviceinfo.safearea.left || 10}}px">
    <view class="canvas_box">
      <!-- 定位到canvas画布的下方作为背景 -->
      <view class="canvas_tips">
        签字区
      </view>
      <!-- canvas画布 -->
      <canvas class="canvas_content" type="2d" style='width:{{canvaswidth}}px; height:{{canvasheight}}px' id="mycanvas" bindtouchstart="bindtouchstart" bindtouchmove="bindtouchmove" bindtouchend="bindtouchend" bindtouchcancel="bindtouchcancel"></canvas>
    </view>
  </view>
  <!-- footer -->
  <view class="footer" style="padding-left: {{deviceinfo.safearea.left}}px">
    <van-button plain class="item" block icon="replay" bind:click="overwrite" type="warning">清除重写</van-button>
    <van-button plain class="item" block icon="revoke" bind:click="prev" type="danger">撤销</van-button>
    <van-button class="item" block icon="passed" bind:click="confirm" type="info">提交</van-button>
  </view>
</view>
<!-- 提示框组件 -->
<van-toast id="van-toast" />
3、index.less
.content {
  box-sizing: border-box;
  width: 100%;
  height: 100%;
  padding: 10px;
  .canvas_box {
    width: 100%;
    height: 100%;
    background-color: #e8e9ec;
    position: relative;
    // 定位到canvas画布的下方作为背景
    .canvas_tips {
      position: absolute;
      left: 0;
      top: 0;
      width: 100%;
      height: 100%;
      font-size: 80px;
      color: #e2e2e2;
      font-weight: bold;
      display: flex;
      align-items: center;
      justify-content: center;
    }

    // .canvas_content {
    //   width: 100%;
    //   height: 100%;
    // }
  }
}
// 底部按钮
.footer {
  box-sizing: border-box;
  padding: 20rpx 0;
  z-index: 2;
  background-color: #ffffff;
  text-align: center;
  position: fixed;
  width: 100%;
  box-shadow: 0 0 15rpx rgba(0, 0, 0, 0.1);
  left: 0;
  bottom: 0;
  display: flex;

  .item {
    flex: 1;
    margin: 0 10rpx;
  }

  .scan {
    width: 80rpx;
    margin: 0 10rpx;
  }

  .morebtn {
    width: 150rpx
  }
}
4、index.js
// index.js
// 获取应用实例
// import request from "../../request/index";
import toast from '@vant/weapp/toast/toast';

const app = getapp()
page({
  data: {
    // expertid: '', // 专家id
    deviceinfo: {}, // 设备信息
    canvaswidth: '', // 画布宽
    canvasheight: '', // 画布高
    canvas: null, // canvas 对象实例
    ctx: null, // canvas 对象上下文实例
    historyimag: [], // 历史记录,每一笔动作完成后的图片数据,用于每一次回退上一步是当作图片绘制到画布上
    filelist: [], // 签名后生成的附件
    initialcanvasimg: '', // 初始画布图,解决非ios设备重设置宽高不能清空画布的问题
  },
  onready() {
    // 获取可使用窗口的宽高,赋值给canvas(宽高要减去上下左右padding的20,以及高度要减去footer区域)
    wx.createselectorquery()
      .select('.footer') // canvas获取节点
      .fields({ node: true, size: true }) // 获取节点的相关信息,node:是否返回节点对应的 node 实例,size:是否返回节点尺寸
      .exec((res) => {
        console.log('res', res);
        // 获取手机左侧安全区域(刘海)
        const deviceinfo = wx.getsysteminfosync()
        const canvaswidth = deviceinfo.windowwidth - 20 - deviceinfo?.safearea?.left || 0
        const canvasheight = deviceinfo.windowheight - res[0].height - 20
        this.setdata({
          deviceinfo,
          canvaswidth,
          canvasheight
        })
        this.initcanvas('init')
      })
  },
  onload(option) {
    wx.setnavigationbartitle({
      title: '电子签名'
    })
    // const {expertid} = option
    // this.setdata({expertid})
  },
  // 初始话canvas画布
  initcanvas(type) {
    let ctx = null
    let canvas = null
    let {historyimag, canvaswidth, canvasheight, deviceinfo, initialcanvasimg} = this.data
    // 获取canvas画布以及渲染上下文
    wx.createselectorquery()
      .select('#mycanvas') // canvas获取节点
      .fields({ node: true, size: true }) // 获取节点的相关信息,node:是否返回节点对应的 node 实例,size:是否返回节点尺寸
      .exec((res) => { // 执行所有的请求。请求结果按请求次序构成数组
        // canvas 对象实例
        canvas = res[0].node
        // canvas 对象上下文实例(动画动作绘图等都是在他的身上完成)
        ctx = canvas.getcontext('2d')
        // canvas 画布的实际绘制宽高
        const width = res[0].width
        const height = res[0].height
        // 获取设备像素比
        const dpr = wx.getwindowinfo().pixelratio
        // 初始化画布大小
        canvas.width = width * dpr
        canvas.height = height * dpr
        // 画笔的颜色
        ctx.fillstyle = 'rgb(200, 0, 0)';
        // 指定了画笔(绘制线条)操作的线条宽度
        ctx.linewidth = 5
        // 如果存在历史记录,则将历史记录最新的一张图片拿出来进行绘制。非ios时直接加载一张初始的空白图片
        if(historyimag.length !== 0 || (deviceinfo.platform !== 'ios' && type !== 'init')) {
          // 图片对象
          const image = canvas.createimage()
          // 图片加载完成回调
          image.onload = () => {
            // 将图片绘制到 canvas 上
            ctx.drawimage(image, 0, 0, canvaswidth, canvasheight)
          }
          // 设置图片src
          image.src = historyimag[historyimag.length - 1] || initialcanvasimg;
        }
        // 缩小/放大图像
        ctx.scale(dpr, dpr)
        this.setdata({canvas, ctx})
        // 保存一张初始空白图片
        if(type === 'init') {
          wx.canvastotempfilepath({
            canvas,
            png: 'png',
            success: res => {
              // 生成的图片临时文件路径
              const tempfilepath = res.tempfilepath
              this.setdata({initialcanvasimg: tempfilepath})
            },
          })
        }
      })
  },
  // 手指触摸动作开始
  bindtouchstart(event) {
    this.addpathdrop(event)
  },
  // 手指触摸后移动
  bindtouchmove(event) {
    this.addpathdrop(event)
  },
  // 手指触摸动作结束
  bindtouchend(event) {
    this.addpathdrop(event)
  },
  // 手指触摸动作被打断,如来电提醒,弹窗
  bindtouchcancel(event) {
    this.addpathdrop(event)
  },
  // 添加路径点
  addpathdrop(event) {
    let {ctx, historyimag, canvas} = this.data
    let {type, changedtouches} = event
    let {x, y} = changedtouches[0]
    if(type === 'touchstart') { // 每次开始都是一次新动作
      // 最开始点
      ctx.moveto(x, y) // 设置绘图起始坐标。
    } else {
      // 上一段终点
      ctx.lineto(x, y) // 从最后一点到点(x,y)绘制一条直线。
      // 绘制
      ctx.stroke();
      // 下一段起点
      ctx.moveto(x, y) // 设置绘图起始坐标。
    }
    // 每一次结束或者意外中断,保存一份图片到历史记录中
    if(type === 'touchend' || type === 'touchcancel') {
      // 生成图片
      // historyimag.push(canvas.todataurl('image/png'))
      wx.canvastotempfilepath({
        canvas,
        png: 'png',
        success: res => {
          // 生成的图片临时文件路径
          const tempfilepath = res.tempfilepath
          historyimag.push(tempfilepath)
          this.setdata(historyimag)
        },
      })
    }
  },
  // 上一步
  prev() {
    this.setdata({
      historyimag: this.data.historyimag.slice(0, this.data.historyimag.length - 1)
    })
    this.initcanvas()
  },
  // 重写
  overwrite() {
    this.setdata({
      historyimag: []
    })
    this.initcanvas()
  },
  // 提交
  confirm() {
    const {canvas, historyimag} = this.data
    if(historyimag.length === 0) {
      toast.fail('请先签名后保存!');
      return
    }
    // 生成图片
    wx.canvastotempfilepath({
      canvas,
      png: 'png',
      success: res => {
        // 生成的图片临时文件路径
        const tempfilepath = res.tempfilepath
        // 保存图片到系统
        wx.saveimagetophotosalbum({
          filepath: tempfilepath,
        })
        // this.beforeread(res.tempfilepath)
      },
    })
  },
  // // 图片上传
  // async beforeread(tempfilepath) {
  //   const that = this;
  //   wx.getimageinfo({
  //     src: tempfilepath,
  //     success(imageres) {
  //       wx.uploadfile({
  //         url: '', // 仅为示例,非真实的接口地址
  //         filepath: imageres.path,
  //         name: 'file',
  //         header: {token: wx.getstoragesync('token')},
  //         formdata: {
  //           ext: imageres.type
  //         },
  //         success(fileres) {
  //           const response = json.parse(fileres.data);
  //           if (response.code === 200) {
  //             that.setdata({
  //               filelist: [response.data]
  //             })
  //             that.submit();
  //           } else {
  //             wx.hideloading();
  //             toast.fail('附件上传失败');
  //             return false;
  //           }
  //         },
  //         fail(err) {
  //           wx.hideloading();
  //           toast.fail('附件上传失败');
  //         }
  //       });
  //     },
  //     fail(err) {
  //       wx.hideloading();
  //       toast.fail('附件上传失败');
  //     }
  //   })
  // },
  // 提交
  // submit() {
  //   const {filelist} = this.data
  //   wx.showloading({title: '提交中...',})
  //   request('post', '', {
  //     fileids: filelist.map(item => item.id),
  //   }).then(res => {
  //     if (res.code === 200) {
  //       wx.hideloading();
  //       toast.success('提交成功!');
  //       settimeout(() => {
  //         wx.navigateback({delta: 1});
  //       }, 1000)
  //     }
  //   })
  // },
})
以上就是微信小程序实现canvas电子签名功能的详细内容,更多关于微信小程序电子签名的资料请关注代码网其它相关文章!


发表评论