qt利用布局,widget和scrollarea实现抽屉效果
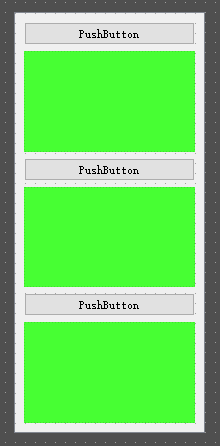
利用布局,widget和scrollarea实现的抽屉效果如下:
思路就是将scrollarea设定为垂直布局,然后加入按钮和widget,当鼠标点击按钮后,隐藏widget,利用垂直布局,做到自然伸缩,然后为什么要使用scrollarea做容器,因为scrollarea可以实现当容器空间不足,出现进度条进行列表滑动,下面一步一步来实现。
首先拖拽一个scrollarea,并拖拽几个按钮和widget放进scrollarea,并将scrollarea设定为垂直布局
为按钮添加槽,当按钮被点击时,widget执行setvisible(false)函数,widget被隐藏,利用布局自动排列,可以看到widget好像被合起。
bool iswiedet_1=true;
void mainwindow::on_pushbutton_5_clicked()
{
    if(iswiedet_1==true)
    {
        ui->widget_2->setvisible(false);
        iswiedet_1=false;
        return;
    }
    ui->widget_2->setvisible(true);
    iswiedet_1=true;
}
到此就,就实现了如下效果:
现在,我们就可以在对应的widget添加我们需要的控件,但是目前还缺少一种东西,就是当列表铺满窗体,自动出现滑动条,scrollarea可以帮助我们,将以上控件拖到scrollarea里面,并将scrollarea设置垂直布局,并将widgetresizable打勾,这样就是实现完整的抽屉效果。

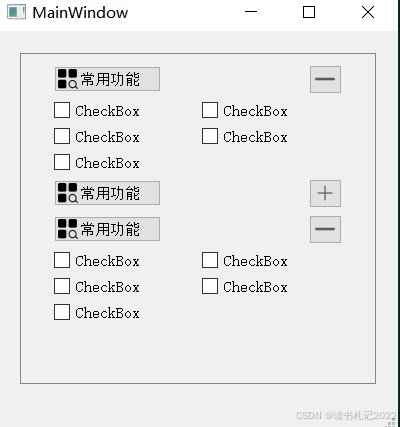
补充:qt 实现抽屉效果
qt 实现抽屉效果
1、实现效果和ui设计界面

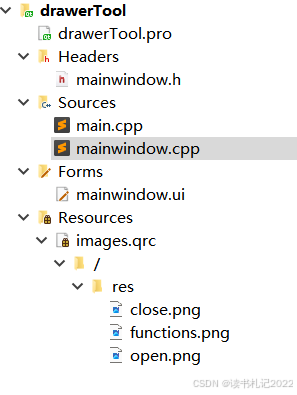
2、工程目录
3、mainwindow.h
#ifndef mainwindow_h
#define mainwindow_h
#include <qmainwindow>
#include <qtoolbutton>
#include <qpushbutton>
#include <vector>
using namespace std;
qt_begin_namespace
namespace ui { class mainwindow; }
qt_end_namespace
class mainwindow : public qmainwindow
{
    q_object
public:
    mainwindow(qwidget *parent = nullptr);
    ~mainwindow();
private:
    ui::mainwindow *ui;
    /**
     * @brief 初始化 ui
     */
    void initui();
    // 要折叠的内容
    vector<qwidget*> widgetbodys;
    // 要用到的 toolbutton
    vector<qtoolbutton*> toolbuttons;
    // 折叠按钮 pushbutton
    vector<qpushbutton*> pushbuttons;
private slots:
    // 点击打开和关闭抽屉按钮
    void on_btns_clicked();
};
#endif // mainwindow_h
4、mainwindow.cpp
#include "mainwindow.h"
#include "ui_mainwindow.h"
mainwindow::mainwindow(qwidget *parent)
    : qmainwindow(parent)
    , ui(new ui::mainwindow)
{
    ui->setupui(this);
    // 初始化 ui
    initui();
}
mainwindow::~mainwindow()
{
    delete ui;
}
void mainwindow::initui()
{
    // 要折叠的内容
    widgetbodys.push_back(ui->widgetonebody);
    widgetbodys.push_back(ui->widgettwobody);
    widgetbodys.push_back(ui->widgetthreebody);
    // 要用到的 toolbutton
    toolbuttons.push_back(ui->toolbuttonone);
    toolbuttons.push_back(ui->toolbuttontwo);
    toolbuttons.push_back(ui->toolbuttonthree);
    // 折叠按钮 pushbutton
    pushbuttons.push_back(ui->pushbuttonone);
    pushbuttons.push_back(ui->pushbuttontwo);
    pushbuttons.push_back(ui->pushbuttonthree);
    for(size_t i = 0;i < widgetbodys.size();++i)
    {
        // 设置 toolbutton 的样式
        toolbuttons[i]->settoolbuttonstyle(qt::toolbuttontextbesideicon);
        toolbuttons[i]->seticon(qicon(qpixmap(":/res/functions.png")));
        toolbuttons[i]->settext(qstring::fromlocal8bit("常用功能"));
        // 设置抽屉按钮的样式,抽屉默认折叠
        pushbuttons[i]->seticon(qicon(qpixmap(":/res/close.png")));
        // 设置抽屉默认折叠,一定记得在 ui 设计界面将 layouttopmargin 和 layoutbottommargin 设置为0
        widgetbodys[i]->hide();
        // 方便后面点击按钮时获取点击的哪个按钮
        pushbuttons[i]->setproperty("index",i);
        connect(pushbuttons[i],&qpushbutton::clicked,this,&mainwindow::on_btns_clicked);
    }
}
void mainwindow::on_btns_clicked()
{
    // 获取点击的按钮
    qpushbutton *pushbutton = qobject_cast<qpushbutton*>(sender());
    if(pushbutton)
    {
        int index = pushbutton->property("index").toint();
        if(widgetbodys[index]->isvisible())
        {// 当前抽屉是展开的
            // 关闭抽屉
            widgetbodys[index]->hide();
            // 按钮变为关闭状态
            pushbutton->seticon(qicon(qpixmap(":/res/close.png")));
        }
        else
        {// 当前抽屉是关闭的
            // 打开抽屉
            widgetbodys[index]->show();
            // 按钮变为打开状态
            pushbutton->seticon(qicon(qpixmap(":/res/open.png")));
        }
    }
}
到此这篇关于qt利用布局,widget和scrollarea实现抽屉效果的文章就介绍到这了,更多相关qt抽屉效果内容请搜索代码网以前的文章或继续浏览下面的相关文章希望大家以后多多支持代码网!


发表评论