以前都在用installshield制作安装包,基本需求是能满足的,但也有一些缺点:
1、界面不能完全定制
2、不能直接调用代码里的功能
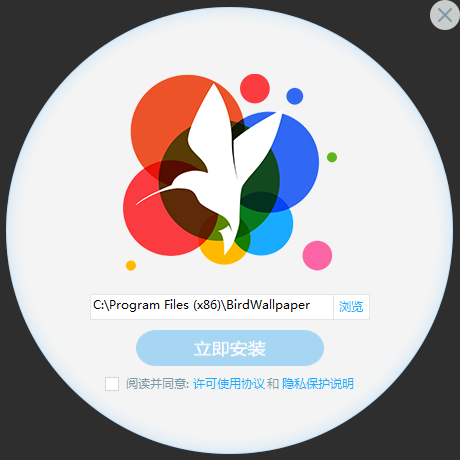
平常使用一些其它软件,觉得安装界面挺炫的,类似下面这种。

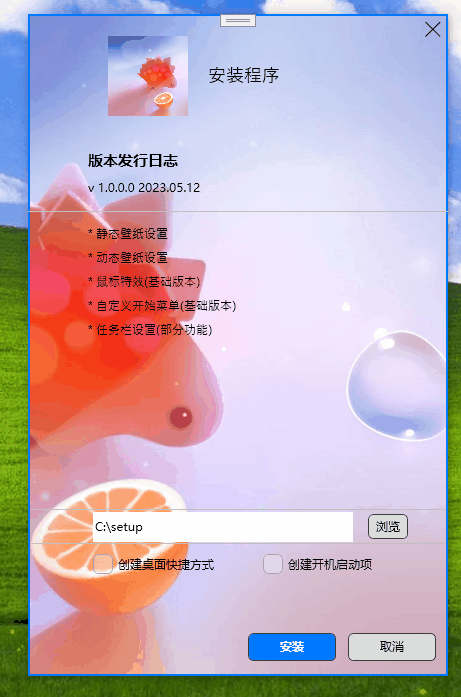
其实安装的过程主要就是解压文件,注册文件等。所以想自己封装一个简易的安装工具,实现界面的完全定制。
使用.net framework开发安装包美中不足的就是需要依赖.net framework runtime ,像上面这种不知道是用什么技术开发的,完全不需要依赖任何运行时。
好在windows 10及以上版本都自带了.net framework。
我这里主要实现以下基本安装包功能
1、释放文件
2、安装依赖
3、注册com组件
4、创建桌面快捷方式/开机启动
5、创建控制面板卸载程序项
6、安装进度及状态显示
效果如下:
释放文件
这里我直接将需要释放的文件压缩成zip文件,然后放到工程的资源文件中去。通过解压 到指定路径的形式来完成释放功能。
主要用到ziparchive类
这里的filebuffer就是资源里的压缩包

代码如下:
using (memorystream ms = new memorystream(filebuffer))
                {
                    var ziparchive = new ziparchive(ms);

                    foreach (var item in ziparchive.entries)
                    {
                        //创建文件夹操作

                        //文件判断操作

                        //解压
                        item.extracttofile(destfilename, true);

                      }
                    }
                }
安装依赖
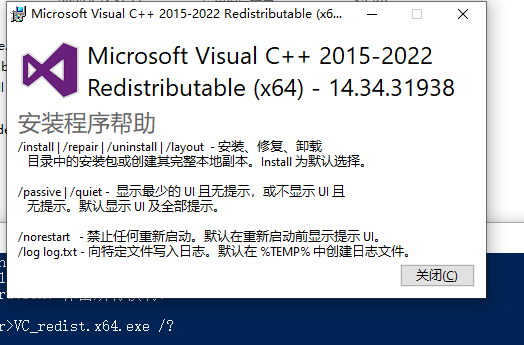
这里主要借助依赖库安装程序自身的命令行参数来完成。
像microsoft visual c++ 2015-2022 redistributable (x64) ,可以通过/install /passive来进行直接安装。
一般来说大部分的依赖库可以通过 参数 /?进行查看
如果是 .msi格式的安装包 ,可以直接通过msiexec.exe来进行安装。
注册com组件
直接调用regsvr32.exe /s执行安静注册即可
system.diagnostics.process.start("regsvr32.exe", dllpath + " /s");创建桌面快捷方式/开机启动
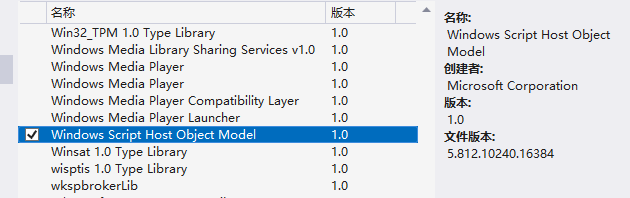
创建桌面快捷方式需要用到一个com组件windows script host object。在项目中直接引用 即可
使用代码如下:
这里的exepath就是程序释放到的路径 如d:\install\xxx.exe
shotcutpath就是快捷方式的路径,如 c:\user\xx\desktop\xxx.lnk
private static void internalcreateshortcut(string exepath, string shotcutpath)
        {
            try
            {
                wshshell shell = new wshshell();
                var exename = system.io.path.getfilenamewithoutextension(exepath);
                iwshshortcut shortcut = (iwshshortcut)shell.createshortcut(shortcutpath);
                shortcut.targetpath = exepath;  //目标路径
                shortcut.workingdirectory = system.io.path.getdirectoryname(exepath); //工作目录
                shortcut.windowstyle = 1;
                shortcut.description = exename;  //描述
                shortcut.iconlocation = exepath + ",0";  //图标位置
                shortcut.arguments = ""; //启动参数
                shortcut.save();
            }
            catch (exception ex)
            {

            }
        }
创建开机自启,
直接使用上面的函数,将lnk创建到 shell:startup路径即可。
var shortcutpath = environment.getfolderpath(environment.specialfolder.startup) + "\\" + exename + ".lnk";
创建控制面板卸载程序项
这里主要对注册表进行操作
计算机\hkey_local_machine\software\microsoft\windows\currentversion\uninstall
增加一个guid项,代表产品id。
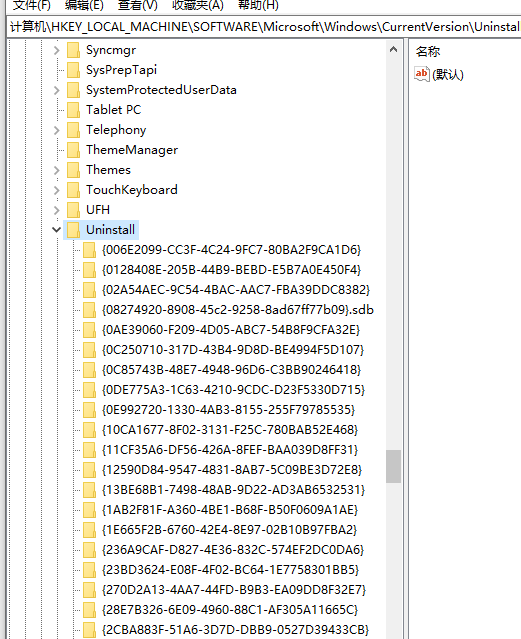
然后在项下增加图中所示的键值
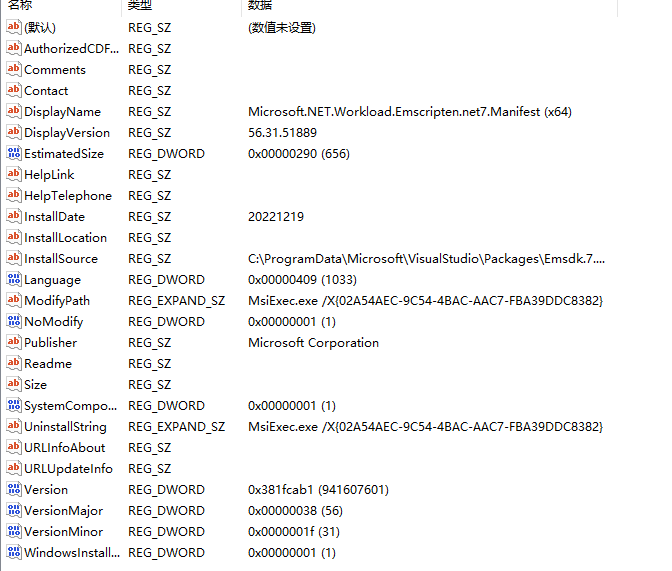
这里只需要增加一些常用的属性即可。上图是微软的安装程序创建的,我是直接参考上图创建。
完整的属性可以参考 properties (windows installer) - win32 apps | microsoft learn
我这里定义的数据结构如下:
public class setupproperty
    {
        public string productid => "{c8997941-26f4-4e38-a5bd-d6306f0a8fc2}";  //我的产品id
        public string comments => "描述";
        public string contact => "";
        public string displayicon => system.reflection.assembly.getexecutingassembly().location;
        public string displayname => "控制面板显示名称";
        public string displayversion => versionutil.getversionstring();
        public int estimatedsize { get; set; }
        public string helplink => "";
        public string installdate => datetime.now.tostring();
        public string installlocation { get; set; }
        public string installsource { get; set; }
        public string uninstallstring { get; set; }
        public string publisher => "发布者";
    }
创建代码如下:
public void createuninstallinregistry(setupproperty setupproperty)
        {
                try
                {
                    var productkey = microsoft.win32.registry.localmachine.createsubkey($"software\\microsoft\\windows\\currentversion\\uninstall\\{setupproperty.productid}");

                    foreach (var property in setupproperty.gettype().getproperties())
                    {
                        if (property.name == nameof(setupproperty.productid))
                            continue;

                        if (property.name == nameof(setupproperty.estimatedsize))
                        {
                            productkey.setvalue(property.name, property.getvalue(setupproperty), microsoft.win32.registryvaluekind.dword);
                        }
                        else
                        {
                            productkey.setvalue(property.name, property.getvalue(setupproperty), microsoft.win32.registryvaluekind.string);
                        }
                    }
                }
                catch
                {

                }
        }
创建完成后就可以在控制面板看到自己添加的新项目。
这里需要注意的的uninstallstring这个值就是在控制面板点击卸载时,系统执行的操作。文末的如何制作卸载程序这部分会说明如何设置uninstallstring。
安装进度及状态显示
界面上放置一个progressbar,将每个阶段划分一定的比例,然后再计算tick,显示到progressbar上即可。
如何制作卸载程序
像微软的msi安装包安装后,都会缓存在
c:\programdata\package cache\{productid}\installers
一些应用软件的msi安装包会缓存 在
c:\users\x\appdata\local\downloaded installations
之所以要缓存 ,因为后面卸载是需要用到这些安装包的,这里不做详细介绍,可以自行查找资料了解。
我这里也在安装完成后,将安装包缓存在c:\users\x\appdata\local\downloaded installations目录下。
然后在程序中增加一个卸载的命令行参数判断
public enum setuptype
    {
        install,
        uninstall
    }


 public partial class app : application
    {
        public static setuptype setuptype = setuptype.install;

        protected override void onstartup(startupeventargs e)
        {
            base.onstartup(e);

            if (e.args.length > 0 && e.args[0].toupper() == nameof(setuptype.uninstall).toupper())
                setuptype = setuptype.uninstall;
        }
    }
当程序以uninstall参数启动时,执行卸载。
在删除依赖库时,依旧是通过程序的命令行参数或msiexec来执行卸载。
像microsoft visual c++ 2015-2022 redistributable (x64) 的卸载参数是/uninstall /passive
msiexec.exe的卸载参数是/uninstall {0} /qn
所以我们在安装完成后在设置注册表项的uninstallstring键值时,需要设置为带uninstall的值。
假设产品id是{02a54aec-9c54-4bac-aac7-fba39ddc8381},安装程序的名称为setup.exe,uninstallstring就设置为"c:\users\x\appdata\local\downloaded installations\setup.exe uninstall"
这样在控制面板中就能正确卸载。
最后需要注意的就是,像注册com,创建注册表都是需要管理员权限 的,可以将程序设置为管理员权限运行。
示例代码
github - zhaotianff/custominstaller: simple custom installer
//还有一个64位系统下32位软件的注册表路径
hkey_local_machine\software\wow6432node\microsoft\windows\currentversion\uninstall
以上就是使用c#自制一个windows安装包的详细过程的详细内容,更多关于c#自制windows安装包的资料请关注代码网其它相关文章!

发表评论