前言
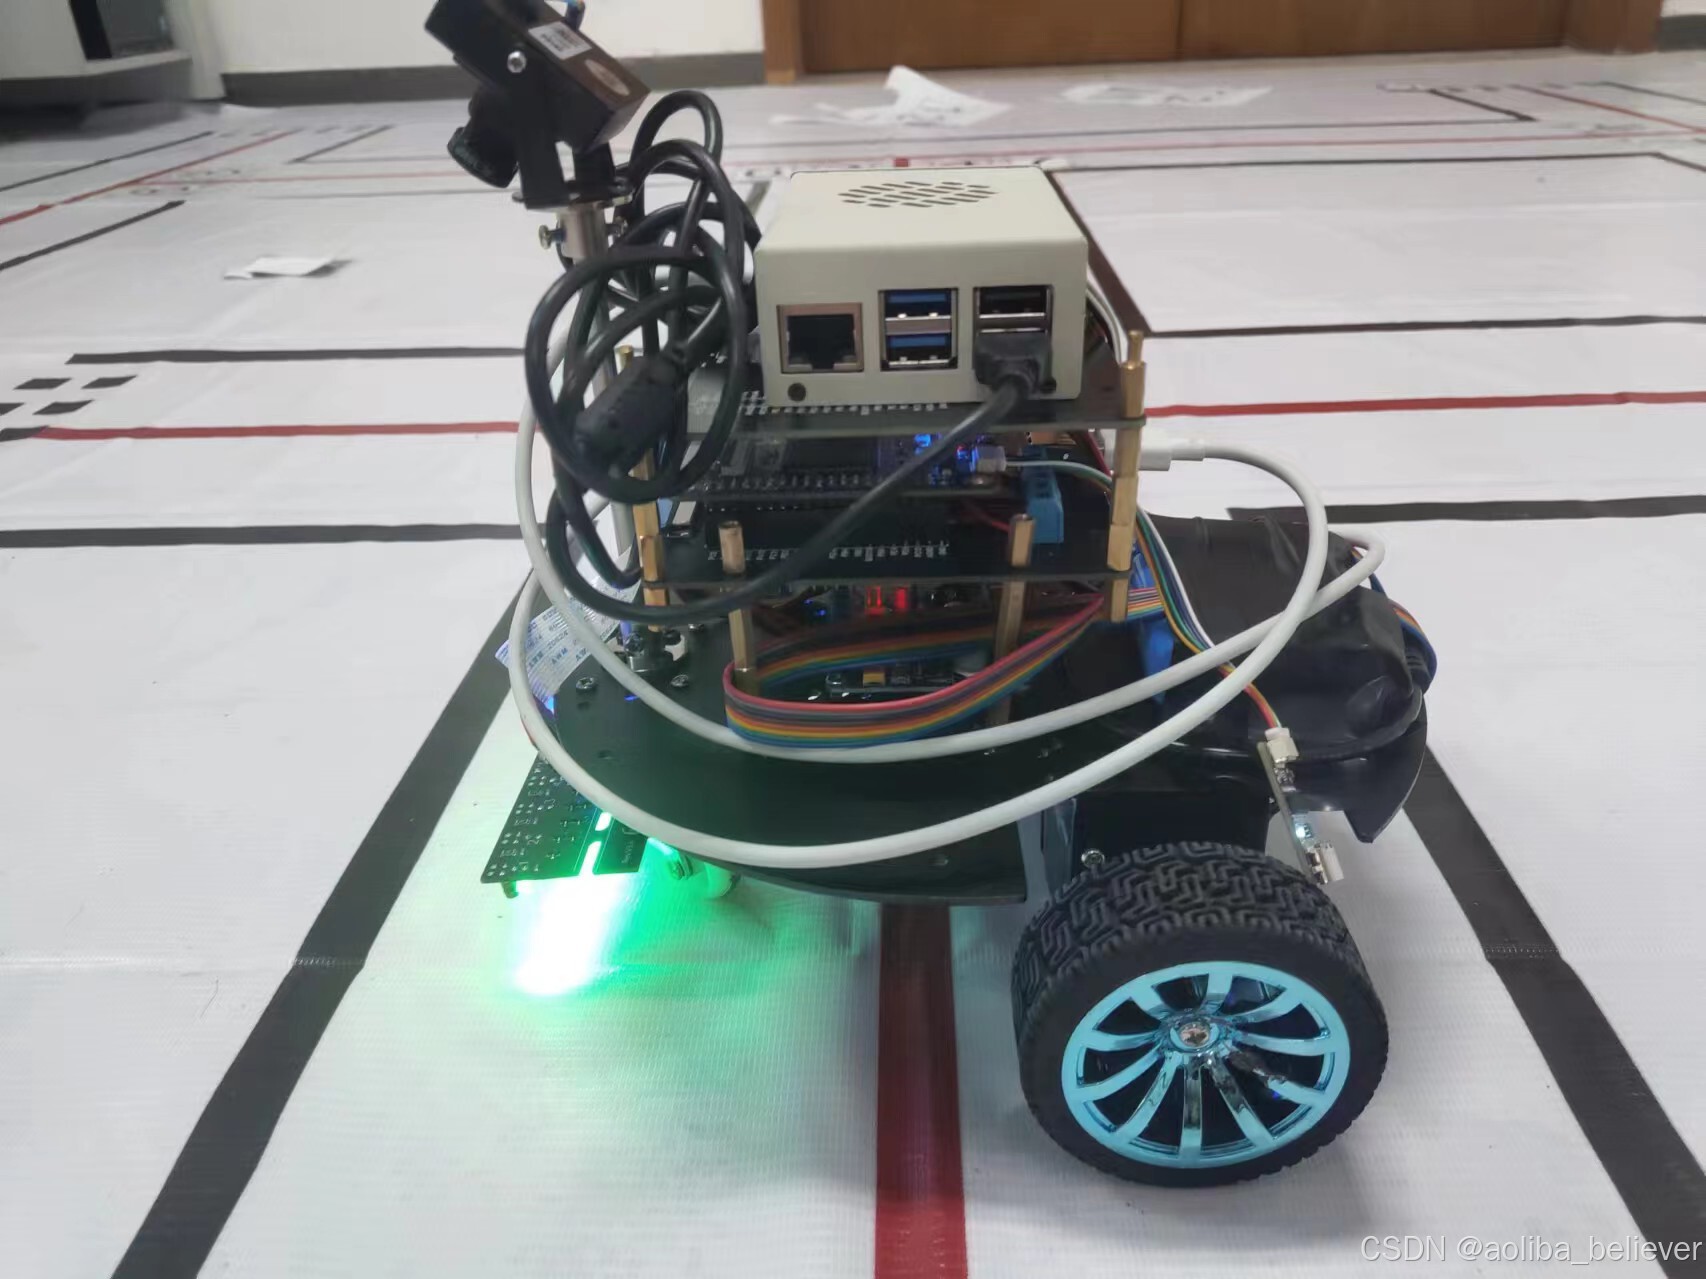
本项目是树莓派识别数字的小例程
电赛备赛时写的,实现对1-8的数字识别并与下位机通信控制小车进行运动
项目前置
python 版本要求
python>=3.6
库依赖要求
做图像处理
numpy

opencv-python
做引脚操控
rpi.gpio

pyserial

rpi-lgpi
项目主体
主要实现思路
传统图像处理,使用模板匹配
主要步骤
-
对模板图像进行预处理,得到1-8总共8个模板
-
对识别图像进行预处理,将图像二值化转换取出矩形区域组成roi区域
-
roi和模板做模板匹配
详细过程
仅展示部分源码,详细源码可以去github库
模板图像预处理
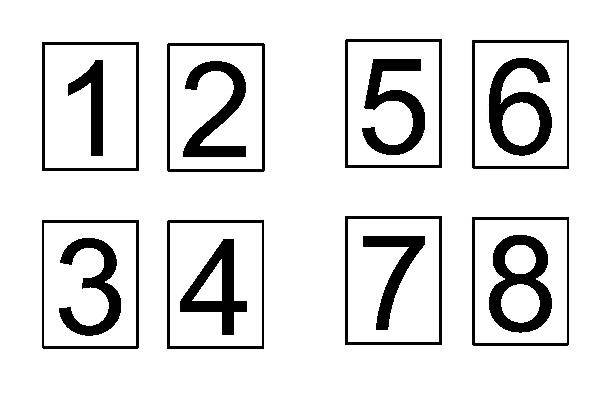
模板预览图本身是含有八个数字带外接矩形黑框的一张图,我们对它作二值化处理,在对二值化模板图像边缘提取,通过轮廓检测将模板的轮廓提取,在将其外接矩形坐标画出来,在对不同数字1-8进行排序,最后将整个图像按比例内截,在重排成(100,150)的固定的模板存入字典。
代码实现
# 定义需识别数字
to_detect_num = none
# 硬件初始化
ser = hardware_init()
template = cv2.imread(osp.join(template_dir, 'num_template.jpg'))
gray_template = cv2.cvtcolor(template, cv2.color_bgr2gray)
print('二值化模板图像已读取')
# 边缘检测
edged_template = cv2.canny(template, 80, 200) # 边缘低阈值75和高阈值20
# 轮廓检测
template_contours, hierarchy = cv2.findcontours(edged_template, cv2.retr_external, cv2.chain_approx_simple)
# 读取模板轮廓的矩形坐标
x, y, w, h = cv2.boundingrect(template_contours[1])
print(f'检测到{len(template_contours)}个轮廓')
# 模板数字排序 1-8 (太菜了写不出自动排序的脚本 >_< )
sorted_template_contours = [template_contours[5], template_contours[4], template_contours[1],template_contours[0], template_contours[7], template_contours[6], template_contours[3], template_contours[2]]
# 构造模板字典
digit_dict = {}
# 分割模板图像
for (i, c) in enumerate(sorted_template_contours):
    (x, y, w, h) = cv2.boundingrect(c)
    roi = gray_template[y+10:y+h-10, x+10:x+w-10]
    roi = cv2.resize(roi, (100, 150))
    digit_dict[i] = roi
识别图像预处理
从摄像头获取视频流,将其缩放固定比例减少后续的运算量,转换为灰度图并应用高斯模糊将锐度过高的区域排除边缘和消除噪点,再使用canny边缘检测,提取边缘后进行膨胀,得到识别数字完整的矩形边缘轮廓。通过轮廓检测再将轮廓面积最大的前5个轮廓进行提取并排序,计算轮廓周长,进行近似轮廓,看是否能构成四边形,将能构成四边形的轮廓且面积符合一定要求的轮廓进行筛选,并通过两个矩形左x坐标的大小来判断数字的左右并重排。本身通过相机拍到的矩形数字框就不可能是正好的矩形,需要我们进行图像变换,因此进行透射变换,将提取到的四边形变换成矩形然后二值化。

代码实现
# 初始化视频捕获对象
cap = cv2.videocapture(0)
while true:
    # 逐帧读取视频
    start_time = time.time()
    ret, frame = cap.read()
    if not ret:
        break
    # 图像resize
    ratio = frame.shape[0] / 500.0
    orig_frame = frame.copy()
    # 转换为灰度图像
    gray_img = cv2.cvtcolor(orig_frame, cv2.color_bgr2gray)
    # 应用高斯模糊
    blur_img = cv2.gaussianblur(gray_img, (5, 5), 0)
    # canny 边缘检测
    edged_img = cv2.canny(blur_img, low_threshold, high_threshold) # 边缘低阈值75和高阈值200
    cv2.imshow("edged_img",edged_img)
    # 定义膨胀操作的核
    kernel = cv2.getstructuringelement(cv2.morph_rect, (5, 5))
    # 对边缘检测后的图像进行膨胀操作
    dilated_img = cv2.dilate(edged_img, kernel, iterations=2)
    cv2.imshow("dilated image", dilated_img)
    # 轮廓检测
    contours, _ = cv2.findcontours(edged_img, cv2.retr_external, cv2.chain_approx_simple)
    sorted_contours = sorted(contours, key=cv2.contourarea, reverse=true)[:5]
    i = 0
    screencnt = []  # 在循环开始前初始化screencnt
    output = []
    for c in sorted_contours:
        # 计算轮廓周长
        peri = cv2.arclength(c, true)
        # 近似轮廓  0.02*peri为近似精度
        approx = cv2.approxpolydp(c, 0.02*peri, true)
        # 如果近似轮廓有四个顶点,则认为找到了数字边缘
        if len(approx)==4 and cv2.contourarea(approx) > 10000 and cv2.contourarea(approx) < 45000:
            #num_detect.shrink_approx(approx, 3)
            screencnt.append(approx)
            i += 1
            if i == 2:
                break

    # 根据检测到的两个数字的x左坐标来判断左右并排序
    if len(screencnt) == 2:
        num_detect.left_right_sort(screencnt)
        # print(f"左:{screencnt[0]}, 右:{screencnt[1]}")
    # 在尝试展示轮廓之前检查screencnt是否已定义
    if screencnt != []:
        cv2.drawcontours(frame, screencnt, -1, (255, 255, 0), 2)
        postion_count = 0
        warped_list = []
        thresh_list = []
        for c in screencnt:
            # 检查轮廓c是否有点(即是否有效)
            if c.size == 0:
                print("找到一个空的轮廓,跳过。")
                continue  # 跳过当前轮廓,继续下一个轮廓
            # 透视变换
            warped_list.append(num_detect.four_point_transform(orig_frame, c.reshape(4, 2) * ratio))
            warped_list[postion_count] = cv2.cvtcolor(warped_list[postion_count], cv2.color_bgr2gray)
            thresh_list.append(cv2.threshold(warped_list[postion_count], 0, 255, cv2.thresh_binary | cv2.thresh_otsu)[1])
            # 显示透视变换结果
            cv2.imshow(f"thresh_{postion_count}", thresh_list[postion_count])
roi区域
首先将图像预处理得到的二值化图像进行重排,变成(150,100)的图像,再进行高斯模糊和腐蚀操作滤除噪点,边缘检测再次提取矩形框边缘,轮廓检测提取矩形框轮廓,最后将整个图像按比例内截去除矩形框,在重排成(100,150)的roi区域送给下步模板匹配。


代码实现
if roi.size > 0:  # 检查roi是否为空
    roi = cv2.resize(thresh_list[postion_count], (100, 150))
    # 定义结构元素
    kernel = np.ones((5,5), np.uint8)
    roi_blur = cv2.gaussianblur(roi, (7, 7), 0)
    roi_edge = cv2.canny(roi_blur, 80, 200)
    roi_eroded = cv2.erode(roi_edge, kernel, iterations=2)
    # 找到边缘的轮廓
    roi_contours, _ = cv2.findcontours(roi_edge, cv2.retr_external, cv2.chain_approx_simple)
    for cnt in roi_contours:
        (x,y,w,h) = cv2.boundingrect(roi_edge)
    cv2.rectangle(roi, (x, y), (x+w, y+h), (0, 255, 0), 2)
    cv2.imshow("roi_edge",roi_edge)
    roi = cv2.resize(roi[y:y+h, x:x+w],(100, 150))
    roi = cv2.resize(roi[0+15:150-15, 0+12:100-12],(100, 150))
    cv2.imshow(f"roi{postion_count}", roi)
else:
    print("roi为空,跳过调整大小。")
postion_count += 1
模板匹配
将字典里的数字与模板图像取出与识别图像的roi区域进行模板匹配,找到最适合的数字,再进行个赋值。

代码实现
# 初始化模板匹配
scores = []
for (digit, digitroi) in digit_dict.items():
    result = cv2.matchtemplate(roi, digitroi, cv2.tm_ccoeff) # 模板匹配
    (_, score, _, _) = cv2.minmaxloc(result)
    scores.append(score)
trust = false
# 找到最适合的数字,从scores中找到最大值的索引 + 1     1~8
for score in scores:
    if score > 0.8:
        trust = true
if trust:
    output.append(str(scores.index(max(scores)) + 1))
下位机通信
通过串口去传输数据,将左右数字传给下位机mcu进行进一步的控制。
代码实现
if output != []:# 如果识别结果不为空
    if to_detect_num is not none: # 如果这不是第一次检测
        for i in range(len(output)):
            cv2.puttext(frame, output[i], (screencnt[i][0][0][0], screencnt[i][0][0][1] - 10), cv2.font_hershey_simplex, 0.8, (0, 255, 0), 2)
        if len(output) == 2:
            print(f"左:{output[0]},右:{output[1]}")
            if(hardware.uart_read(ser)==b'o'):
                print(f"发送{output[0]}、{output[1]}成功")
                hardware.uart_write(ser, f'({output[0]}{output[1]})\r\n'.encode())
    else:
        while(hardware.uart_read(ser)==b'o'):
            hardware.uart_write(ser, f'({output[0]}{output[0]})\r\n'.encode())
            print(f"发送{output[0]}成功")
            to_detect_num = int(output[0])
            print(f"需要识别的数字为 {output[0]}")
            print("等待下位机ok")
            start_wait_ok = time.time()
            if(((start_wait_ok - time.time())*10)%10 > 1):
                start_wait_ok = time.time()
                print("等待超时")
                hardware.uart_write(ser, f'({output[0]}{output[0]})\r\n'.encode())
                print(f"发送{output[0]}成功")
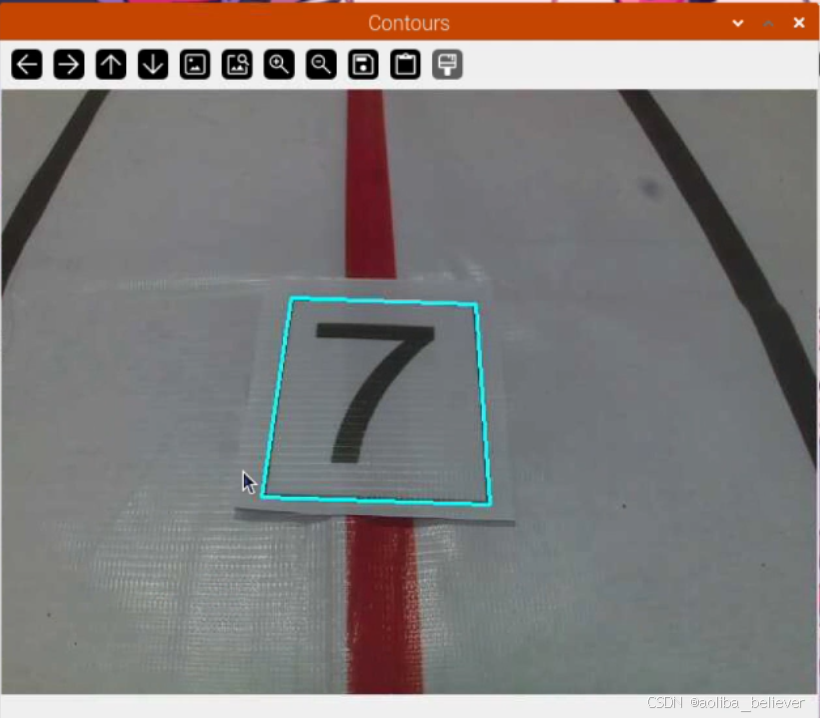
识别效果
跑了一次21年的赛题,视觉部分基本没有问题,就是在运动控制部分上还需要作优化。
2021年电赛送药小车raspberrypi-opencv复现
后记
第一次写csdn的博客,希望能和各位大佬多多交流!以下是我的联系方式,有疑问或是在嵌入式领域志同道合的朋友可以了解一下
\(^ o ^)/
本人博客


发表评论