前言
在前端开发中,有时我们需要提供打印网页内容的功能,让最终用户能够将网页上的特定部分打印成纸质文档。
虽然浏览器提供了自己的打印预览和打印功能,但使用 javascript 的 window.print() 方法可以更灵活地控制打印内容和样式。
本文洲洲将详细介绍如何使用 window.print() 方法实现网页打印,并提供代码示例。
一、打印基础知识
在开始之前,我们需要了解基本的打印流程:
1、用户触发打印操作,这可以是一个按钮点击事件。
2、javascript 捕获事件并调用 window.print() 方法。
3、浏览器显示打印预览窗口,用户可以设置打印选项并打印。
print() 方法用于打印当前窗口的内容。
调用 print() 方法会产生一个打印预览弹框,让用户可以设置打印请求。
最简单的打印就是直接调用window.print(),当然用 document.execcommand(‘print’) 也可以达到同样的效果。
默认打印页面中body里的所有内容。
<!doctype html>
<html lang="en">
<head>
  <meta charset="utf-8">
  <title>打印-洲洲</title>
</head>
<body>
  <input type="button" value="打印此页面" onclick="printpage()" />
  <div>内容</div>
  <script>
    function printpage() {
      window.print()
    }
  </script>
</body>
</html>
比方说我们用上面的代码,进行一个简单的尝试:
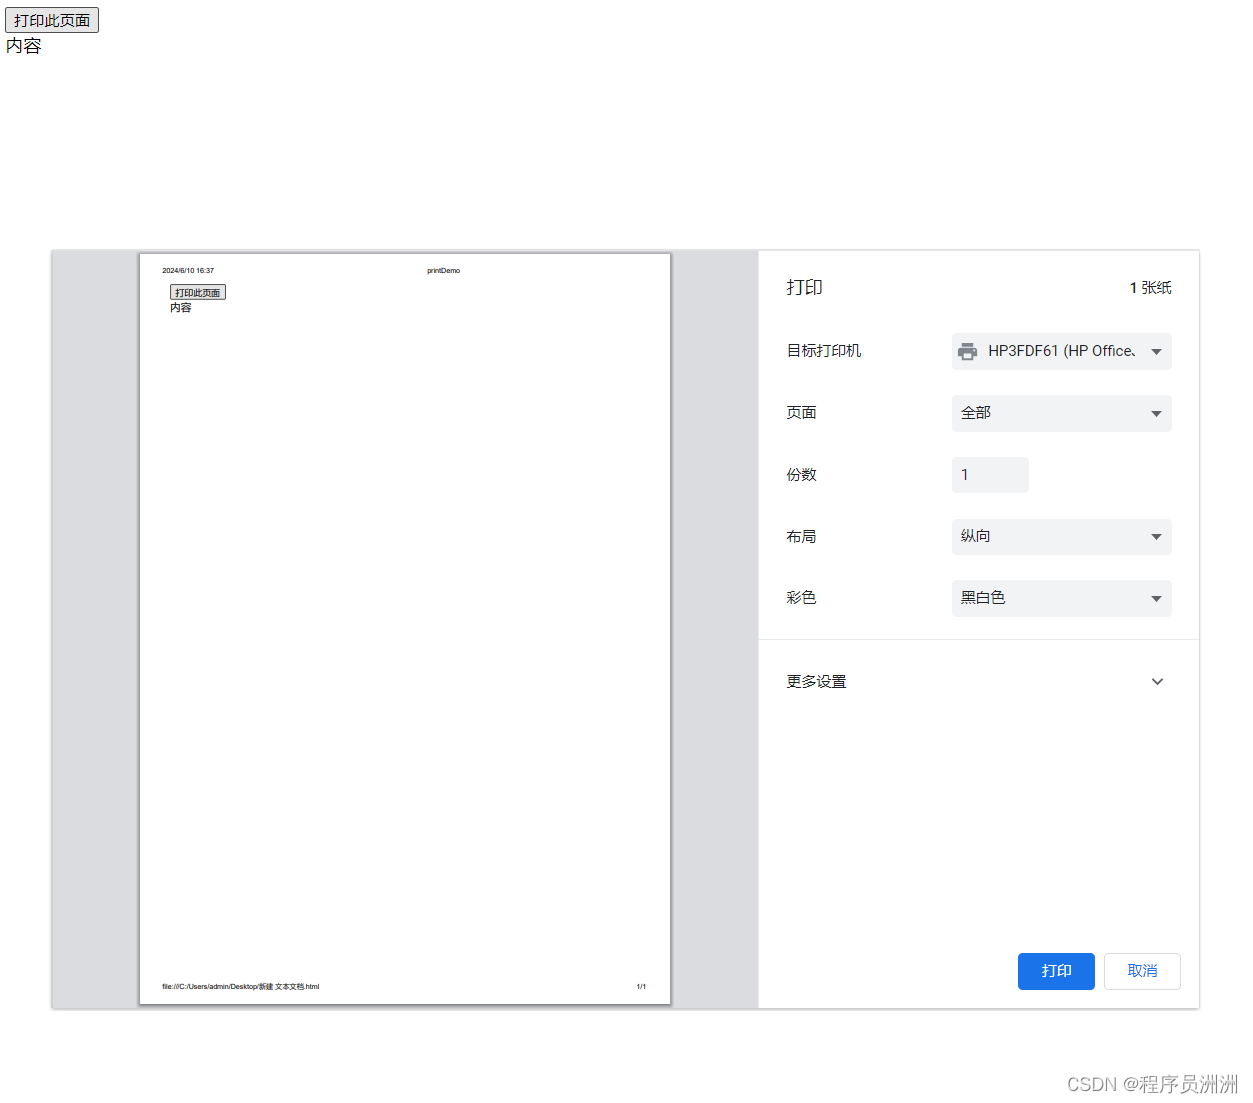
但是这样会存在一定的问题,那就是直接调用print()方法去打印网页内容,事先调整好的布局和样式都没法实现,所以有哪些方法可以帮助我们改善打印的用户体验呢?
二、打印控制
2.1 使用打印样式表
配置一份打印样式表print.css,引入到html文档,在 上加上一个 media=“print” 来标识这是打印机才会应用的样式表,这样打印就会默认将该样式表应用到文档中。
<link href="/path/print.css" rel="external nofollow" media="print" rel="stylesheet" />
2.2 使用媒介查询
要修改的样式没有很多的时候,其实完全不需要重新写个样式表,写上一个媒介查询也可以达到同样的效果,如:
@media print {
  h1 {
    font-size: 20px;
    color: red;
  }
}
2.3 内联样式使用media属性
<style type="text/css" media="print">
   // 打印样式
</style>
2.4 css中使用@import引入打印样式表
@import url("/path/print.css") print;
2.5 打印指定区域
在需要打印的正文内容所对应的html开始处加上标识,结尾处加上标识,截取打印标识之间的内容替换body的内容,调用打印print()方法。
<body>
  <input type="button" value="打印此页面" onclick="printpage()" />

  <!--startprint-->
  <div id="printcontent">打印内容</div>
  <!--endprint-->

  <script>
    function printpage() {
      let oldstr = window.document.body.innerhtml; // 获取body的内容
      let start = "<!--startprint-->"; // 开始打印标识, 17个字符
      let end = "<!--endprint-->"; // 结束打印标识
      let newstr = oldstr.substr(oldstr.indexof(start) + 17); // 截取开始打印标识之后的内容
      newstr = newstr.substring(0, newstr.indexof(end)); // 截取开始打印标识和结束打印标识之间的内容
      window.document.body.innerhtml = newstr; // 把需要打印的指定内容赋给body
      window.print(); // 调用浏览器的打印功能打印指定区域
      window.document.body.innerhtml = oldstr; // body替换为原来的内容
    }
  </script>
</body>
或者也可以将需要打印的内容用一个大的div包裹,打印时将body的内容替换为该div的内容,调用打印print()方法。
<body>

  <input type="button" value="打印此页面" onclick="printpage()" />
  <div id="printcontent">打印内容</div>

  <script>
    function printpage() {
      let newstr = document.getelementbyid("printcontent").innerhtml;
      let oldstr = document.body.innerhtml;
      document.body.innerhtml = newstr;
      window.print();
      document.body.innerhtml = oldstr;
      return false;
    }
  </script>
</body>
也可以在打印之前,我们可以使用 javascript 来隐藏那些不需要打印的元素。
function printcontent() {
    // 隐藏不需要打印的元素
    document.body.style.display = 'none';

    // 调用打印
    window.print();

    // 打印完成后恢复显示
    window.onfocus = function() {
        document.body.style.display = '';
        window.onfocus = null; // 清除事件监听
    };
}
2.6 插入分页
/* 在h1元素前始终插入分页符 */
@media print {
    h1 {page-break-before: always;}
}
/* 在 .footer 元素后始终插入分页符 */
@media print {
    .footer {page-break-after: always;}
}
/* 避免在 <pre> 与 <blockquote> 元素中插入分页符 */
@media print {
    pre, blockquote {page-break-inside: avoid;}
}
2.7 设置打印布局
 @media print {
    @page {
      /* 纵向 */
      size: portrait;

      /* 横向 */
      size: landscape;

      /* 边距 上右下左 */
      margin: 1cm 2cm 1cm 2cm;
    }
  }
2.8 去除页眉页脚
当页眉打印默认有页眉页脚信息,展现到页面外边距范围,我们可以通过去除页面模型page的外边距,使得内容不会延伸到页面的边缘,再通过设置 body 元素的 margin 来保证 a4 纸打印出来的页面带有外边距。
@media print {
  @page {
    margin: 0;
  }
  body {
    margin: 1cm;
  }
}
三、示例代码打印方法
在utils下新建print.js文件:
export default function printhtml(html) {
  let style = getstyle();
  let container = getcontainer(html);

  document.body.appendchild(style);
  document.body.appendchild(container);

  getloadpromise(container).then(() => {
    window.print();
    document.body.removechild(style);
    document.body.removechild(container);
  });
}

// 设置打印样式
function getstyle() {
let stylecontent = `#print-container {
    display: none;
}
@media print {
    body > :not(.print-container) {
        display: none;
    }
    html,
    body {
        display: block !important;
    }
    #print-container {
        display: block;
    }
}`;
  let style = document.createelement("style");
  style.innerhtml = stylecontent;
  return style;
}

// 清空打印内容
function cleanprint() {
  let div = document.getelementbyid('print-container')
  if (!!div) {
    document.queryselector('body').removechild(div)
  }
}

// 新建dom,将需要打印的内容填充到dom
function getcontainer(html) {
  cleanprint()
  let container = document.createelement("div");
  container.setattribute("id", "print-container");
  container.innerhtml = html;
  return container;
}

// 图片完全加载后再调用打印方法
function getloadpromise(dom) {
  let imgs = dom.queryselectorall("img");
  imgs = [].slice.call(imgs);

  if (imgs.length === 0) {
    return promise.resolve();
  }

  let finishedcount = 0;
  return new promise(resolve => {
    function check() {
      finishedcount++;
      if (finishedcount === imgs.length) {
        resolve();
      }
    }
    imgs.foreach(img => {
      img.addeventlistener("load", check);
      img.addeventlistener("error", check);
    })
  });
}
引入print文件,传入需要打印的dom元素即可:
import printhtml from "@/utils/print.js"

export default {
  methods: {
    print() {
      let printdata = `<div>打印内容</div>`
      printhtml(printdata)
    }
  },
}
总结
到此这篇关于使用window.print()前端实现网页打印的文章就介绍到这了,更多相关window.print()前端网页打印内容请搜索代码网以前的文章或继续浏览下面的相关文章希望大家以后多多支持代码网!


发表评论