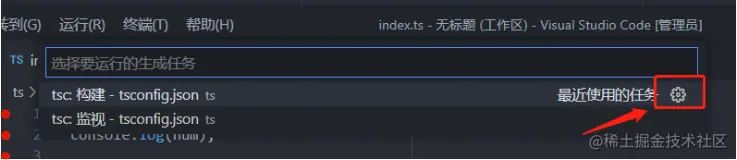
补充知识点:每次调试时重新编译
按上述的操作已经生成了task.json配置文件
{
	"version": "2.0.0",
	"tasks": [
    {
      "type": "typescript",
      "tsconfig": "tsconfig.json",
      "problemmatcher": [
        "$tsc"
      ],
      "group": "build",
      "label": "tsc: 构建 - tsconfig.json"
    }
  ]
}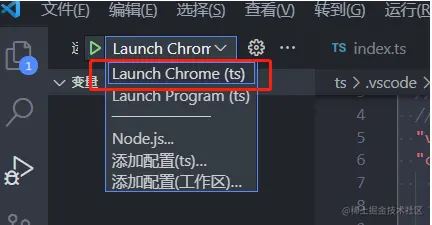
复制代码- 点击
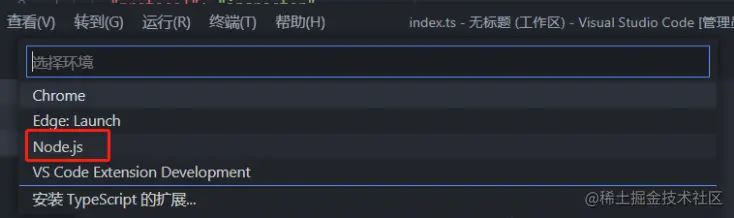
运行 -> 添加配置 -> 选择nodejs
- 在生成的
launch.json文件中,添加prelaunchtask字段,值是tasks.json的label值,一定要相同,注意大小写。该字段的作用是在执行命令前先执行改task任务。

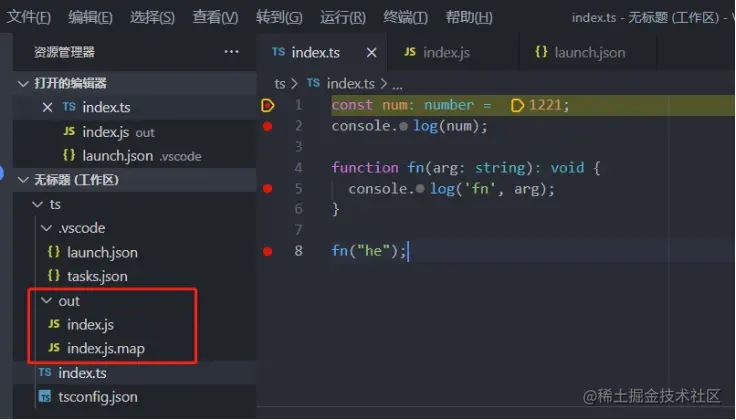
注意,如果编译后的js文件不在相应的位置,通过图中的outfiles字段可以指定ts编译后的js路径。
- 在
index.ts文件中按f5启动调试,可以看到调试前已经生成了编译文件,而后就可以正常调试了。
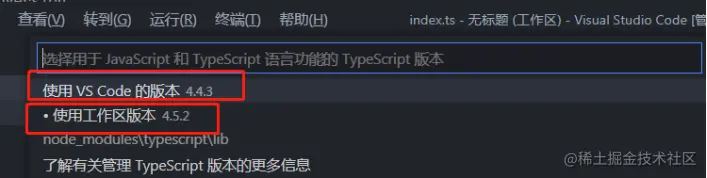
补充知识点:vscode的ts版本说明
vscode本身内置了对ts的支持
vscode内置的ts版本(即工作区版本),仅仅用于intellisense(代码提示),工作区ts版本与用于编译的ts版本无任何关系。
修改工作区ts版本的方法:
- 在状态栏选择typescript的图标,选择版本切换

- 选择你需要的版本即可

调试html项目
学会了上述ts的调试后,我们尝试调试html文件,并且html文件中引入ts文件:
- 创建html,引入ts编译后的js文件
<!doctype html>
<html lang="en">
<head>
  <meta charset="utf-8">
  <meta http-equiv="x-ua-compatible" content="ie=edge">
  <meta name="viewport" content="width=device-width, initial-scale=1.0">
  <title>document</title>
</head>
<body>
  <h3>hello</h3>
  <script src="./out/index.js"></script>
</body>
</html>
复制代码
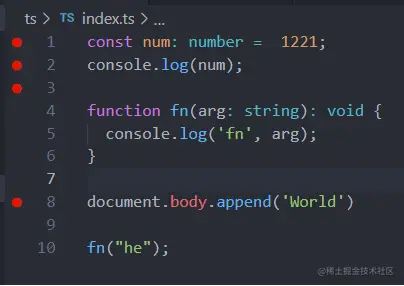
- ts源文件如下:
const num: number =  1221;
console.log(num);
function fn(arg: string): void {
  console.log('fn', arg);
}
document.body.append('world')
fn("he");
复制代码- 打debug
- launch.json启动命令配置
{
  // 使用 intellisense 了解相关属性。
  // 悬停以查看现有属性的描述。
  // 欲了解更多信息,请访问: https://go.microsoft.com/fwlink/?linkid=830387
  "version": "0.2.0",
  "configurations": [
    {
      "type": "pwa-chrome",
      "request": "launch",
      "name": "launch chrome",
      "url": "file:///e:/demo/vscode/debug/ts/index.html",
      "prelaunchtask": "tsc: 构建 - tsconfig.json",
      "webroot": "${workspacefolder}"
    }
  ]
}
复制代码- 选择我们的启动命令
- 按
f5可以正常唤起chrome浏览器,并在vscode的ts源码处会有debug效果
调试vue项目的两种方式
下面介绍两种调试vue2项目的3种方法,其他框架的调试也类似:
不使用vscode插件debugger for chrome的方法
- 初始化vue项目,配置
vue.config.js,指定要生成sourcemaps资源
module.exports = {
  configurewebpack: {
    // 生成sourcemaps
    devtool: "source-map"
  }
};
复制代码- 根目录下创建
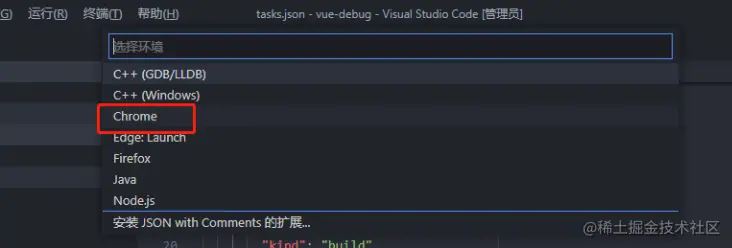
./vscode/launch.json文件或者选择运行 -> 添加配置 -> chrome
发表评论