本文分享swagger中常用功能在scalar中的使用,包括版本说明、接口分类、接口及参数描述、枚举类型、文件上传和jwt认证等,并提供相关代码示例和效果展示,以及可能遇到的问题和解决方案。
书接上回,上一章介绍了swagger代替品scalar,在使用中遇到不少问题,今天单独分享一下之前swagger中常用的功能如何在scalar中使用。
下面我们将围绕文档版本说明、接口分类、接口描述、参数描述、枚举类型、文件上传、jwt认证等方面详细讲解。

01、版本说明
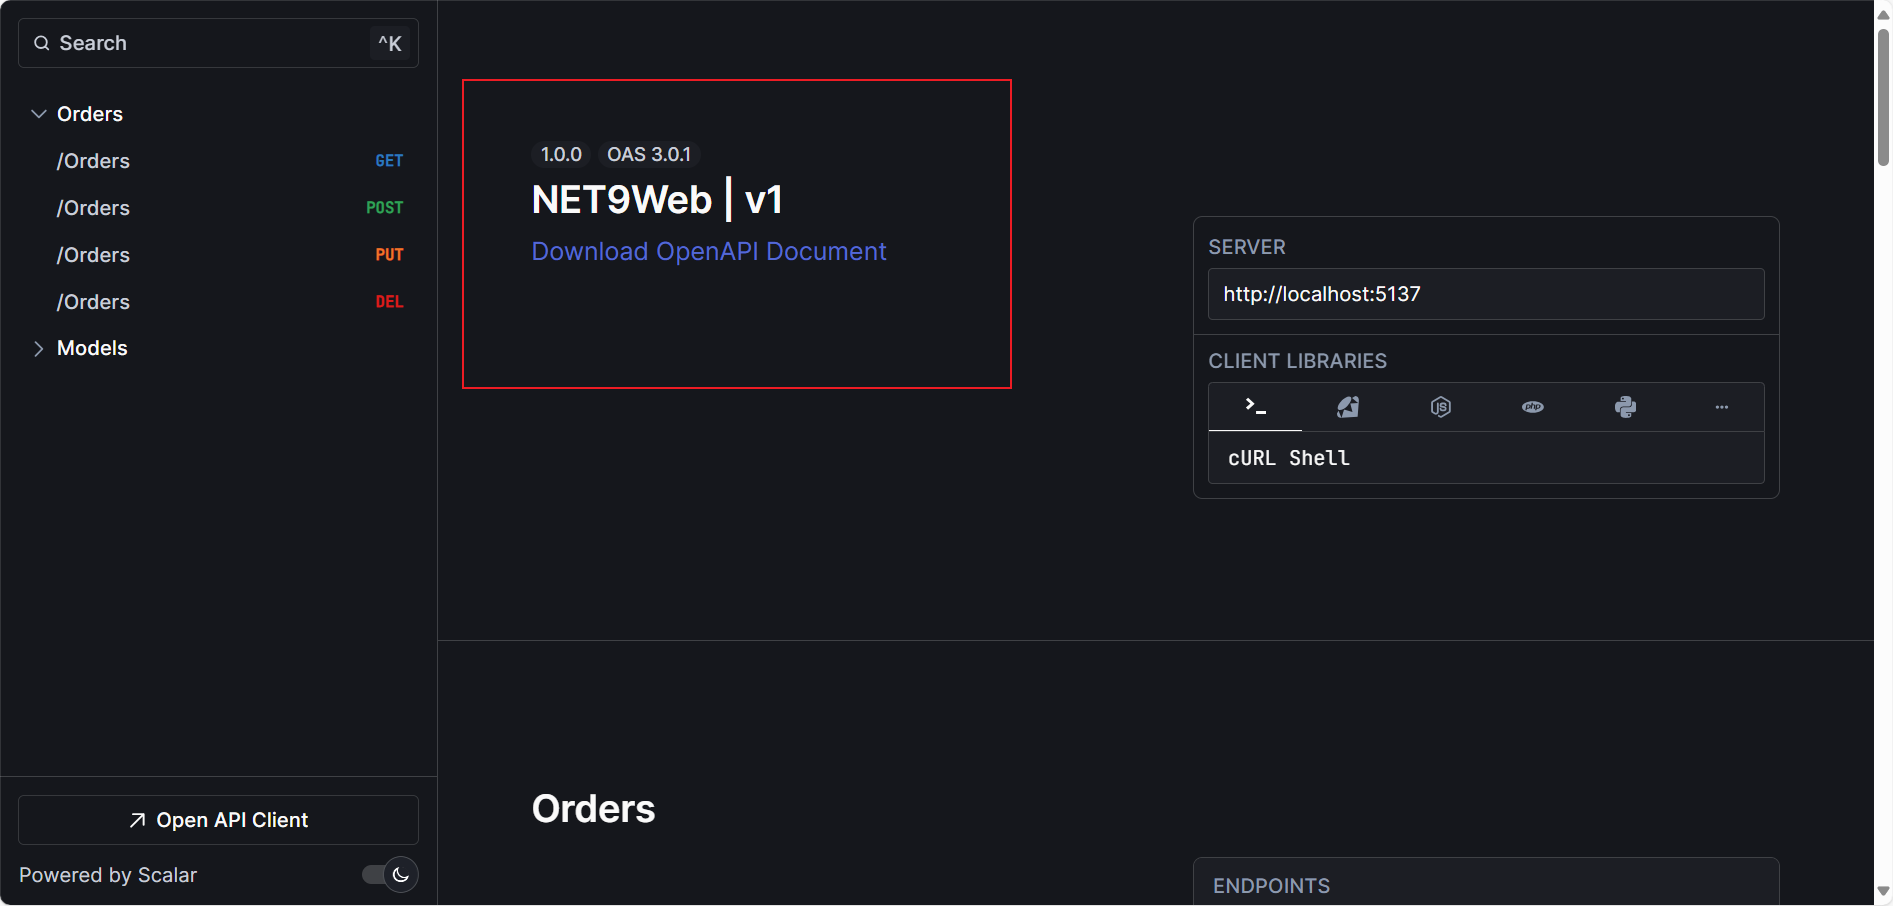
我们先来看看默认添加后是什么样子的。
public static void main(string[] args)
{
    var builder = webapplication.createbuilder(args);
    builder.services.addcontrollers();
    builder.services.addopenapi();
    var app = builder.build();
    app.mapscalarapireference();
    app.mapopenapi();
    app.useauthorization();
    app.mapcontrollers();
    app.run();
}
效果如下:
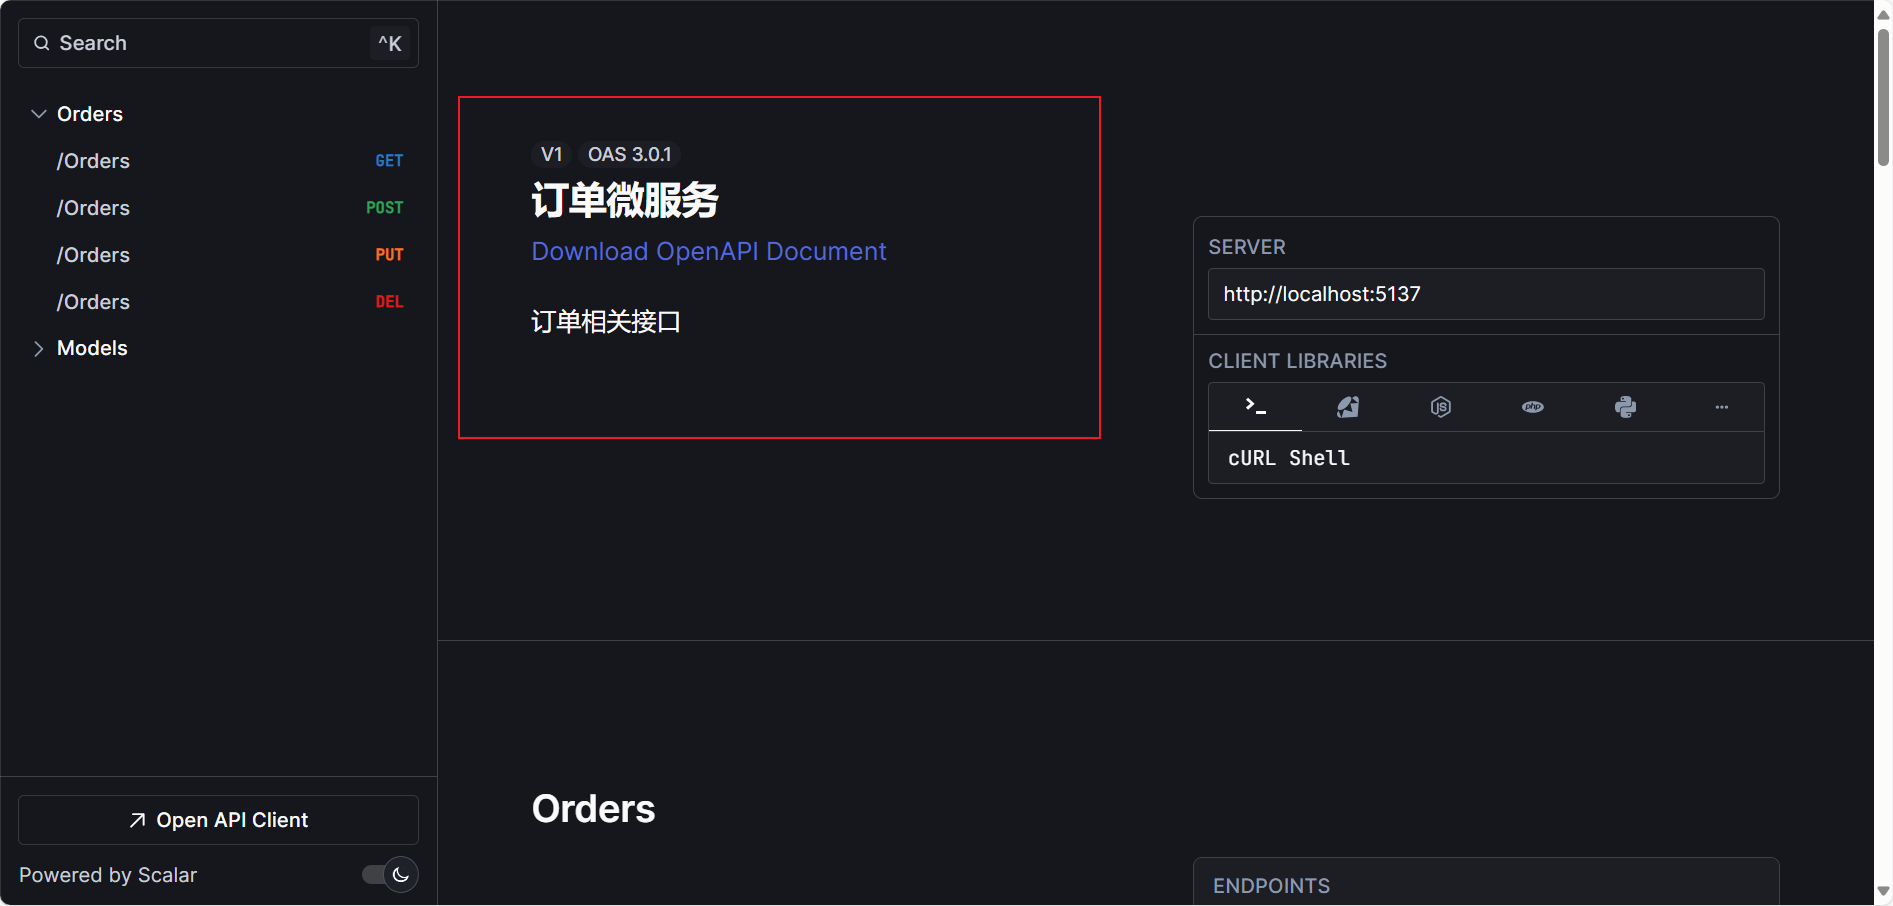
我们可以直接修改builder.services.addopenapi()这行代码,修改这块描述,代码如下:
builder.services.addopenapi(options =>
{
    options.adddocumenttransformer((document, context, cancellationtoken) =>
    {
        document.info = new()
        {
            title = "订单微服务",
            version = "v1",
            description = "订单相关接口"
        };
        return task.completedtask;
    });
});
我们再来看看效果。
02、接口分类
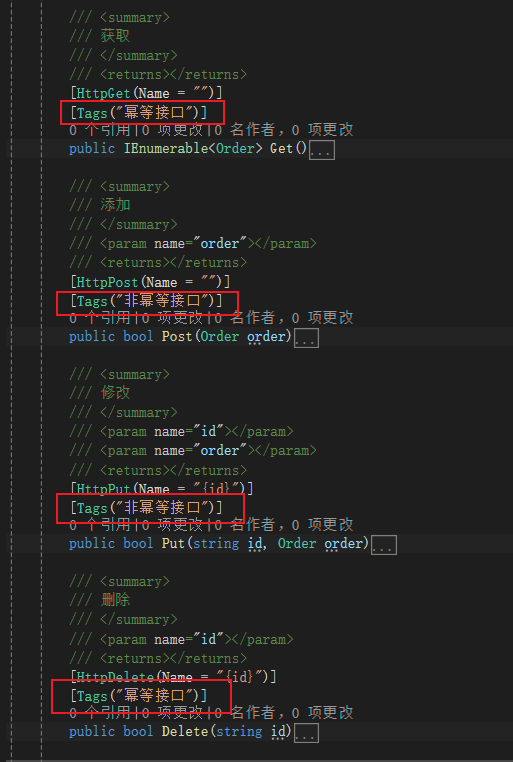
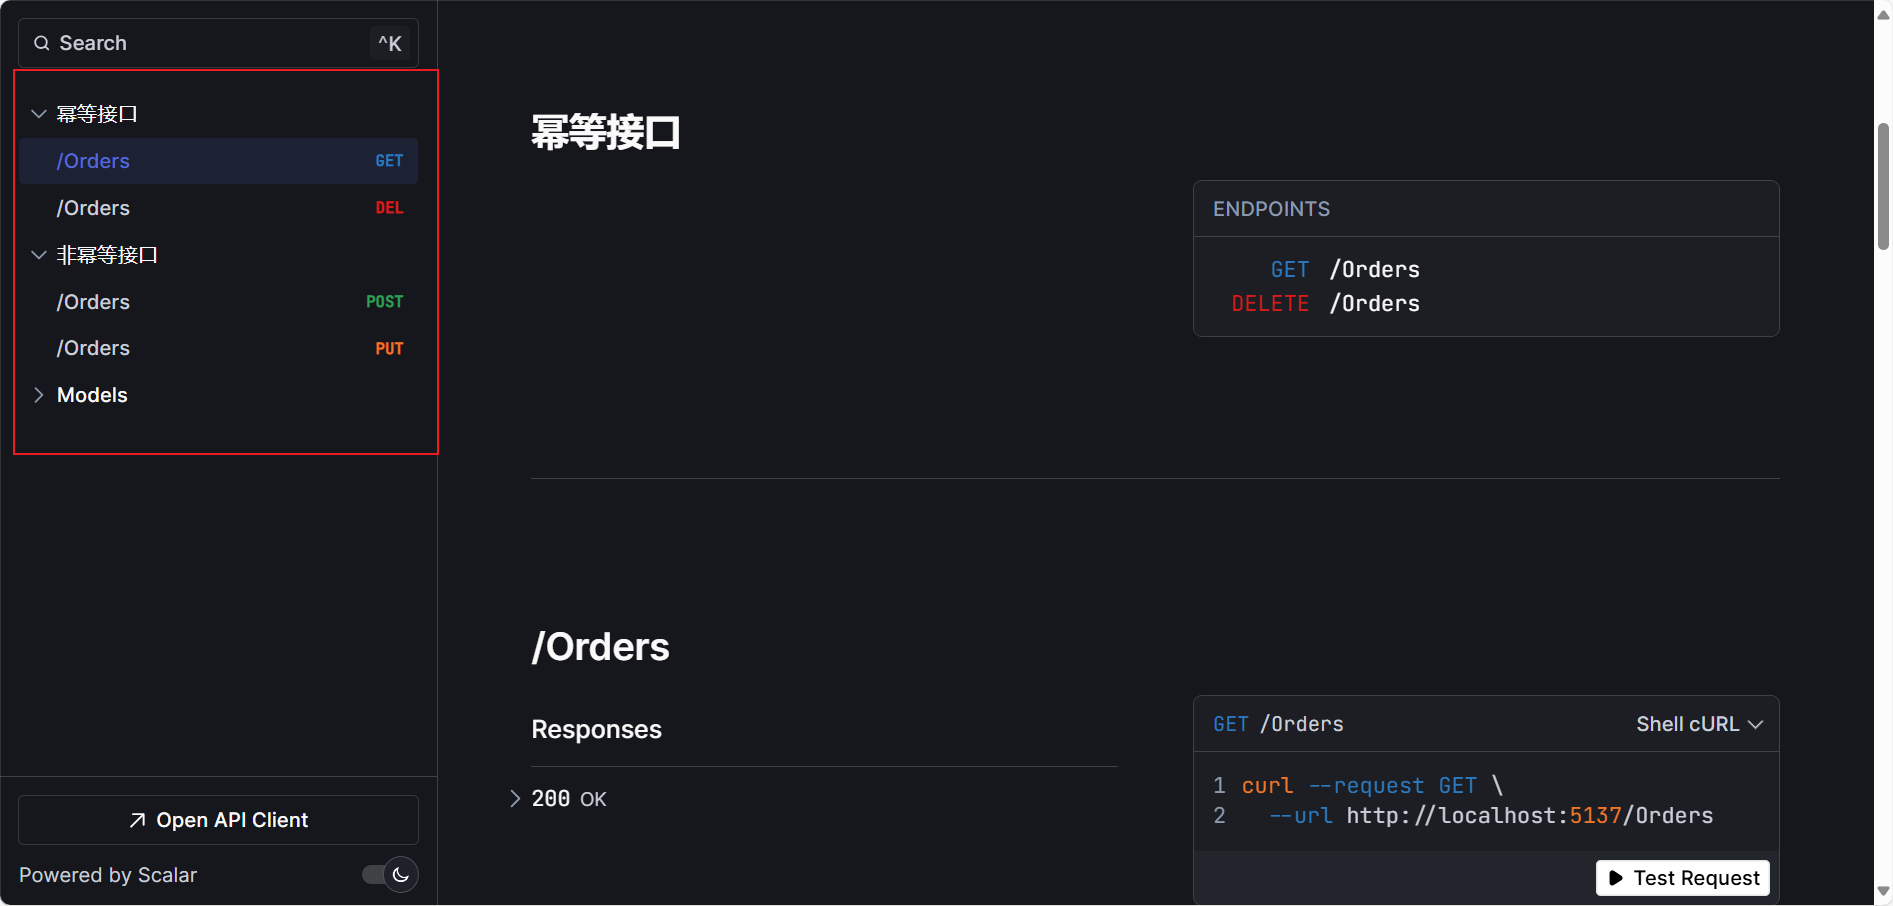
通过上图可以看到菜单左侧排列着所有接口,现在我们可以通过tags特性对接口进行分类,如下图我们把增删改查4个方法分为幂等接口和非幂等接口两类,如下图:
然后我们看看效果,如下图:
03、接口描述
之前使用swagger我们都是通过生成的注释xml来生成相关接口描述,现在则是通过编码的方式设置元数据来生成相关描述。
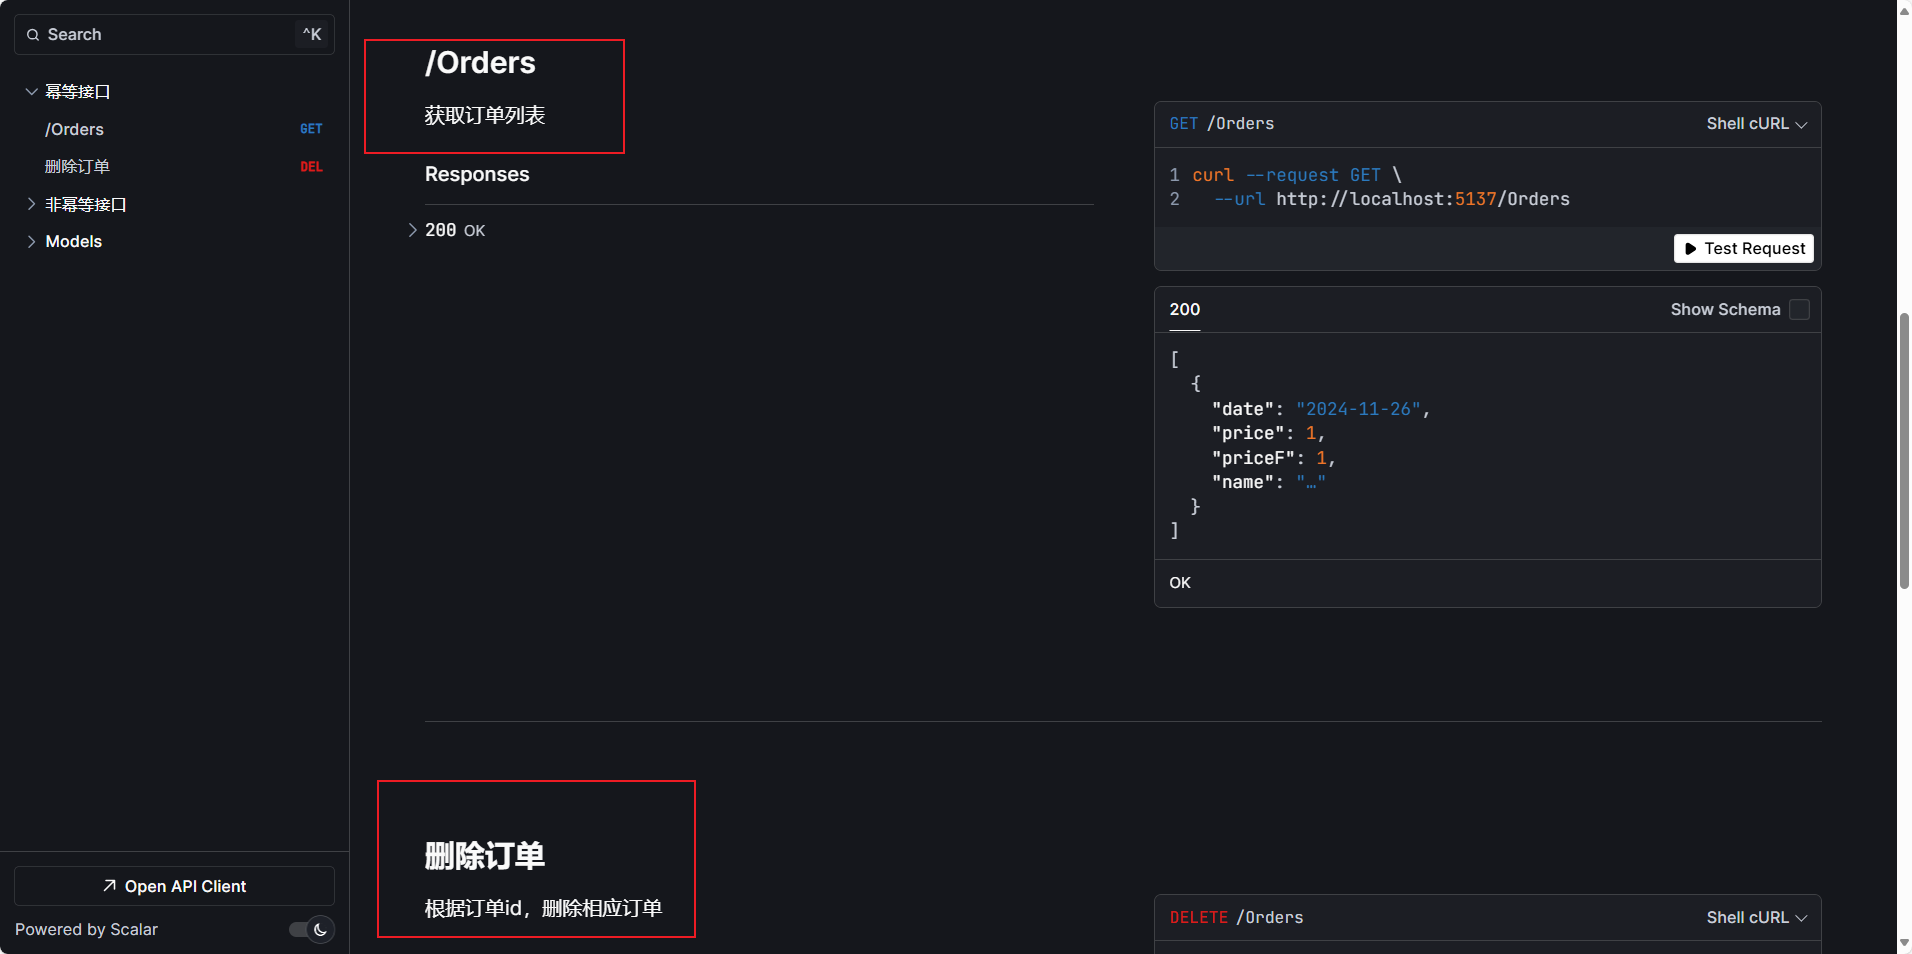
可以通过endpointsummary设置接口摘要,摘要不设置默认为接口url,通过endpointdescription设置接口描述,代码如下:
//获取
[httpget(name = "")]
[tags("幂等接口")]
[endpointdescription("获取订单列表")]
public ienumerable<order> get()
{
    return null;
}
//删除
[httpdelete(name = "{id}")]
[tags("幂等接口")]
[endpointsummary("删除订单")]
[endpointdescription("根据订单id,删除相应订单")]
public bool delete(string id)
{
    return true;
}
运行效果如下:
04、参数描述
同样可以通过description特性来设置参数的描述,并且此特性可以直接作用于接口中参数之前,同时也支持作用于属性上,可以看看下面示例代码。
public class order
{
    [property: description("创建日期")]
    public dateonly date { get; set; }
    [property: required]
    [property: defaultvalue(120)]
    [property: description("订单价格")]
    public int price { get; set; }
    [property: description("订单折扣价格")]
    public int pricef => (int)(price * 0.5556);
    [property: description("商品名称")]
    public string? name { get; set; }
}
[httpput(name = "{id}")]
[tags("非幂等接口")]
public bool put([description("订单id")] string id, order order)
{
    return true;
}
效果如下图:
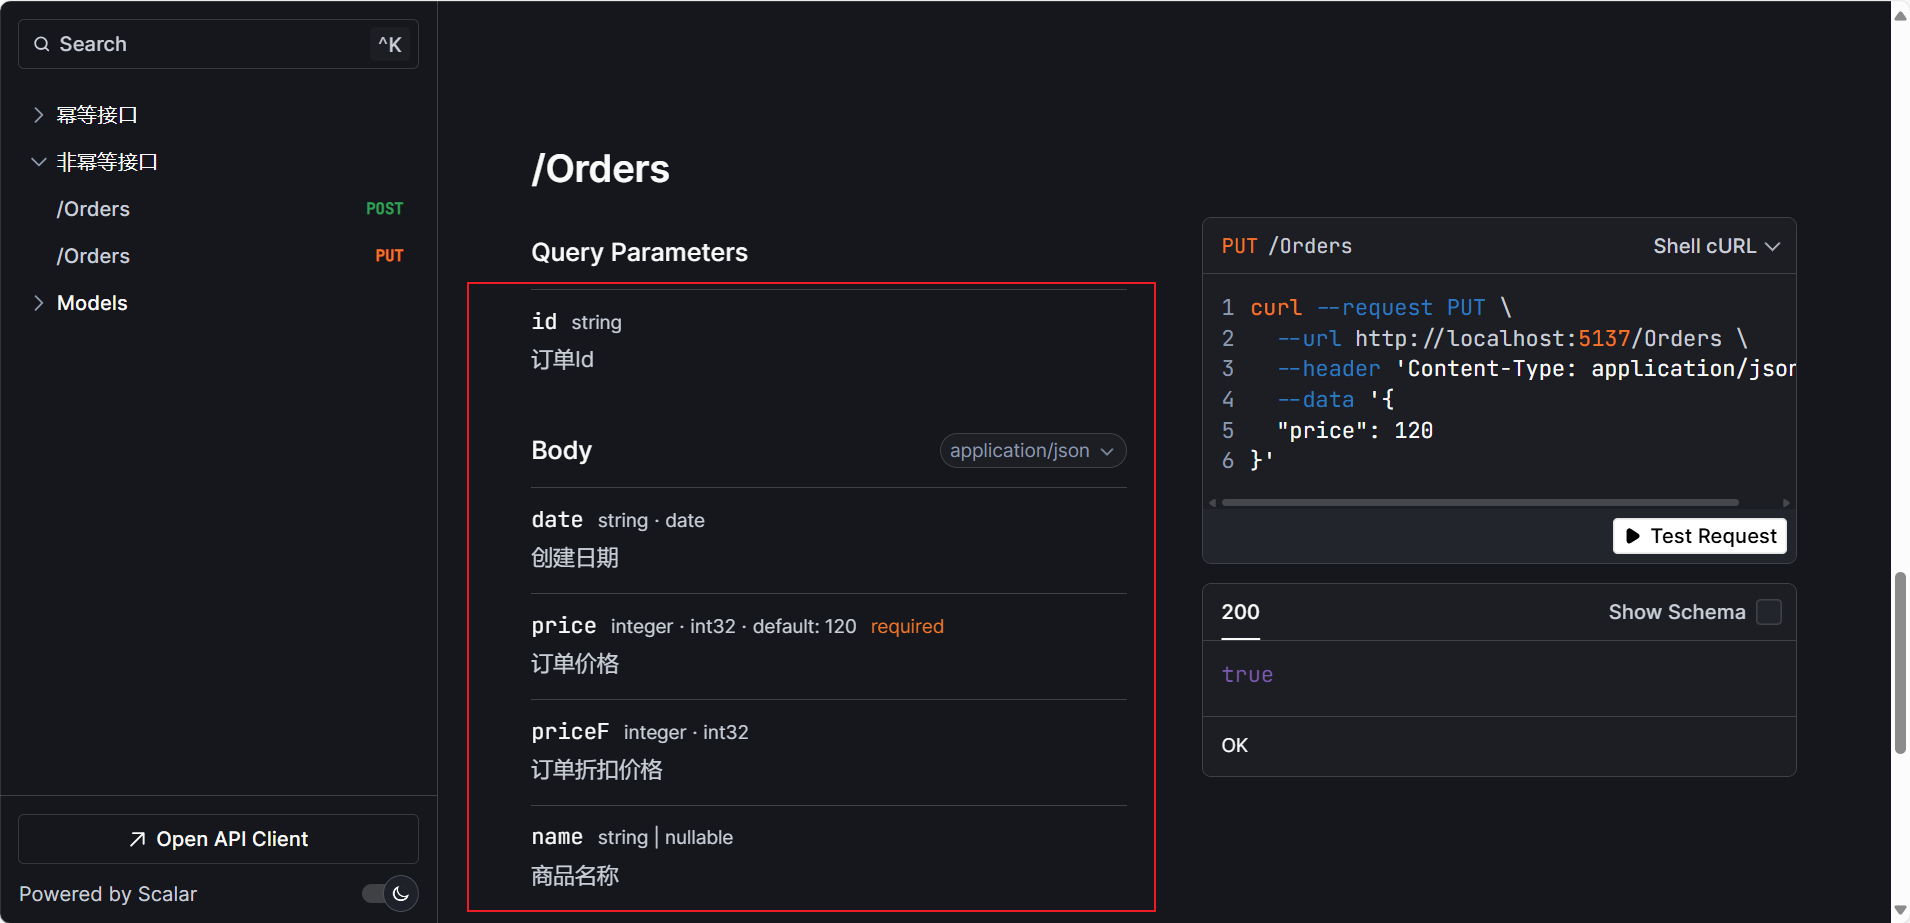
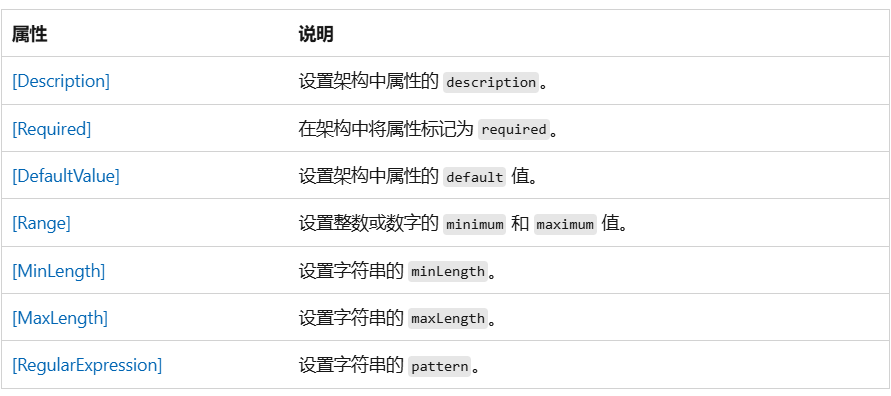
从上图可以发现除了描述还有默认值、必填项、可空等字样,这些是通过其他元数据设置的,对于属性还有以下元数据可以进行设置。
05、枚举类型
对于枚举类型,我们正常关注两个东西,其一为枚举项以int类型展示还是以字符串展示,其二为枚举项显示描述信息。
关于第一点比较简单只要对枚举类型使用jsonstringenumconverter即可,代码如下:
[jsonconverter(typeof(jsonstringenumconverter<orderstatus>))]
public enum orderstatus
{
[description("等待处理")]
pending = 1,
[description("处理中")]
processing = 2,
[description("已发货")]
shipped = 3,
[description("已送达")]
delivered = 4,
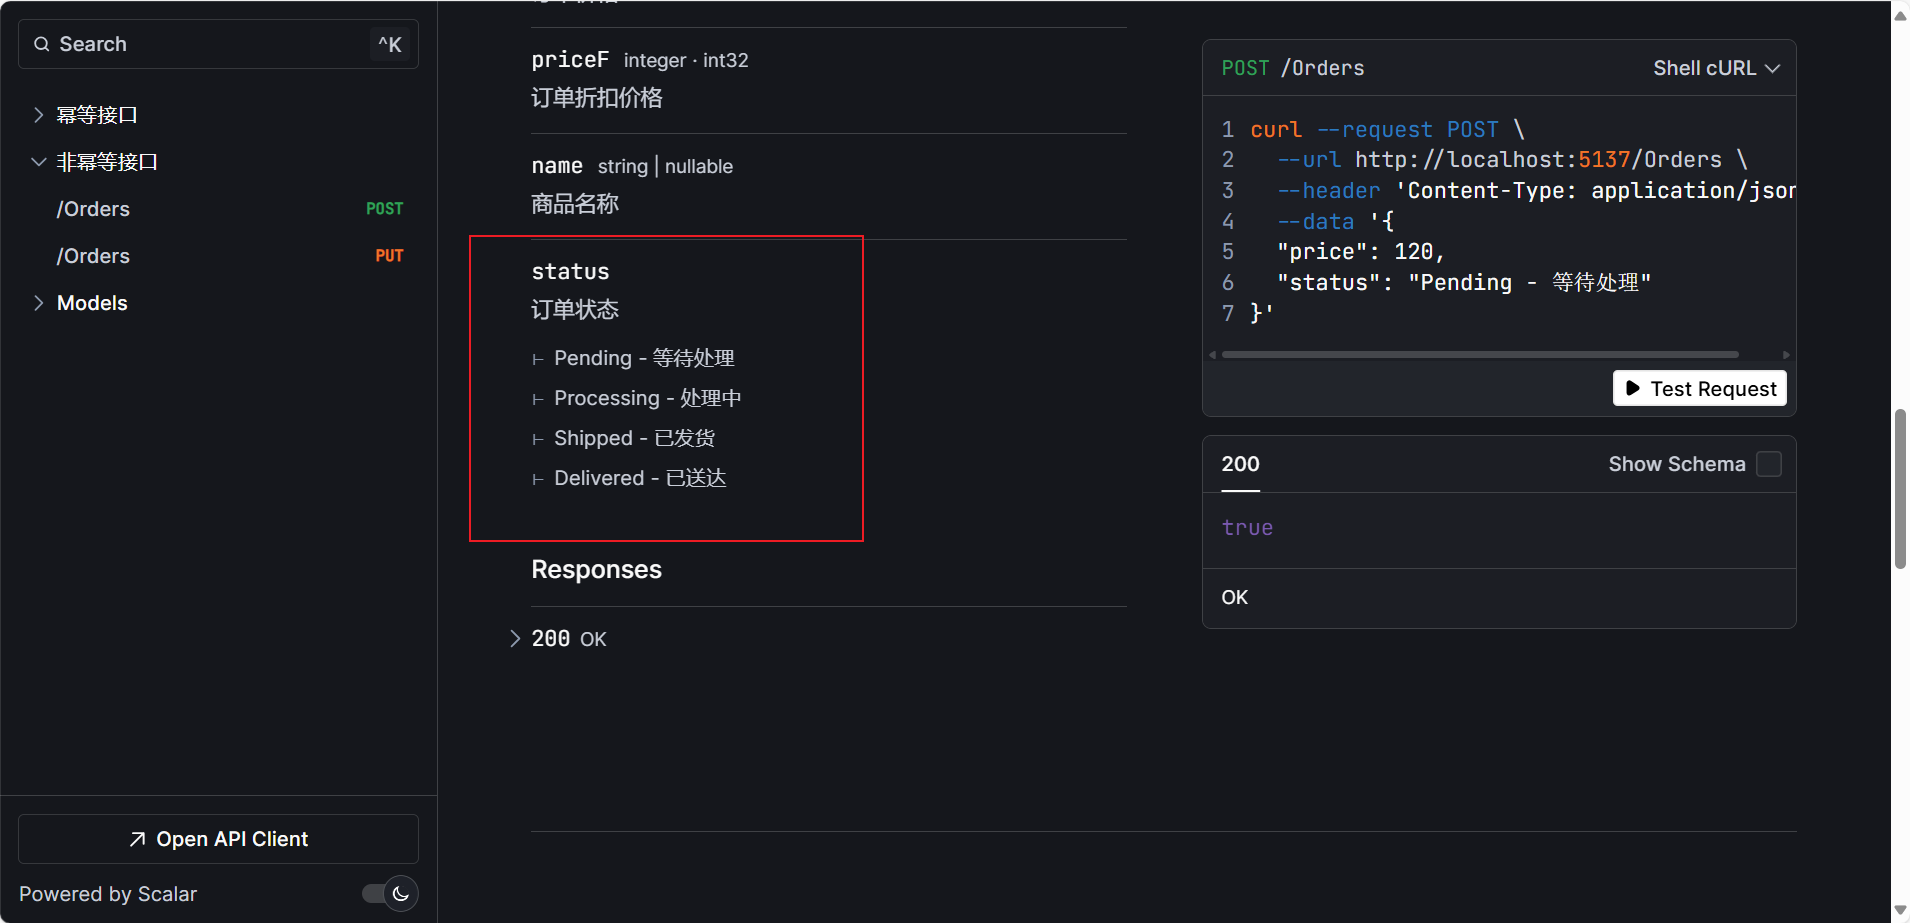
}效果如下:
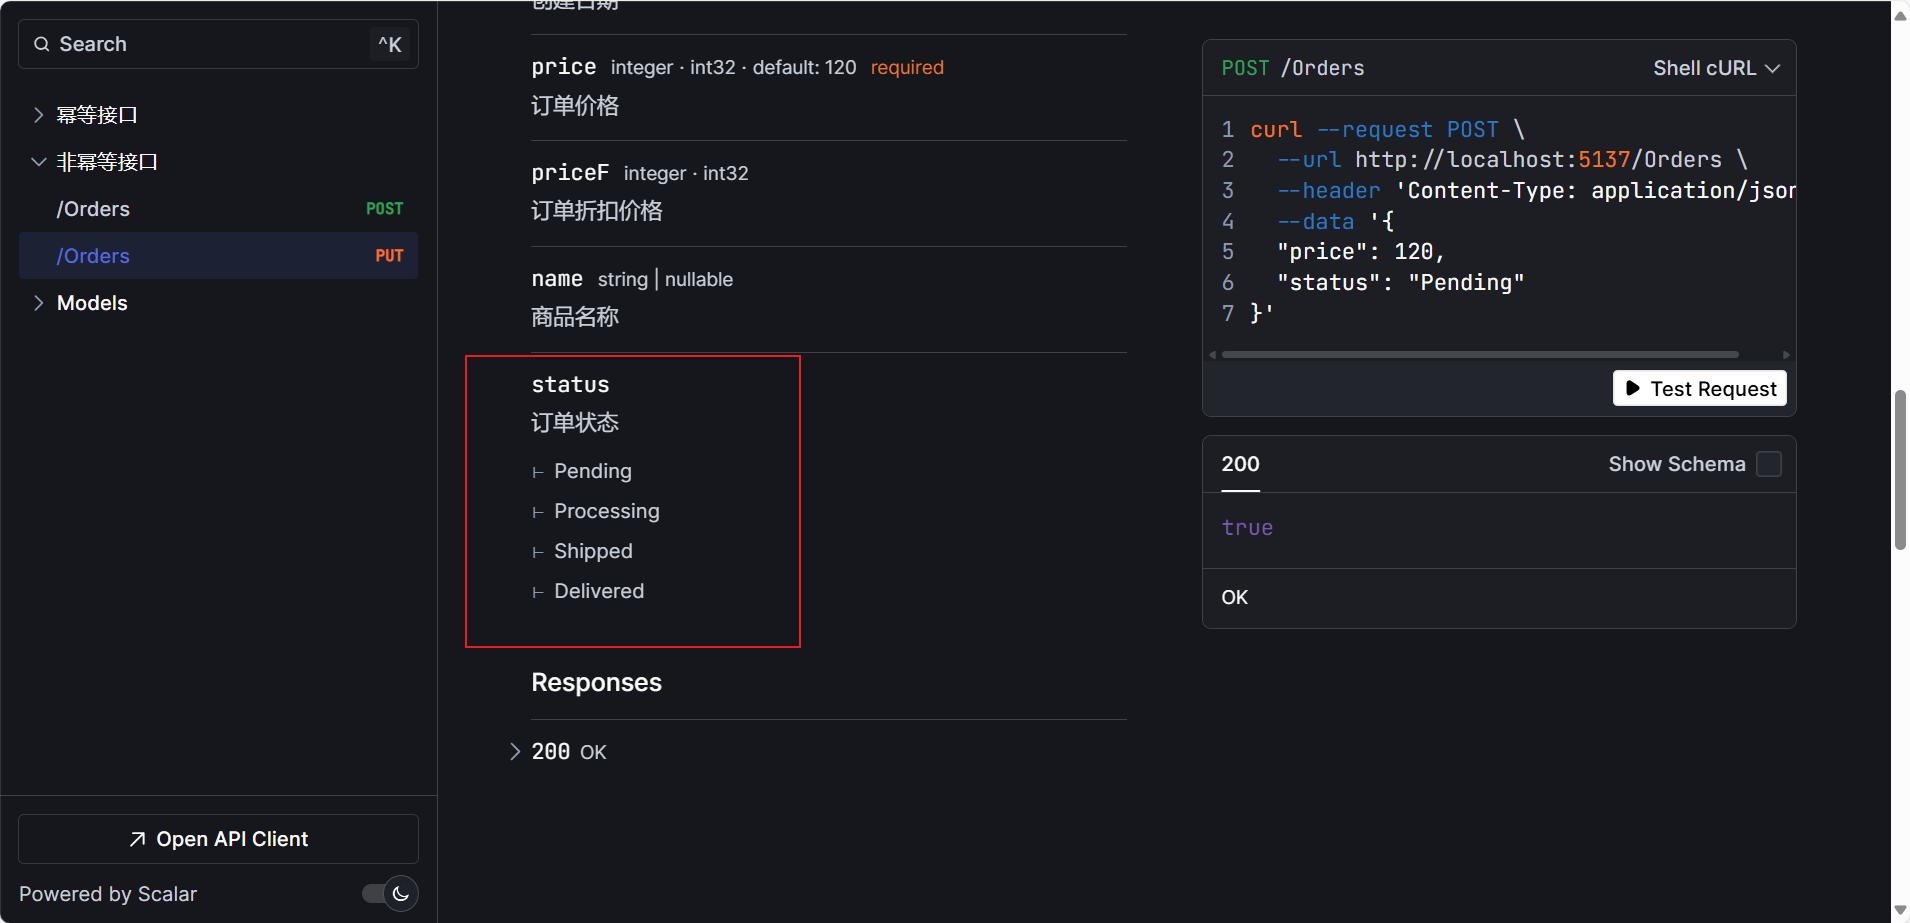
通过上图也可以引发关于第二点的需求,如何对每个枚举项添加描述信息。
要达到这个目标需要做两件事,其一给每个枚举项通过description添加元数据定义,其二我们要修改文档的数据结构schema。
修改builder.services.addopenapi(),通过addschematransformer方法修改文档数据结构,代码如下:
options.addschematransformer((schema, context, cancellationtoken) =>
{
    //找出枚举类型
    if (context.jsontypeinfo.type.basetype == typeof(enum))
    {
        var list = new list<iopenapiany>();
        //获取枚举项
        foreach (var enumvalue in schema.enum.oftype<openapistring>())
        {
            //把枚举项转为枚举类型
            if (enum.tryparse(context.jsontypeinfo.type, enumvalue.value, out var result))
            {
                //通过枚举扩展方法获取枚举描述
                var description = ((enum)result).todescription();
                //重新组织枚举值展示结构
                list.add(new openapistring($"{enumvalue.value} - {description}"));
            }
            else
            {
                list.add(enumvalue);
            }
        }
        schema.enum = list;
    }
    return task.completedtask;
});
我们再来看看结果。
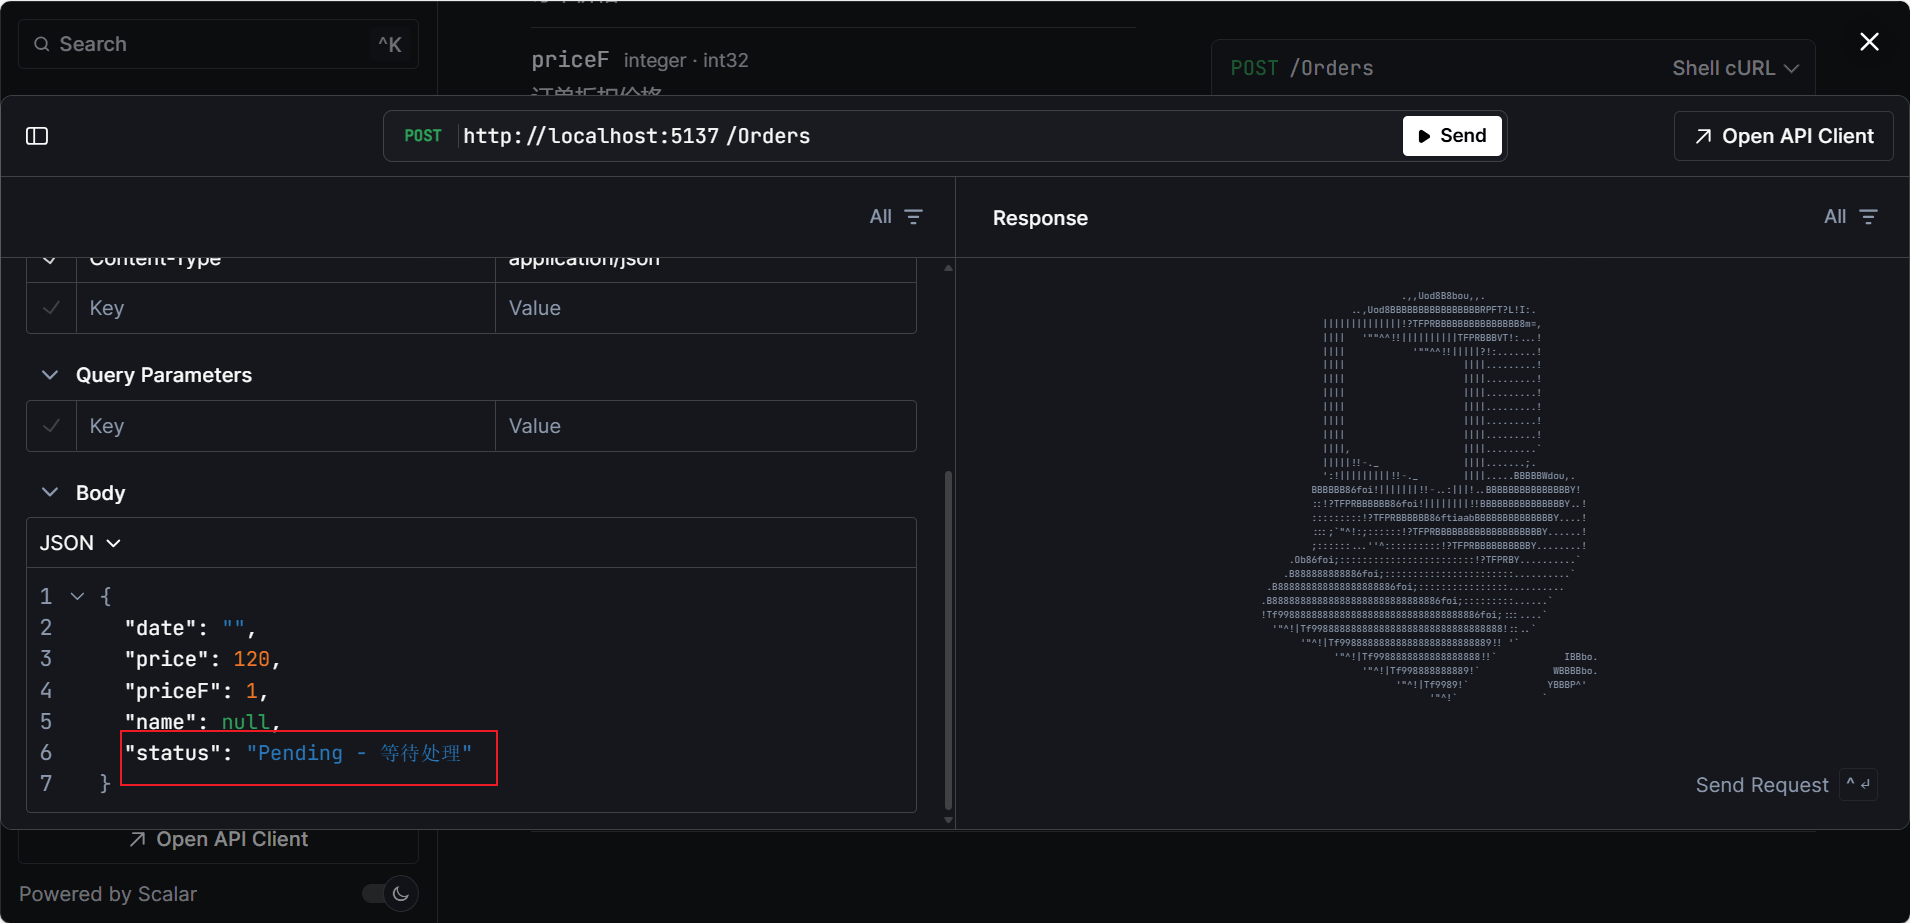
但是这也带来了一个问题,就是参数的默认值也是添加描述的格式,显然这样的数据格式作为参数肯定是错误的,因此我们需要自己注意,如下图。目前我也没有发现更好的方式即可以把每项枚举描述加上,又不影响参数默认值,有解决方案的希望可以不吝赐教。
06、文件上传
下面我们来看看文件上传怎么用,直接上代码:
[httppost("upload/image")]
[endpointdescription("图片上传接口")]
[disablerequestsizelimit]
public bool uploadimgageasync(iformfile file)
{
return true;
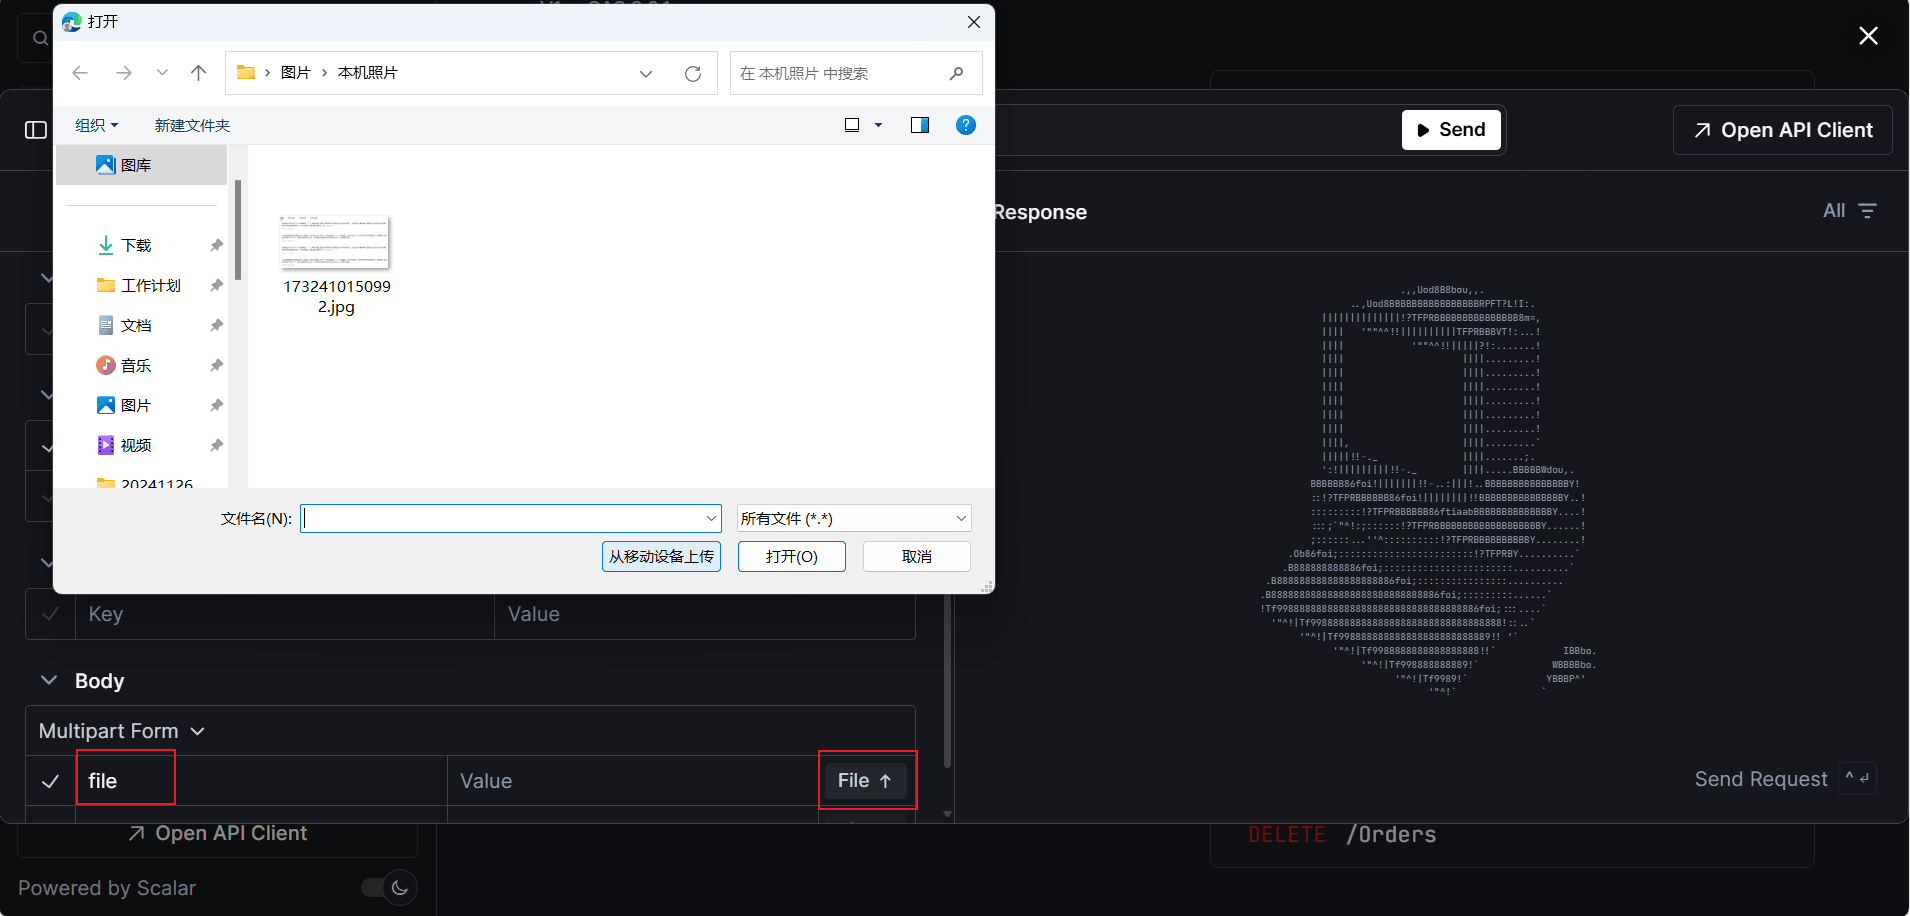
}然后我们测试一下效果。
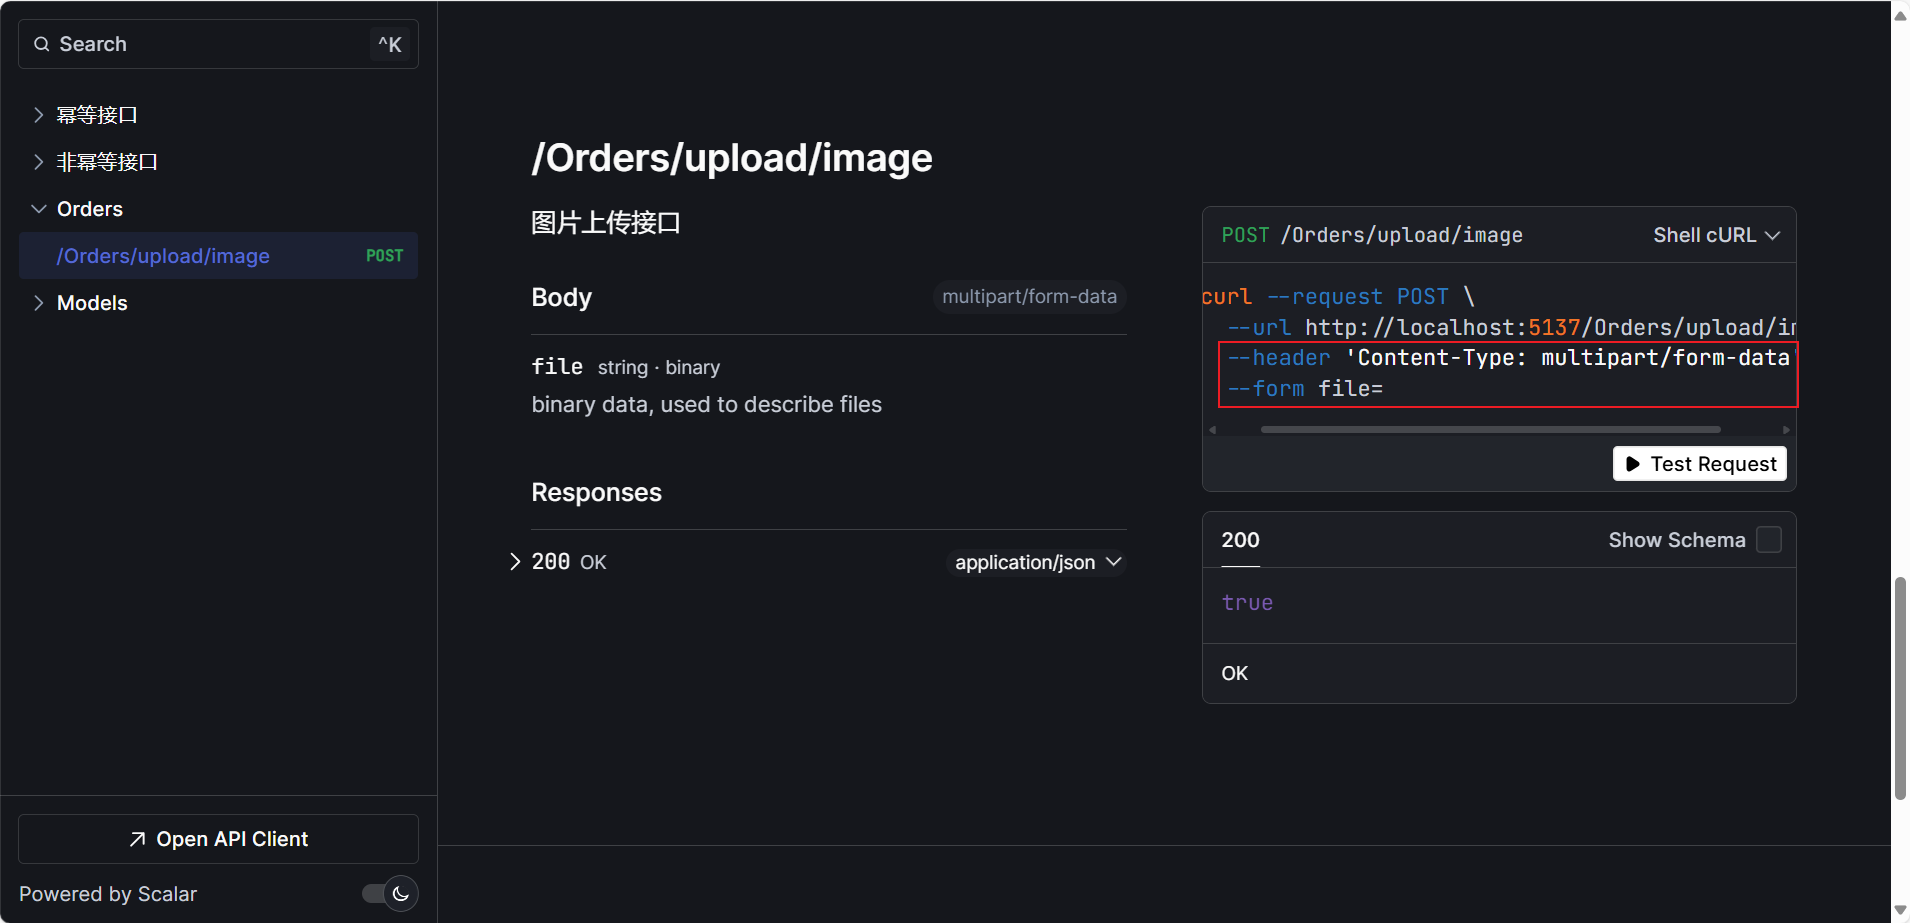
首先我们可以看到请求示例中相关信息,这个相当于告诉我们后面要怎么选择文件上传,我们继续点击test request。
首先请求体需要选择multipart/form-data,上图请求示例中已经给出提示。
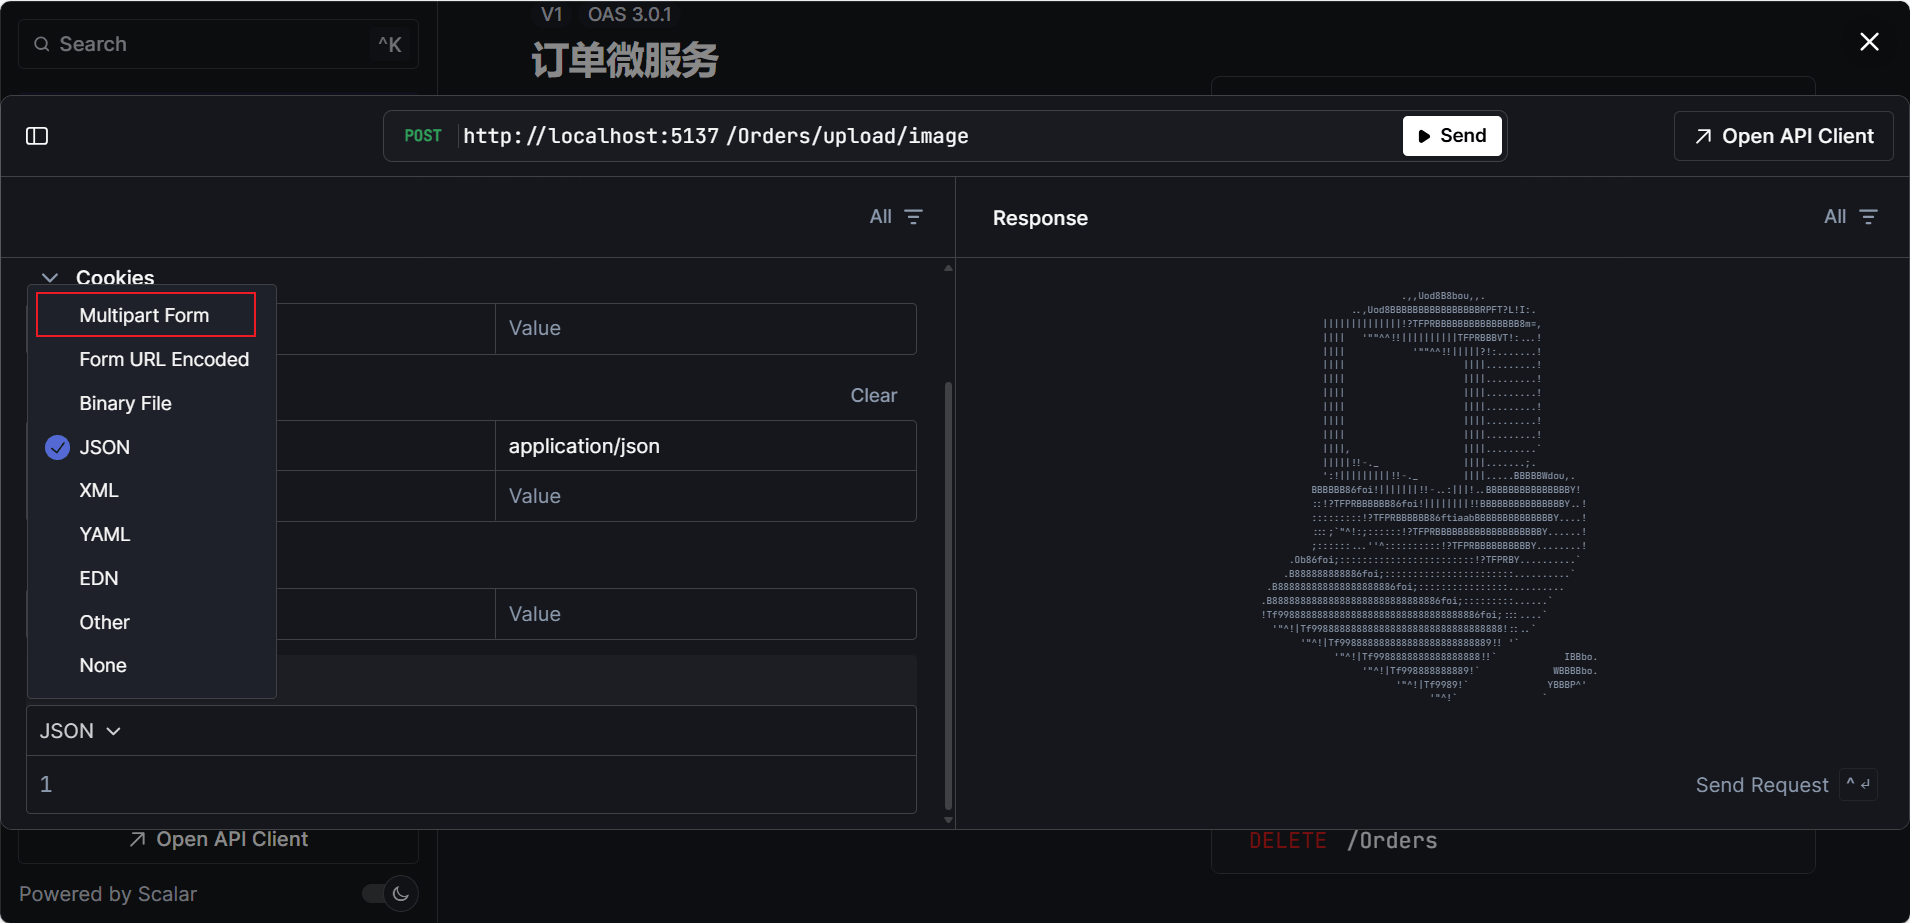
然后设置key为file,上图请求示例中已经给出提示,然后点击file上传图片,最后点击send即可。
07、jwt认证
最后我们来看看如何使用jwt认证,
首先我们需要注入addauthentication及addjwtbearer,具体代码如下:
public class jwtsettingoption
{
    //这个字符数量有要求,不能随便写,否则会报错
    public static string secret { get; set; } = "123456789qwertyuiopasdfghjklzxcb";
    public static string issuer { get; set; } = "asdfghjkkl";
    public static string audience { get; set; } = "zxcvbnm";
    public static int expires { get; set; } = 120;
    public static string refreshaudience { get; set; } = "zxcvbnm.2024.refresh";
    public static int refreshexpires { get; set; } = 10080;
}
builder.services.addauthentication(options =>
{
    options.defaultauthenticatescheme = jwtbearerdefaults.authenticationscheme;
    options.defaultchallengescheme = jwtbearerdefaults.authenticationscheme;
}).addjwtbearer(options =>
{
    //取出私钥
    var secretbyte = encoding.utf8.getbytes(jwtsettingoption.secret);
    options.tokenvalidationparameters = new tokenvalidationparameters()
    {
        //验证发布者
        validateissuer = true,
        validissuer = jwtsettingoption.issuer,
        //验证接收者
        validateaudience = true,
        validaudiences = new list<string> { jwtsettingoption.audience, jwtsettingoption.audience },
        //验证是否过期
        validatelifetime = true,
        //验证私钥
        issuersigningkey = new symmetricsecuritykey(secretbyte),
        clockskew = timespan.fromhours(1), //过期时间容错值,解决服务器端时间不同步问题(秒)
        requireexpirationtime = true,
    };
});
然后我们需要继续修改builder.services.addopenapi()这行代码,在里面加上如下代码:
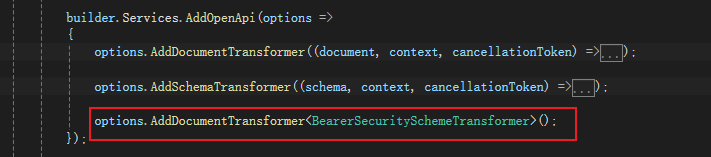
其中bearersecurityschemetransformer实现如下:
public sealed class bearersecurityschemetransformer(iauthenticationschemeprovider authenticationschemeprovider) : iopenapidocumenttransformer
{
    public async task transformasync(openapidocument document, openapidocumenttransformercontext context, cancellationtoken cancellationtoken)
    {
        var authenticationschemes = await authenticationschemeprovider.getallschemesasync();
        if (authenticationschemes.any(authscheme => authscheme.name == jwtbearerdefaults.authenticationscheme))
        {
            var requirements = new dictionary<string, openapisecurityscheme>
            {
                [jwtbearerdefaults.authenticationscheme] = new openapisecurityscheme
                {
                    type = securityschemetype.http,
                    scheme = jwtbearerdefaults.authenticationscheme.tolower(),
                    in = parameterlocation.header,
                    bearerformat = "json web token"
                }
            };
            document.components ??= new openapicomponents();
            document.components.securityschemes = requirements;
            foreach (var operation in document.paths.values.selectmany(path => path.operations))
            {
                operation.value.security.add(new openapisecurityrequirement
                {
                    [new openapisecurityscheme
                    {
                        reference = new openapireference
                        {
                            id = jwtbearerdefaults.authenticationscheme,
                            type = referencetype.securityscheme
                        }
                    }] = array.empty<string>()
                });
            }
        }
    }
}
下面就可以通过[authorize]开启接口认证,并实现一个登录接口获取token用来测试。
[httppost("login")]
[endpointdescription("登录成功后生成token")]
[allowanonymous]
public string login()
{
//登录成功返回一个token
// 1.定义需要使用到的claims
var claims = new[] { new claim("userid", "test") };
// 2.从 appsettings.json 中读取secretkey
var secretkey = new symmetricsecuritykey(encoding.utf8.getbytes(jwtsettingoption.secret));
// 3.选择加密算法
var algorithm = securityalgorithms.hmacsha256;
// 4.生成credentials
var signingcredentials = new signingcredentials(secretkey, algorithm);
var now = datetime.now;
var expires = now.addminutes(jwtsettingoption.expires);
// 5.根据以上,生成token
var jwtsecuritytoken = new jwtsecuritytoken(
jwtsettingoption.issuer, //issuer
jwtsettingoption.audience, //audience
claims, //claims,
now, //notbefore
expires, //expires
signingcredentials //credentials
);
// 6.将token变为string
var token = new jwtsecuritytokenhandler().writetoken(jwtsecuritytoken);
return token;
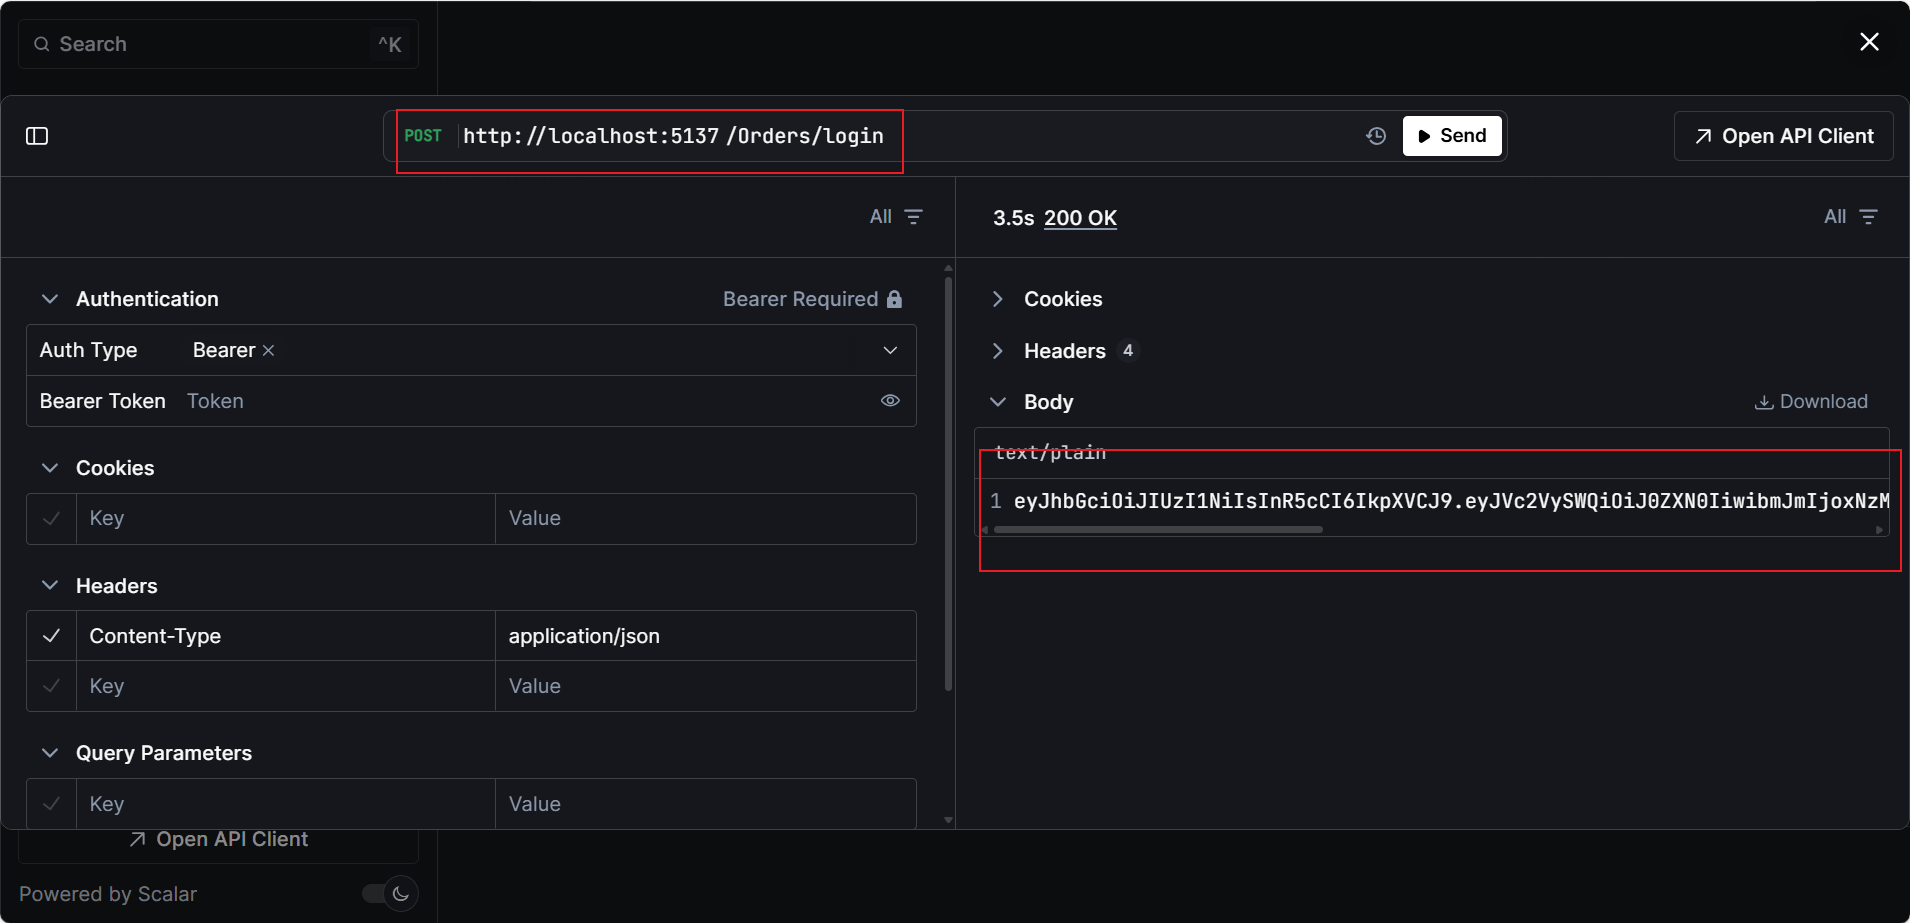
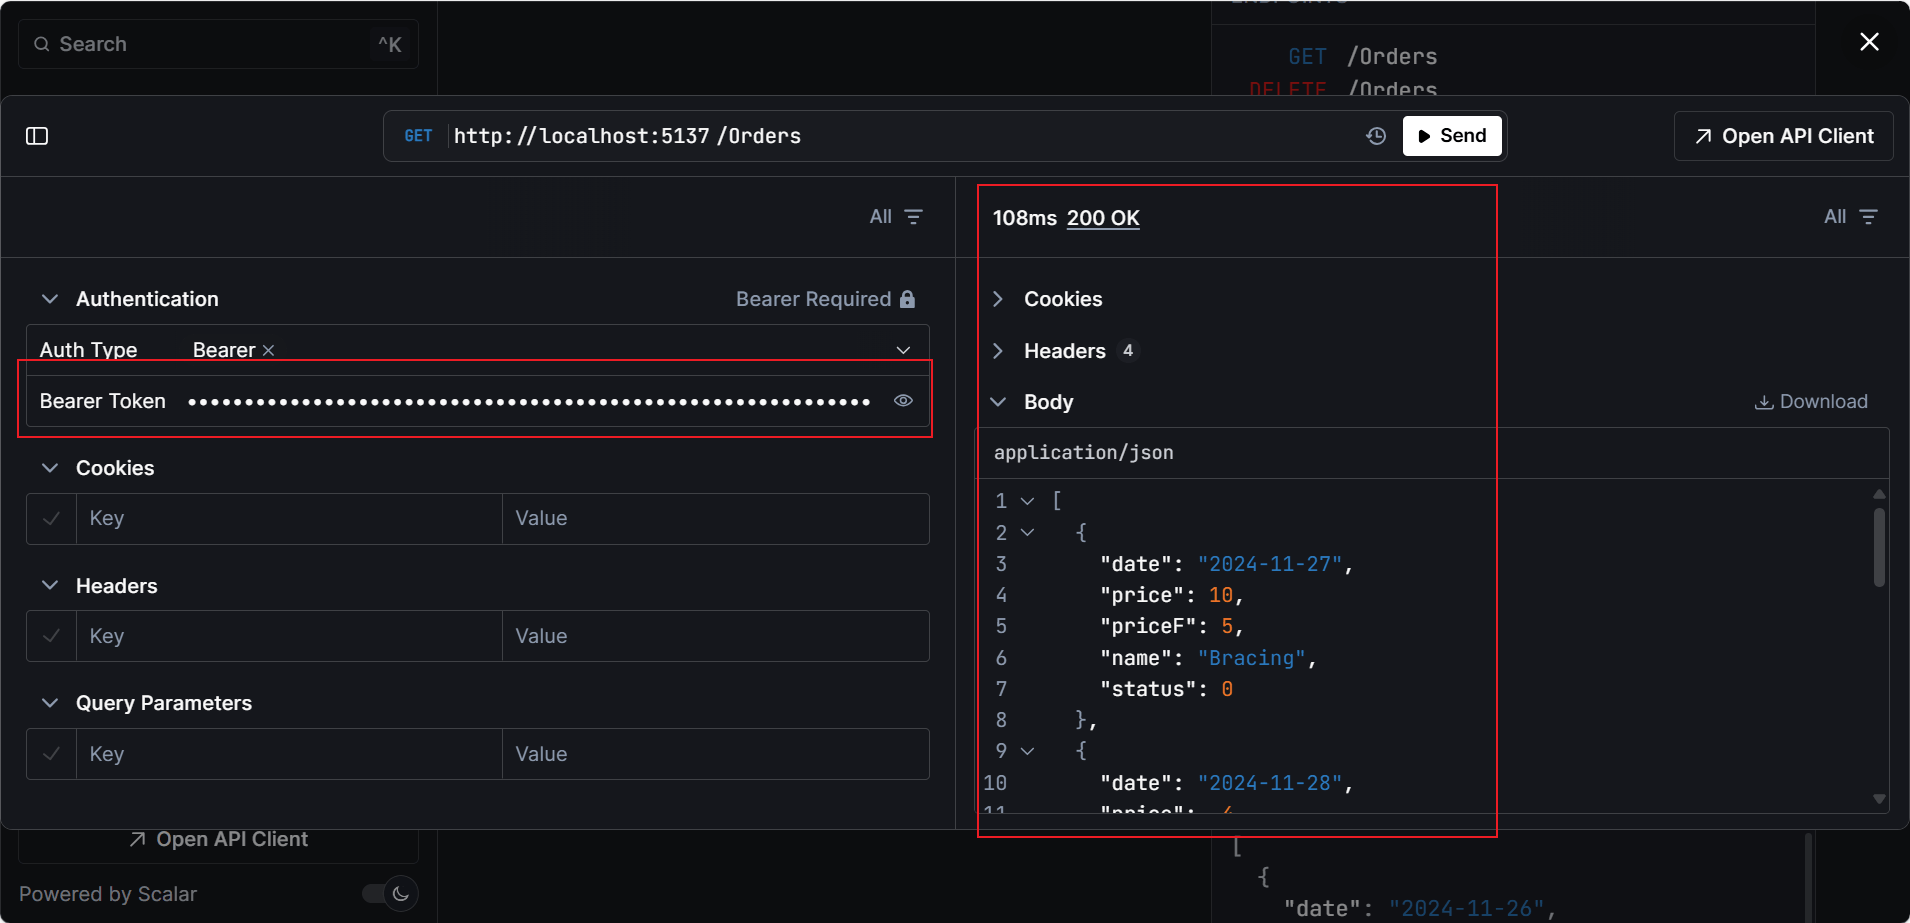
}下面我们先用登录接口获取一个token。
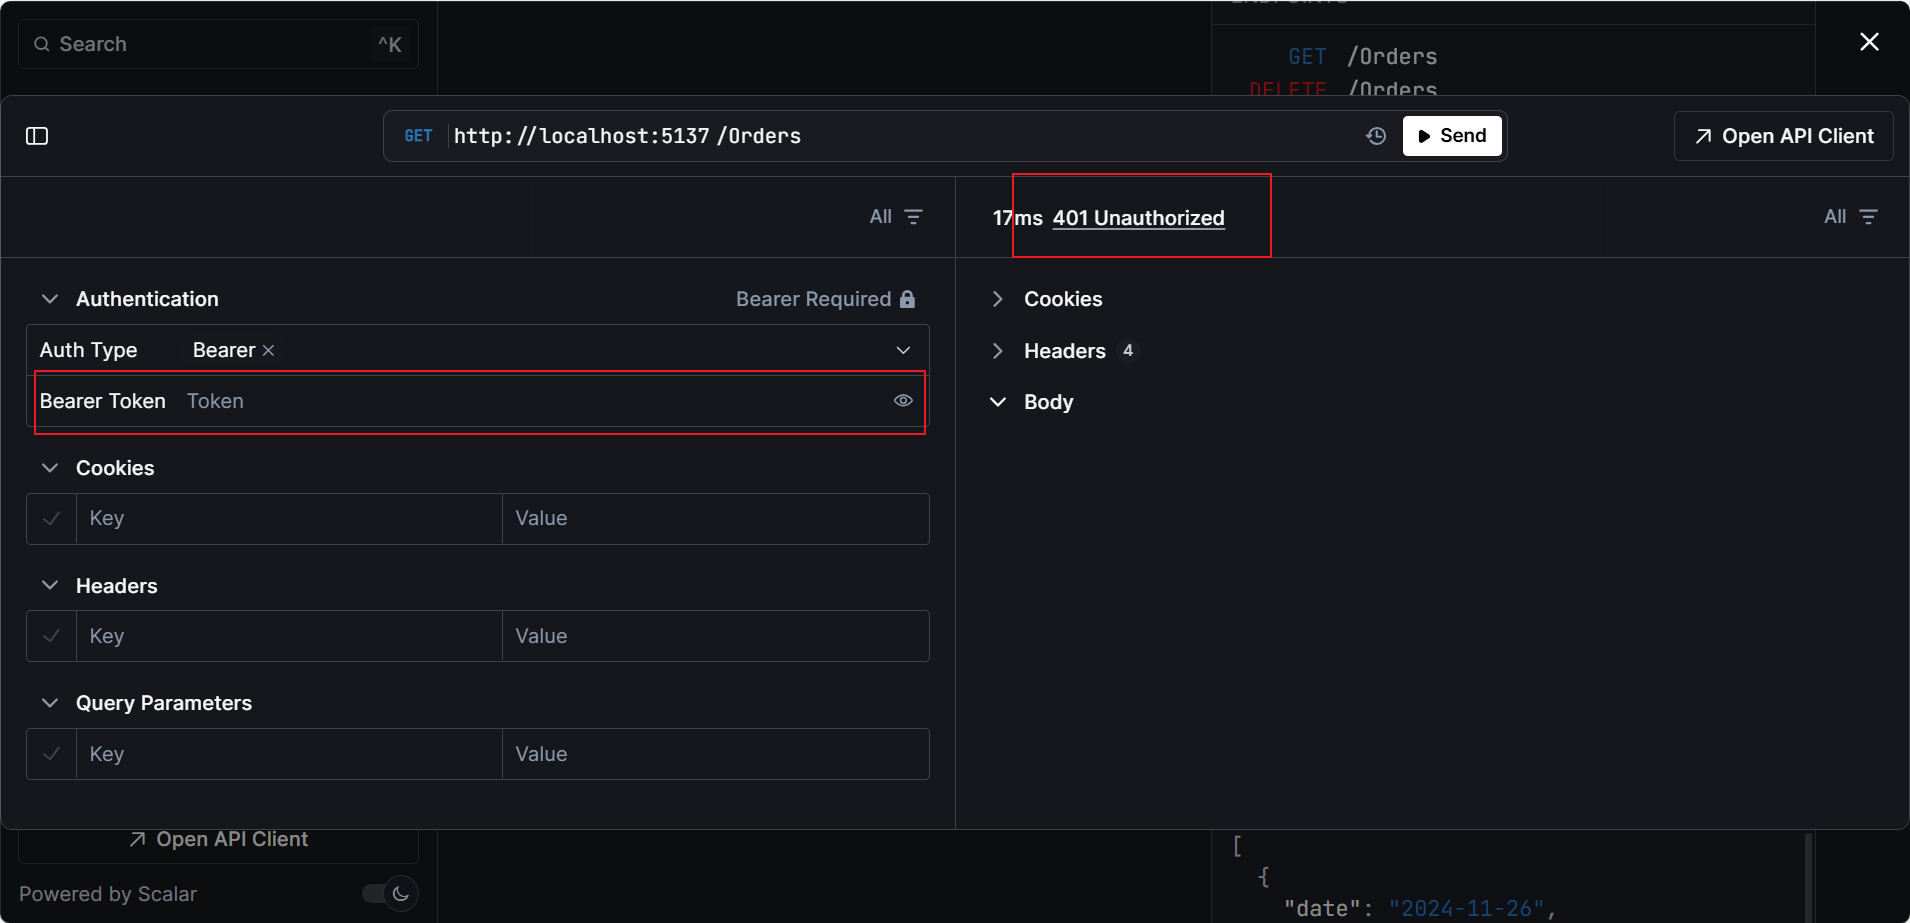
我们先用token调用接口,可以发现返回401。
然后我们把上面获取的token放进去,请求成功。
在这个过程中有可能会遇到一种情况:auth type后面的下拉框不可选,如下图。
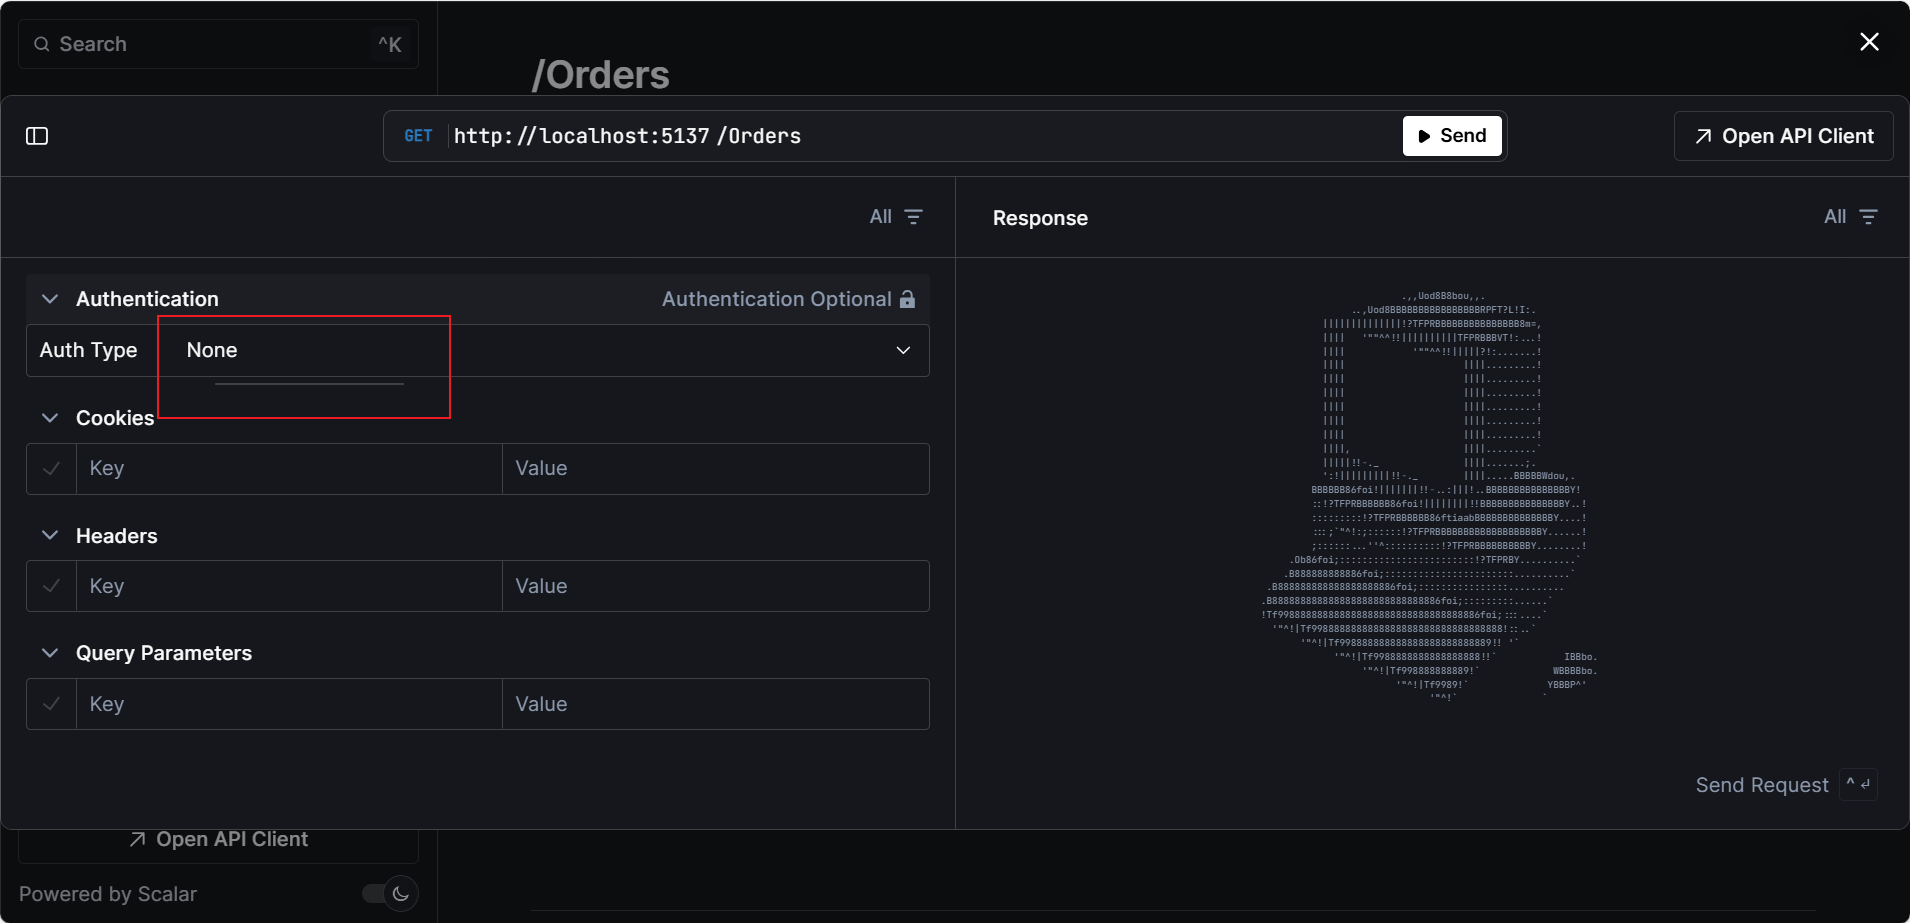
可能因以下原因导致,缺少[builder.services.addauthentication().addjwtbearer();]或[options.adddocumenttransformer();]任意一行代码。
注:测试方法代码以及示例源码都已经上传至代码库,有兴趣的可以看看。https://gitee.com/hugogoos/planner
到此这篇关于.net9中swagger平替scalar详解(四)的文章就介绍到这了,更多相关.net9 swagger平替scalar内容请搜索代码网以前的文章或继续浏览下面的相关文章希望大家以后多多支持代码网!


发表评论