1.@componentscan注解作用
@componentscan用于类或接口上主要是指定扫描路径,spring会把指定路径下带有指定注解的类自动装配到bean容器里。
会被自动装配的注解包括@controller、@service、@component、@repository等等。
与componentscan注解相对应的xml配置就是<context:component-scan/>, 根据指定的配置自动扫描package,将符合条件的组件加入到ioc容器中;
xml的配置方式如下:
	<context:component-scan
		base-package="com.example.test" use-default-filters="false">
		<context:exclude-filter type="custom"
		expression="com.example.test.filter.mtytypefilter" />
	</context:component-scan>
2. @componentscan注解属性
@componentscan有如下常用属性:
basepackages和value:指定要扫描的路径(package),如果为空则以@componentscan注解的类所在的包为基本的扫描路径。basepackageclasses:指定具体扫描的类。includefilters:指定满足filter条件的类。excludefilters:指定排除filter条件的类。usedefaultfilters=true/false:指定是否需要使用spring默认的扫描规则:被@component, @repository, @service, @controller或者已经声明过@component自定义注解标记的组件;
在过滤规则filter中:
filtertype:指定过滤规则,支持的过滤规则有:
annotation:按照注解规则,过滤被指定注解标记的类(默认);assignable_type:按照给定的类型;aspectj:按照aspectj表达式;regex:按照正则表达式;custom:自定义规则,自定义的filter需要实现typefilter接口;
value和classes:指定在该规则下过滤的表达式;
@componentscan的常见的配置如下:
@componentscan(
    excludefilters = {@filter(
    type = filtertype.custom,
    classes = {typeexcludefilter.class}
), @filter(
    type = filtertype.custom,
    classes = {autoconfigurationexcludefilter.class}
)}
)
3. @componentscan过滤规则说明
规则表达式说明:
- 1.扫描指定类文件
@componentscan(basepackageclasses = person.class)
- 2.扫描指定包,使用默认扫描规则,即被@component, @repository, @service, @controller或者已经声明过@component自定义注解标记的组件;
@componentscan(value = "com.example")
- 3.扫描指定包,加载被@component注解标记的组件和默认规则的扫描(因为usedefaultfilters默认为true)
@componentscan(value = "com.example", includefilters = { @filter(type = filtertype.annotation, value = component.class) })- 4.扫描指定包,只加载person类型的组件
@componentscan(value = "com.example", includefilters = { @filter(type = filtertype.assignable_type, value = person.class) }, usedefaultfilters = false)- 5.扫描指定包,过滤掉被@component标记的组件
@componentscan(value = "com.example", excludefilters = { @filter(type = filtertype.annotation, value = component.class) })- 6.扫描指定包,自定义过滤规则
@componentscan(value = "com.example", includefilters = { @filter(type = filtertype.custom, value = mtytypefilter.class) }, usedefaultfilters = true)4. 自定义扫描过滤规则
用户自定义扫描过滤规则,需要实现org.springframework.core.type.filter.typefilter接口。
//1.自定义类实现typefilter接口并重写match()方法
public class mtytypefilter implements typefilter {
    /**
     *
     * @param metadatareader:读取到当前正在扫描的类的信息
     * @param metadatareaderfactory:可以获取到其他任何类的信息
     * @return
     * @throws ioexception
     */
    @override
    public boolean match(metadatareader metadatareader, metadatareaderfactory metadatareaderfactory) throws ioexception {
        system.out.println("========mtytypefilter===========");
        //获取当前类的注解的信息
        annotationmetadata annotationmetadata = metadatareader.getannotationmetadata();
        system.out.println("annotationmetadata: "+annotationmetadata);
        //输出结果:annotationmetadata: com.example.test.bean.color

        //获取当前正在扫描的类的类信息
        classmetadata classmetadata = metadatareader.getclassmetadata();
        system.out.println("classmetadata: "+classmetadata);
        //输出结果: classmetadata: com.example.test.bean.color

        //获取当前类资源(类的路径)
        resource resource = metadatareader.getresource();
        system.out.println("resource: "+resource);
        //输出结果:resource: file [d:\idea\demo-02\target\classes\com\example\test\bean\color.class]


        //获取类名
        string classname = classmetadata.getclassname();
        system.out.println("classname: "+classname);
        //输出结果:classname: com.example.test.bean.color
        class<?> forname = null;
        try {
            forname = class.forname(classname);
            if (color.class.isassignablefrom(forname)) {
                // 如果是color的子类,就加载到ioc容器
                return true;
            }
        } catch (classnotfoundexception e) {
            e.printstacktrace();
        }

        system.out.println("========mtytypefilter===========");
        return false;
    }
}
5. @componentscans
可以一次声明多个@componentscan
@retention(retentionpolicy.runtime)
@target(elementtype.type)
@documented
@repeatable(componentscans.class)  //指定componentscan可以被componentscans作为数组使用
public @interface componentscan {
}


@retention(retentionpolicy.runtime)
@target(elementtype.type)
@documented
public @interface componentscans {

	componentscan[] value();

}
@componentscans(value = { @componentscan(value = "com.example.test"),
@componentscan(value = "com.example.test", includefilters = {
@filter(type = filtertype.custom, value = mtytypefilter.class) }) })
public class mainconfig {
@bean(name = "pers", initmethod = "init", destroymethod = "destory")
public person person() {
return new person();
}
}6. spring boot处理@componentscan源码分析
spring创建bean对象的基本流程是先创建对应的beandefinition对象,然后在基于beandefinition对象来创建bean对象,springboot也是如此,只不过通过注解创建beandefinition对象的时机和解析方式不同而已。
springboot是通过configurationclasspostprocessor这个beanfactorypostprocessor类来处理。
本演示的demo涉及到4个演示类,分别是:
- 带有@springbootapplication注解的启动类demo02application。
- 带有@restcontroller注解的类hellocontroller。
- 带有@configuration注解且有通过@bean注解来创建addinterceptors的方法的mymvcconfig类。
- account实体类无任何注解。
本文的最后会贴出所有代码。先从启动类为入口,springboot启动类如下:
@springbootapplication
public class demo02application {

    public static void main(string[] args) {
        //1、返回我们ioc容器
        configurableapplicationcontext run = springapplication.run(demo02application.class, args);
	}
}
从:
springapplication.run(demo02application.class, args);
一路断点到核心方法
springapplication.configurableapplicationcontext run(string... args)
run方法干了两件事:
- 创建springapplication对象
- 利用创建好的springapplication对象调用run方法
 public configurableapplicationcontext run(string... args) {
        long starttime = system.nanotime();
        defaultbootstrapcontext bootstrapcontext = this.createbootstrapcontext();
        configurableapplicationcontext context = null;
        this.configureheadlessproperty();
        //初始化监听器
        springapplicationrunlisteners listeners = this.getrunlisteners(args);
        //发布applicationstartingeven
        listeners.starting(bootstrapcontext, this.mainapplicationclass);

        try {
        	 //装配参数和环境
            applicationarguments applicationarguments = new defaultapplicationarguments(args);
            //发布applicationenvironmentpreparedevent
            configurableenvironment environment = this.prepareenvironment(listeners, bootstrapcontext, applicationarguments);
            this.configureignorebeaninfo(environment);
            banner printedbanner = this.printbanner(environment);
            //创建applicationcontext,并装配
            context = this.createapplicationcontext();
            context.setapplicationstartup(this.applicationstartup);
            //发布applicationpreparedevent
            this.preparecontext(bootstrapcontext, context, environment, listeners, applicationarguments, printedbanner);
            this.refreshcontext(context);
            this.afterrefresh(context, applicationarguments);
            duration timetakentostartup = duration.ofnanos(system.nanotime() - starttime);
            if (this.logstartupinfo) {
                (new startupinfologger(this.mainapplicationclass)).logstarted(this.getapplicationlog(), timetakentostartup);
            }
			//发布applicationstartedeven
            listeners.started(context, timetakentostartup);
            //执行spring中@bean下的一些操作,如静态方法
            this.callrunners(context, applicationarguments);
        } catch (throwable var12) {
            this.handlerunfailure(context, var12, listeners);
            throw new illegalstateexception(var12);
        }

        try {
            duration timetakentoready = duration.ofnanos(system.nanotime() - starttime);
            listeners.ready(context, timetakentoready);
            return context;
        } catch (throwable var11) {
            this.handlerunfailure(context, var11, (springapplicationrunlisteners)null);
            throw new illegalstateexception(var11);
        }
    }
重点方法一:本方法法实现的重点功能:
- 本
demo是web工程,springboot通过反射创建上下文context:annotationconfigservletwebserverapplicationcontext类 - 在构建context的无参构造方法中构建成员变量reader=new annotatedbeandefinitionreader(this),在annotatedbeandefinitionreader的无参构造方法中会beanfactory对象,并向beanfactory中注册5个beandefinition对象,重点关注configurationclasspostprocessor。
context = this.createapplicationcontext();
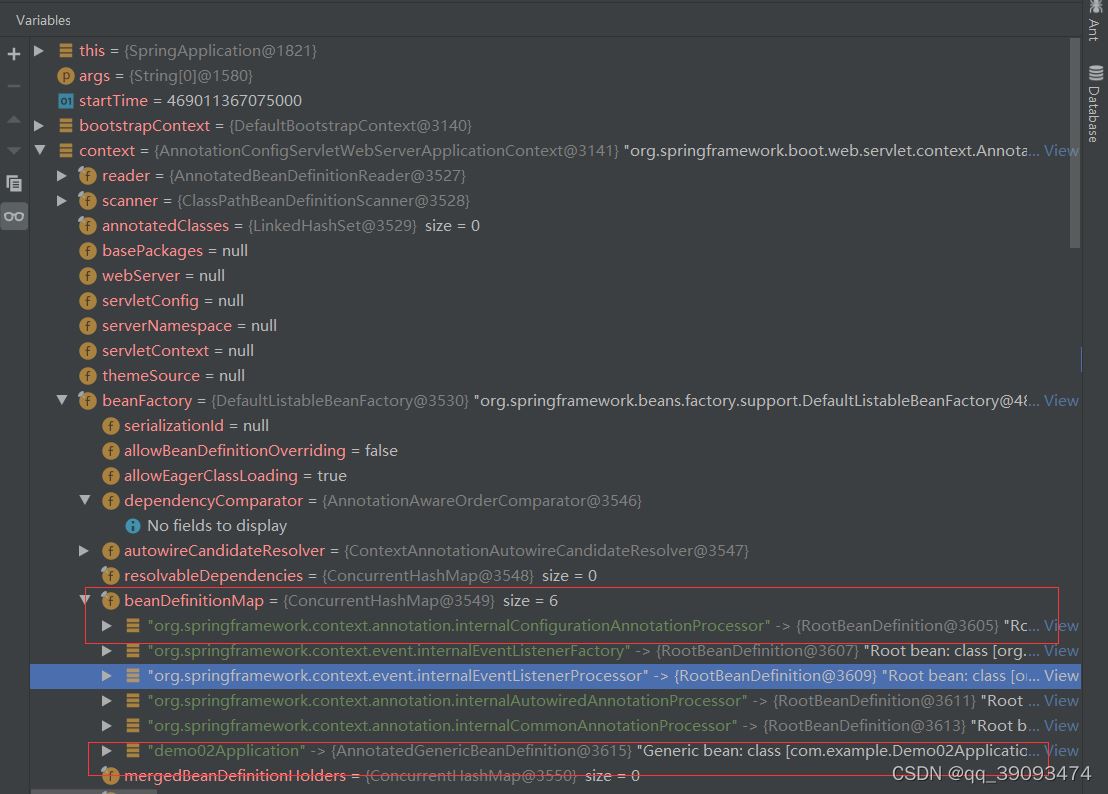
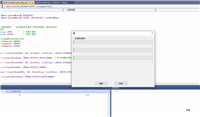
重点方法二:本方法实现的重点功能本方法会构建启动类demo02application对应的beandefinition对象,并注册到beanfactory中,此时的context对象可见下图
this.preparecontext(context, environment, listeners, applicationarguments, printedbanner);
重点方法三:本方法实现的重点功能该方法实际调用applicationcontext的refresh方法,本文后面只会分析configurationclasspostprocessor对象的创建和postprocessbeandefinitionregistry方法的执行
    this.refreshcontext(context);
    this.afterrefresh(context, applicationarguments);
this.preparecontext(context, environment, listeners, applicationarguments, printedbanner);
代码执行后的截图如下:
configurationclasspostprocessor实现beanfactorypostprocessor,关于beanfactorypostprocessor扩展接口的作用在此处不做介绍。
configurationclasspostprocessor对象的创建和方法执行的断点如下:
this.refreshcontext(context);–> abstractapplicationcontext.refresh() --> invokebeanfactorypostprocessors() -->postprocessorregistrationdelegate.invokebeanfactorypostprocessors()->invokebeandefinitionregistrypostprocessors()
下面重点看configurationclasspostprocessor类的postprocessbeandefinitionregistry()方法如何处理@componentscan注解:
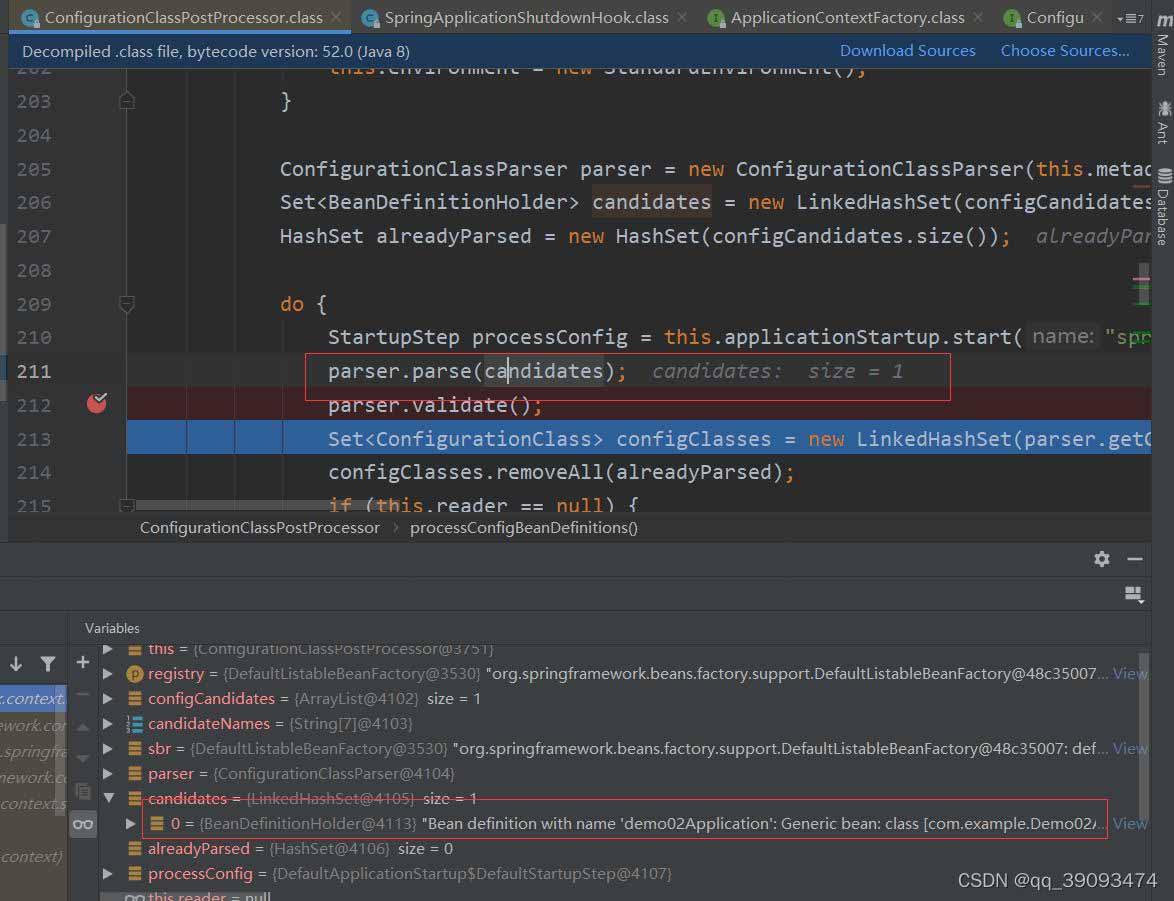
同过源代码发现最终是由configurationclassparser的解析类来处理,继续查看configurationclassparser.doprocessconfigurationclass
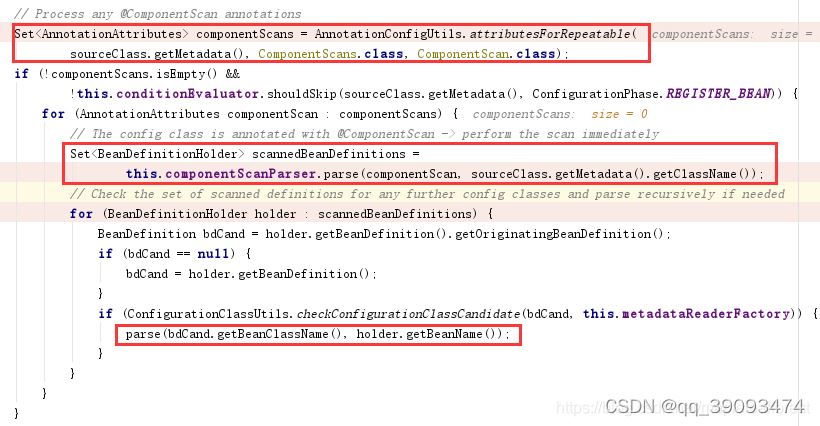
原来在这里对@componentscan注解做了判断,上面一段代码做了核心的几件事:
- 扫描@componentscan注解包下面的所有的可自动装备类,生成beandefinition对象,并注册到beanfactory对象中。
- 通过deferredimportselectorhandler处理@enableautoconfiguration注解,后续会有专文介绍。
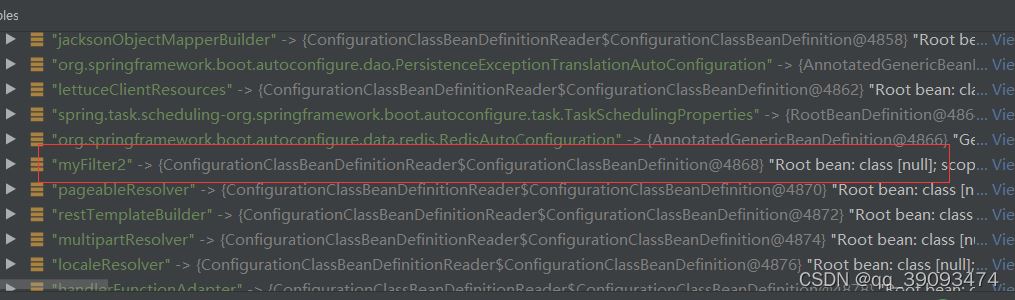
- 将带有@configuration 注解的类解析成configurationclass对象并缓存,后面创建@bean注解的bean对象所对应的beandefinition时会用到到此为止myfilter2对应的beandefinition已创建完毕。
- 如下图:
总结
以上为个人经验,希望能给大家一个参考,也希望大家多多支持代码网。


发表评论