c:\pythoncode\new\deleteyemeiyejiao.py
全部代码:
import wx
import docx
import os
class mainframe(wx.frame):
def __init__(self):
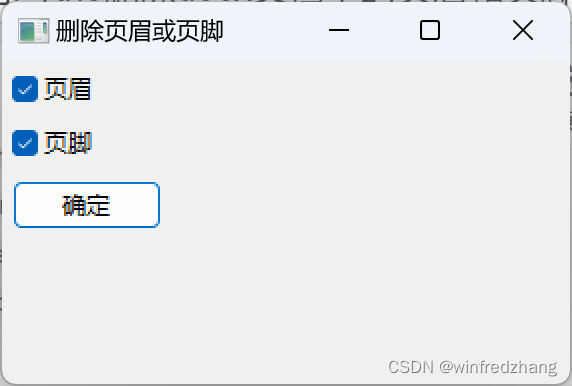
wx.frame.__init__(self, none, title="删除页眉或页脚", size=(300, 200))
panel = wx.panel(self)
# 创建复选框和按钮
self.header_checkbox = wx.checkbox(panel, label="页眉")
self.footer_checkbox = wx.checkbox(panel, label="页脚")
self.delete_button = wx.button(panel, label="确定")
# 绑定按钮点击事件
self.delete_button.bind(wx.evt_button, self.on_delete)
# 创建布局
sizer = wx.boxsizer(wx.vertical)
sizer.add(self.header_checkbox, 0, wx.all, 5)
sizer.add(self.footer_checkbox, 0, wx.all, 5)
sizer.add(self.delete_button, 0, wx.all, 5)
panel.setsizer(sizer)
def on_delete(self, event):
# 打开选择文件对话框
dlg = wx.filedialog(self, "选择要打开的文档", style=wx.fd_open | wx.fd_file_must_exist, wildcard="word文档 (*.docx)|*.docx")
if dlg.showmodal() == wx.id_ok:
# 获取用户选择的文件路径
filepath = dlg.getpath()
dlg.destroy()
# 打开文档
doc = docx.document(filepath)
# 删除页眉
if self.header_checkbox.getvalue():
for section in doc.sections:
header = section.header
for paragraph in header.paragraphs:
paragraph.text = ""
# 删除页脚
if self.footer_checkbox.getvalue():
for section in doc.sections:
footer = section.footer
for paragraph in footer.paragraphs:
paragraph.text = ""
# 保存修改后的文档到新文件
dirname = os.path.dirname(filepath)
filename = os.path.basename(filepath)
new_filename = "modified_" + filename
new_filepath = os.path.join(dirname, new_filename)
doc.save(new_filepath)
wx.messagebox("页眉或页脚删除成功!新文件保存在:" + new_filepath, "提示", wx.ok | wx.icon_information)
else:
dlg.destroy()
# 创建应用程序对象
app = wx.app()
frame = mainframe()
frame.show()
# 运行应用程序
app.mainloop()
步骤:
安装依赖库
首先,我们需要安装两个python库:wxpython和python-docx。可以使用以下命令进行安装:
pip install wxpython
pip install python-docx
创建gui应用程序
我们将使用wxpython模块创建一个简单的gui应用程序,用于选择要处理的docx文档、选择要删除的页眉和页脚,并提供一个"确定"按钮来触发处理操作。
在应用程序中,我们将使用wx.frame类创建一个窗口,包含两个复选框(“页眉"和"页脚”)和一个按钮(“确定”)。当用户选择了要删除的页眉或页脚并点击"确定"按钮后,程序将打开文档并删除相应的内容。
# 创建复选框和按钮
self.header_checkbox = wx.checkbox(panel, label="页眉")
self.footer_checkbox = wx.checkbox(panel, label="页脚")
self.delete_button = wx.button(panel, label="确定")

# 绑定按钮点击事件
self.delete_button.bind(wx.evt_button, self.on_delete)
处理文档
在点击"确定"按钮后,我们将使用python-docx库打开选择的docx文档,并根据用户的选择删除页眉和/或页脚。
对于每个文档节(section),我们可以通过section.header和section.footer属性访问页眉和页脚。我们可以遍历每个段落(paragraph)并将其内容设置为空字符串,从而删除页眉和页脚的内容。
# 删除页眉
if self.header_checkbox.getvalue():
    for section in doc.sections:
        header = section.header
        for paragraph in header.paragraphs:
            paragraph.text = ""

# 删除页脚
if self.footer_checkbox.getvalue():
    for section in doc.sections:
        footer = section.footer
        for paragraph in footer.paragraphs:
            paragraph.text = ""
保存处理后的文档
为了保存处理后的文档,我们将在原始文件的路径下创建一个新的文件,并在文件名前添加"modified_"前缀。这样可以避免覆盖原始文件。我们使用os.path模块来获取原始文件的路径和文件名,并构造新的文件路径。
最后,我们使用doc.save()方法将修改后的文档保存到新文件中。
# 保存修改后的文档到新文件
dirname = os.path.dirname(filepath)
filename = os.path.basename(filepath)
new_filename = "modified_" + filename
new_filepath = os.path.join(dirname, new_filename)
doc.save(new_filepath)
结果:
总结:
本文介绍了如何使用python和wxpython模块创建一个简单的gui应用程序,帮助我们删除docx文档中的页眉和页脚。通过选择要删除的内容并点击"确定"按钮,我们可以轻松地处理文档,而无需手动编辑每个文档。
到此这篇关于python删除docx文档中的页眉和页脚的示例代码的文章就介绍到这了,更多相关python删除docx文档页眉和页脚内容请搜索代码网以前的文章或继续浏览下面的相关文章希望大家以后多多支持代码网!


发表评论