1. 前言
相信大家学习springboot到现在,使用maven构建项目时,会在pom.xml文件中引入各种各样的依赖,那么我们如何将自己常用的一些工具类库进行封装成starter或者sdk供其他项目使用呢,本博客就会带着大家一步一步创建自定义的sdk依赖
2. 前置准备
本博客基于的java开发环境如下:
- jdk17
- springboot3.2.6(springboot2.x的项目此处不适用!!!)
3. 开发步骤
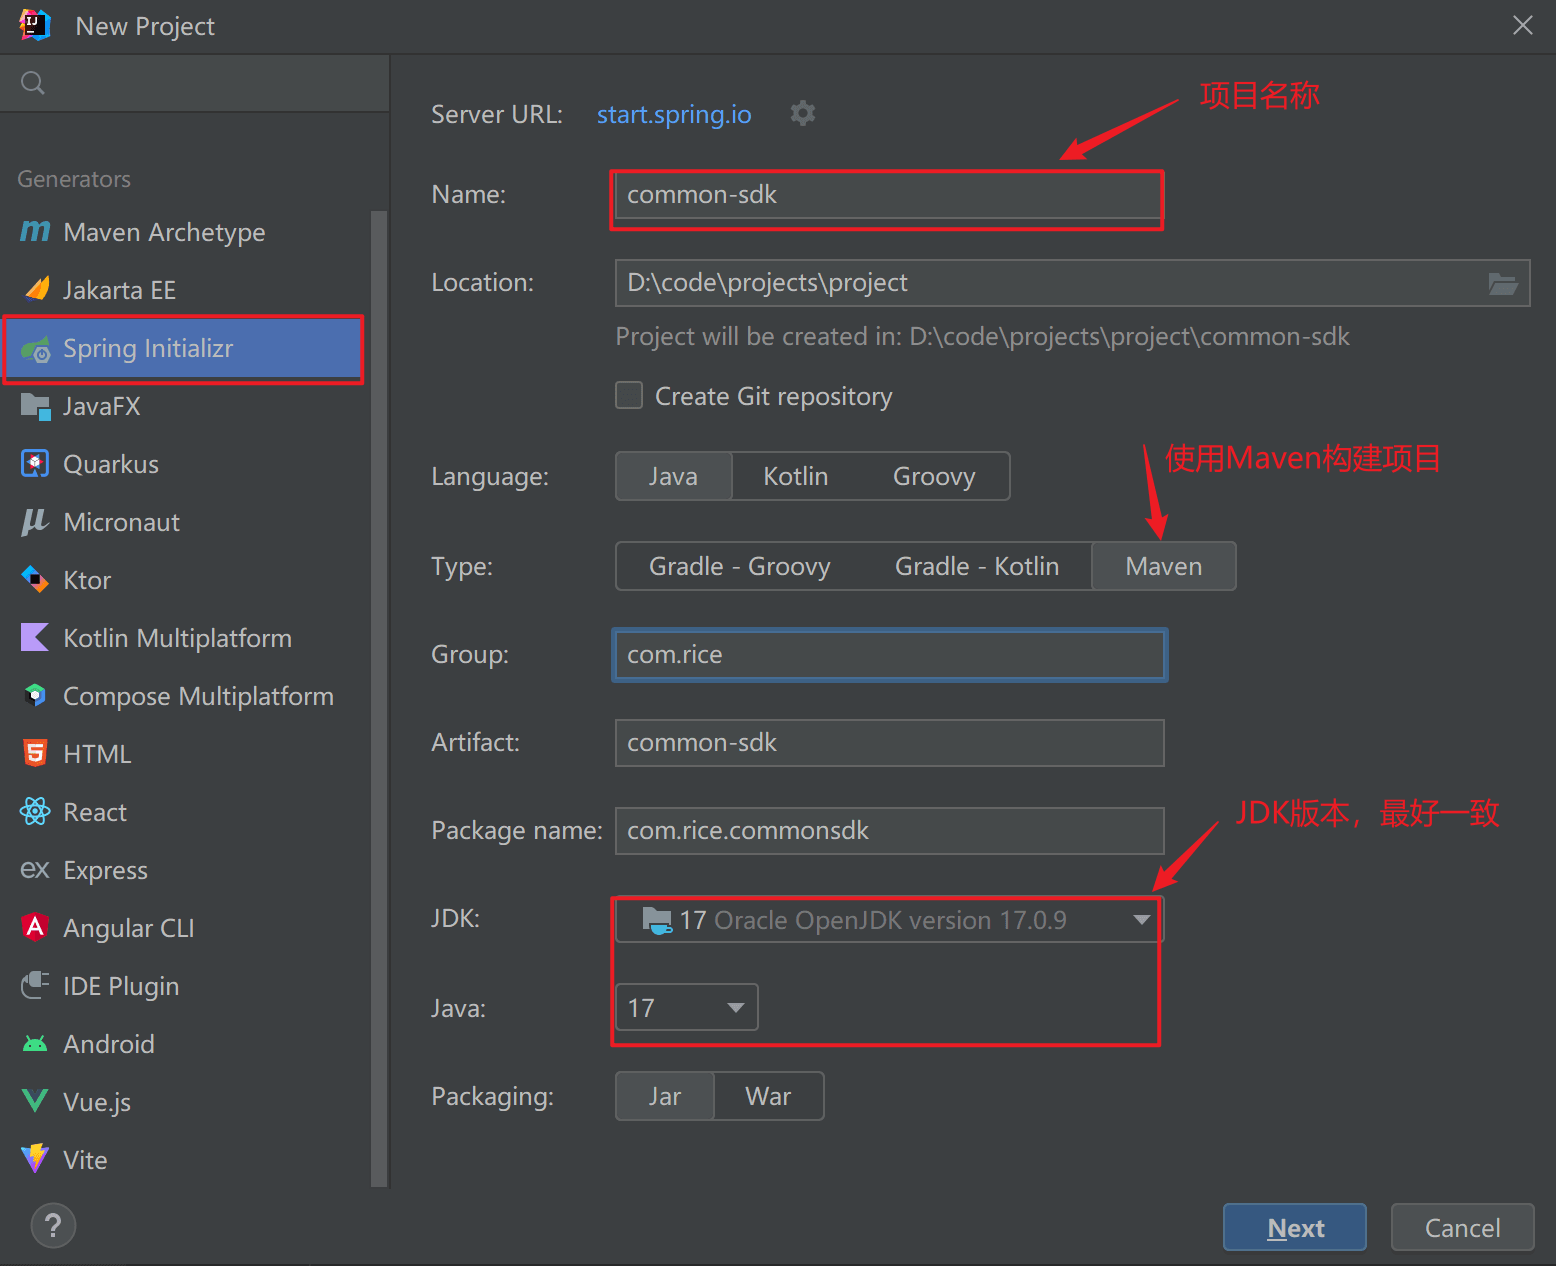
3.1 创建项目
此处使用idea内置spring initializr初始化工具快速创建项目:
- 填写项目配置:
- 设置springboot版本以及依赖
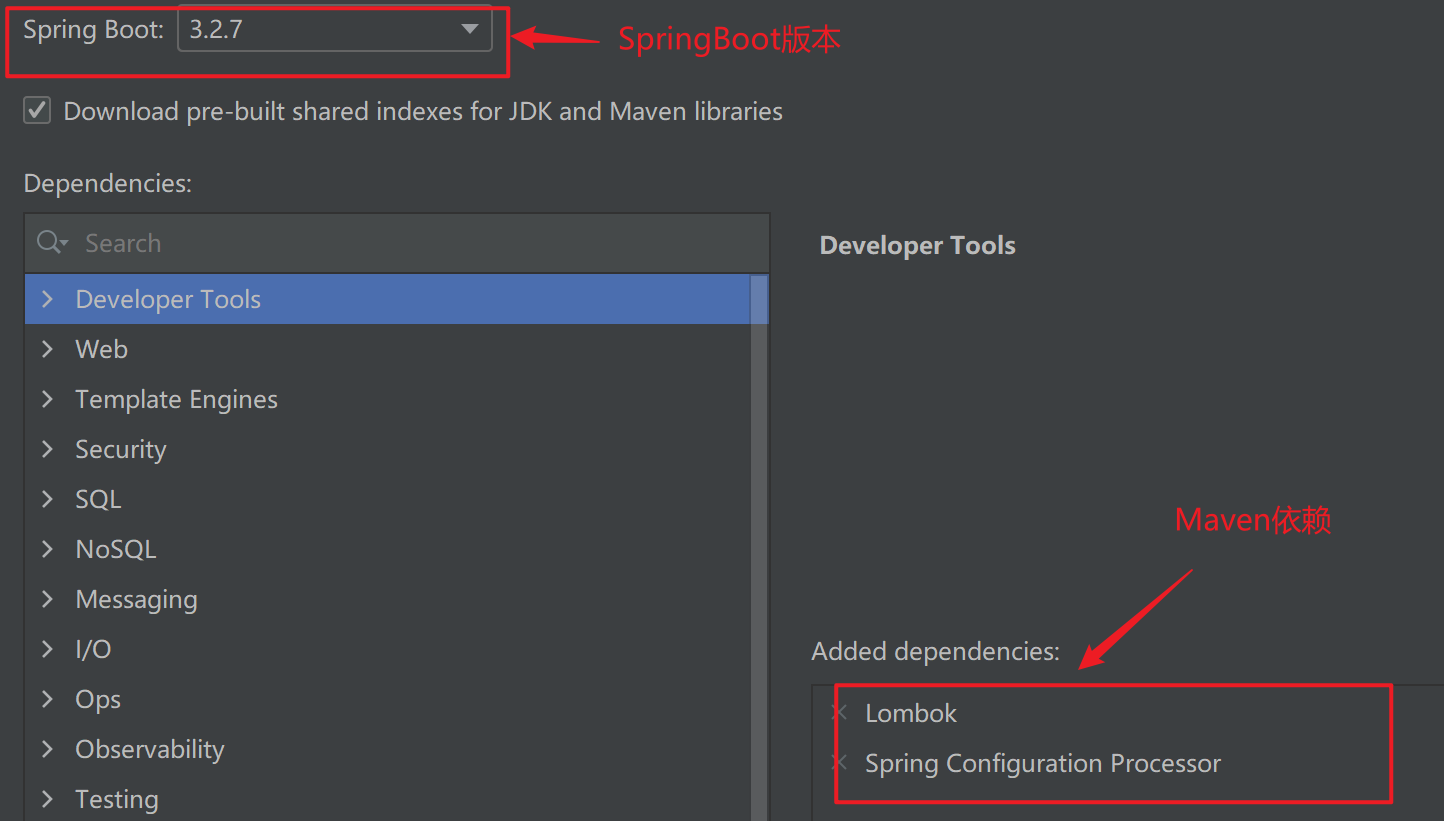
此处一定要勾选(spring configuration processor依赖)
- 点击create创建项目即可!
3.2 修改无关配置
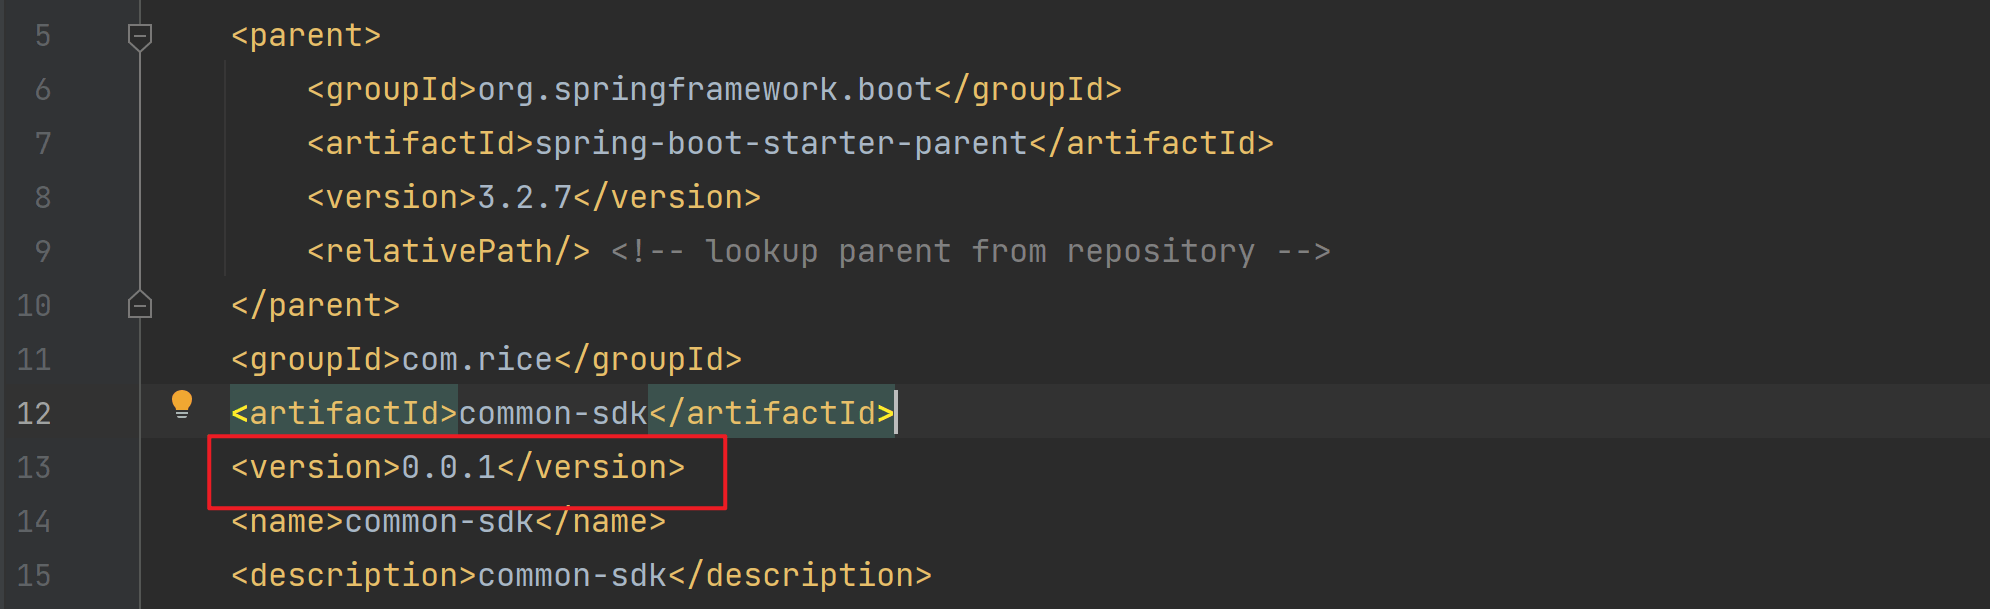
3.2.1 设置项目版本
将pom.xml文件中的项目版本改写成:<version>0.0.1<version>
3.2.2 删除maven的build插件
将如下内容从pom.xml文件中删除

3.2.3 删除启动类
由于这不是一个web项目,因此我们需要将启动类给删除
3.3 编写配置类
3.3.1 编写属性配置类
例如,下面该类用于读取配置文件中形如rice.executors.fixedpoolsize=10的变量
/**
 * 线程池属性类
 * @author 米饭好好吃
 */
@configuration
@configurationproperties(prefix = "rice.executors")
@data
public class executorproperties {
    private int fixedpoolsize; // num of threads
}
3.3.2 编写业务类
@data
public class fixedexecutortemplate {
    private executorservice executorservice;

    public fixedexecutortemplate(int fixedpoolsize) {
        this.executorservice = executors.newfixedthreadpool(fixedpoolsize);
    }

    public void submit(runnable task) {
        this.executorservice.submit(task);
    }
}
3.3.3 编写配置类
该类就用于注入不同的属性配置类对象,读取配置文件中的信息,然后创建出不同的bean实例供其他项目使用,本质就是省去了其余项目手动创建的麻烦!!!
/**
 * 项目配置类
 * @author 米饭好好吃
 */
@autoconfiguration
@enableconfigurationproperties({executorproperties.class})
public class commonconfig {
    @resource
    private executorproperties executorproperties;

    @bean
    public fixedexecutortemplate executortemplate() {
        return new fixedexecutortemplate(executorproperties.getfixedpoolsize());
    }
}
3.4 设置配置文件
下面我们还需要给其余项目在application.yml等文件中给予友好提示,类似于下图这样的效果:

详细步骤:
- 在 resources目录下创建
meta-inf/spring两级子目录 - 然后在spring目录下创建文件名为
org.springframework.boot.autoconfigure.autoconfiguration.imports的文件,如果配置无误应该在idea中会有识别提示:

- 在该文件中配置项目配置类的路径,例如此处就是:
com.rice.commonsdk.commonconfig

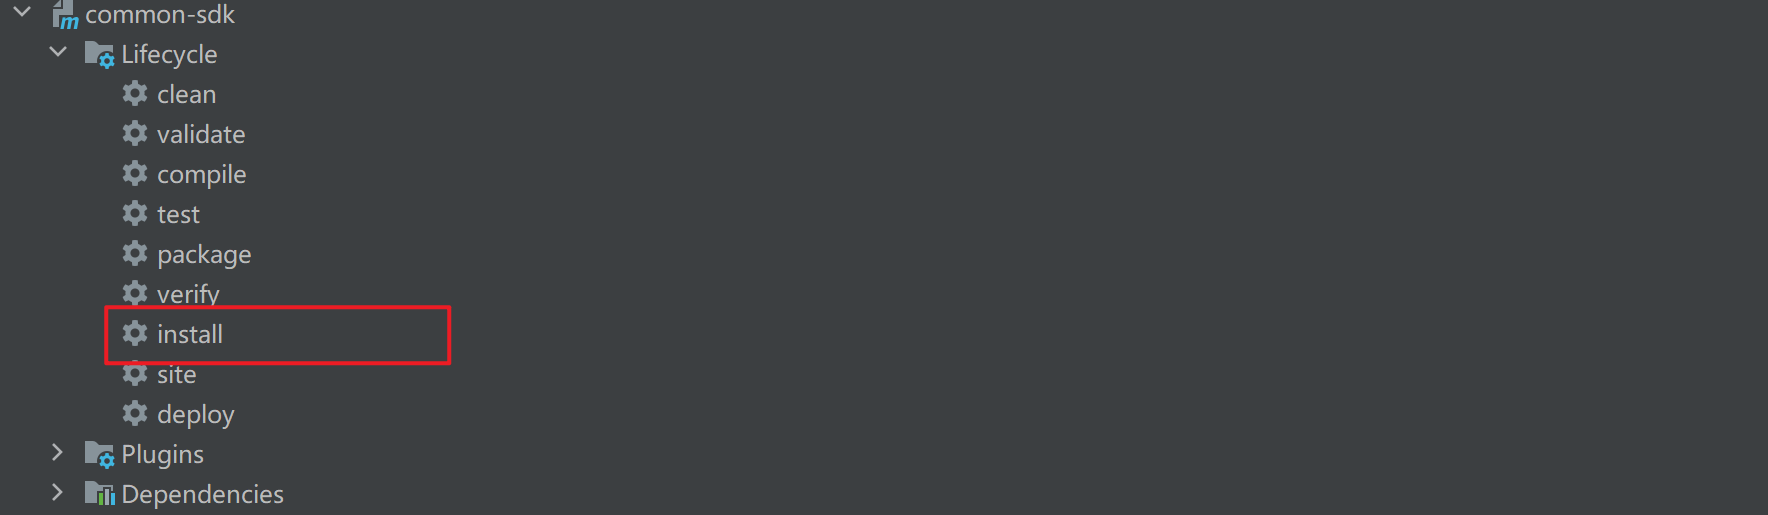
3.5 使用maven构建成jar包
接下来我们就可以借助maven的install命令将项目构建成jar包,供其余项目引入:
如果出现以下错误,说明是测试的问题,只要将项目中的test目录删除或者在maven配置面板中选择toggle skip test model选项即可省略执行测试的步骤:
构建完成后就可以在本地的maven仓库目录找到所在jar包,默认路径为:c:\用户目录\.m2\repository\包名

3.6 测试
我们在别的项目中就可以引入jar包依赖观察能够正常使用:

此处我们也能在pom.xml文件中看到提示了:

编写控制类测试:
@restcontroller
@requestmapping("/test")
public class clientcontroller {

    @resource
    private fixedexecutortemplate fixedexecutortemplate;

    @getmapping("/fixed")
    public void testfixed() {
        for (int i = 0; i < 10; i++) {
            int j = i;
            fixedexecutortemplate.submit(() -> {
                system.out.println(j);
            });
        }
    }
}
到此这篇关于springboot3.x中自定义开发通用sdk的实现的文章就介绍到这了,更多相关springboot3.x通用sdk内容请搜索代码网以前的文章或继续浏览下面的相关文章希望大家以后多多支持代码网!


发表评论