一、windows编程基础
windows操作系统提供了丰富的api,用于窗口管理、消息传递和图形处理。为了进行后台窗口操作,我们需要理解以下几个关键组件:
- win32 api:微软提供的底层api,允许对操作系统的深入访问。
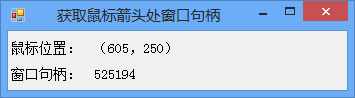
- 窗口句柄 (hwnd):用于标识windows窗口的唯一标识符。
- 设备上下文 (device context, dc):用于绘图的环境,由系统定义。
二、c#与win32 api的交互
c#语言本身并不直接支持win32 api,但通过p/invoke机制,c#能够调用windows api函数,实现对系统资源的操作。首先,我们需要了解如何获取后台窗口的句柄。

1. 获取窗口句柄
我们可以使用findwindow函数通过窗口类名和窗口标题来获取窗口句柄。如果只知道部分信息,还可以使用enumwindows函数枚举所有窗口并进行条件筛选。
using system;
using system.runtime.interopservices;

class windowinteractor
{
    [dllimport("user32.dll", setlasterror = true)]
    private static extern intptr findwindow(string lpclassname, string lpwindowname);

    public intptr getwindowhandle(string windowname)
    {
        return findwindow(null, windowname);
    }

    // example usage
    // var handle = getwindowhandle("untitled - notepad");
}
注意:findwindow的调用能够获取窗口的句柄,仅当窗口标题是已知的情况下。
2. 获取设备上下文
一旦我们获取了窗口的句柄,就可以获取该窗口的设备上下文,这对后续的截图操作至关重要。
[dllimport("user32.dll")]
private static extern intptr getdc(intptr hwnd);

[dllimport("user32.dll")]
private static extern int releasedc(intptr hwnd, intptr hdc);

public intptr getwindowdc(intptr hwnd)
{
    return getdc(hwnd);
}
三、从后台窗口获取截图
为了从后台窗口获取图像,首先需要将窗口内容绘制到位图中。我们可以使用gdi+库来实现这个功能。
1. 使用gdi+进行截图
gdi+提供了更高层的接口来处理图形操作,包括创建位图(bitmap)、绘制等功能。在c#中,我们将结合gdi+和win32 api来截取后台窗口的图像。
using system.drawing;

public bitmap capturewindow(intptr hwnd)
{
    // get window rectangle
    rect rect;
    getwindowrect(hwnd, out rect);

    // create compatible bitmap
    bitmap bmp = new bitmap(rect.width, rect.height);
    using (graphics gfxbmp = graphics.fromimage(bmp))
    {
        intptr hdcbitmap = gfxbmp.gethdc();

        // bitblt function to copy pixel data
        bitblt(hdcbitmap, 0, 0, rect.width, rect.height, hdc, 0, 0, ternaryrasteroperations.srccopy);

        gfxbmp.releasehdc(hdcbitmap);
    }
    return bmp;
}

[dllimport("gdi32.dll")]
private static extern bool bitblt(intptr hobject, int nxdest, int nydest, int nwidth, int nheight, intptr hobjsource, int nxsrc, int nysrc, int dwrop);
在上述代码中,bitblt函数是关键,它用于将窗口内容从设备上下文复制到位图中。
2. gdi+与bitblt函数详解
bitblt函数所需的参数包括目的设备上下文、源设备上下文和几何参数。srccopy参数指定了副本操作为直接复制。
四、在图像中寻找指定图标
这部分内容涉及图像处理技术。opencv是一个强大且流行的计算机视觉库,可以用于模式识别和图像搜索,即在图像中寻找子图像。
1. opencv与c#集成
可以使用emgu cv或opencvsharp库,这些库将opencv封装为.net兼容接口。
using opencvsharp;

public point findiconinimage(bitmap screenshot, bitmap icon)
{
    // convert bitmap images to opencv matrices
    mat screenmat = bitmapconverter.tomat(screenshot);
    mat iconmat = bitmapconverter.tomat(icon);

    // use template matching
    mat result = new mat();
    cv2.matchtemplate(screenmat, iconmat, result, templatematchmodes.ccoeffnormed);

    // find the best match
    double minval, maxval;
    point minloc, maxloc;
    cv2.minmaxloc(result, out minval, out maxval, out minloc, out maxloc);

    if (maxval > 0.8)
    {
        return maxloc;
    }
    throw new exception("icon not found in image.");
}
上面的代码使用模板匹配的方法在截取的窗口图像中寻找指定图标的位置,并返回其坐标。
2. 模板匹配原理
模板匹配是一种线性滤波方法,计算模板与图像不同位置的相似度。结果图中最大值的坐标即为匹配的位置。
五、实际应用与优化
图像搜索与自动化工具在以下几个方面具有广泛应用:
- 用户界面测试:自动执行应用程序操作并捕获结果,用于回归测试。
- 视觉算法优化:在游戏机器人中,识别特定的界面元素并做出响应。
- 多线程应用:在使用cpu密集型应用时,充分利用多核处理器实现并行处理。
优化建议:
- 使用更高效的匹配算法:如多尺度模板匹配,以提高在不同分辨率下的匹配率。
- 提高图像处理速度:通过减少搜索区域、调整模板大小或切换算法来提高效率。
- 异常处理:增强错误处理和日志记录,以提高程序的健壮性。
六、总结
通过结合win32 api和现代图像处理库,c#程序员能够高效地获取和操作后台窗口。本篇文章详细探讨了从窗口绑定、截图到图标搜索的完整技术流程,并提供了示例代码供开发者参考。在实践中,需根据具体应用场景,进行适当的代码优化和错误处理,以达到最适的应用效果。
以上就是基于c#实现windows后台窗口操作与图像处理技术分析的详细内容,更多关于c# windows窗口操作与图片分析的资料请关注代码网其它相关文章!


发表评论