安装
npm install compressorjs
使用
在使用elementui或者其他ui框架的上传组件时,都会有上传之前的钩子函数,在这个函数中可以拿到原始file,这里我用vantui的上传做演示
afterread 函数是上传之前的钩子,可以获取到原始file
<template>
  <div>
    <van-uploader
      :max-count="prop.limit"
      v-model="state.filelist"
      :after-read="afterread"
      :before-read="beforeread"
      @delete="deletefile"
    />
  </div>
</template>
<script setup>
import { reactive, defineemits, defineprops, watch } from 'vue'
import { fileuploadfun } from '@/api/index.js'
import { usecustomfieldvalue } from '@vant/use'
import { toast } from 'vant'
import compressor from 'compressorjs'

const prop = defineprops({
  url: {
    type: string,
    default: '',
  },
  limit: {
    type: number,
    default: 5,
  },
})
const emit = defineemits(['onsuccess'])
const state = reactive({
  filelist: [],
})

watch(
  () => prop.url,
  () => {
    if (prop.url) {
      state.filelist = []
      prop.url.split(',').foreach((item) => {
        state.filelist.push({
          url: item,
        })
      })
    }
  }
)

// 文件上传之前对图片进行压缩
const beforeread = (file) => {
  return new promise((resolve, reject) => {
    new compressor(file, {
      // 压缩质量,0-1之间。数字越小,压缩比越高
      quality: 0.2,
      success(result) {
        // 默认返回result是blob类型的文件,可以转成file并返回,交给afterread钩子进行上传
        let newfile = new file([result], file.name, { type: file.type })
        resolve(newfile)
      },
      error(err) {
        reject(err)
      },
    })
  })
}

// 文件上传后触发
const afterread = (file) => {
  file.status = 'uploading'
  file.message = '上传中...'

  fileuploadfun(file.file)
    .then((res) => {
      file.status = 'done'
      file.message = '上传成功'
      let urls = state.filelist.map((i) => i.url)
      urls.pop()
      urls.push(res.data.url)
      // 通知外界上传成功
      emit('onsuccess', urls.join(','))
    })
    .catch(() => {
      state.filelist.pop()
      file.status = 'done'
      toast('上传失败')
    })
}

// 文件删除后触发
const deletefile = () => {
  emit('onsuccess', state.filelist.map((i) => i.url).join(','))
}

// 用于返回信息
usecustomfieldvalue(() => state.filelist.map((item) => item.url).join(','))
</script>
示例
| quality | 原始大小 | 压缩后大小 | 压缩比 | description |
|---|---|---|---|---|
| 0 | 2.12 mb | 114.61 kb | 94.72% | - |
| 0.2 | 2.12 mb | 349.57 kb | 83.90% | - |
| 0.4 | 2.12 mb | 517.10 kb | 76.18% | - |
| 0.6 | 2.12 mb | 694.99 kb | 67.99% | 推荐 |
| 0.8 | 2.12 mb | 1.14 mb | 46.41% | 推荐 |
| 1 | 2.12 mb | 2.12 mb | 0% | 不推荐 |
| nan | 2.12 mb | 2.01 mb | 5.02% | - |
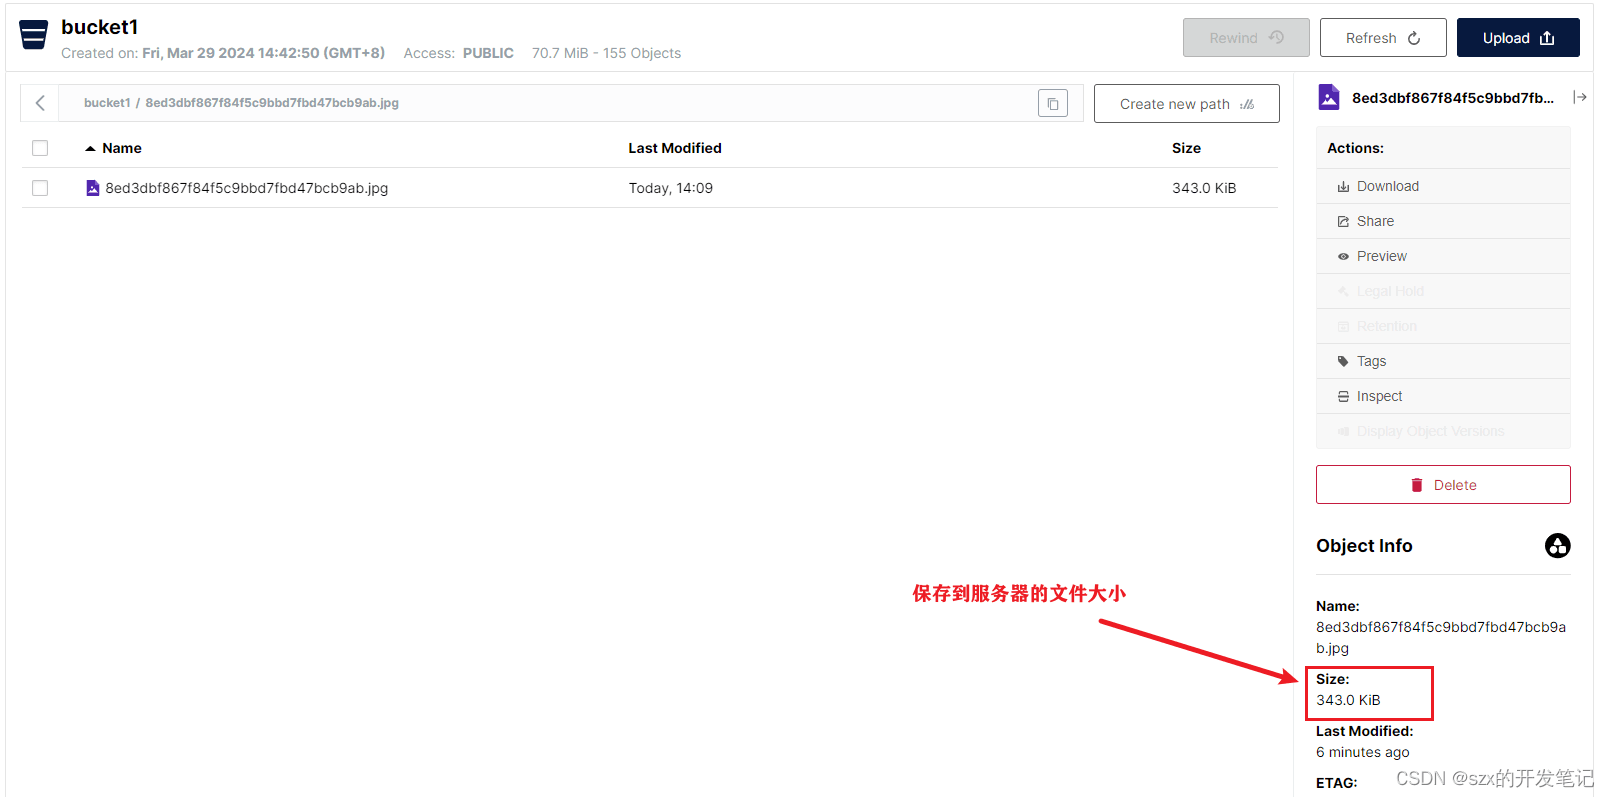
测试效果
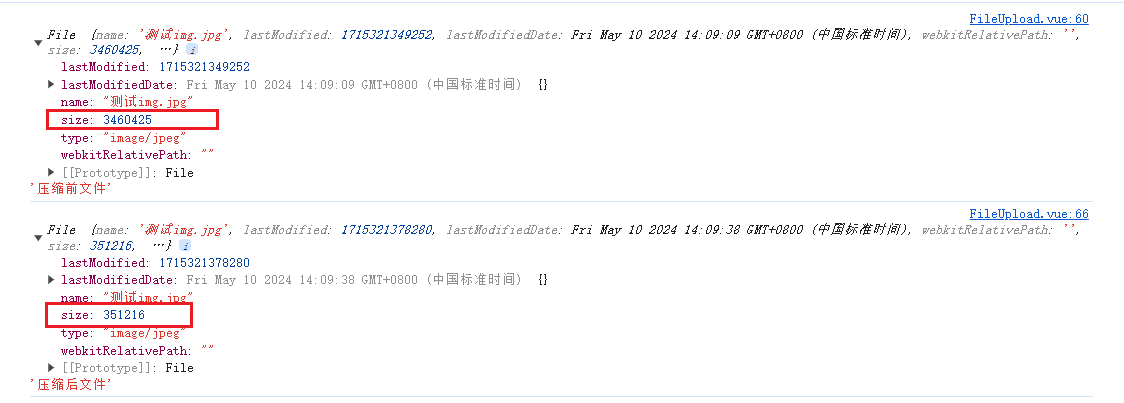
可以看到压缩前的图片大小3.29m,压缩后343kb
下面是前后的图片对比
原图

压缩后的图

总结
到此这篇关于前端使用compressor.js实现图片压缩上传的文章就介绍到这了,更多相关前端compressor.js图片压缩上传内容请搜索代码网以前的文章或继续浏览下面的相关文章希望大家以后多多支持代码网!


发表评论