首先
npm install mqtt --save
一,.第一种方法 (相对比较容易看懂)
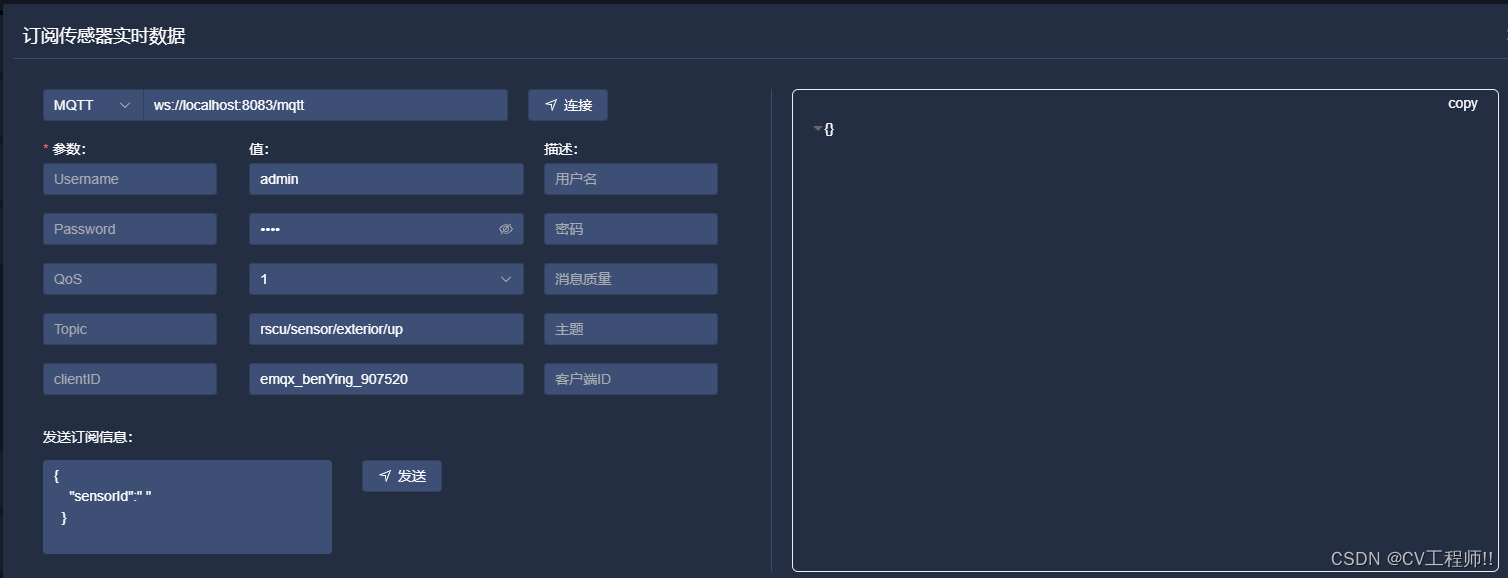
使用场景跟mqttx 类似的测试调试订阅接收信息的工具 (参数都是可配置的)
1.1 新建 mqtt.js
import * as mqtt from "mqtt/dist/mqtt.min";
import { elmessage } from 'element-plus'
class mqtt {
    url = '';// mqtt地址
    topic = ''; //
    clientid = '';
    username = '';
    password = '';//密码
    qos = 0;
    // 初始化类实例
    constructor(params) {
        this.topic = params.topic;
        this.url = params.url;
        // 虽然是mqtt但是在客户端这里必须采用websock的链接方式
        this.clientid = params.clientid;
        this.username = params.username;
        this.password = params.password;
        this.qos = params.qos;
    }

    //初始化mqtt
    init() {
        const options = {
            // protocol: "ws",
            // host: this.url,
            // ws: 8083; wss: 8084
            // port: 8083,
            // endpoint: "/mqtt",
            clean: true,
            connecttimeout: 4000, // 超时时间
            username: this.username,
            password: this.password,
            clientid: this.clientid,
            clean: true,
            connecttimeout: 30 * 1000, // ms
            reconnectperiod: 4000, // ms
        };
//ws://localhost:8083/mqtt  这里组合起来是这种格式的地址 但是我传递过来的地址直接就是完整地址不用组装 所以我才注释上面 options 中的参数
        const connecturl = `${options.protocol}://${options.host}:${options.port}${options.endpoint}`;
//并在这里直接使用地址链接
        this.client = mqtt.connect(this.url, options);
        // 消息处理
        this.client.on("message", (topic, message) => {
            // console.log("收到消息", topic, message);
            // console.log("收到消息" + topic + '发来的' + json.parse(message));
        })
        // 重连处理
        this.client.on('reconnect', (error) => {
            console.log('正在重连:', error)
        });
        // 链接失败
        this.client.on('error', (error) => {
            console.log(error);
        });
    }
    //取消订阅
    unsubscribes() {
        this.client.unsubscribe(this.topic, (error) => {
            if (!error) {
                console.log('取消订阅成功');
            } else {
                // console.log('取消订阅失败');
            }
        });
    }
    //连接
    link() {
        this.client.on('connect', (con) => {
            let qosvalue = this.qos
            this.client.subscribe(this.topic, { qosvalue }, (error, res) => {
                if (!error) {
                    console.log('订阅成功');
                    elmessage({
                        message: '订阅成功',
                        type: 'success',
                    })
                } else {
                    elmessage({
                        message: '订阅失败',
                        type: 'error',
                    })
                    // console.log('订阅失败');
                }
            });
        });
    }
    // 发送信息
    sendmessage(topic, sendmsg) {
        let options = this.qos
        this.client.publish('rscu/sensor/exterior/up/id', sendmsg, options, (err, a) => {
            if (!err) {
                console.log('发送信息成功');
                elmessage({
                    message: '发送信息成功',
                    type: 'success',
                })
            } else {
                console.log('发送信息失败');
            }
        })
    }
    //收到的消息
    get(callback) {
        this.client.on('message', callback);
    }
    //结束链接
    over() {
        this.client.end();
        console.log('结束链接');
    }
}
export default mqtt;
1.2 新建usemqtt.js (当时与对上面 mqtt.js的使用并二次封装)
import mqtt from './mqtt';
import { onunmounted, ref } from 'vue';
import { elmessage } from 'element-plus'
export default function usemqtt() {
    const publicmqtt = ref(null);

    const startmqtt = (val, callback) => {

        //设置订阅地址
        publicmqtt.value = new mqtt(val);
        //初始化mqtt
        publicmqtt.value.init();
        //链接mqtt
        publicmqtt.value.link();
        getmessage(callback);
    };
    // 发送信息 监测有没有链接 没有弹框
    const send = (topic, message) => {
        if (publicmqtt.value) {
            let mqttpayload = json.parse(message);
            mqttpayload.dynamictype = "";
            message = json.stringify(mqttpayload);
            publicmqtt.value.sendmessage(topic, message);
        } else {
            elmessage({
                message: '尚未连接',
                type: 'error',
            });
        }
    }
    const getmessage = (callback) => {
        publicmqtt.value?.get(callback);
    };
    // 断开链接
    const endmqtt = () => {
        if (publicmqtt.value) {
            publicmqtt.value.unsubscribes();
            publicmqtt.value.over();
        }
    }
    onunmounted(() => {
        //页面销毁结束订阅
        if (publicmqtt.value) {
            publicmqtt.value.unsubscribes();
            publicmqtt.value.over();
        }
    });

    return {
        startmqtt,
        send,
        endmqtt
    };
}
1.3页面使用
import usemqtt from '../../../utils/usemqtt'
const { startmqtt, send, endmqtt } = usemqtt();

//链接 订阅 方法  在需要的地方调用  (参数可看第一张效果图上的参数)
function concatmqttfn() {
//校验输入信息
    protocolform.value.validate((valid) => {
        if (valid) {
            let params = {
                topic: protocolformdata.topic,   //主题
                url: protocolformdata.addresspath, //地址
                clientid: protocolformdata.clientid,  //clientid
                username: protocolformdata.account,   //用户名
                password: protocolformdata.password,  //密码
                qos: protocolformdata.qos,  //qos
            }
            startmqtt(params, (topic, message) => {
//因为我在封装js里面 callback 将他接收的信息返回回来了 所以我在这可以直接接收到
                const msg = json.parse(message.tostring());
                requestdata.value = msg
            });
        }
    })
}

//最后在需要关闭链接 取消订阅的地方使用   endmqtt() 方法
二,第二种方法 (适用于不用配置 全局固定死链接地址和订阅主题) 就一个js文件
2.1 新建allmqtt.js
import * as mqtt from "mqtt/dist/mqtt.min";
import { onunmounted, ref, reactive } from 'vue';
import { elnotification } from 'element-plus'
export default function usemqtt() {
let client = ref({
connected: false
});
const notifypromise = ref(promise.resolve())
const qoslist = [0, 1, 2];
// 订阅主题
const topic = ref('rscu/sensor/warning/count')
// 发送主题
const sendtopic = ref('rscu/sensor/warning')
const qos = ref(1)
// 链接地址
const hosturl = ref('')
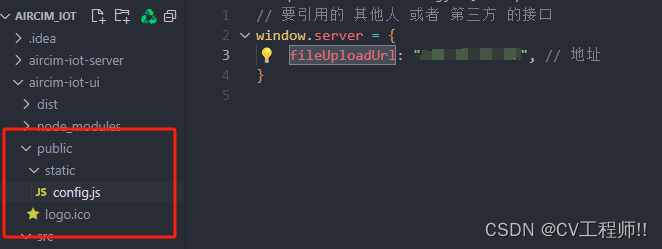
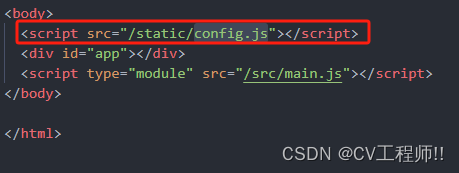
//window.server.fileuploadurl 这个是我在public文件下 static文件下
//创建的config.js 中定义的一个全局静态地址 并在 index.html中引用了他 他不会被打包
//你们也可以直接固定死
hosturl.value = window.server.fileuploadurl ? window.server.fileuploadurl : ''
const connection = reactive({
// 指明协议类型
protocol: "ws",
host: hosturl.value,
// ws: 8083; wss: 8084
port: 8083,
endpoint: "/mqtt",
// for more options, please refer to https://github.com/mqttjs/mqtt.js#mqttclientstreambuilder-options
clean: true,
connecttimeout: 30 * 1000, // ms
reconnectperiod: 4000, // ms
clientid: "emqx_benying_" + math.random().tostring(16).substring(2, 8),
// auth
username: "warning",
password: "root",
});
const messagevalue = ref(false)
// 订阅的信息
const receivenews = ref('')
const time = ref(null)
const startmqtt = (topic, callback) => {
try {
const { protocol, host, port, endpoint, ...options } = connection;
const connecturl = `${protocol}://${host}:${port}${endpoint}`;
client.value = mqtt.connect(connecturl, options);
if (client.value.on) {
// 连接
client.value.on("connect", () => {
console.log("连接成功 successful");
link()
});
// 重连
client.value.on("reconnect", handleonreconnect);
client.value.on("error", (error) => {
// console.log("重连失败 error:", error);
});
// 收到信息 callback返回收到的信息
client.value.on("message", callback);
}
} catch (error) {
// console.log("mqtt.connect error:", error);
}
};
// 订阅
const link = () => {
client.value.subscribe(
topic.value,
'1',
(error, granted) => {
if (error) {
// console.log("订阅失败 error:", error);
return;
} else {
sendmessage()
// console.log("订阅成功 successfully:", granted);
}
}
);
};
// 取消订阅
const unsubscribe = () => {
let qosvalue = qos.value
client.value.unsubscribe(topic.value, { qosvalue }, (error) => {
if (error) {
// console.log("取消订阅失败 error:", error);
return;
}
console.log(`取消订阅成功 topic: ${topic}`);
});
};
// 取消连接
const destroyconnection = () => {
if (client.value.connected) {
try {
client.value.end(false, () => {
console.log("断开连接成功 successfully");
});
} catch (error) {
// console.log("断开连接失败 error:", error);
}
}
};
const retrytimes = ref(0);
const handleonreconnect = () => {
retrytimes.value += 1;
if (retrytimes.value > 5) {
try {
client.value.end();
initdata();
// console.log("connection maxreconnecttimes limit, stop retry");
} catch (error) {
// console.log("handleonreconnect catch error:", error);
}
}
};
const initdata = () => {
client.value = {
connected: false,
};
retrytimes.value = 0;
};
//发送信息
const sendmessage = () => {
client.value.publish('rscu/sensor/warning', '1', '1', (err, a) => {
if (!err) { } else {
}
})
};
return {
startmqtt,
link,
unsubscribe,
destroyconnection,
sendmessage
};
}
2.2使用
// 使用mqtt
import usemqtt from '../../utils/allmqtt.js'
const { startmqtt, link, unsubscribe, destroyconnection } = usemqtt();
//html:
<div class="message-prompt" :class="{ 'change': animateclass == true }">
<el-dropdown trigger="click" @command="messagehandlecommand">
<span style="cursor: pointer;">
<el-badge :value="all" :max="99" class="item">
<el-icon color="#fff" size="20">
<bell />
</el-icon>
</el-badge>
</span>
<template #dropdown>
<el-dropdown-menu>
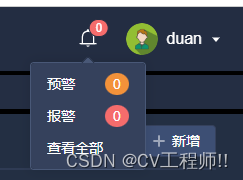
<el-dropdown-item command="warning">
<span>预警</span>
<span class="warning-text num">{{ alarm }}</span>
</el-dropdown-item>
<el-dropdown-item command="alarm">
<span>报警</span>
<span class="alarm-text num">{{ warning }}</span>
</el-dropdown-item>
<el-dropdown-item command="all">
<span>查看全部</span>
</el-dropdown-item>
</el-dropdown-menu>
</template>
</el-dropdown>
</div>
//因为我在链接的时候 顺便调用了他的订阅方法 在js中 所以我在这直接链接
function concatmqttfn() {
startmqtt('', (topic, message) => {
//拿到的数据
const msg = json.parse(message.tostring());
// console.log(msg, 'msg');
alarm.value = msg.data.alarm
all.value = msg.data.all
warning.value = msg.data.warning
});
}
//生命周期销毁的时候 取消 断开
onmounted(() => {
destroyconnection()
concatmqttfn()
});2.3实现效果
总结
到此这篇关于前端mqtt详细使用方法的文章就介绍到这了,更多相关前端mqtt使用内容请搜索代码网以前的文章或继续浏览下面的相关文章希望大家以后多多支持代码网!


发表评论