在开发中 遇到如下需求,要求前端传参并导入excel表格。导入失败,要弹出错误信息,同时导出错误信息的excel表格,导入成功提示信息即可。
1.原生方式导入文件
参考官方文档,把上传需要的属性加加入使用
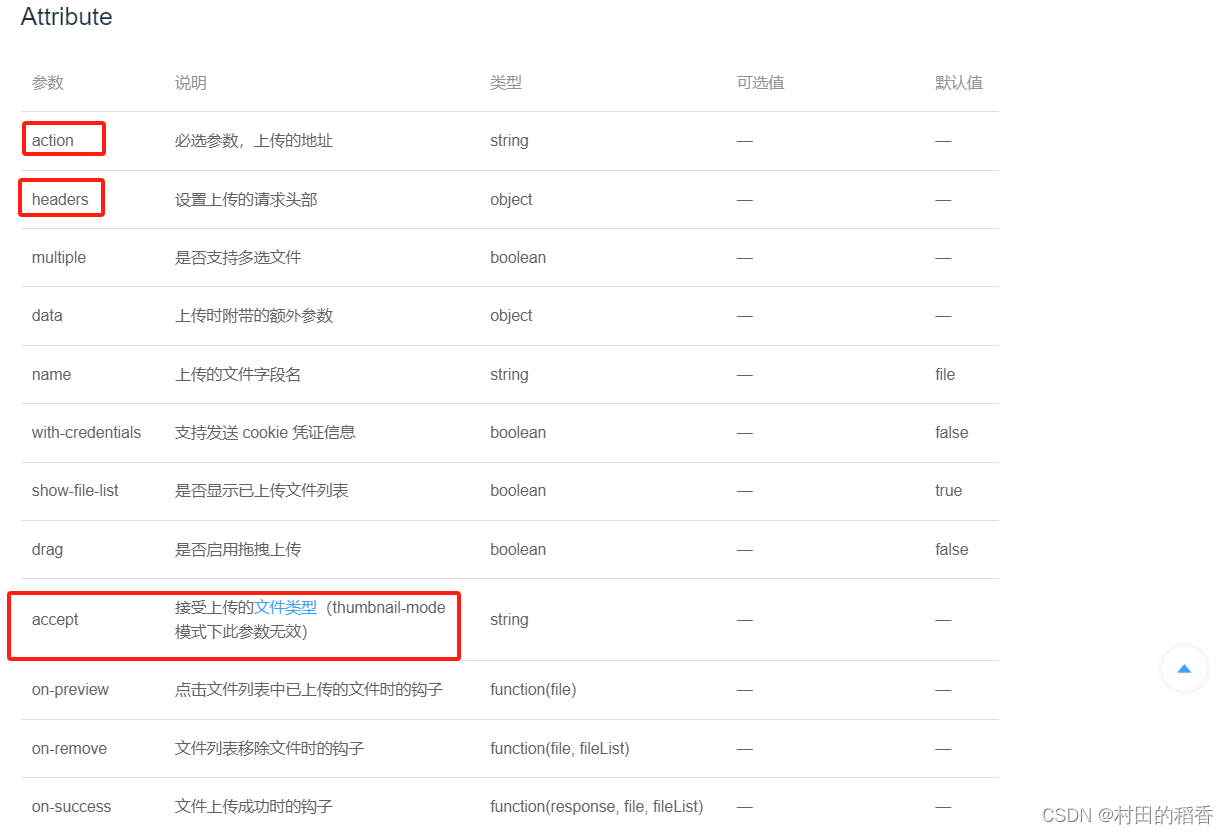
改造之前:
设置headers信息

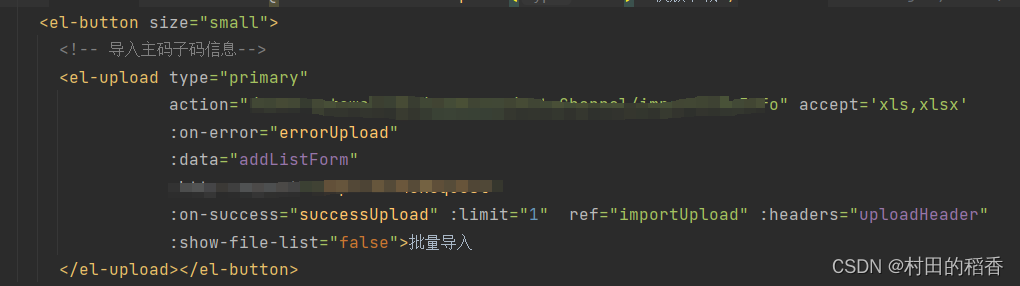
2.自定义导入文件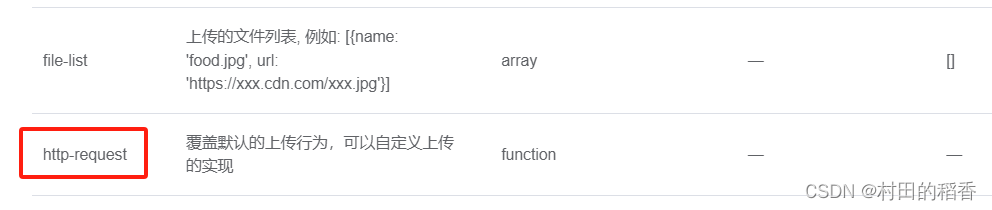
在el-upload标签中加入http-request ,如下:
:http-request="importsoncoderequest" //方法名具体操作方法如下:
importsoncoderequest(option){//option 这个参数会拿取到我们el_upload标签里我们配置信息
      if (this.classid=='' ){
        this.$message.warning("请选择归属模块!")
        return
      }
      if (this.codeid=='' ){
        this.$message.warning("请选择子码!")
        return
      }
      var  data = new  formdata()//自定义 参数类型必须为 formdata格式 此为强制要求
      data.append("file",option.file)
      data.append("classid",this.classid)
      data.append("codeid",this.codeid)
      this.importcommit(data,option,'son')
    },
//导入方法提交
//data :为上传文件的参数, type :因为我有两个导入,我用类型来判断是哪个导入方法不需要去掉即可
importcommit(data,option,type){
axios({
url: `${option.action}`,//取自el-upload标签的action中配置,或者也可以在这里直接写url
method:"post",
data:data,
processdata:false,
contenttype:false,
headers: option.headers,//同理
responsetype: "blob",
datatype: 'json',
}).then(res => {
if (res.data.size==0){
this.$message.success("导入成功!")
if (type=='son'){
//刷新页面操作
}else{
//刷新页面操作
}
}else{
this.errinfoexport(res)
}
this.$refs.importupload.clearfiles()//清除上传成功的文件,非常重要,原因我下文写出来
}).catch(err=>{
//解析错误信息
const filereader = new filereader()
const errinfo =err.response.data
filereader.readastext(err.response.data)
filereader.onloadend = () => {
if (errinfo.type.indexof("application/json") >-1) { // 说明是普通对象数据,包含错误提示信息
const jsondata = json.parse(filereader.result)
// 后台错误信息
this.$confirm(jsondata.message, "提示", {
showcancelbutton: false, //是否显示取消按钮
type: "warning",
}).then(() => {
})
}else{
this.$message.error("导入失败!")
}
this.addlistload = false;
this.loading=false
this.$refs.importupload.clearfiles()
}
});
}, //错误信息导出方法封装
errinfoexport(res){
this.$message.error("导入失败!")
this.addlistload = false;
const filename = decodeuricomponent("错误信息导出");//在这个定义导出文件的文件名
const blob = new blob([res.data], {type: 'application/vnd.openxmlformats-officedocument.spreadsheetml.sheet'});
if (window.navigator.mssaveblob) {
navigator.mssaveblob(blob, filename);
} else {
const elink = document.createelement("a");
elink.style.display = "none";
elink.href = url.createobjecturl(blob);
document.body.appendchild(elink);
elink.setattribute("download", filename);
document.body.appendchild(elink);
elink.click();
document.body.removechild(elink);
window.url.revokeobjecturl(elink.href); // 释放url 对象
}
},注意: 这里的type是根据我们后端代码excelutil工具类中的配置的,无论您的配置是啥,前后端必须要一致,否则导出的excel文档将会是乱码!!

application/vnd.openxmlformats-officedocument.spreadsheetml.sheet此外 :
//这行代码是是必须要使用的
this.$refs.importupload.clearfiles()

//用于清空上传组件中已选择的文件列表。将清空el-upload组件中已选择的文件列表。这个方法通常用于在用户选择了错误的文件或者需要重新选择文件时,清空已选择的文件列表
这样el-upload的自定义上传文件的简单使用就完成了。当然如果只是单纯的上传文件没有其他额外的需求我还是推荐原生方式。
感谢您看到这里,您的阅读就是我继续写作的动力!!能帮到您是我的荣幸,愿我们一同进步,加油!


发表评论