前言
上篇介绍了nginx服务器单向代理和动静分离等相关内容,可参考nginx重写功能和反向代理-csdn博客,这里就ip透传和负载均衡对nginx反向代理做进一步了解。
目录
一、客户端ip透传
1. 概述
在nginx中,代理客户端ip透传是指将客户端的真实ip地址(也称为远程ip地址)传递给后端服务器。这在一些情况下非常有用,例如,当nginx作为反向代理服务器时,我们希望后端服务器能够获取到客户端的真实ip地址,而不是nginx服务器的ip地址。
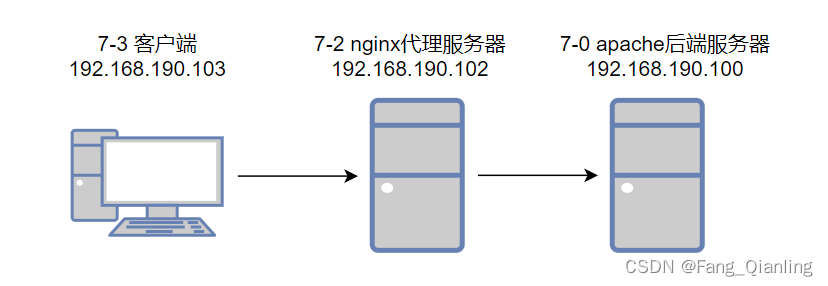
2. 一级代理
2.1 图示
2.2 操作过程
实现目标:7-0服务器日志可以查看到客户端真实地址。
ip未透传前效果:
① 修改代理端7-2配置
[root@localhost ~]# vim /apps/nginx/conf.d/pc.conf
server {
        listen 80;
        server_name www.pc.com;
        root /data/;
        location / {
        proxy_pass http://192.168.190.100;
        }
}
[root@localhost ~]# nginx -t
[root@localhost ~]# nginx -s reload
② 添加后端服务器7-0web文件,开启httpd服务,关闭防火墙,并实时查看访问日志
[root@localhost ~]# cd /var/www/html/
[root@localhost html]# echo welcome 7-0 > index.html
[root@localhost html]# systemctl start httpd
[root@localhost html]# systemctl stop firewalld.service
[root@localhost html]# setenforce 0
[root@localhost html]# tail -f /var/log/httpd/access_log
③ 客户端7-3访问代理服务器
[root@localhost ~]# curl 192.168.190.102
welcome 7-0
④ 观察后端服务器7-0新增日志信息
[root@localhost html]# tail -f /var/log/httpd/access_log
192.168.190.102 - - [27/feb/2024:16:02:18 +0800] "get / http/1.0" 200 12 "-" "curl/7.29.0"
#无法查看到真实客户端地址
配置ip透传:
① 修改代理端7-2配置
[root@localhost ~]# vim /apps/nginx/conf.d/pc.conf
server {
        listen 80;
        server_name www.pc.com;
        root /data/;
        proxy_set_header x-forwarded-for $proxy_add_x_forwarded_for;
#添加客户端ip和反向代理服务器ip到请求报文头部
        location / {
        proxy_pass http://192.168.190.100;
        }
}
[root@localhost ~]# nginx -t
[root@localhost ~]# nginx -s reload
② 修改后端服务器7-1配置
[root@localhost html]# vim /etc/httpd/conf/httpd.conf
196     logformat "%h %l %u %t \"%r\" %>s %b \"%{referer}i\" \"%{user-agent}i\" \"%{x-forwarded-for}i\"" combined
#添加变量x-forwarded-for
[root@localhost html]# systemctl restart httpd
③ 再次访问代理端,查看后端服务器访问日志
[root@localhost html]# tail -f /var/log/httpd/access_log
192.168.190.102 - - [27/feb/2024:16:25:36 +0800] "get / http/1.0" 200 12 "-" "curl/7.29.0" "192.168.190.103"
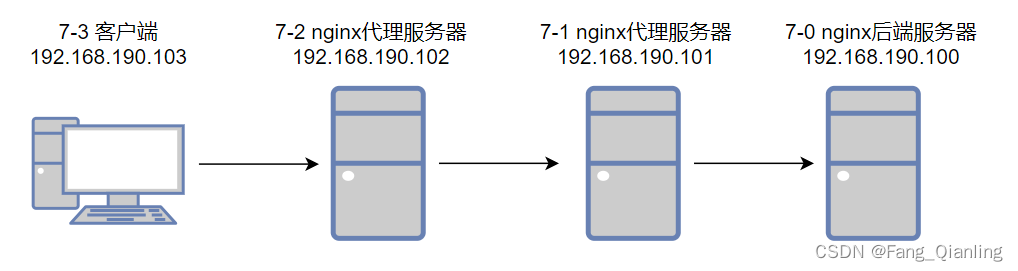
#开启ip透传后可以查看到客户端ip3. 二级代理
实现目标:7-0服务器日志可以查看到客户端ip和反向代理服务器ip。
3.1 图示
3.2 示例
① 修改7-2代理服务器配置
[root@localhost ~]# vim /apps/nginx/conf.d/pc.conf
server {
        listen 80;
        server_name www.pc.com;
        root /data/;
        proxy_set_header x-forwarded-for $proxy_add_x_forwarded_for;
        location / {
        proxy_pass http://192.168.190.101;
        }
}
[root@localhost ~]# nginx -t
[root@localhost ~]# nginx -s reload
② 修改7-1代理服务器配置
[root@localhost ~]# vim /etc/nginx/nginx.conf
 43         proxy_set_header x-forwarded-for $proxy_add_x_forwarded_for;
 45         location / {
 46         proxy_pass http://192.168.190.100;
 47         }
[root@localhost ~]# systemctl restart nginx
③ 后端服务器7-0新建web文件
[root@localhost ~]# cd /usr/share/nginx/html
[root@localhost html]# echo welcome 7-0 > index.html
④ 客户端7-3访问代理服务器7-2
[root@localhost ~]# curl 192.168.190.102
welcome 7-0
⑤ 查看后端服务器访问日志
[root@localhost ~]# tail -f /var/log/nginx/access.log
192.168.190.101 - - [27/feb/2024:18:00:11 +0800] "get / http/1.0" 200 12 "-" "curl/7.29.0" "192.168.190.103, 192.168.190.102"
二、负载均衡
1. 概述
在上一个节中nginx可以将客户端的请求转发至单台后端服务器,但是无法转发至特定的一组的服务器,而且不能对后端服务器提供相应的服务器状态监测,nginx可以基于ngx_http_upstream_module模块提供服务器分组转发、权重分配、状态监测、调度算法等高级功能。
2. 配置格式
http {
    upstream web {
        server 192.168.190.100 weight=5;
        server 192.168.190.101;
        server 192.168.190.102;

        least_conn;
        ip_hash;
        keepalive 32;
        fair;
    }
}

server {
    listen 80;
    server_name www.pc.com;
    proxy_set_header x-forwarded-for $proxy_add_x_forwarded_for;
    root /data/;
    location / {
    proxy_pass  http://web/
    }
}
上面的配置中,upstream块定义了后端服务器的列表和负载均衡算法。server块定义了反向代理服务器的监听端口和域名,以及请求转发的配置。具体说明如下:
- upstream块:定义了一个名为web的负载均衡服务器组,其中包含了三个后端服务器,分别是192.168.190.100、192.168.190.101、192.168.190.102。
- weight=5表示将第一个后端服务器的权重设置为5,即分配更多的请求给它。ip_hash表示使用ip哈希算法进行负载均衡。keepalive 32表示使用长连接并保持32个连接。
- server块:定义了一个监听80端口的虚拟主机,它的域名是www.pc.com。location /表示将所有请求转发给upstream块中定义的服务器组web。proxy_set_header指令可以设置请求头,以便后端服务器能够获取客户端的真实ip地址等信息。
- 由于使用了least_conn;算法,nginx会动态地将请求发送到当前连接数最少的后端服务器上,以达到负载均衡的目的。
- upstream块中使用了ip_hash算法,表示会根据客户端的ip地址,将该客户端的所有请求都发送到同一个后端服务器上。
- 由于使用了fair算法,请求会被发送到响应时间最短的服务器上,从而实现负载均衡。
3. 调度算法
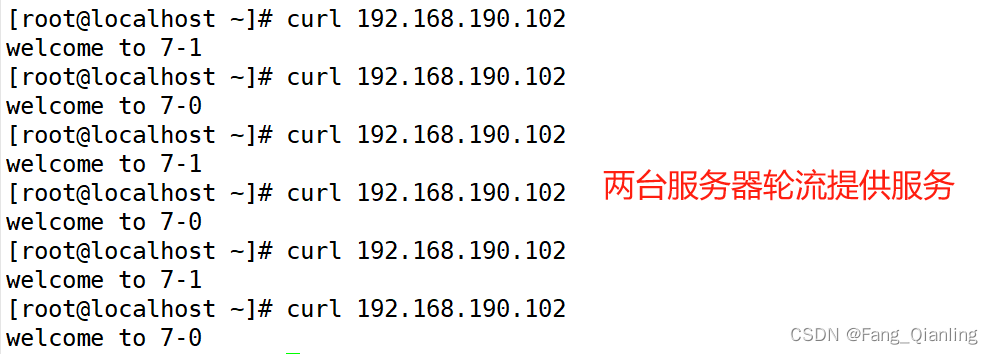
3.1 轮询算法
默认算法是轮询算法即反向代理服务器处理用户请求时,每个后端服务器都轮流提供响应。
3.2 加权轮询算法
在默认轮询的基础上增加权重,weight=number。如果后端有2个服务器其中一个配置权重为weight=5另外一个不配置默认是1,则有用户访问时分配给给有权重的服务器和不配置权重的服务器的比例为5:1。
3.3 最小连接数算法
最少连接调度算法,优先将客户端请求调度到当前连接最少的后端服务器,相当于lvs中的wlc。按照nginx反向代理服务器和后端服务器的连接数分配请求,连接越少的分配处理请求优先级越高。例如最小连接数(least_conn;)是设置是3,1号后端服务器有2个请求在处理,而后2号后端服务器只有1个请求在处理,则新请求交给后端服务器2。
3.4 ip_hash算法
基于客户端ip地址的负载均衡算法。它会根据客户端的ip地址,将该客户端的所有请求都发送到同一个后端服务器上。这样可以保证同一个客户端的所有请求都被发送到同一个后端服务器,从而保证了会话的一致性。
3.5 fair算法
基于后端服务器的负载均衡算法。它会根据后端服务器的响应时间,将请求发送到响应时间最短的服务器上。这样可以保证请求被发送到处理能力最强的服务器上,从而提高系统的性能。
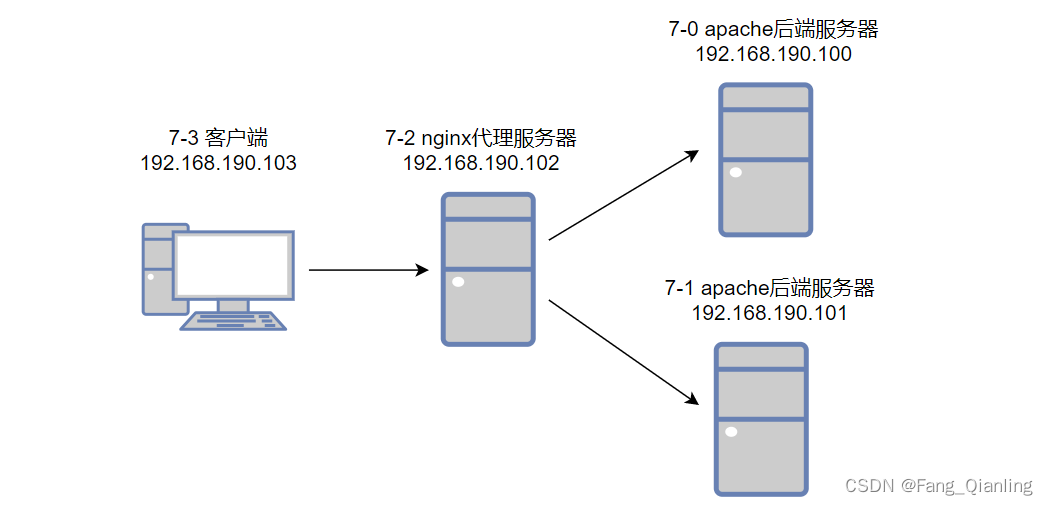
4. 示例
这里后端服务器使用httpd服务
4.1 图示
4.2 轮询操作过程
① 7-0和7-1 apache后端服务器开启httpd服务,关闭防火墙,分别建立web文件
7-0,7-1:
[root@localhost ~]# systemctl start httpd
[root@localhost ~]# systemctl stop firewalld
[root@localhost ~]# setenforce 0

7-0:
[root@localhost ~]# cd /var/www/html/
[root@localhost html]# echo welcome to 7-0 > index.html

7-1:
[root@localhost ~]# cd /var/www/html/
[root@localhost html]# echo welcome to 7-1 > index.html
#理论上7-0和7-1页面一样,这里为了方便查看分别命名主页面
② 修改7-2nginx主配置文件
[root@localhost ~]# vim /apps/nginx/conf/nginx.conf
 20     upstream web {
 21     server 192.168.190.100;
 22     server 192.168.190.101;
 23     }
#在http下添加以上配置
 25    # include       /apps/nginx/conf.d/*.conf;

 49         location / {
 50             proxy_pass http://web/;
 51             index  index.html index.htm;
 52         }
[root@localhost ~]# nginx -t
[root@localhost ~]# nginx -s reload
③ 客户端7-3访问代理服务器7-2
当7-1后端服务器宕机,代理服务器轮询算法是否会出现隔次无法访问?
停止7-1httpd服务,查看7-3客户机访问情况:
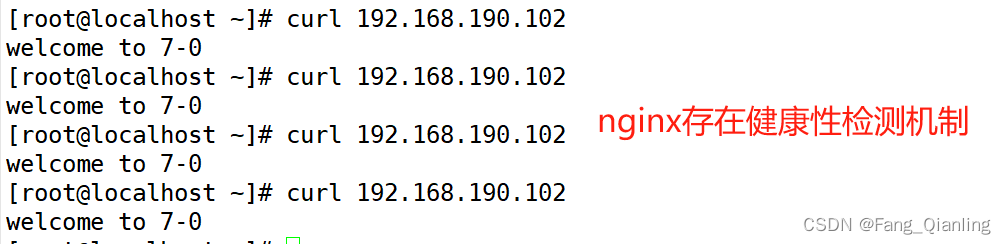
nginx服务较为只能,通过tcp三次握手可以检查服务器健康性,当无法完成连通性,默认将不会访问从而提示报错。当故障服务器恢复正常后,再次轮询调度。
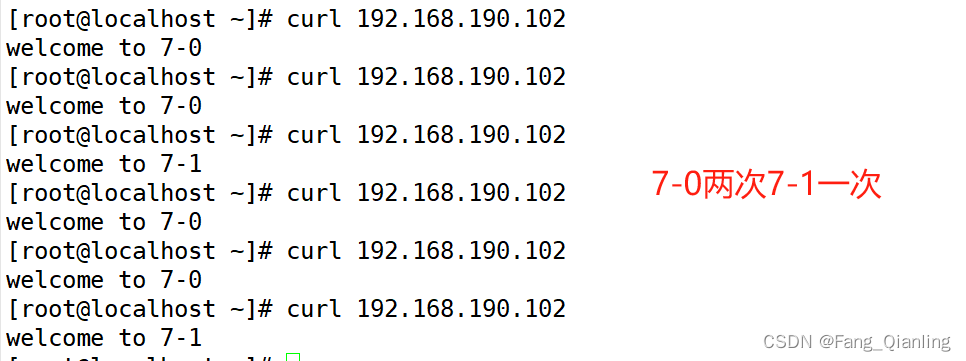
4.3 加权轮询操作过程
① 修改7-2代理服务器配置
 20     upstream web {
 21     server 192.168.190.100 weight=2;
 22     server 192.168.190.101;
 23     }
② 7-3访问结果
4.4 最大链接数、连续检测和延迟上线
 20     upstream web {
 21     server 192.168.190.100;
 22     server 192.168.190.101 max_conns=10 max_fails=3 fail_timeout=30s;
 23     }
#max_conns=number  #给当前后端server设置最大活动链接数,默认为0表示没有限制
#max_fails=number   后端服务器的下线条件,当客户端访问时,对本次调度选中的后端服务器连续进行检测多少次,如果都失败就标记为不可用,默认为1次,当客户端访问时,才会利用tcp触发对探测后端服务器健康性检查,而非周期性的探测
#fail_timeout=time 后端服务器的上线条件,对已经检测到处于不可用的后端服务器,每隔此时间间隔再次进行检测是否恢复可用,如果发现可用,则将后端服务器参与调度,默认为10秒。这样避免服务器刚上线不稳定再次导致业务失败
4.5 备份服务器
当所有后端服务器不可用时,才会启用此备用服务器sorry server,自己不能转自己。
① 修改代理服务器7-2配置
20 upstream web {
21 server 192.168.190.100;
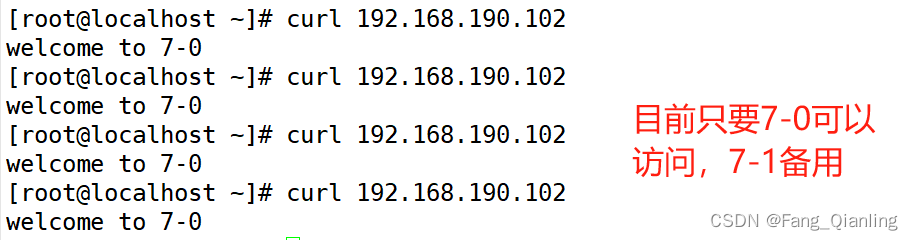
22 server 192.168.190.101 backup;
23 }
#当192.168.190.100宕机后启动192.168.190.101② 客户端7-3访问代理服务器7-2
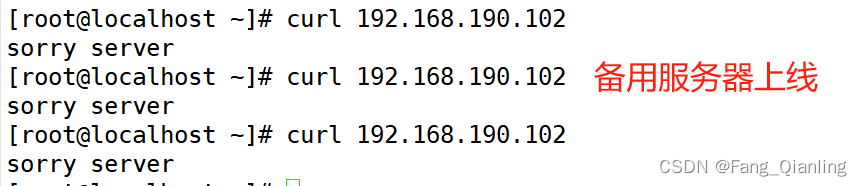
③ 配置7-1备用服务器主页web文件,并关闭7-0后端服务器
7-1:
[root@localhost html]# echo sorry server > index.html

7-0:
[root@localhost html]# systemctl stop httpd
④ 客户端7-3再次访问代理服务器7-2
4.6 hash调度操作
根据客户端ip:
① 修改代理服务器配置
 20     upstream web {
 21     hash $remote_addr;         #hash客户端ip
 22     server 192.168.190.100;
 23     server 192.168.190.101;
 24     }
② 客户端访问
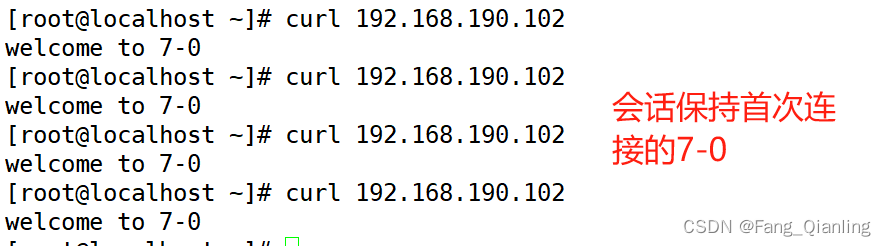
注:hash/总权重得到正确的值,该值会受权重影响,至于访问到那台与谁会话保持存在几率。
根据请求地址:
① 修改代理服务器7-2配置
 20     upstream web {
 21     hash $request_uri;         #发送请求的地址,一旦确定不会轻易改变
 22     server 192.168.190.100;
 23     server 192.168.190.101;
 24     }
② 客户端访问

cookie:
① 修改代理服务器7-2配置
 20     upstream web {
 21     hash $cookie_hello;         #提取cookie中hello关键字
 22     server 192.168.190.100;
 23     server 192.168.190.101;
 24     }
② 客户端模拟加上cookie访问


发表评论