一、引言
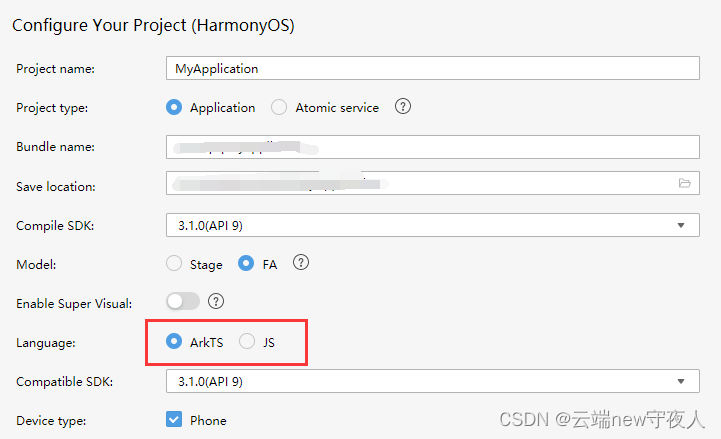
1、开发环境
- harmonyos:3.1/4.0
- sdk:api 9 release
- node.js:v14.20.1
- deveco studio: 3.1.0
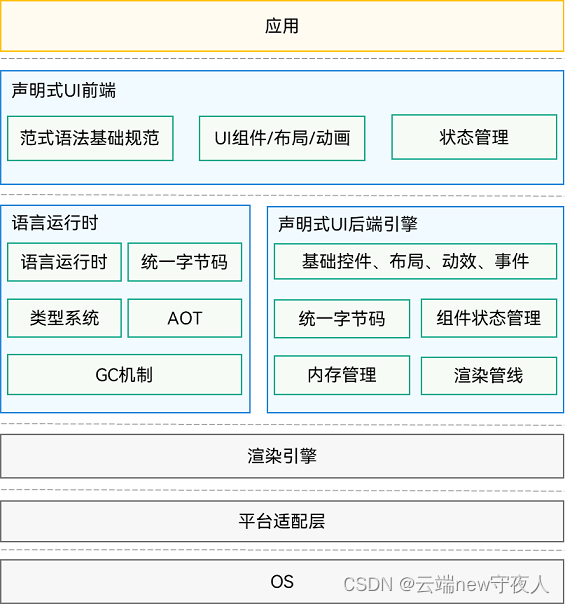
2、整体架构图
二、认识arkui
1、基本概念
(官方已经给出了非常详细的介绍,我这里就照搬,主要为后面的实操进行铺垫)
- ui:即用户界面。开发者可以将应用的用户界面设计为多个功能页面,每个页面进行单独的文件管理,并通过页面路由api完成页面间的调度管理如跳转、回退等操作,以实现应用内的功能解耦。
- 组件:ui构建与显示的最小单位,如列表、网格、按钮、单选框、进度条、文本等。开发者通过多种组件的组合,构建出满足自身应用诉求的完整界面。
2、开发范式(附:案例)
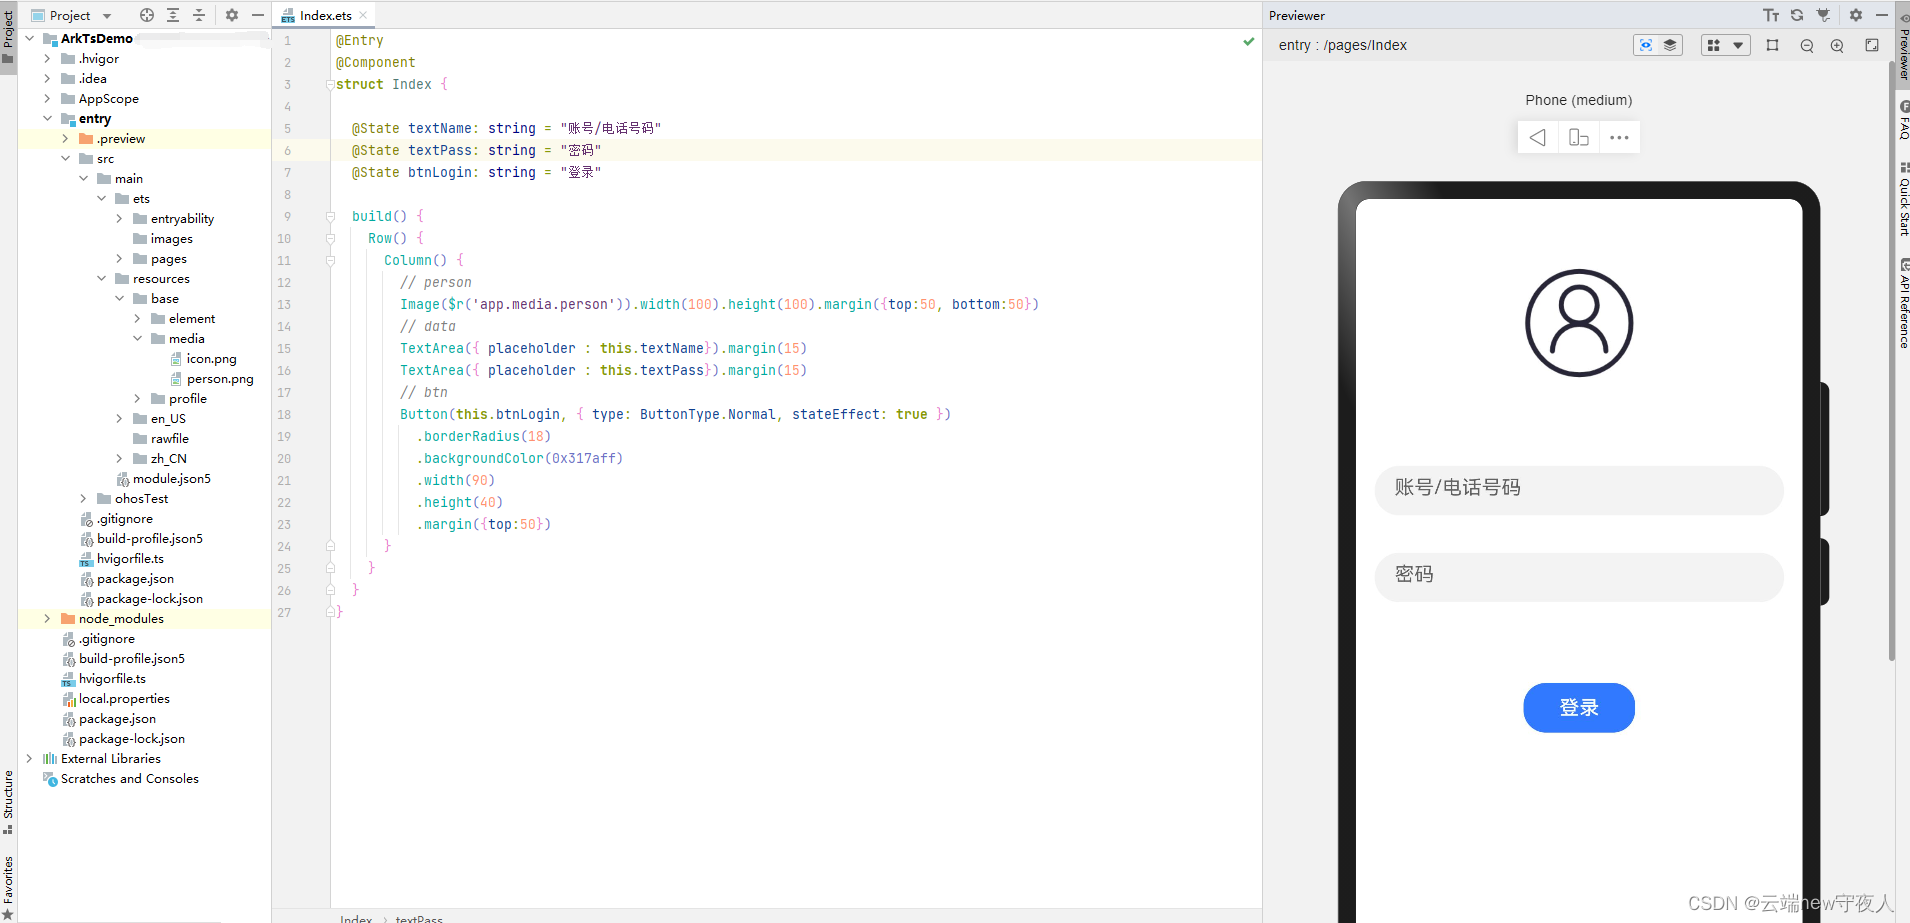
(1)arkts
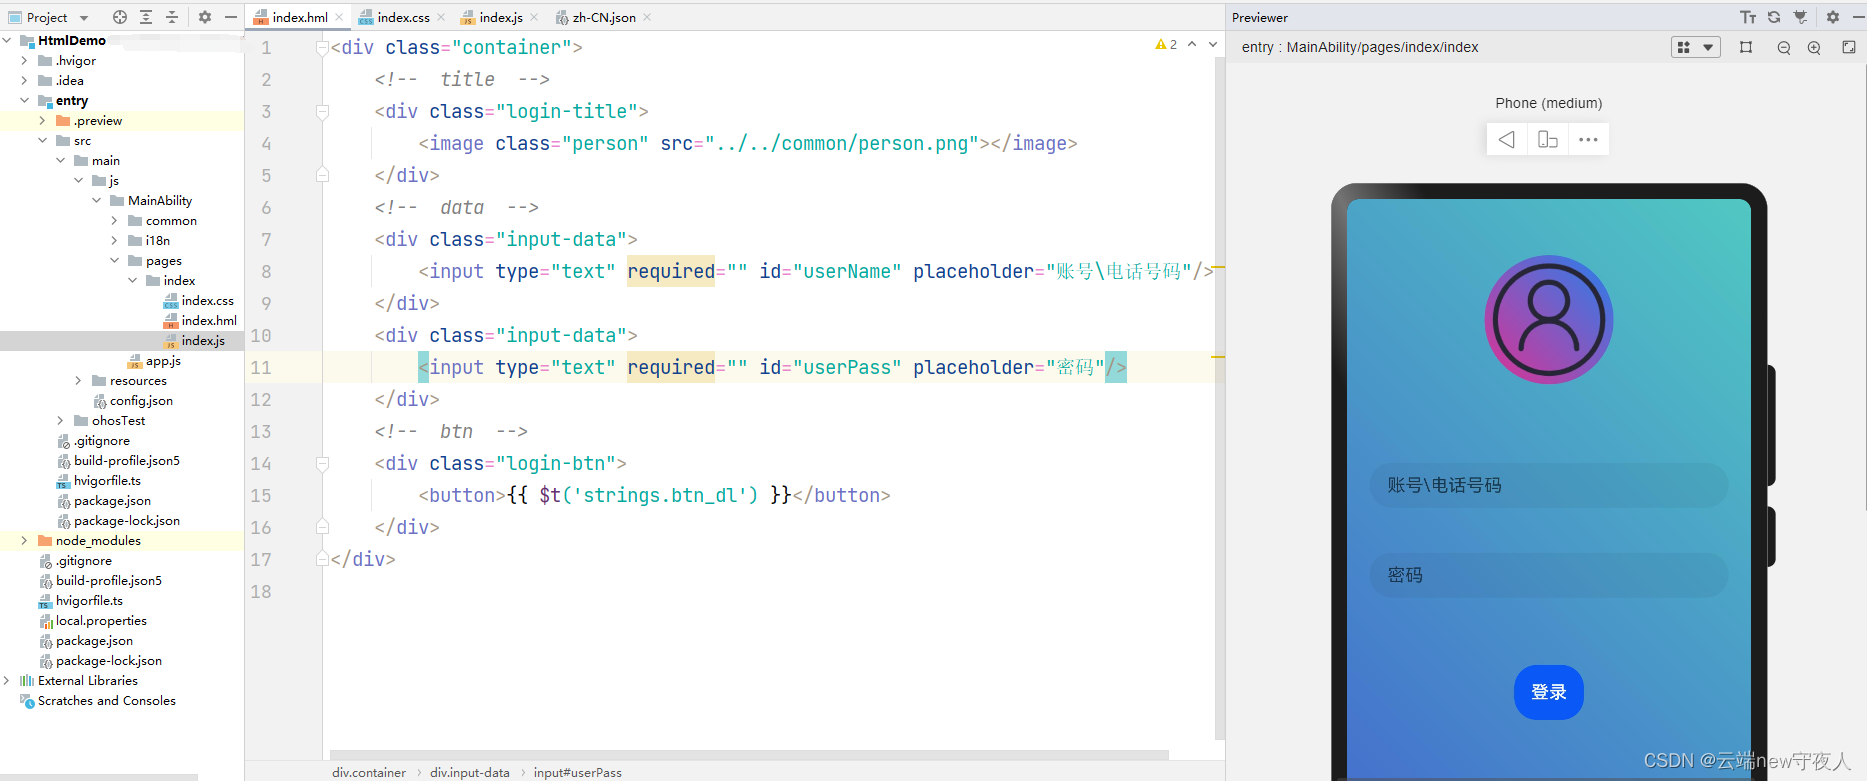
(2)js
三、附件
- arkts代码
@entry
@component
struct index {

  @state textname: string = "账号/电话号码"
  @state textpass: string = "密码"
  @state btnlogin: string = "登录"

  build() {
    row() {
      column() {
        // person
        image($r('app.media.person')).width(100).height(100).margin({top:50, bottom:50})
        // data
        textarea({ placeholder : this.textname}).margin(15)
        textarea({ placeholder : this.textpass}).margin(15)
        // btn
        button(this.btnlogin, { type: buttontype.normal, stateeffect: true })
          .borderradius(18)
          .backgroundcolor(0x317aff)
          .width(90)
          .height(40)
          .margin({top:50})
      }
    }
  }
}
- js代码
<div class="container">
    <!--  title  -->
    <div class="login-title">
        <image class="person" src="../../common/person.png"></image>
    </div>
    <!--  data  -->
    <div class="input-data">
        <input type="text" required="" id="username" placeholder="账号\电话号码"/>
    </div>
    <div class="input-data">
        <input type="text" required="" id="userpass" placeholder="密码"/>
    </div>
    <!--  btn  -->
    <div class="login-btn">
        <button>{{ $t('strings.btn_dl') }}</button>
    </div>
</div>
- index.css
.container {
    display: flex;
    flex-direction: column;
    align-items: center;
    left: 0px;
    top: 0px;
    width: 100%;
    height: 100%;
    background: linear-gradient(-135deg, #50c8c2, #4158d0);
}

.person {
    text-align: center;
    background: linear-gradient(-135deg, #ff2481ef, #ffe03092);
    width: 230px;
    height: 230px;
    margin: 100px;
    border-radius: 230px;
}

@media screen and (orientation: landscape) {
    .title {
        font-size: 60px;
    }
}

@media screen and (device-type: tablet) and (orientation: landscape) {
    .title {
        font-size: 100px;
    }
}

.input-data{
    padding: 40px;
}

.login-btn button{
    margin-top: 80px;
    padding: 30px;
}


发表评论