✨✨ 欢迎大家来到景天科技苑✨✨
🎈🎈 养成好习惯,先赞后看哦~🎈🎈
文章目录
pyqt5鼠标事件
鼠标跟踪
在pyqt5中想要实现追踪鼠标的坐标,并实现实时打印出来,需要开启鼠标追踪功能。如果想要界面中的所有组件,或者qdialog弹窗获取坐标点,那么每个组件都需要做如下设置
setmousetracking(true)
默认是没有鼠标跟踪的,只有鼠标按下移动鼠标,才会触发鼠标移动事件
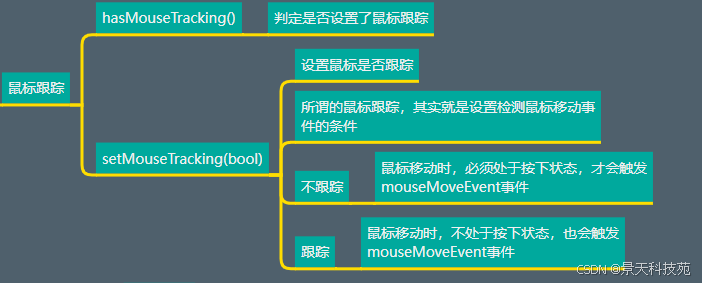
默认情况下,按下鼠标移动才会触发鼠标移动事件
案例分析
from pyqt5.qt import *
import sys
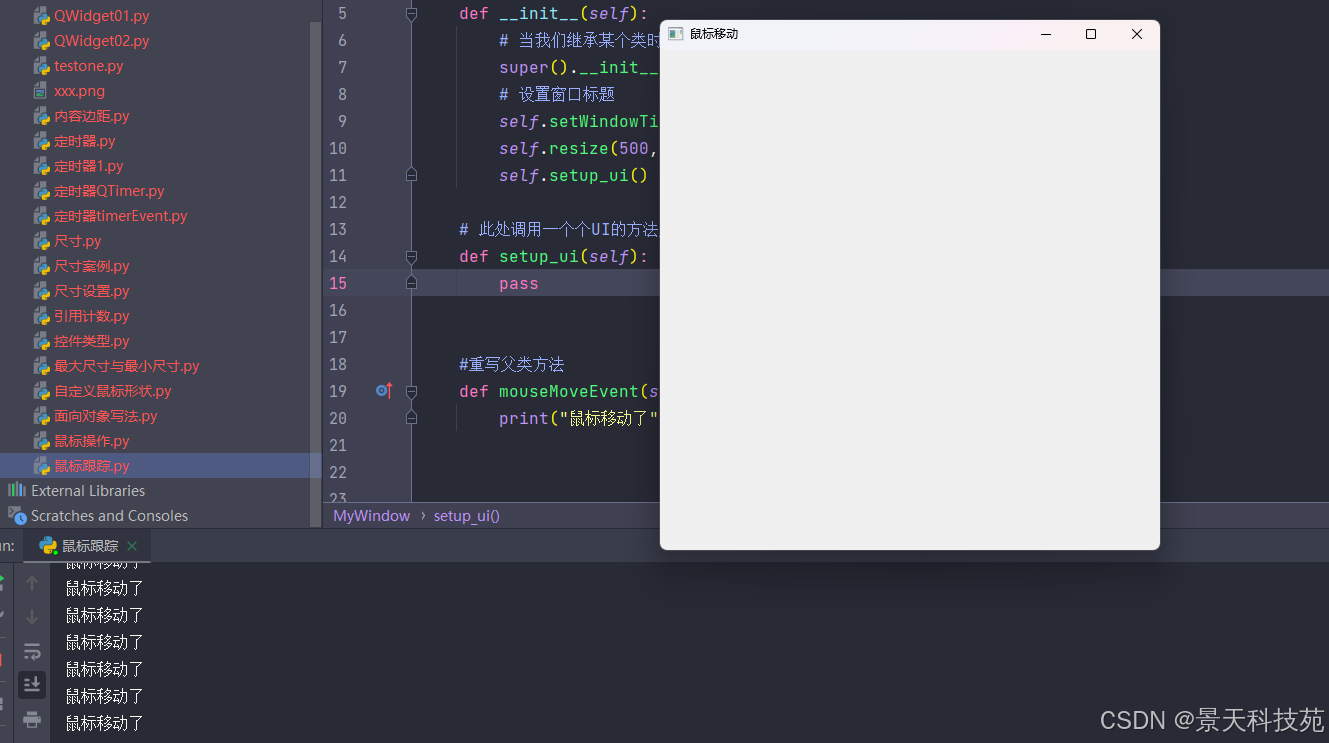
class mywindow(qwidget):
def __init__(self):
# 当我们继承某个类时,需要调用父类构造方法
super().__init__()
# 设置窗口标题
self.setwindowtitle("鼠标移动")
self.resize(500, 500)
self.setup_ui()
# 此处调用一个个ui的方法展示即可
def setup_ui(self):
pass
#重写父类方法
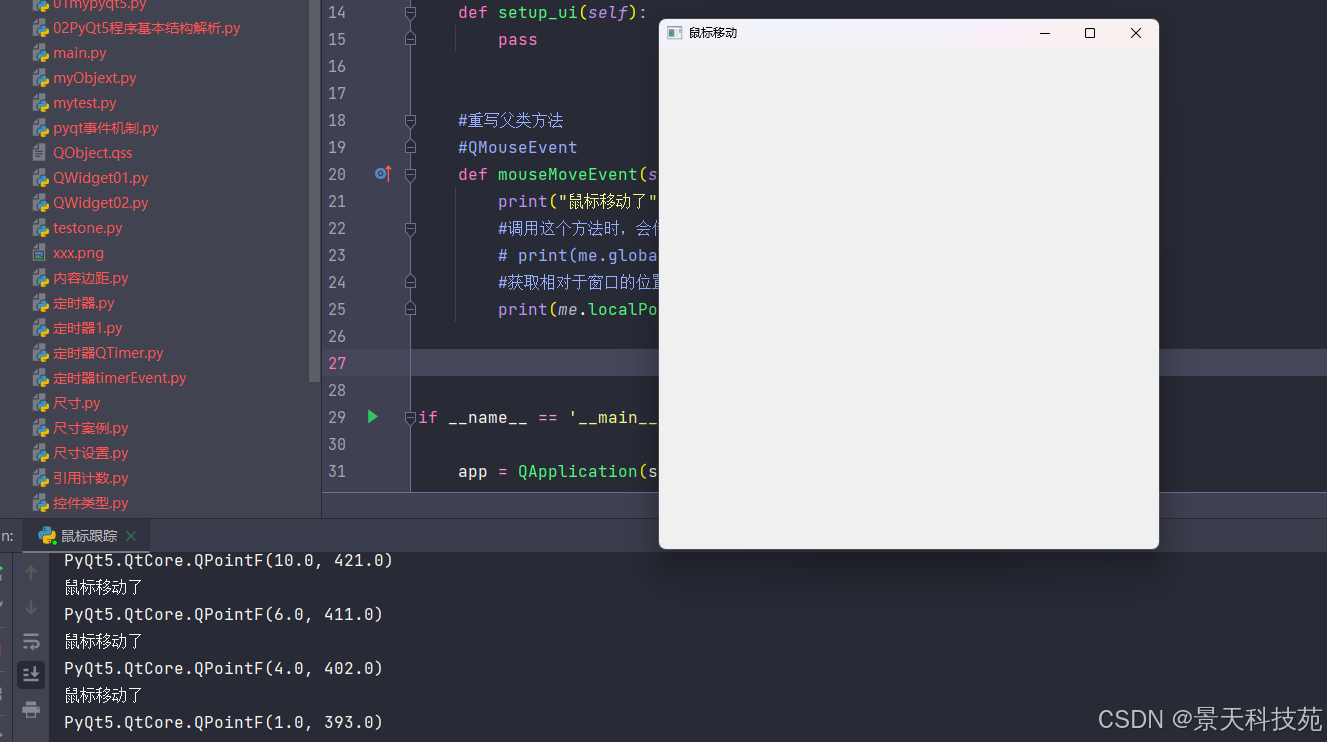
def mousemoveevent(self, me):
print("鼠标移动了")
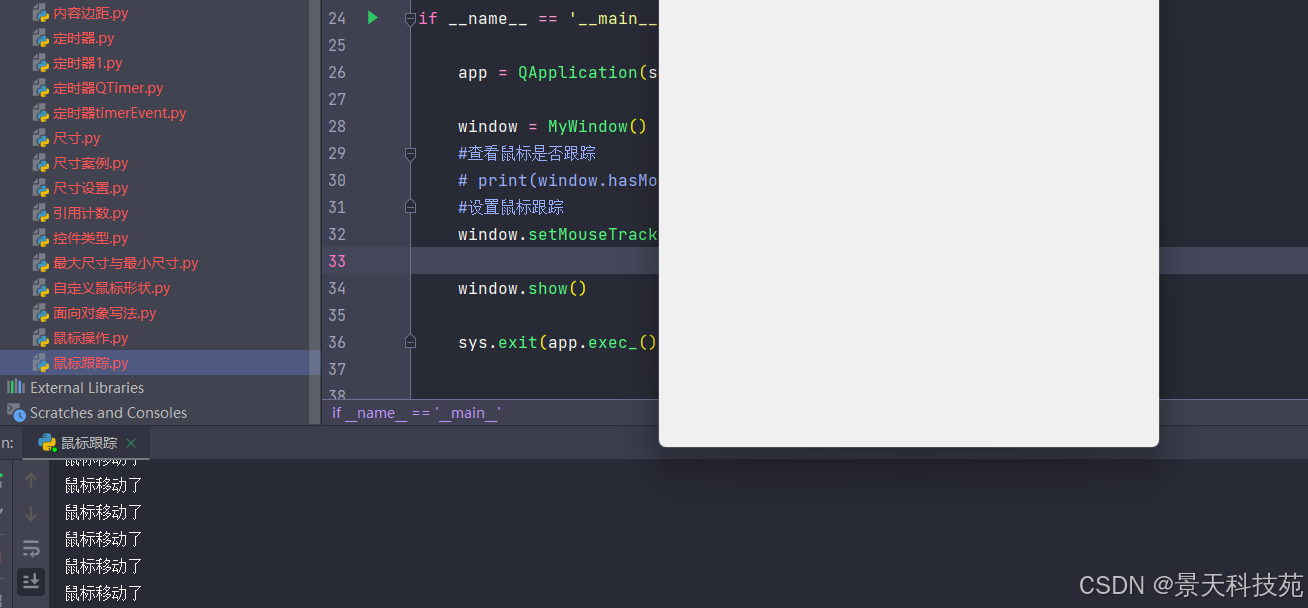
if __name__ == '__main__':
app = qapplication(sys.argv)
window = mywindow()
window.show()
sys.exit(app.exec_())
运行, 不按下鼠标左键,不触发mousemoveevent方法,按下后触发
查看鼠标是否跟踪
#查看鼠标是否跟踪
print(window.hasmousetracking())
默认鼠标是没有跟踪的

设置鼠标跟踪
设置鼠标跟踪
window.setmousetracking(true)
当设置的鼠标跟踪,不用按下鼠标左键,移动鼠标,也会触发mousemoveevent方法
当触发鼠标移动事件方法时,会传进来一个事件对象qmouseevent,这个事件对象里面有很多方法
我们可以根据这个事件对象,获取鼠标的实时位置
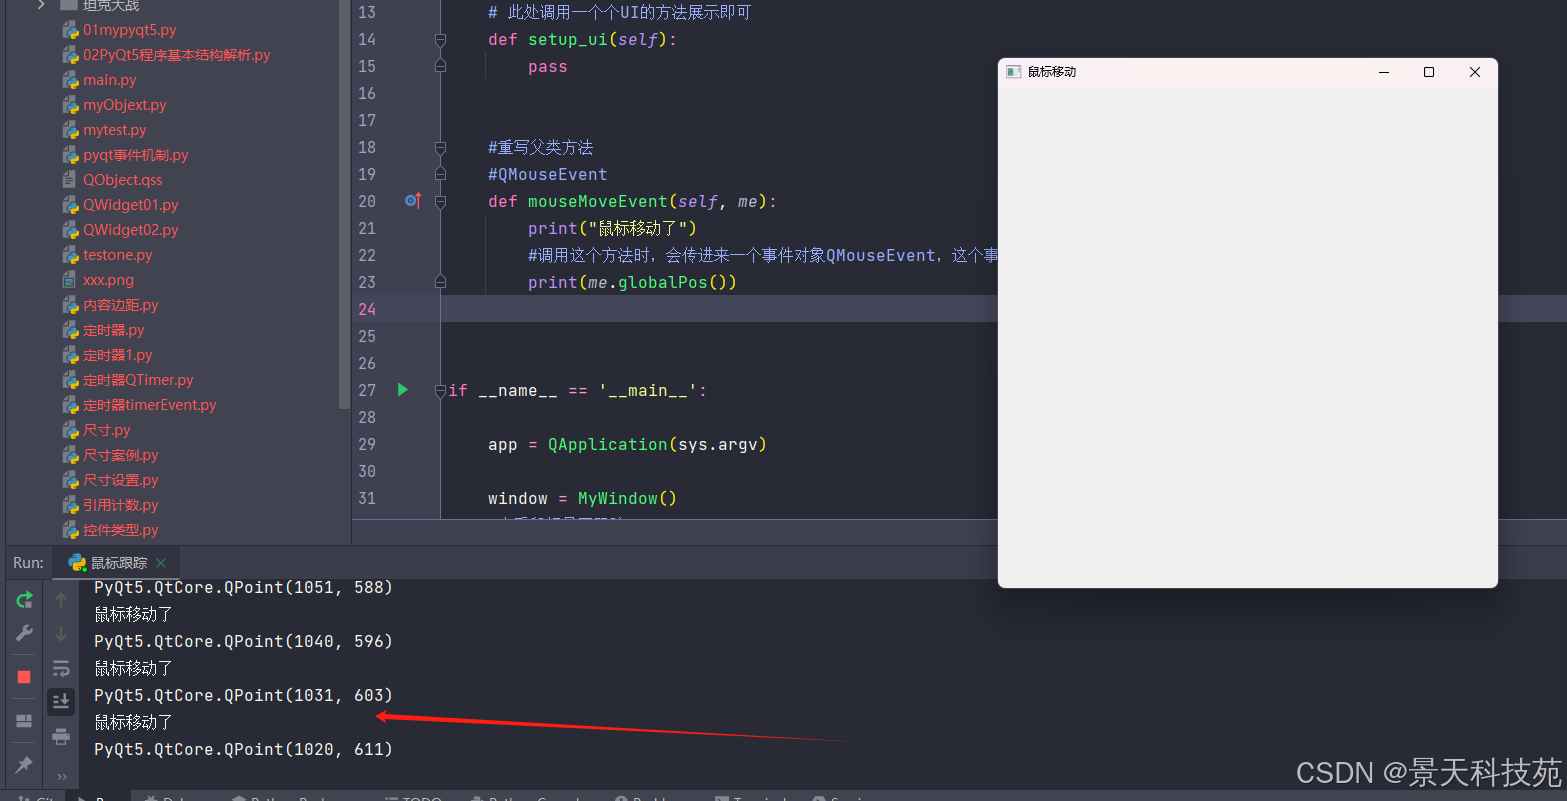
获取相对于窗口的位置
print(me.localpos())
鼠标跟踪案例实战
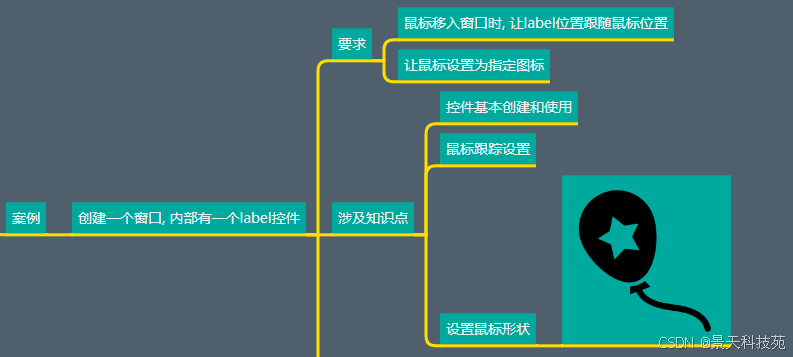
from pyqt5.qt import *
import sys
#设置鼠标跟踪,需要重写mousemoveevent方法,需要继承
class mywindow(qwidget):
#qmouseevent
#将鼠标位置设为类变量
def mousemoveevent(self, me):
print("鼠标移动了")
#在方法里面通过查找子类,获取到标签,然后再让标签移动
lable = self.findchild(qlabel)
lable.move(me.x(),me.y())
if __name__ == '__main__':
app = qapplication(sys.argv)
window = mywindow()
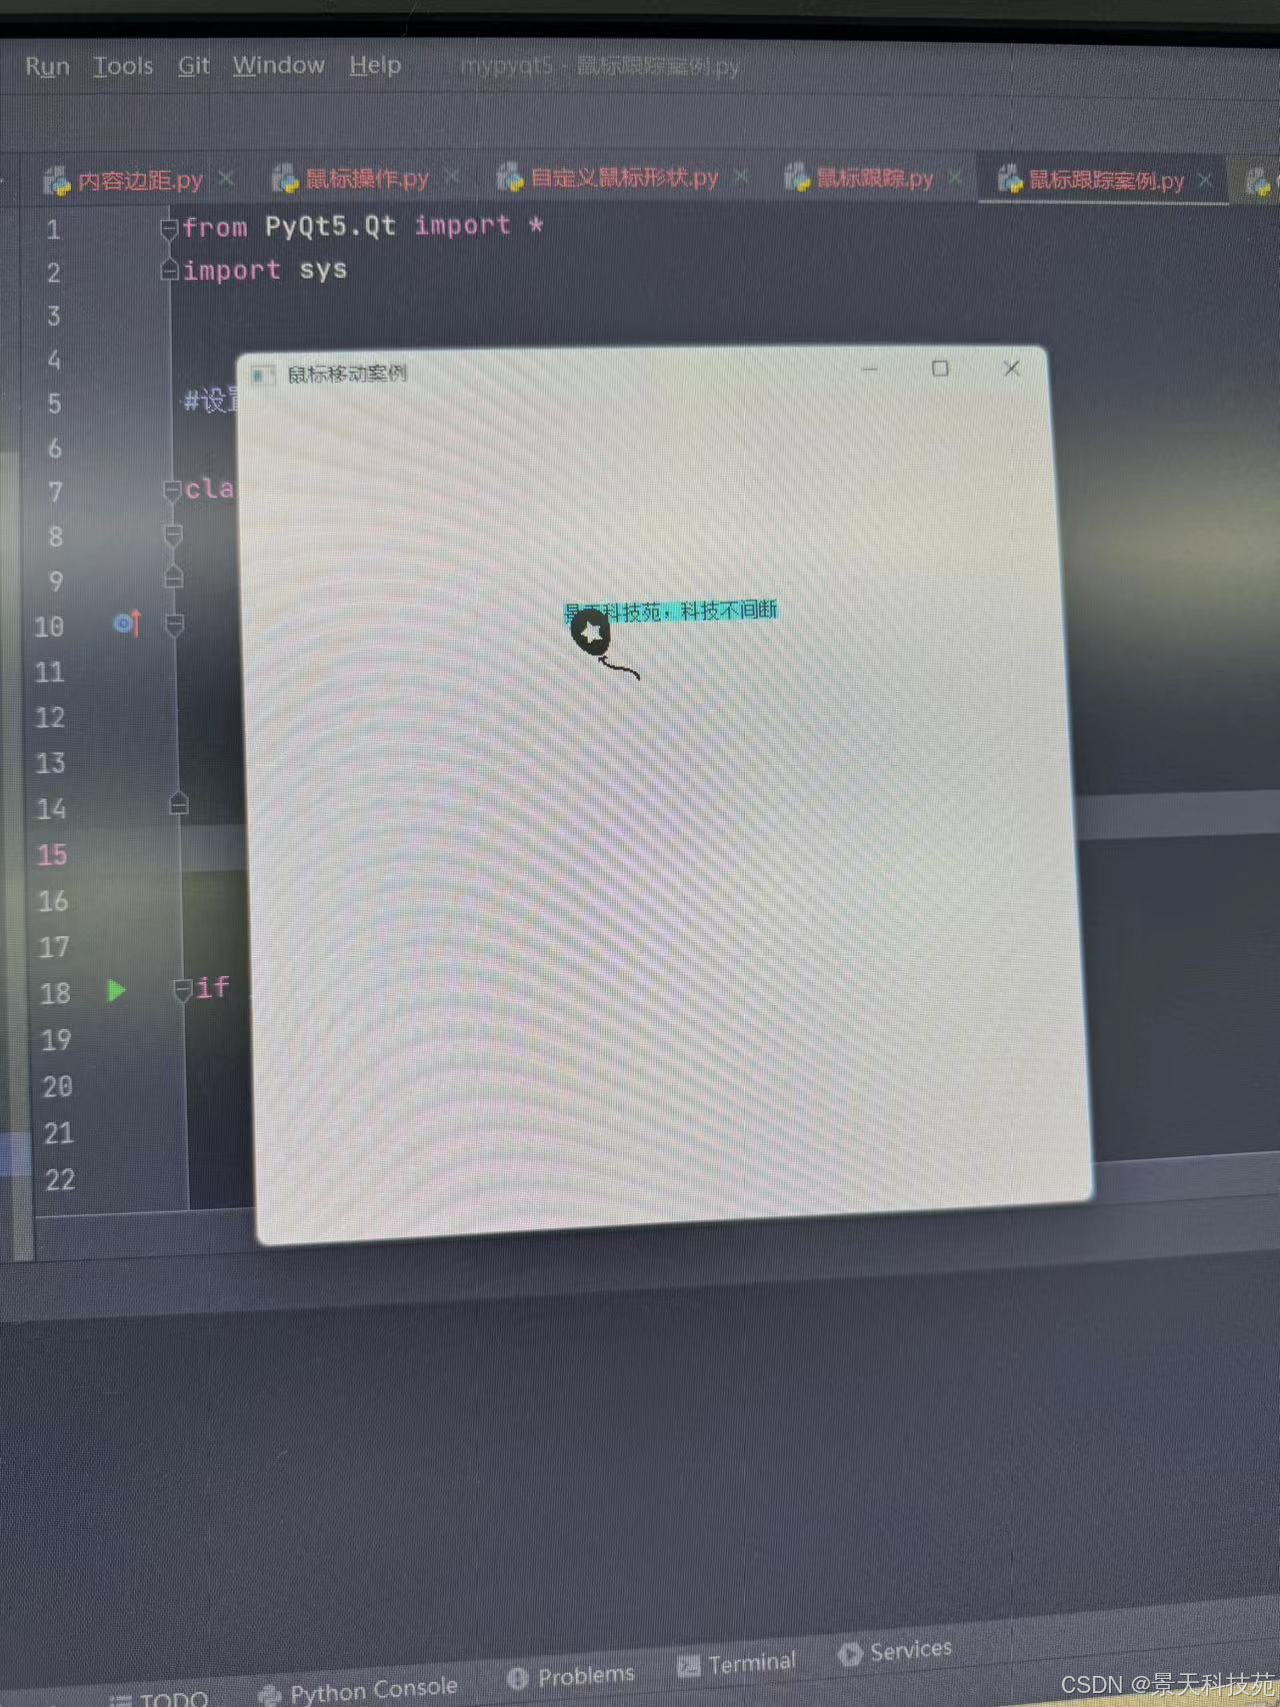
window.setwindowtitle("鼠标移动案例")
window.move(500,200)
window.resize(500,500)
#设置鼠标跟踪
window.setmousetracking(true)
#自定义鼠标形状
# 创建qpixmap对象,并设置显示的图片
pixmap = qpixmap("xxx.png")
# 设置对象宽和高按比例缩小,返回一个新对象。原对象并没有被缩放
#pixmap.scaled(targetwidth, targetheight, qt.keepaspectratio)
#targetwidth 和 targetheight 是目标缩小后的宽度和高度。qt.keepaspectratio 参数表示保持宽高比。
new_pixmap = pixmap.scaled(50, 50,qt.keepaspectratio)
# 创建qcursor对象(鼠标对象),用作setcursor参数
# 设置该对象的作用点为图片的左上角(0,0),默认是图片中心点
# 默认qcursor(pixmap: qpixmap, hotx: int = -1, hoty: int = -1) 表示作用点在图片中心点
cursor = qcursor(new_pixmap, 0, 0)
# 设置window控件的鼠标样式为自定义的qcursor对象:cursor
window.setcursor(cursor)
#创建标签
lable = qlabel(window)
lable.settext("景天科技苑,科技不间断")
lable.setstylesheet("background-color:cyan;")
window.show()
sys.exit(app.exec())
运行,在控件里面移动鼠标,标签就跟着鼠标移动
pyqt5的事件api详解
api详解
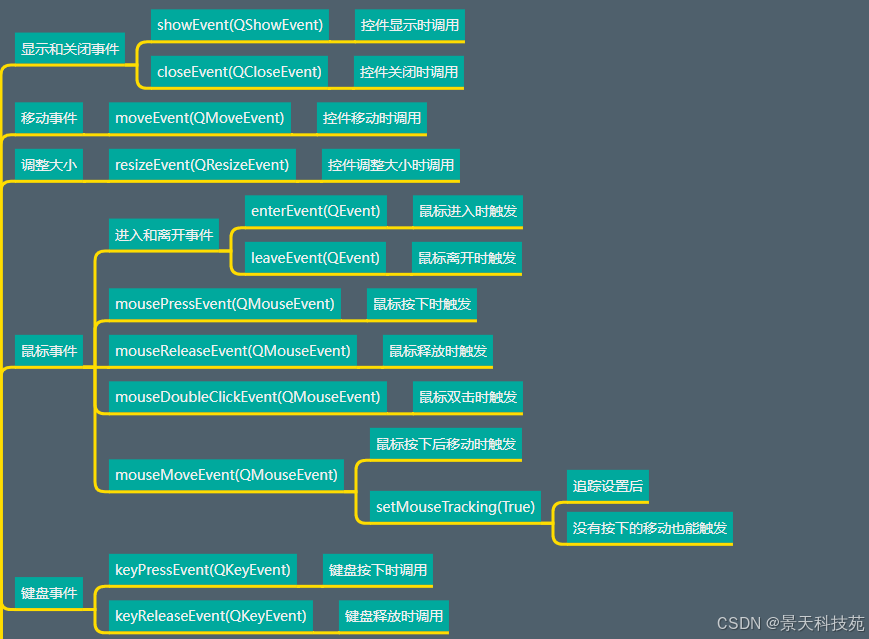
一、每个事件都被封装成相应的类
pyqt中,每个事件类型都被封装成相应的事件类,如鼠标事件为qmouseevent,键盘事件为qkeyevent等。而它们的基类是qevent。
二、基类qevent的几个重要方法
accept() 表示事件已处理,不需要向父窗口传播
ignore()表示事件未处理,继续向父窗口传播f
type()返回事件类型,如qtcore.qevent.mousebuttonpress,一般由基事件调用。因为其它事件已经知道自己的事件类型了。
还有一个自定义事件的注册方法。
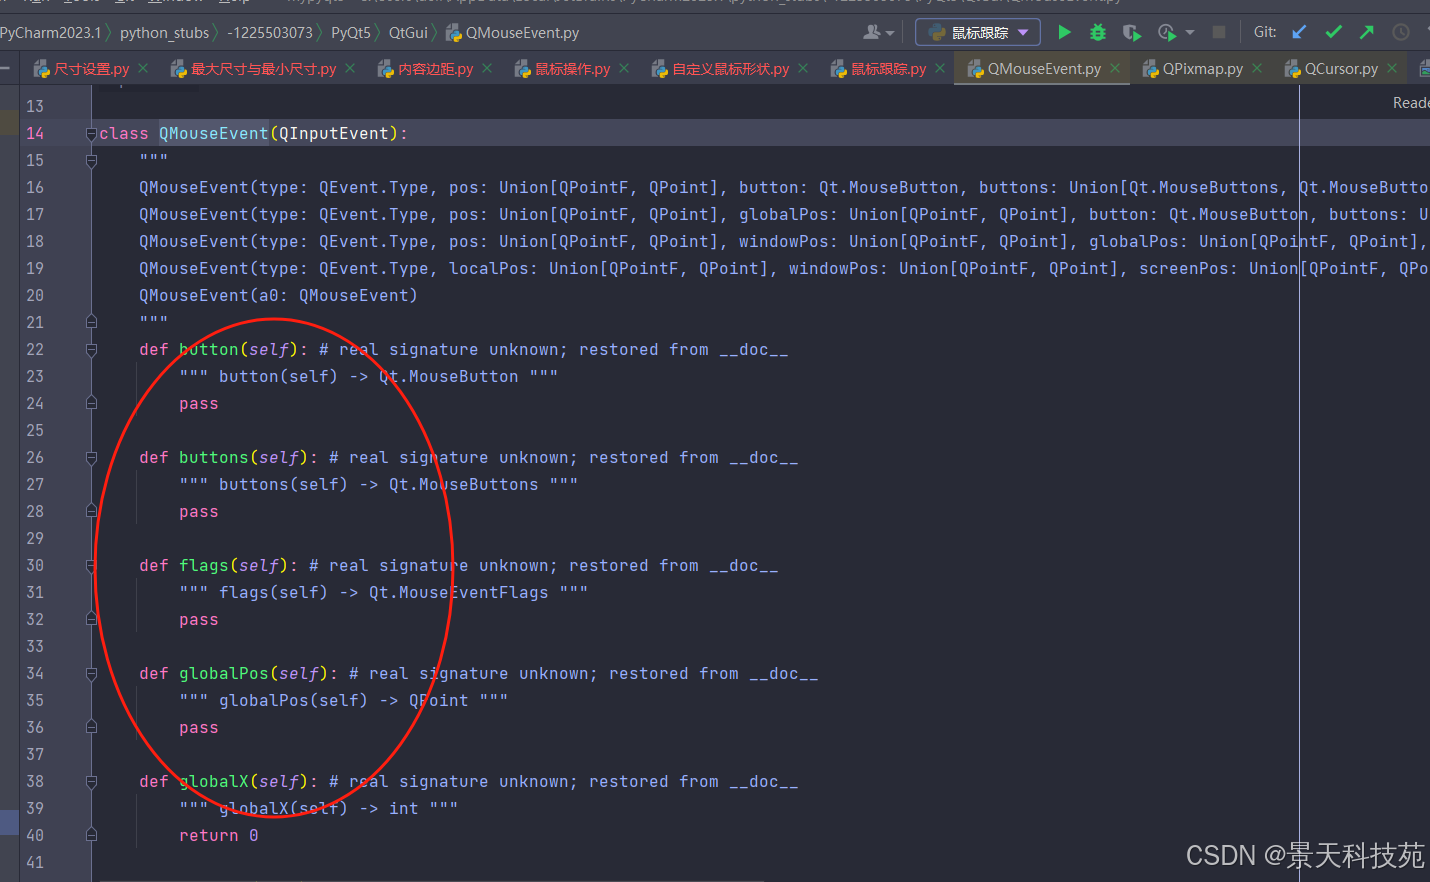
三、qmouseevent鼠标事件
buttons()返回哪个鼠标按键被按住了。如qt.leftbutton
globalpos()返回鼠标相对屏幕的位置qpoint
pos()返回鼠标相对处理事件的窗口的位置
四、处理鼠标事件的响应函数(在qwidget及其继承类中)
mousepressevent(qmouseevent)
mousereleaseevent(event)
mousemoveevent(event)
五、处理鼠标事件的一些常见操作
处理鼠标事件的频率不低于键盘事件。包括按下、松开鼠标按键;移动鼠标到特定区域或离开特定区域;更改鼠标指针的形状,等等。
按下、松开鼠标按键
按下并释放鼠标按钮时,将调用以下方法:
mousepressevent (self,  event) - 鼠标键按下时调用;
mousereleaseevent (self, event) - 鼠标键公开时调用;
mousedoubieciickevent (self, event) - 双击鼠标时调用。必须注意,在双击之前的其他事件。双击时的事件顺序如下:
mousebuttonpress
mousebuttonrelease
mousebuttondblclick
mousebuttonpress
mousebuttonrelease
qapplicaption类的setdoubleclickinterval( )方法可设置双击的时间间隔;doubleclickinterval( )方法返回双击的时间间隔。
    event参数是qmouseevent对象,存储事件的其他信息。有以下方法:

x() 和 y() -返回相对于控件空间的鼠标坐标值;
pos() - 返回相对于控件空间的qpoint对象;
localpos()- 返回相对于控件空间的qpointf对象;
globalx() 和 globaly() -  返回相对于屏幕的x,y 坐标值;
globalpos() - 返回相对于屏幕的qpoint对象;
windowpos() -  返回相对于窗口的qpointf对象;
screenpos() - 返回相对于屏幕的qpointf对象;
button() - 返回以下枚举值(只列了部分,详细内容参见 https://doc.qt.io/qt-5/qt.html#mousebutton-enum,用以判断是哪个鼠标健触发了事件。
qtcore.qt.nobutton - 0 - 没有按下鼠标键。例如移动鼠标时的button()返回值;
qtcore.qt.leftbutton -1 -按下鼠标左键;
qtcore.qt.rightbutton -2 -按下鼠标右键;
qtcore.qt.mion 或 qtcore.qt.middlebutton -4 -按下鼠标中键;
buttons() - 返回前面所列枚举值的组合,用于判断同时按下了哪些键。
modifiers() - 判断按下了哪些修饰键(shift,ctrl , alt,等等),详见键盘事件(18)中的modifiers()。
timestamp() - 返回事件发生的时间;
    如果要让父控件继续收到鼠标事件,要调用事件的ignore()方法;否则,调用accept()。

    如果一个控件的qtcore.qt.wa_nomousepropagation的属性设为true,则不会将事件传递给父控件。调用setattribute( )方法可修改此参数:
    button.setattribute (qtcore.qt.wa_nomousepropagation, true)

    缺省情况下,鼠标事件只拦截控件区域上的鼠标操作。如果可拦截控件区域以下的鼠标事件,必须调用grabmouse( )方法;释放时,调用releasemouse( )。
六、鼠标和键盘事件案例实战
from pyqt5.qt import *

class window(qwidget):
    def __init__(self):
        super().__init__()
        self.setwindowtitle("事件消息")
        self.resize(500, 500)
        self.setup_ui()

    def setup_ui(self):
        pass

    #初始化窗口后就触发
    def showevent(self, qshowevent):
        print("窗口被展示了出来")

    #关闭窗口时触发
    def closeevent(self, qcloseevent):
        print("窗口被关闭了")


    #窗口移动时触发
    def moveevent(self, qmoveevent):
        print("窗口被移动了")

    #窗口尺寸改变时触发
    def resizeevent(self, qresizeevent):
        print("窗口改变了尺寸大小")

    #鼠标进入控件时触发
    def enterevent(self, qevent):
        print("鼠标进来了")
        # 设置控件背景颜色
        self.setstylesheet("background-color: yellow;")

    #鼠标离开控件时触发
    def leaveevent(self, qevent):
        print("鼠标移开了")
        #设置控件背景颜色
        self.setstylesheet("background-color: green;")


    #鼠标按键被按下时触发,不管哪个按键按下都触发

    def mousepressevent(self, qmouseevent):
        #查看鼠标哪个按键被按下
        print("鼠标被按下",qmouseevent.button())

    #松开鼠标按键时触发
    def mousereleaseevent(self, qmouseevent):
        print("鼠标被释放")

    #双击下鼠标按键时触发
    def mousedoubleclickevent(self, qmouseevent):
        print("鼠标双击")

    #按下鼠标按键,并移动鼠标时触发
    def mousemoveevent(self, qmouseevent):
        print("鼠标移动了")

    #按下键盘上按键时触发
    # qkeyevent
    def keypressevent(self, qkeyevent):
        #获取哪个键盘上哪个按键被按下,得到的是ascii码
        print("键盘上某一个按键被按下了",qkeyevent.key())

    #松开键盘按键时触发
    def keyreleaseevent(self, qkeyevent):
        print("键盘上某一个按键被释放了")


if __name__ == '__main__':
    import sys
    app = qapplication(sys.argv)

    window = window()

    window.show()


    sys.exit(app.exec_())
运行

按下鼠标左键

按下键盘a键

其他键盘按键也得到的是ascii码,感兴趣的小伙伴可以试试


发表评论