目录
4.1 将项目打包,并且复制下面的dockerfile文件(和src同级)
一、引入依赖
  <dependency>
            <groupid>org.springframework.boot</groupid>
            <artifactid>spring-boot-starter-webflux</artifactid>
        </dependency>
        <dependency>
            <groupid>org.springframework.cloud</groupid>
            <artifactid>spring-cloud-starter-gateway</artifactid>
        </dependency>
        <dependency>
            <groupid>com.alibaba.cloud</groupid>
            <artifactid>spring-cloud-starter-alibaba-nacos-discovery</artifactid>
        </dependency>
        <dependency>
            <groupid>com.alibaba.cloud</groupid>
            <artifactid>spring-cloud-starter-alibaba-nacos-config</artifactid>
        </dependency>
二、开启两个测试项目
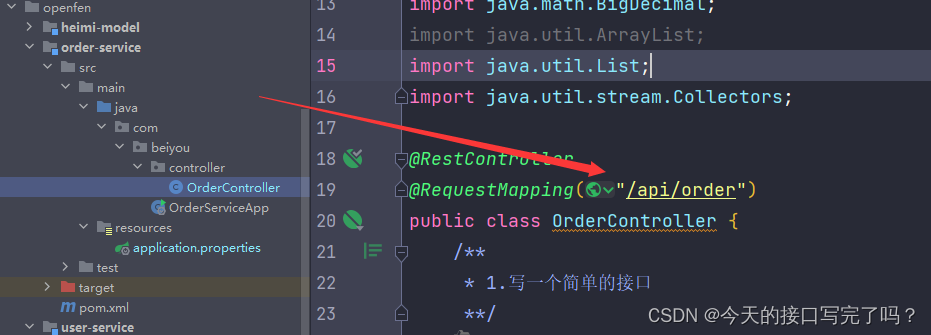
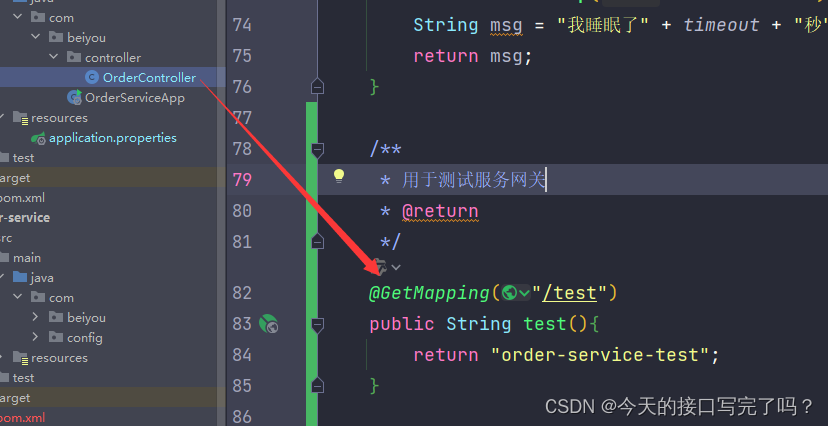
2.1 order service
端口为:3222
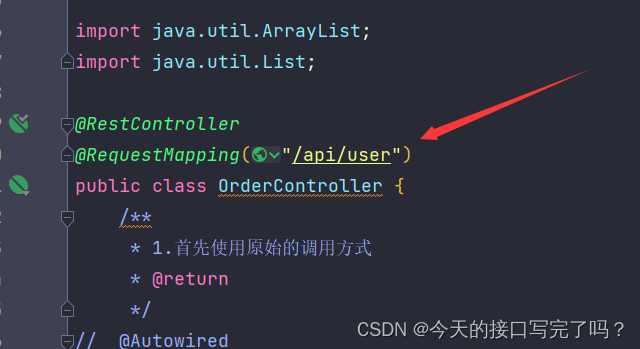
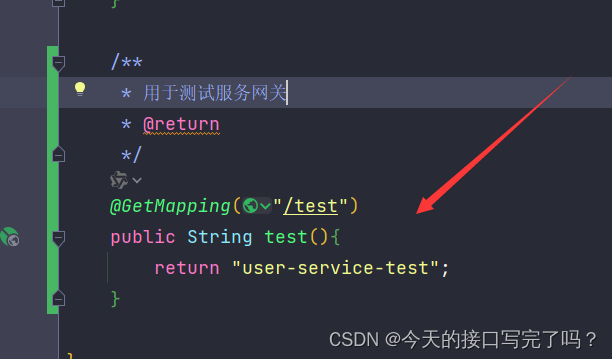
 2.2 user service
端口为:3111
三、gateway项目
3.1 新建一个bootstrap.yml文件
指定文件的地址为 yaml形式 如果是properties 则可以不用加
spring:
  application:
    name: gateway-app
  cloud:
    nacos:
      config:
        server-addr: 192.168.11.82:8848
        file-extension: yaml
      discovery:
        server-addr: 192.168.11.82:8848
3.2 将我们的的网关配置写道nacos里的配置里

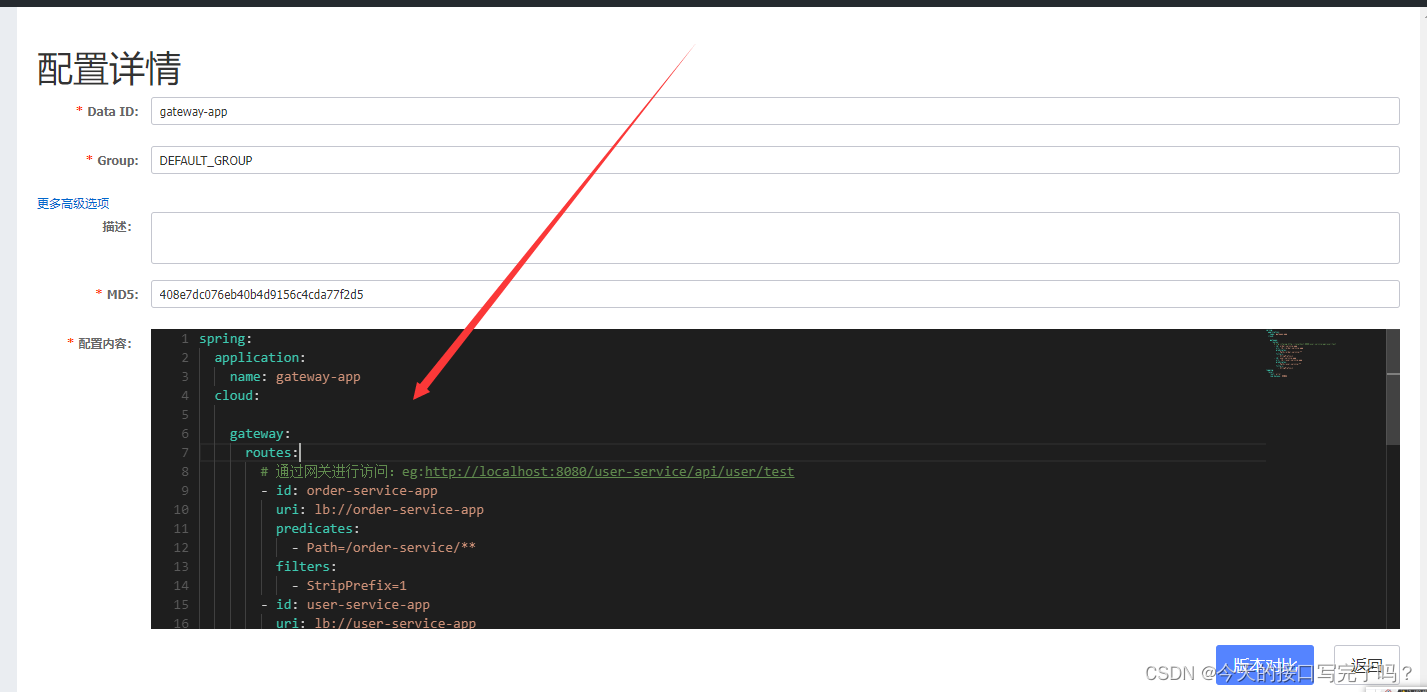 配置内容:
配置内容:
spring:
  application:
    name: gateway-app
  cloud:
    gateway:
      routes:
        # 通过网关进行访问:eg:http://localhost:8080/user-service/api/user/test
        - id: order-service-app
          uri: lb://order-service-app
          predicates:
            - path=/order-service/**
          filters:
            - stripprefix=1
        - id: user-service-app
          uri: lb://user-service-app
          predicates:
            - path=/user-service/**
          filters:
            - stripprefix=1
logging:
  level:
    root: error
    com.beiyou: debug
3.3 测试:看能够根据网关路由到两个测试的项目

四、 优化
前面方式的弊端:当我们的服务越来越多的时候 配置也越来越繁琐,我们可以将项目打包到docker
4.1 将项目打包,并且复制下面的dockerfile文件(和src同级)
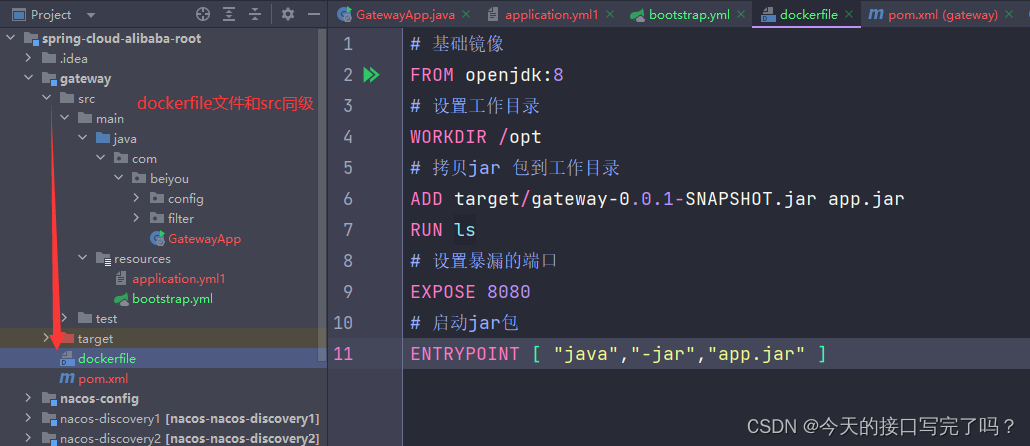
# 基础镜像
from openjdk:8
# 设置工作目录
workdir /opt
# 拷贝jar 包到工作目录
add target/gateway-0.0.1-snapshot.jar app.jar
run ls
# 设置暴漏的端口
expose 8080
# 启动jar包
entrypoint [ "java","-jar","app.jar" ]
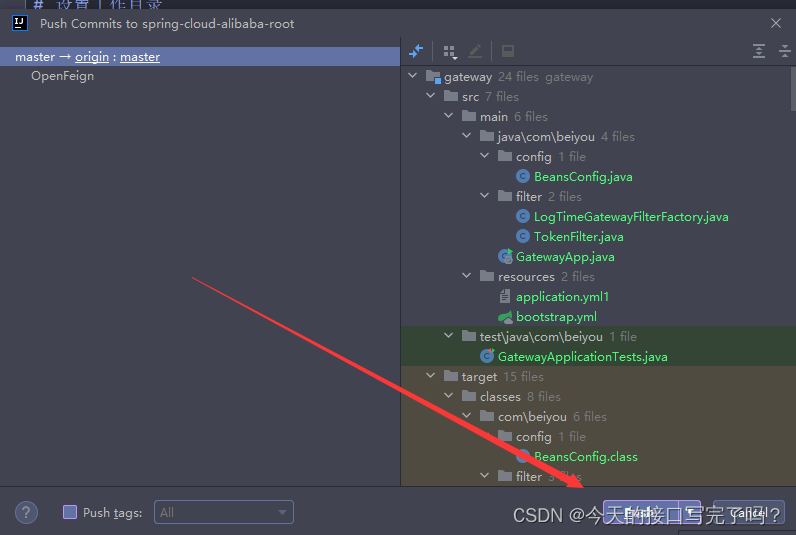
4.2 提交代码到云效
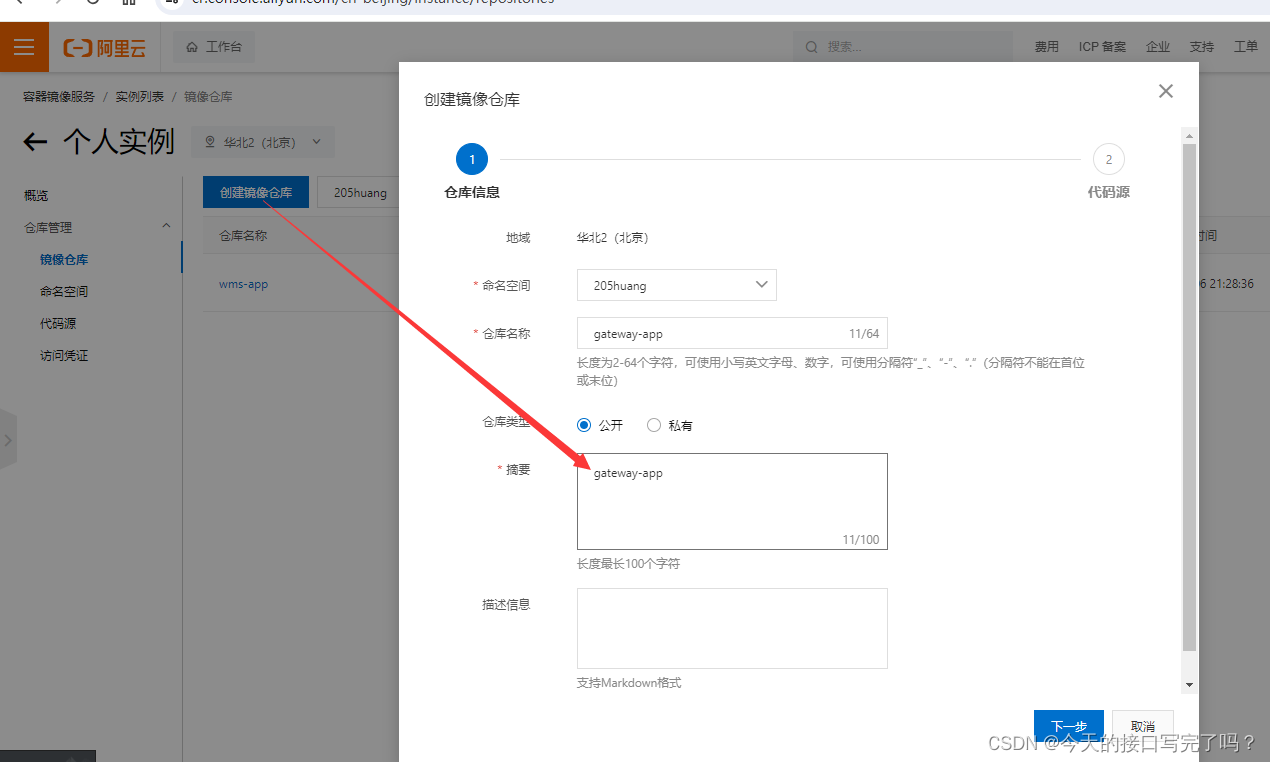
4.3 打开阿里云镜像
https://cr.console.aliyun.com/cn-beijing/instance/repositories
新建一个gateway-app的镜像
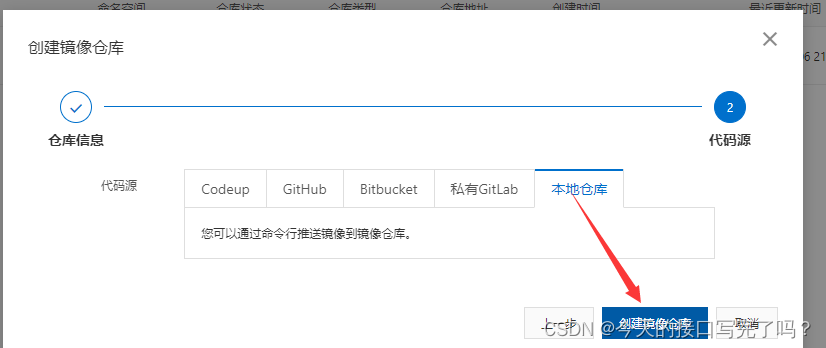
4.4 新建clcd流水线
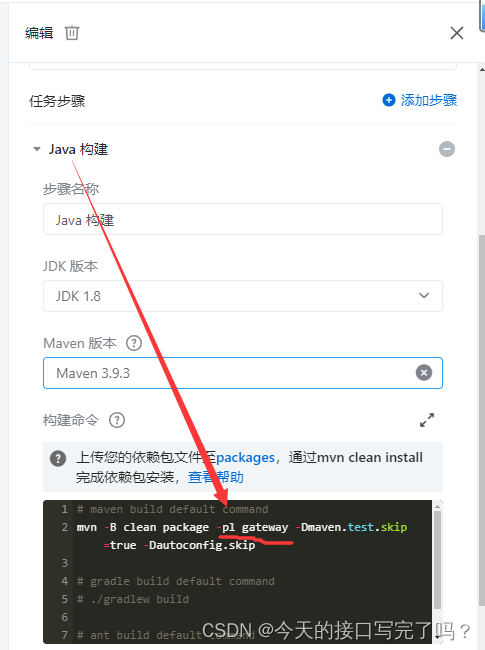
注意点 :maven版本选择和自己本地相同或相近的,java构建的时候,由于是父子项目 我们只想要gateway这个子项目 添加命令 -pl gateway
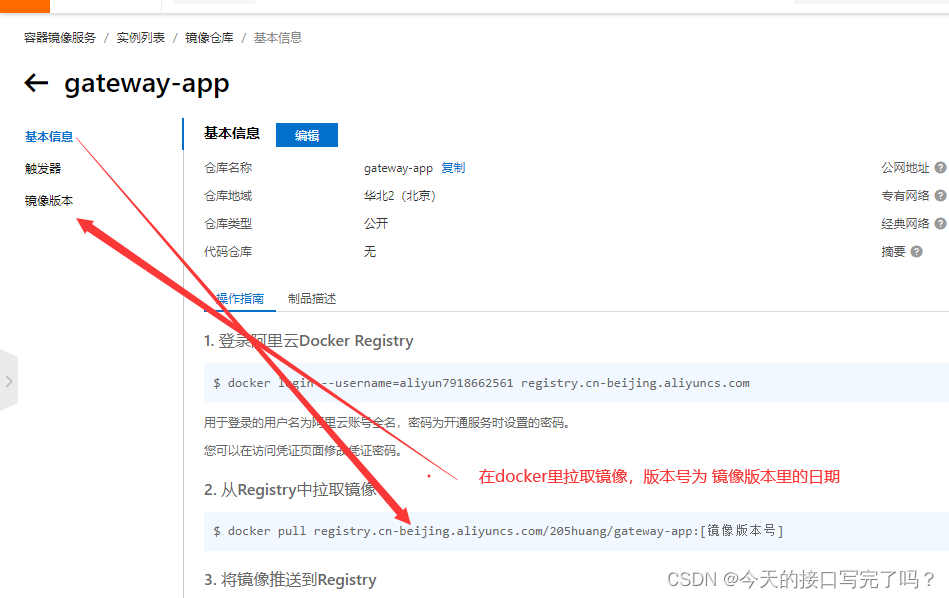
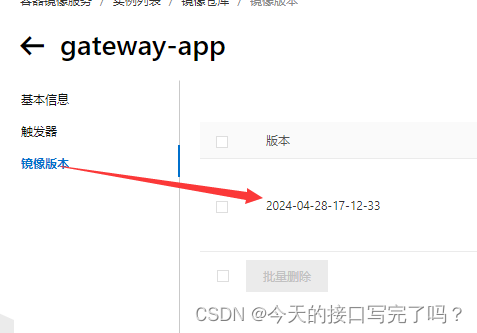
等到成功之后,打开阿里云镜像,复制里的日期为版本号
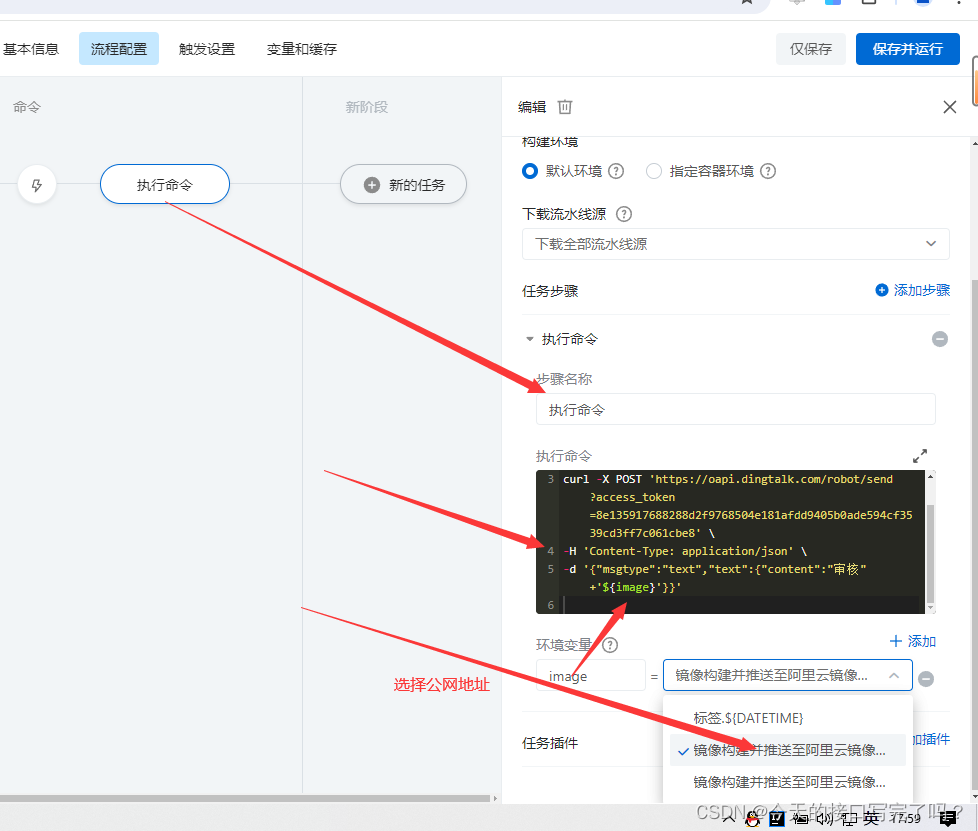
新建一个任务:执行命令curl post 钉钉通知(自动将我们的版本号 让钉钉通知我们)
https换成自己机器人的地址
curl -x post \
     'https://oapi.dingtalk.com/robot/send?access_token=你的key' \
     -h 'content-type: application/json' \
     -d '{"msgtype":"text","text":{"content":"镜像:'${image}'"}}'

4.5 docker 发布多个镜像
 docker run -d --name=gateway01 -p 3111:8080 registry.cn-beijing.aliyuncs.com/wsm-app/gateway-app:2024-04-28-20-35-35


docker run -d --name=gateway02 -p 3222:8080 registry.cn-beijing.aliyuncs.com/wsm-app/gateway-app:2024-04-28-20-35-35
4.6 配置nginx,调用多个服务

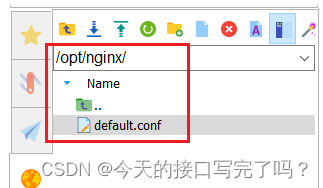
 配置nginx 将nginx 进行挂载
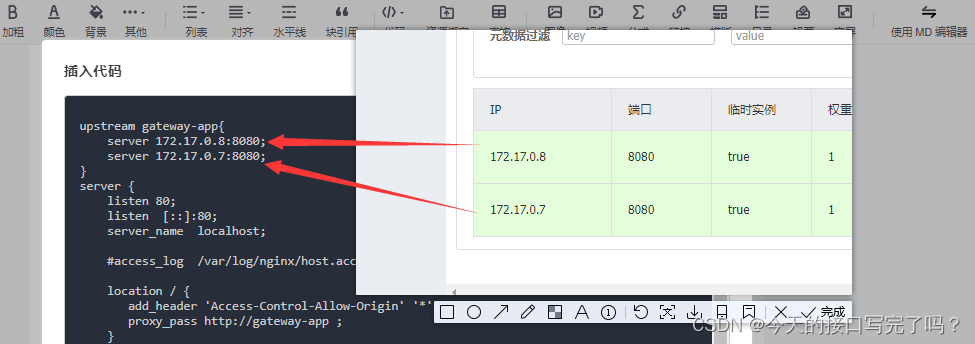
upstream gateway-app{
    server 172.17.0.8:8080;
    server 172.17.0.7:8080;
}
server {
    listen 80;
    listen  [::]:80;
    server_name  localhost;

    #access_log  /var/log/nginx/host.access.log  main;

    location / {
       add_header 'access-control-allow-origin' '*';
       proxy_pass http://gateway-app ;
    }

    #error_page  404              /404.html;

    # redirect server error pages to the static page /50x.html
    #
    error_page   500 502 503 504  /50x.html;
    location = /50x.html {
        root   /usr/share/nginx/html;
    }

    # proxy the php scripts to apache listening on 127.0.0.1:80
    #
    #location ~ \.php$ {
    #    proxy_pass   http://127.0.0.1;
    #}

    # pass the php scripts to fastcgi server listening on 127.0.0.1:9000
    #
    #location ~ \.php$ {
    #    root           html;
    #    fastcgi_pass   127.0.0.1:9000;
    #    fastcgi_index  index.php;
    #    fastcgi_param  script_filename  /scripts$fastcgi_script_name;
    #    include        fastcgi_params;
    #}

    # deny access to .htaccess files, if apache's document root
    # concurs with nginx's one
    #
    #location ~ /\.ht {
    #    deny  all;
    #}
}
4.7 挂载
docker run -d --name=nginx01 -v /opt/nginx/default.conf:/etc/nginx/conf.d/default.conf -p 3000:80 nginx
4.8 测试


发表评论