开发环境
flutter version:3.16.4- 系统:
macos sonoma-apple m1芯片 android studio: 17.0.7

我们通过 flutter create project_name 创建项目。
我们如何打印
关于调起 printer 打印的功能。我们有以下的想法:
- 打印当前路由页面的内容,类似于网页的调用
window.print方式打印 - 打印页面中指定的
widget的内容 - 打印重组的
widget的内容 - 将页面指定的
widget转化为image之后,再调起打印
针对第一点,我们并没有发现在 app 中有类似 window.print 的方法;而对第二点,我们也不能指定页面中 widget 进行打印。剩下的第三点和第四点,我们都可以实现。
接下来,我们将应用 flutter printing 包,来演示后两种实现方式。
引入 printing 包
引入 printing 很简单:
将 printing 包添加到我们的 pubspec.yaml 文件:
dependencies:
  flutter:
    sdk: flutter
  webview_flutter: ^2.0.13 # optional
  flutter_inappwebview: ^5.3.2 # optional

  # the following adds the cupertino icons font to your application.
  # use with the cupertinoicons class for ios style icons.
  cupertino_icons: ^1.0.2
  printing: ^5.12.0
webview_flutter 和 flutter_inappwebview 是可选,笔者在调试 macos 的项目时候用到。printing 在编写本文时候的版本是 ^5.12.0,请以 官网 版本为主
然后,我们可以通过 flutter pub get 来获取包
打印组合的 widgets
下面,我们以一个简单的案例来说说怎么使用该包,并怎么打印组合的 widget。
我们直接在项目的 main.dart 上操作:
import 'package:pdf/pdf.dart';
import 'package:pdf/widgets.dart' as pw;
import 'package:printing/printing.dart';
上面引入 pdf 和 printing 相关包。
因为我们是在 macos 上进行调试,我们还需要在 macos/runner/release.entitlements 和 macos/runner/debugprofile.entitlements 文件中添加内容:
<key>com.apple.security.print</key>
<true/>
如果是其他平台开发调试,请参考 printing 引入相关的内容。
之后我们在 main.dart 中实现相关的逻辑:
@override
widget build(buildcontext context) {
  return scaffold(
    appbar: appbar(
      title: text('print demo'),
    ),
    body: center(
      child: elevatedbutton(
        onpressed: _printpdf,
        child: text('print'),
      ),
    ),
  );
}
上面我们编写了相关的 widget,展示一个 print 按钮,当点击按钮时候,触发方法 _printpdf,该方法的实现如下
future<void> _printpdf() async {
  try {
    final doc = pw.document();

    doc.addpage(pw.page(
      pageformat: pdfpageformat.a4,
      build: (pw.context context) {
        return pw.center(
          child: pw.text('hello jimmy'),
        );
      }
    ));

    await printing.layoutpdf(
      onlayout: (pdfpageformat format) async => doc.save(),
    );
  } catch (e) {
    print(e);
  }
}
在这个方法中,我们在 addpage 中重新组合了需要打印的 widgets,然后调起打印机 printing.layoutpdf,动态如下

那么,对于复杂的内容,如果我们还是编写自定义的 widgets 的话,那不切实际,维护成本高。那么,我们有什么方法打印它呢?这就是下面我们要介绍的了~
widgets 内容转 image,再打印 image
我们直接将页面上的 widgets 内容转换为 image,再结合上面提及的打印组合的 widgets 处理即可。
将 widgets 内容转 image
先上代码:
import 'dart:typed_data';
import 'dart:ui' as ui;
import 'package:flutter/material.dart';
import 'package:flutter/rendering.dart';
import 'package:flutter/services.dart';

class _myhomepagestate extends state<myhomepage> {
  final globalkey boundarykey = globalkey();
  uint8list _imagebytes = uint8list(0);

  @override
  widget build(buildcontext context) {
    return scaffold(
      appbar: appbar(
        title: text('widget to image demo'),
      ),
      body: center(
        child: column(
          mainaxisalignment: mainaxisalignment.center,
          children: <widget>[
            repaintboundary(
              key: boundarykey,
              child: container(
                width: 200,
                height: 200,
                color: colors.blue,
                child: center(
                  child: text(
                    'hello, jimmy!',
                    style: textstyle(
                      color: colors.white,
                      fontsize: 24,
                    ),
                  ),
                ),
              ),
            ),
            sizedbox(height: 20),
            elevatedbutton(
              onpressed: _capturepng,
              child: text('capture image'),
            ),
            sizedbox(height: 20),
            if (!_imagebytes.isempty)
              image.memory(
                _imagebytes,
                width: 200,
                height: 200,
              ),
          ],
        ),
      ),
    );
  }

  future<void> _capturepng() async {
    try {
      renderrepaintboundary? boundary =
      boundarykey.currentcontext?.findrenderobject() as renderrepaintboundary?;
      ui.image? image = await boundary?.toimage(pixelratio: 3.0);
      bytedata? bytedata =
      await image?.tobytedata(format: ui.imagebyteformat.png);
      setstate(() {
        _imagebytes = bytedata!.buffer.asuint8list(); // 赋值
      });
    } catch (e) {
      print(e);
    }
  }
}
在代码中,我们用 repaintboundary 来指定了重绘的区域为 200*200 的文本值。当我们点击 elevatedbutton 挂件时候,会触发 _capturepng 方法。在 _capturepng 方法中,我们将区域内的内容转换为图像,并且,将图像转为位数据,给 _imagebytes 赋值,展现在页面上。相关 gif 图如下

整合 image 挂件
在上面的例子中,我们保存了生成的图数据。接下来,我们将该图片打印出来。上面的代码,我们在原始基础上更改:
elevatedbutton(
  onpressed: () => _capturepng(context),
  child: text('capture image'),
),
引入包:
import 'package:pdf/pdf.dart';
import 'package:pdf/widgets.dart' as pw;
import 'package:printing/printing.dart';
然后补充 _capturepng 方法:
future<void> _capturepng(buildcontext ctx) async {
  try {
    // 添加 print
    final doc = pw.document();

    renderrepaintboundary? boundary = boundarykey.currentcontext
      ?.findrenderobject() as renderrepaintboundary?;
    ui.image? image = await boundary?.toimage(pixelratio: 3.0);
    bytedata? bytedata =
      await image?.tobytedata(format: ui.imagebyteformat.png);

    final pageformat = pdfpageformat.a4;

    print(mediaquery.of(ctx).size.height); // 测试打印界面的高度

    doc.addpage(pw.page(
      pageformat: pageformat,
      orientation: pw.pageorientation.landscape,
      build: (pw.context context) {
        return pw.center(
          child: pw.image( // 图像挂件
            pw.memoryimage(_imagebytes),
            width: pageformat.height - 20,
            fit: pw.boxfit.fitwidth,
          ),
        );
      }));

    // 打印
    await printing.layoutpdf(
      onlayout: (pdfpageformat format) async => doc.save(),
    );
  } catch (e) {
    print(e);
  }
}
上面,我们通过 pw.memoryimage(_imagebytes) 指定 image 的内容,并调起打印机打印~
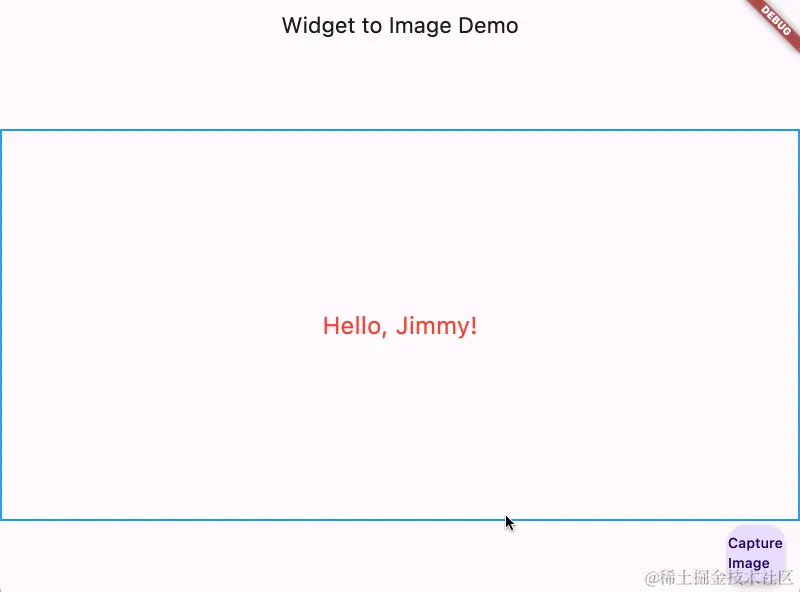
为了方便演示,看到边界,我们更改了下 ui

当然,我们可以设定其打印的边距和指定内容的方向等:
pw.page(
  orientation: pw.pageorientation.landscape, // 内容的方向
  margin: pw.edgeinsets.all(16.0), // 边距
  ...
)
以上就是flutter实现打印功能的示例详解的详细内容,更多关于flutter打印的资料请关注代码网其它相关文章!


发表评论