
 我要评论
我要评论引言
演示文稿里图片几乎不可或缺:公司 logo、产品截图、流程图、配图都靠图片传达信息。往幻灯片上放一张图片看似简单,但要精确控制位置、大小、边框和透明度,或者在多份文稿里批量替换旧 logo,手动操作就不够用了。
本文以 spire.presentation for python 为例,介绍如何在幻灯片上插入图片、缩放图片尺寸、设置图片框的边框和旋转角度、给图片加透明度、替换已有图片,以及批量删除幻灯片上的图片。
环境准备
安装 spire.presentation 库:
pip install spire.presentation
在脚本中引入模块:
from spire.presentation import *
from spire.presentation.common import *
在幻灯片上插入图片
appendembedimagebypath() 把图片嵌入到指定幻灯片的矩形区域内,返回一个图片形状对象:
import math

presentation = presentation()
presentation.loadfromfile("演示文稿.pptx")

imagepath = "logo.png"
# 计算居中位置
left = math.trunc(presentation.slidesize.size.width / float(2)) - 280
rect = rectanglef.fromltrb(left, 140, 120 + left, 260)

# 在第一张幻灯片插入图片
image = presentation.slides[0].shapes.appendembedimagebypath(
    shapetype.rectangle, imagepath, rect)
# 去掉默认边框
image.line.filltype = fillformattype.none

presentation.savetofile("插入图片.pptx", fileformat.pptx2010)
presentation.dispose()

rectanglef.fromltrb(left, top, right, bottom) 定义图片在幻灯片上的位置和大小,单位为像素。shapetype.rectangle 指定容器形状类型。插入后默认带边框,把 line.filltype 设为 fillformattype.none 即可去掉。
缩放幻灯片上的图片
已经存在的图片可以通过遍历 shapes 集合找到,再按比例调整 width 和 height:
presentation = presentation()
presentation.loadfromfile("演示文稿.pptx")

scale = 0.5
for slide in presentation.slides:
    for shape in slide.shapes:
        if isinstance(shape, iembedimage):
            shape.width = shape.width * scale
            shape.height = shape.height * scale

presentation.savetofile("缩放图片.pptx", fileformat.pptx2013)
presentation.dispose()
isinstance(shape, iembedimage) 用来筛选出图片形状,跳过文本框、表格等其他形状。scale = 0.5 把每张图片缩小到原来的一半。按比例缩放可以保持宽高比不变形。
设置图片框的边框和旋转
插入图片时返回的对象本身就是形状,可以设置边框线型、宽度和旋转角度:
import math

presentation = presentation()

stream = stream("logo.png")
imagedata = presentation.images.appendstream(stream)
stream.close()

# 以图片原始尺寸的一半插入
rect = rectanglef.fromltrb(
    100, 100,
    math.trunc(imagedata.width / float(2)) + 100,
    math.trunc(imagedata.height / float(2)) + 100)
pptimage = presentation.slides[0].shapes.appendembedimagebyimagedata(
    shapetype.rectangle, imagedata, rect)

# 设置边框:实线、浅蓝色、宽度 5
pptimage.line.fillformat.filltype = fillformattype.solid
pptimage.line.fillformat.solidfillcolor.color = color.get_lightblue()
pptimage.line.width = 5
# 旋转 -45 度
pptimage.rotation = -45

presentation.savetofile("图片框格式.pptx", fileformat.pptx2013)
presentation.dispose()
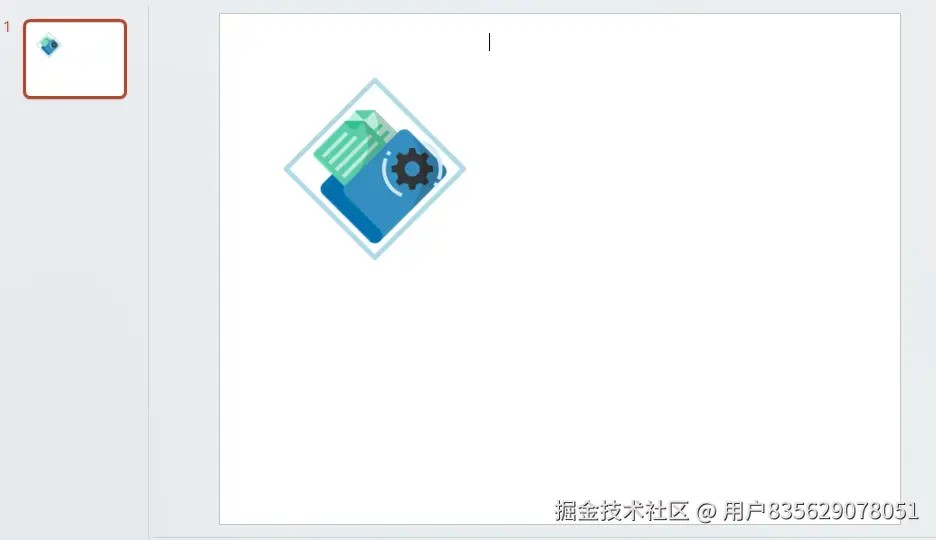
appendembedimagebyimagedata() 用已加载的图片数据插入,适合同一张图片要多次使用的场景——先 images.appendstream() 加载一次,再重复引用。line.fillformat 控制边框填充,rotation 控制旋转角度(正值为顺时针,负值为逆时针)。
给图片设置透明度
透明度需要通过形状填充来实现:先把图片加载到文稿的图片集合,再画一个矩形形状并用该图片填充,最后设置透明度:
from spire.presentation import *

presentation = presentation()
stream = stream("logo.png")
imagedata = presentation.images.appendstream(stream)
stream.close()

# 从图片数据读取尺寸
width, height = imagedata.width, imagedata.height
rect = rectanglef.fromltrb(200, 100, width + 200, height + 100)
shape = presentation.slides[0].shapes.appendshape(shapetype.rectangle, rect)
shape.line.filltype = fillformattype.none

# 用图片填充形状
shape.fill.filltype = fillformattype.picture
shape.fill.picturefill.picture.embedimage = presentation.images[0]
shape.fill.picturefill.filltype = picturefilltype.stretch

# 设置透明度为 50%
shape.fill.picturefill.picture.transparency = 50

presentation.savetofile("透明图片.pptx", fileformat.pptx2013)
presentation.dispose()

images.appendstream() 把图片加入文稿资源池并返回图片数据,从中可以直接读取 width 和 height,无需借助 pillow。filltype = fillformattype.picture 把形状填充切换为图片,embedimage 指向资源池中的图片对象,picturefilltype.stretch 让图片拉伸填满形状。transparency 取值 0 到 100,数值越大越透明。这种方式适用于需要把图片当背景或水印的场景。
替换已有的图片
更新 logo 或换图时,先把新图片加载到文稿的图片集合,再把它赋给目标图片形状的 embedimage:
ppt = presentation()
ppt.loadfromfile("演示文稿.pptx")
slide = ppt.slides[0]

# 加载新图片
stream = stream("new_logo.png")
newimage = ppt.images.appendstream(stream)
stream.close()

# 找到标题为 "image1" 的图片并替换
for shape in slide.shapes:
    if isinstance(shape, slidepicture):
        if shape.alternativetitle == "image1":
            shape.picturefill.picture.embedimage = newimage

ppt.savetofile("替换图片.pptx", fileformat.pptx2013)
ppt.dispose()
slidepicture 是幻灯片图片形状的类型。通过 alternativetitle 定位到要替换的图片,再把新图片数据赋给 picturefill.picture.embedimage,即可完成替换。appendstream() 把新图片加入文稿的图片资源池,替换时只是把形状指向新的资源。
删除幻灯片上的图片
清理不需要的图片,遍历 shapes 并倒序移除:
ppt = presentation()
ppt.loadfromfile("演示文稿.pptx")
slide = ppt.slides[0]

for i in range(slide.shapes.count - 1, -1, -1):
    if isinstance(slide.shapes[i], slidepicture):
        slide.shapes.removeat(i)

ppt.savetofile("删除图片.pptx", fileformat.pptx2013)
ppt.dispose()
isinstance(slide.shapes[i], slidepicture) 判断形状是否为图片,removeat(i) 按索引删除。倒序遍历避免删除后索引错位。
实用提示
rectanglef.fromltrb的四个参数是左、上、右、下坐标,不是宽和高,容易写错。- 插入图片后默认有边框,需要纯图片效果时记得把
line.filltype设为none。 - 同一张图片多次使用时,先用
images.appendstream()加载一次再引用,比每次appendembedimagebypath()更省体积。 - 设置透明度需要通过形状填充实现,直接对
iembedimage设置transparency不生效。 - 处理完调用
presentation.dispose()释放资源。
总结
本文介绍了用 python 在 powerpoint 中处理图片的常用操作:用 appendembedimagebypath() 在幻灯片上插入图片、遍历 iembedimage 缩放尺寸、设置图片框的边框和旋转、通过形状填充实现透明度、用 embedimage 替换已有图片,以及倒序遍历 slidepicture 批量删除。把这些操作组合进演示文稿生成脚本,图片的插入和维护可以完全自动化。
以上就是使用python操作powerpoint中的图片的完整指南的详细内容,更多关于python操作powerpoint图片的资料请关注代码网其它相关文章!




发表评论