
 我要评论
我要评论一、引言
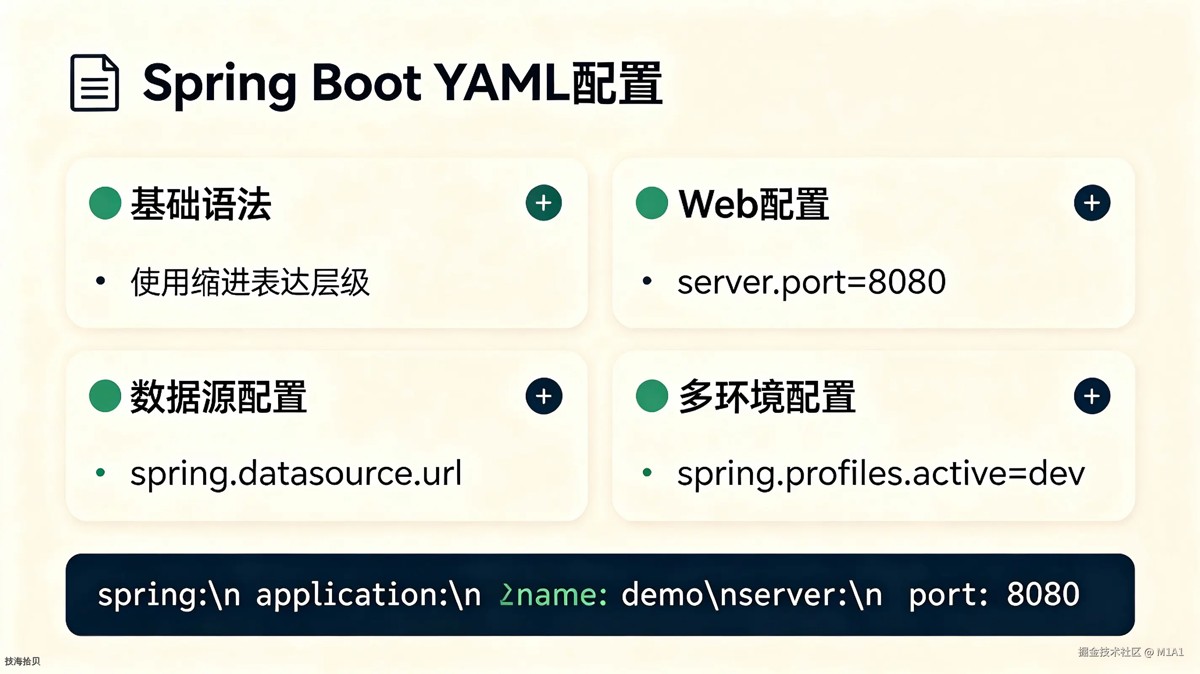
在 spring boot 应用中,配置管理是开发工作的核心环节之一。yaml(yaml ain't markup language)凭借其清晰的层级结构、简洁的语法和对复杂数据类型的原生支持,已逐渐取代传统的 properties 文件,成为 spring boot 项目首选的配置格式。
本文面向具备 java 基础、正在学习 spring boot 的开发者,系统讲解从基础配置读取到微服务引导配置的完整技术链路。我们将通过大量可运行的代码示例,深入剖析 @value、environment、@configurationproperties 等核心机制,并重点展开多环境配置、bootstrap.yml 引导上下文、配置校验与动态刷新等企业级实践。
二、基础读取方式
2.1 yaml 与 properties 的区别与优先级
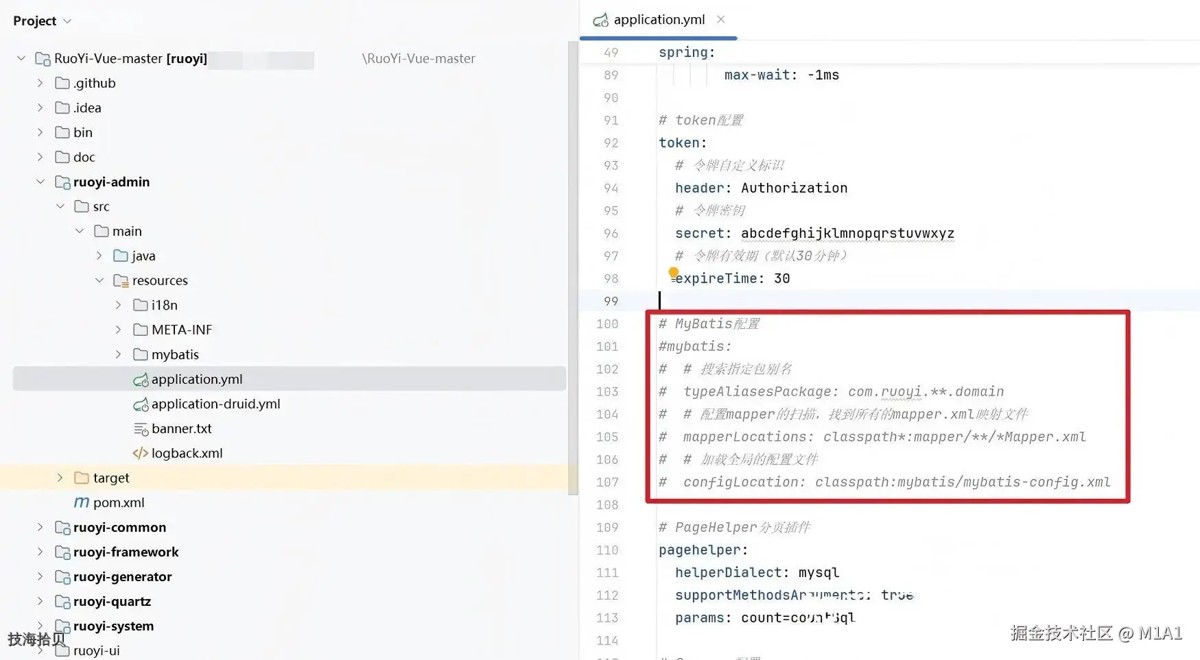
spring boot 同时支持 application.yml 和 application.properties 两种配置文件。当两者并存时,application.properties的优先级高于application.yml(同一配置项会被 properties 覆盖)。
备注:使用idea创建spring boot项目,默认是application.properties。
yaml 的核心优势:
| 特性 | yaml | properties | | --- | --- | --- | | 层级表达 | 通过缩进天然支持多级嵌套 | 需使用点号分隔,扁平化 | | list/map | 原生支持数组与键值对 | 需借助索引或特殊语法 | | 可读性 | 结构清晰,适合复杂配置 | 适合简单键值对 | | 多文档 | 支持 --- 分隔多份配置 | 不支持 |
示例对比:
# application.yml
server:
  port: 8080
  servlet:
    context-path: /api
app:
  name: order-service
  features:
    - cache
    - metrics
    - tracing
# application.properties(等效写法) server.port=8080 server.servlet.context-path=/api app.name=order-service app.features[0]=cache app.features[1]=metrics app.features[2]=tracing
2.2 @value 注解:注入单个配置项
@value 是最直接的配置注入方式,适合读取单个或少量简单属性,支持 spel 表达式和默认值语法。
yaml 配置:
# application.yml
app:
  name: user-service
  version: 1.2.0
  timeout-seconds: 30
java 代码:
import org.springframework.beans.factory.annotation.value;
import org.springframework.stereotype.component;

@component
public class appinfoholder {

    @value("${app.name}")
    private string appname;

    @value("${app.version}")
    private string appversion;

    // 支持默认值:若 app.timeout-seconds 不存在,则使用 10
    @value("${app.timeout-seconds:10}")
    private int timeoutseconds;

    // 支持 spel 表达式
    @value("#{${app.timeout-seconds:10} * 1000}")
    private int timeoutmillis;

    public void printinfo() {
        system.out.printf("应用: %s, 版本: %s, 超时: %ds (%dms)%n",
                appname, appversion, timeoutseconds, timeoutmillis);
    }
}
核心要点:
- • 默认值语法
${key:defaultvalue}可有效避免配置缺失导致的启动失败 - • 属性名遵循松散绑定:yaml 中的
timeout-seconds可自动映射到 java 的timeoutseconds - • 不适合读取复杂嵌套结构,每个字段需单独注解,代码冗余
2.3 environment 接口:动态获取配置
environment 由 spring 容器统一管理,适合在运行时根据条件动态读取配置,或访问系统级属性。
yaml 配置(同上):
app:
  name: user-service
  version: 1.2.0
java 代码:
import org.springframework.core.env.environment;
import org.springframework.stereotype.component;

@component
public class dynamicconfigreader {

    private final environment env;

    public dynamicconfigreader(environment env) {
        this.env = env;
    }

    public void readconfig() {
        string appname = env.getproperty("app.name", "default-app");
        integer timeout = env.getproperty("app.timeout-seconds", integer.class, 10);

        // 检查配置是否存在
        boolean hasversion = env.containsproperty("app.version");
        system.out.println("应用名称: " + appname);
        system.out.println("超时时间: " + timeout);
        system.out.println("是否存在版本配置: " + hasversion);
    }
}
适用场景:
- • 需要在业务逻辑中根据配置值做分支判断
- • 访问系统环境变量(如
env.getproperty("java_home")) - • 与
@value相比,类型转换需手动处理,代码略繁琐
2.4 @configurationproperties 前置使用方式
对于一组相关配置,使用 @configurationproperties 可将整个配置前缀批量绑定到一个 java bean,显著减少样板代码。
yaml 配置:
# application.yml
mail:
  host: smtp.example.com
  port: 587
  username: sender@example.com
  password: secret
java 代码:
import org.springframework.boot.context.properties.configurationproperties;
import org.springframework.stereotype.component;

@component
@configurationproperties(prefix = "mail")
public class mailproperties {

    private string host;
    private int port;
    private string username;
    private string password;

    // 必须提供标准的 getter/setter
    public string gethost() { return host; }
    public void sethost(string host) { this.host = host; }
    public int getport() { return port; }
    public void setport(int port) { this.port = port; }
    public string getusername() { return username; }
    public void setusername(string username) { this.username = username; }
    public string getpassword() { return password; }
    public void setpassword(string password) { this.password = password; }

    @override
    public string tostring() {
        return string.format("mail{host=%s, port=%d, user=%s}", host, port, username);
    }
}
启用配置属性绑定:
import org.springframework.boot.springapplication;
import org.springframework.boot.autoconfigure.springbootapplication;
import org.springframework.boot.context.properties.enableconfigurationproperties;

@springbootapplication
@enableconfigurationproperties(mailproperties.class) // 显式启用(若配置类未标注 @component)
public class demoapplication {
    public static void main(string[] args) {
        springapplication.run(demoapplication.class, args);
    }
}
注意: 若配置类已标注 @component,则无需在启动类上重复添加 @enableconfigurationproperties。后文将详细对比两种注册方式。
三、结构化配置绑定
当配置结构复杂时,@configurationproperties 的真正优势才得以体现。它可以轻松映射嵌套对象、列表和字典。
3.1 复杂配置绑定示例
yaml 配置:
# application.yml
order:
  channel: online
  max-items-per-order: 50
  warehouse:
    code: wh-bj-001
    address: 北京市朝阳区物流园
    manager:
      name: 张经理
      phone: 13800138000
  carriers:
    - name: 顺丰速运
      code: sf
      enabled: true
    - name: 京东物流
      code: jd
      enabled: true
    - name: 中通快递
      code: zto
      enabled: false
  extra-rules:
    fragile: true
    same-day-delivery: false
    note: 易碎品请轻拿轻放
java 代码:
import org.springframework.boot.context.properties.configurationproperties;
import org.springframework.stereotype.component;
import java.util.list;
import java.util.map;

@component
@configurationproperties(prefix = "order")
public class orderconfig {

    private string channel;
    private int maxitemsperorder;
    private warehouse warehouse;
    private list<carrier> carriers;
    private map<string, string> extrarules;

    // 嵌套对象
    public static class warehouse {
        private string code;
        private string address;
        private manager manager;

        public static class manager {
            private string name;
            private string phone;
            // getter/setter 省略...
            public string getname() { return name; }
            public void setname(string name) { this.name = name; }
            public string getphone() { return phone; }
            public void setphone(string phone) { this.phone = phone; }
        }

        // getter/setter 省略...
        public string getcode() { return code; }
        public void setcode(string code) { this.code = code; }
        public string getaddress() { return address; }
        public void setaddress(string address) { this.address = address; }
        public manager getmanager() { return manager; }
        public void setmanager(manager manager) { this.manager = manager; }
    }

    // 列表元素
    public static class carrier {
        private string name;
        private string code;
        private boolean enabled;
        // getter/setter 省略...
        public string getname() { return name; }
        public void setname(string name) { this.name = name; }
        public string getcode() { return code; }
        public void setcode(string code) { this.code = code; }
        public boolean isenabled() { return enabled; }
        public void setenabled(boolean enabled) { this.enabled = enabled; }
    }

    // 主类 getter/setter 省略...
    public string getchannel() { return channel; }
    public void setchannel(string channel) { this.channel = channel; }
    public int getmaxitemsperorder() { return maxitemsperorder; }
    public void setmaxitemsperorder(int maxitemsperorder) { this.maxitemsperorder = maxitemsperorder; }
    public warehouse getwarehouse() { return warehouse; }
    public void setwarehouse(warehouse warehouse) { this.warehouse = warehouse; }
    public list<carrier> getcarriers() { return carriers; }
    public void setcarriers(list<carrier> carriers) { this.carriers = carriers; }
    public map<string, string> getextrarules() { return extrarules; }
    public void setextrarules(map<string, string> extrarules) { this.extrarules = extrarules; }
}
使用示例:
import org.springframework.web.bind.annotation.getmapping;
import org.springframework.web.bind.annotation.restcontroller;

@restcontroller
public class configcontroller {

    private final orderconfig orderconfig;

    public configcontroller(orderconfig orderconfig) {
        this.orderconfig = orderconfig;
    }

    @getmapping("/config")
    public string showconfig() {
        stringbuilder sb = new stringbuilder();
        sb.append("渠道: ").append(orderconfig.getchannel()).append("\n");
        sb.append("仓库: ").append(orderconfig.getwarehouse().getaddress()).append("\n");
        sb.append("物流商数量: ").append(orderconfig.getcarriers().size()).append("\n");
        sb.append("额外规则: ").append(orderconfig.getextrarules()).append("\n");
        return sb.tostring();
    }
}
3.2 @component 与 @enableconfigurationproperties 对比
| 维度 | @component | @enableconfigurationproperties | | --- | --- | --- | | 注册方式 | 配置类作为 spring bean 被组件扫描自动注册 | 在启动类或配置类上显式指定配置类 | | 适用场景 | 配置类位于主包或其子包下,业务相关配置 | 配置类位于外部 starter 或独立模块,框架级配置 | | 灵活性 | 依赖组件扫描路径,位置受限 | 不受包路径限制,可精确控制哪些配置类生效 | | 解耦程度 | 配置类与 spring 容器耦合较深 | 配置类保持 pojo 纯净,由外部决定是否启用 | | 第三方库 | 不适合(无法修改源码添加注解) | 适合(在自动配置类中 @enableconfigurationproperties) |
推荐实践:
- • 业务项目内部配置:使用
@component+@configurationproperties,简洁直观 - • 自定义 starter 或共享模块:配置类不标注
@component,由使用方通过@enableconfigurationproperties显式启用,符合"约定优于配置"的设计哲学
四、多环境与引导配置
4.1 profile 配置与加载机制
spring boot 支持通过 application-{profile}.yml 为不同环境定义专属配置。命名必须严格遵循此规范,否则无法被自动识别。
文件结构:
src/main/resources/
├── application.yml          # 公共配置
├── application-dev.yml      # 开发环境
├── application-test.yml     # 测试环境
└── application-prod.yml     # 生产环境
配置示例:
# application.yml(公共配置)
spring:
  application:
    name: payment-service
---
# application-dev.yml
server:
  port: 8080
spring:
  datasource:
    url: jdbc:mysql://localhost:3306/dev_db
    username: dev_user
    password: dev_pass
---
# application-prod.yml
server:
  port: 80
spring:
  datasource:
    url: jdbc:mysql://prod-mysql.internal:3306/prod_db
    username: ${db_user}
    password: ${db_password}
加载规则:
- • 先加载
application.yml,再加载application-{activeprofile}.yml - • profile 专属配置会覆盖公共配置中的同名属性
- • 若多个 profile 同时激活,后加载的覆盖先加载的
4.2 spring.profiles.active 的四种激活方式
| 方式 | 具体操作 | 优先级 | 适用场景 | | --- | --- | --- | --- | | 配置文件 | 在 application.yml 中写 spring.profiles.active: dev | 最低 | 本地开发快速切换 | | 命令行参数 | java -jar app.jar --spring.profiles.active=prod | 高 | ci/cd 流水线部署 | | 环境变量 | export spring_profiles_active=prod | 高 | 容器化部署(docker/k8s) | | jvm 参数 | -dspring.profiles.active=prod | 高 | 传统应用服务器部署 |
命令行示例:
# 激活 prod 与 monitoring 两个 profile
java -jar app.jar --spring.profiles.active=prod,monitoring
环境变量方式在 linux/unix 中需注意:spring boot 会自动将大写下划线格式 spring_profiles_active 映射到属性 spring.profiles.active。
4.3 多文档 yaml 文件
spring boot 支持在单个****application.yml****文件内使用 --- 分隔符定义多份逻辑文档,并为每份文档指定生效的 profile。
# application.yml(单文件多环境)
spring:
  profiles:
    active: dev
---
spring:
  config:
    activate:
      on-profile: dev
server:
  port: 8080
logging:
  level:
    root: debug
---
spring:
  config:
    activate:
      on-profile: prod
server:
  port: 80
logging:
  level:
    root: warn
注意事项:
- •
---必须独占一行,前后不能有空格或注释混杂 - • 每份文档的
spring.config.activate.on-profile指定该段配置仅在对应 profile 激活时生效 - • 适合环境差异较小的项目,可减少配置文件数量;环境复杂时仍建议使用独立文件
4.4 bootstrap.yml 引导配置深度解析
在微服务架构中,bootstrap.yml 扮演着至关重要的角色。理解它的工作机制,是掌握 spring cloud 配置中心的前提。
4.4.1 本质区别:bootstrap context 与 main context
spring boot 启动时实际上会创建两个 applicationcontext:
bootstrap.yml 专属于 bootstrap context,其加载时机远早于application.yml。这种父子层级设计意味着:
- • bootstrap context 中定义的配置会作为 propertysource 插入到 environment 的最前端
- • main context 中的
application.yml可以引用bootstrap.yml中已定义的属性 - • bootstrap context 中的 bean 对 main context 不可见,反之亦然
4.4.2 加载优先级与用途
bootstrap.yml 的加载优先级高于application.yml,典型用途包括:
- • 从 spring cloud config server 或 nacos 拉取远程配置
- • 解密外部化加密属性(如
{cipher}aqak...) - • 配置服务注册发现的基础参数(如 eureka server 地址、nacos server 地址)
- • 定义日志系统(如 logback)在 main context 创建前所需的配置
4.4.3 实际项目配置示例解析
以下是一个基于 spring cloud + nacos 的真实生产项目配置结构,展示了 bootstrap.yml 在微服务中的典型用法。
项目配置文件结构:
src/main/resources/
├── bootstrap.yml              # 引导主配置:仅指定激活的 profile
├── bootstrap-dev.yml          # 开发环境
├── bootstrap-test.yml         # 测试环境
├── bootstrap-test-local.yml   # 本地测试环境
├── bootstrap-uat.yml          # uat 环境
├── bootstrap-proda.yml        # 生产 a 集群
├── bootstrap-prodb.yml        # 生产 b 集群
├── bootstrap-gray.yml         # 灰度环境
└── bootstrap-local.yml        # 本地开发环境
bootstrap.yml(引导入口,仅做 profile 分发):
spring:
  profiles:
    active: test-local
这种设计将环境切换逻辑完全收敛到 bootstrap.yml 中,开发者只需修改 active 的值即可切换整套环境配置,无需触碰具体参数。
bootstrap-dev.yml(开发环境完整配置):
server:
  port: 39718
  undertow:
    buffer-size: 1024
    buffers-per-region: 1024
    direct-buffers: true
    io-threads: 128
    worker-threads: 1024
# feign 配置:禁用 httpclient,启用 okhttp
feign:
  httpclient:
    enabled: false
  okhttp:
    enabled: true
spring:
  application:
    name: warehouse-provider
  main:
    allow-bean-definition-overriding: true
    allow-circular-references: true
  cloud:
    nacos:
      discovery:
        server-addr: nacos-headless.default.svc.cluster.local:8848
        namespace: test
        group: wms
        file-extension: yml
      config:
        server-addr: nacos-xxx:8848
        namespace: test
        file-extension: yml
配置要点说明:
1. 服务端口与容器调优:server.port 和 undertow 线程池参数直接定义在 bootstrap.yml 中,确保 web 容器在引导阶段即获得正确的运行时参数。
2. feign http 客户端切换:通过 feign.httpclient.enabled: false 和 feign.okhttp.enabled: true,在引导阶段确定下游 http 调用栈的实现。
3. nacos 服务发现与配置中心:
- •
discovery段:注册中心地址、命名空间(namespace)、分组(group),用于服务注册与发现 - •
config段:配置中心地址与命名空间,用于远程配置拉取 - • 用户名和密码使用
enc(...)加密,需配合 jasypt 等加密组件解密
4. spring 主程序兼容设置:allow-bean-definition-overriding: true 和 allow-circular-references: true 用于兼容遗留代码或第三方 starter 中的 bean 覆盖与循环依赖场景。
4.4.4 配合 spring cloud config server 的完整流程
1. 添加依赖(maven):
<!-- spring cloud 2020.x 及以上版本需显式引入 -->
<dependency>
    <groupid>org.springframework.cloud</groupid>
    <artifactid>spring-cloud-starter-bootstrap</artifactid>
</dependency>
<!-- config client -->
<dependency>
    <groupid>org.springframework.cloud</groupid>
    <artifactid>spring-cloud-starter-config</artifactid>
</dependency>
2. bootstrap.yml 配置:
# bootstrap.yml
spring:
  application:
    name: order-service        # 对应 config server 中的配置文件名
  cloud:
    config:
      uri: http://config-server:8888
      profile: dev             # 拉取 order-service-dev.yml
      label: main              # git 分支
      fail-fast: true          # 连接失败时快速报错,避免使用错误本地配置
      retry:
        initial-interval: 1000
        max-attempts: 6
3. 启动流程:
- • jvm 启动 → 创建 bootstrap context
- • bootstrap context 读取
bootstrap.yml,确定 config server 地址 - • 向
http://config-server:8888/order-service/dev/main发起 http 请求 - • 将远程配置合并为 propertysource,注入到 environment
- • 创建 main context,加载
application.yml,此时可引用远程配置中的属性
4.4.5 禁用引导上下文
在纯 spring boot 项目(未使用 spring cloud)中,若不希望加载 bootstrap.yml,可通过以下方式禁用:
# application.yml
spring:
  cloud:
    bootstrap:
      enabled: false
或在 jvm 参数中指定:
java -jar app.jar -dspring.cloud.bootstrap.enabled=false
知识拓展: 常规单体应用无需关注此设置。该选项主要用于排除因类路径中存在 spring-cloud-context 依赖而意外触发的引导上下文加载。
4.4.6 版本兼容性注意
spring cloud 2020.0.x(对应 spring boot 2.4.x)及后续版本默认不再自动启用 bootstrap context。若需使用 bootstrap.yml,必须显式添加依赖:
<dependency>
    <groupid>org.springframework.cloud</groupid>
    <artifactid>spring-cloud-starter-bootstrap</artifactid>
</dependency>
否则 bootstrap.yml 将被忽略,系统仅加载 application.yml。
五、高级特性与最佳实践
5.1 配置校验:@validated 与 jsr-303
生产环境中,错误的配置值可能导致严重故障。spring boot 支持对 @configurationproperties 类进行声明式校验。
添加依赖:
<dependency>
    <groupid>org.springframework.boot</groupid>
    <artifactid>spring-boot-starter-validation</artifactid>
</dependency>
yaml 配置:
app:
  pool:
    core-size: 5
    max-size: 20
    queue-capacity: 100
    timeout-ms: 5000
java 代码:
import jakarta.validation.constraints.max;
import jakarta.validation.constraints.min;
import jakarta.validation.constraints.notnull;
import org.springframework.boot.context.properties.configurationproperties;
import org.springframework.stereotype.component;
import org.springframework.validation.annotation.validated;

@component
@validated
@configurationproperties(prefix = "app.pool")
public class threadpoolconfig {

    @notnull
    @min(1)
    @max(50)
    private integer coresize;

    @notnull
    @min(1)
    @max(200)
    private integer maxsize;

    @min(0)
    private integer queuecapacity;

    @min(100)
    private long timeoutms;

    // getter/setter 省略...
    public integer getcoresize() { return coresize; }
    public void setcoresize(integer coresize) { this.coresize = coresize; }
    public integer getmaxsize() { return maxsize; }
    public void setmaxsize(integer maxsize) { this.maxsize = maxsize; }
    public integer getqueuecapacity() { return queuecapacity; }
    public void setqueuecapacity(integer queuecapacity) { this.queuecapacity = queuecapacity; }
    public long gettimeoutms() { return timeoutms; }
    public void settimeoutms(long timeoutms) { this.timeoutms = timeoutms; }
}
校验失败处理:
当配置值违反约束(如 core-size: 100 超出 @max(50)),spring boot 启动时将抛出 bindexception,并附带详细错误信息:
failed to bind properties under 'app.pool.core-size' to java.lang.integer:
    property: app.pool.core-size
    value: 100
    origin: class path resource [application.yml] - 3:16
    reason: must be less than or equal to 50
建议: 对核心中间件配置(数据库连接池、线程池、http 超时等)务必添加校验注解,将配置错误拦截在启动阶段。
5.2 配置动态刷新:@refreshscope
在微服务场景下,配置中心(spring cloud config、nacos、apollo)支持远程修改配置后无需重启应用即可生效。
实现原理:
- •
@refreshscope会将目标 bean 放入一个特殊的 scope 缓存中 - • 当通过
/actuator/refresh端点触发刷新事件时,spring 会销毁该 scope 内的所有 bean - • 下次访问时重新创建 bean,此时会重新绑定最新的配置值
使用示例:
import org.springframework.beans.factory.annotation.value;
import org.springframework.cloud.context.config.annotation.refreshscope;
import org.springframework.web.bind.annotation.getmapping;
import org.springframework.web.bind.annotation.restcontroller;

@refreshscope
@restcontroller
public class dynamiccontroller {

    @value("${app.welcome-msg:hello}")
    private string welcomemsg;

    @getmapping("/welcome")
    public string welcome() {
        return welcomemsg;
    }
}
触发刷新:
# 1. 确保引入 actuator 依赖并暴露 refresh 端点
# management:
#   endpoints:
#     web:
#       exposure:
#         include: refresh
# 2. 发送 post 请求触发刷新
curl -x post http://localhost:8080/actuator/refresh
# 3. 返回结果示例(显示哪些配置项发生了变化)
# ["app.welcome-msg"]
重要限制:
- •
@refreshscope仅对标注了该注解的 bean 生效 - • 配置类若使用
@configurationproperties,需配合@refreshscope或依赖上下文刷新事件重新绑定 - • 数据库连接池等底层资源类配置变更后,通常仍需重启才能完全生效
5.3 配置优先级总览
spring boot 从多个来源合并配置,按优先级从高到低排列如下:
| 优先级 | 配置来源 | 说明 | | --- | --- | --- | | 1 | 命令行参数 | --server.port=9090 | | 2 | 操作系统环境变量 | server_port=9090 | | 3 | bootstrap.yml | 引导上下文配置(若启用) | | 4 | application.yml / application-{profile}.yml | 主应用配置文件 | | 5 | 默认值 | @value("${key:default}") 或代码硬编码 |
覆盖规则:
- • 高优先级源的配置会覆盖低优先级源的同名属性
- • 列表类型配置通常会被完全替换,而非追加合并
- • 使用
@springboottest(properties = "...")可在测试时注入最高优先级属性
六、注意事项
6.1 缩进必须使用空格,严禁 tab
yaml 语法对缩进极其敏感。必须使用空格(space)进行缩进,绝对禁止使用 tab 键。大多数 ide 可设置将 tab 自动转换为空格(推荐 2 个空格)。
错误示例(包含 tab):
server:
    port: 8080    # 此处若使用 tab,解析将抛出 scannerexception
正确示例:
server:
  port: 8080    # 使用 2 个空格缩进
6.2 必须提供标准 getter/setter
@configurationproperties 通过 java 内省(introspection)机制绑定属性,必须提供符合命名规范的**public**getter/setter 方法。若缺少 setter,该属性将保持 null 或默认值,且不会报错,极易引发难以排查的 npe。
命名匹配规则:
- • yaml
my-app-name↔ javamyappname(中划线转驼峰) - • yaml
my_app_name↔ javamyappname(下划线转驼峰) - • 大小写不敏感:
myappname也能匹配myappname
6.3 强烈推荐添加 configuration processor
在 pom.xml 中添加以下依赖,可在编写 yaml 时获得 ide 的自动补全和属性提示:
<dependency>
    <groupid>org.springframework.boot</groupid>
    <artifactid>spring-boot-configuration-processor</artifactid>
    <optional>true</optional>
</dependency>
效果:
- • 在
application.yml中输入app.时,ide 会自动提示name、pool等已定义属性 - • 鼠标悬停可查看属性注释和类型信息
- • 编译时自动生成
meta-inf/spring-configuration-metadata.json
该依赖仅用于编译期元数据生成,不会被打包进最终产物,建议所有项目默认引入。
七、总结
本文系统梳理了 spring boot 中 yaml 配置文件的完整技术栈:
- • 基础读取:
@value适合简单注入,environment适合动态读取,@configurationproperties适合结构化批量绑定 - • 复杂映射:通过嵌套 pojo、list、map 可优雅表达任意层级配置,松散绑定机制大幅降低了命名的心智负担
- • 多环境管理:
application-{profile}.yml与spring.profiles.active实现了环境隔离,多文档 yaml 进一步简化了文件管理 - • 微服务引导:
bootstrap.yml作为 bootstrap context 的专属配置,是连接 nacos、spring cloud config 等配置中心的桥梁。通过实际项目案例可以看到,bootstrap.yml通常仅用于声明spring.profiles.active,而具体的注册中心地址、服务端口、线程池等参数则下沉到bootstrap-{profile}.yml中,实现环境配置的彻底解耦 - • 生产强化:
@validated将配置错误拦截在启动期,@refreshscope支持运行时热更新,配置优先级体系则提供了灵活的覆盖能力
掌握这些机制后,你不仅能写出配置整洁的 spring boot 应用,更能从容应对微服务架构下的复杂配置管理需求。建议在实际项目中养成"复杂对象用 @configurationproperties、必配项加 @notnull、开发环境引入 configuration-processor"的良好习惯,这将显著提升配置的可维护性和团队协作效率。
以上就是springboot yaml配置读取完全指南的详细内容,更多关于springboot yaml配置读取的资料请关注代码网其它相关文章!


发表评论