ubuntu更换国内源
操作步骤
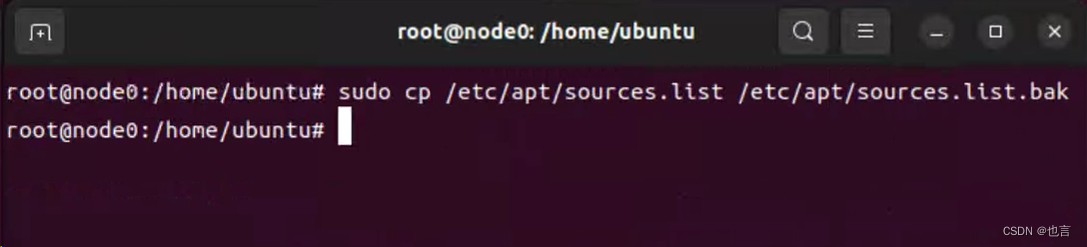
1. 对先前内容进行备份
// 备份源内容 (需要管理员权限)
> sudo cp /etc/apt/sources.list /etc/apt/sources.list.bak
2. 更换国内源文
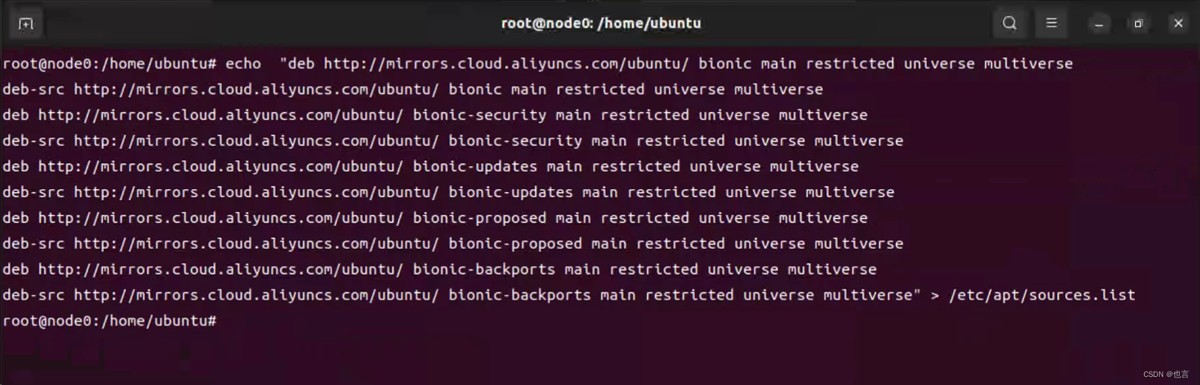
2.1 更换阿里源
// 阿里源
> echo  "deb http://mirrors.aliyun.com/ubuntu/ bionic main restricted universe multiverse
deb-src http://mirrors.aliyun.com/ubuntu/ bionic main restricted universe multiverse
deb http://mirrors.aliyun.com/ubuntu/ bionic-security main restricted universe multiverse
deb-src http://mirrors.aliyun.com/ubuntu/ bionic-security main restricted universe multiverse
deb http://mirrors.aliyun.com/ubuntu/ bionic-updates main restricted universe multiverse
deb-src http://mirrors.aliyun.com/ubuntu/ bionic-updates main restricted universe multiverse
deb http://mirrors.aliyun.com/ubuntu/ bionic-proposed main restricted universe multiverse
deb-src http://mirrors.aliyun.com/ubuntu/ bionic-proposed main restricted universe multiverse
deb http://mirrors.aliyun.com/ubuntu/ bionic-backports main restricted universe multiverse
deb-src http://mirrors.aliyun.com/ubuntu/ bionic-backports main restricted universe multiverse" >> /etc/apt/sources.list
2.2 添加阿里公钥
// 添加公钥key
> sudo apt-key adv --keyserver keyserver.ubuntu.com --recv-keys 3b4fe6acc0b21f32

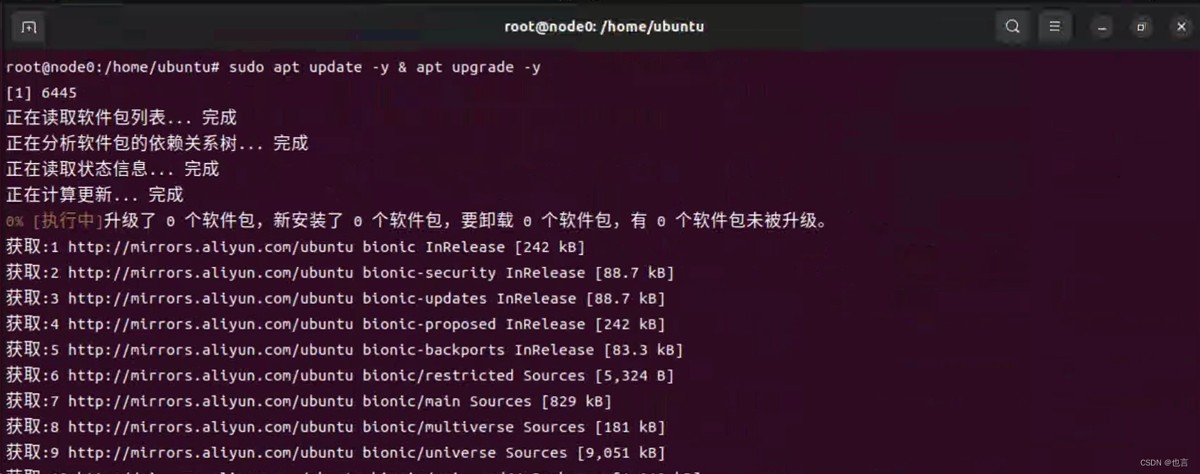
3. 更新源及软件版本
> sudo apt update -y
> sudo apt upgrade -y
总结
以上为个人经验,希望能给大家一个参考,也希望大家多多支持代码网。


发表评论