在后端开发领域,springboot 凭借其 “约定优于配置” 的核心思想,极大简化了 spring 应用的搭建与开发流程。springboot3 作为其最新稳定版本,不仅兼容 spring 6 的核心特性,还在性能优化、原生镜像支持等方面有显著提升。本文将从项目搭建、核心配置、分层开发、统一返回与异常处理等维度,详细讲解 springboot3 项目的构建与工程设计,帮助开发者快速上手。
一、项目整体架构设计
1. 技术栈选型
1.1 后端技术栈
核心框架:springboot3(基于 java17,简化 spring 配置,提升开发效率)
数据持久层:mybatis-plus(简化 mysql 操作,提供 crud 接口、分页插件等)
数据库:mysql8.0(存储用户核心数据)
工具类:lombok(简化实体类代码)、fastjson(json 数据序列化 / 反序列化)
接口文档:knife4j(基于 swagger,自动生成接口文档,方便前后端联调)
1.2 前端技术栈
核心框架:vue3(composition api 语法,响应式更高效)
ui 组件库:element-plus(适配 vue3 的 ui 组件库,提供表格、表单、弹窗等常用组件)
网络请求:axios(封装请求拦截器、响应拦截器,统一处理接口请求)
路由管理:vue router4(实现页面跳转与路由守卫)
状态管理:pinia(vue3 官方推荐,替代 vuex,轻量高效)
2. 架构流程图
前端(vue3 + element-plus)
    │
    ├─ 页面组件(用户列表、新增/编辑弹窗)
    ├─ 网络请求(axios 封装)
    ├─ 路由管理(vue router)
    └─ 状态管理(pinia)
        │
        ▼
http 请求(restful api)
        │
        ▼
后端(springboot3)
    │
    ├─ 控制层(controller:接收请求、返回响应)
    ├─ 服务层(service:业务逻辑处理)
    ├─ 持久层(mapper:mybatis-plus 数据访问)
    ├─ 实体层(entity:数据库表映射)
    ├─ 公共组件(统一返回、全局异常处理)
    └─ 接口文档(knife4j)
        │
        ▼
数据库(mysql8.0)
3. 核心功能模块
用户列表展示:表格形式展示用户 id、用户名、生日、性别、地址等信息,支持分页加载
条件查询功能:根据用户名、地址筛选用户数据,支持清空查询条件
新增用户功能:通过弹窗表单收集用户信息,表单校验后提交至后端
编辑用户功能:回显选中用户信息至弹窗,修改后提交更新
删除功能:支持单条用户删除、批量用户删除,删除前弹出确认提示
数据格式化:对生日字段进行统一格式化(年 - 月 - 日),提升页面可读性
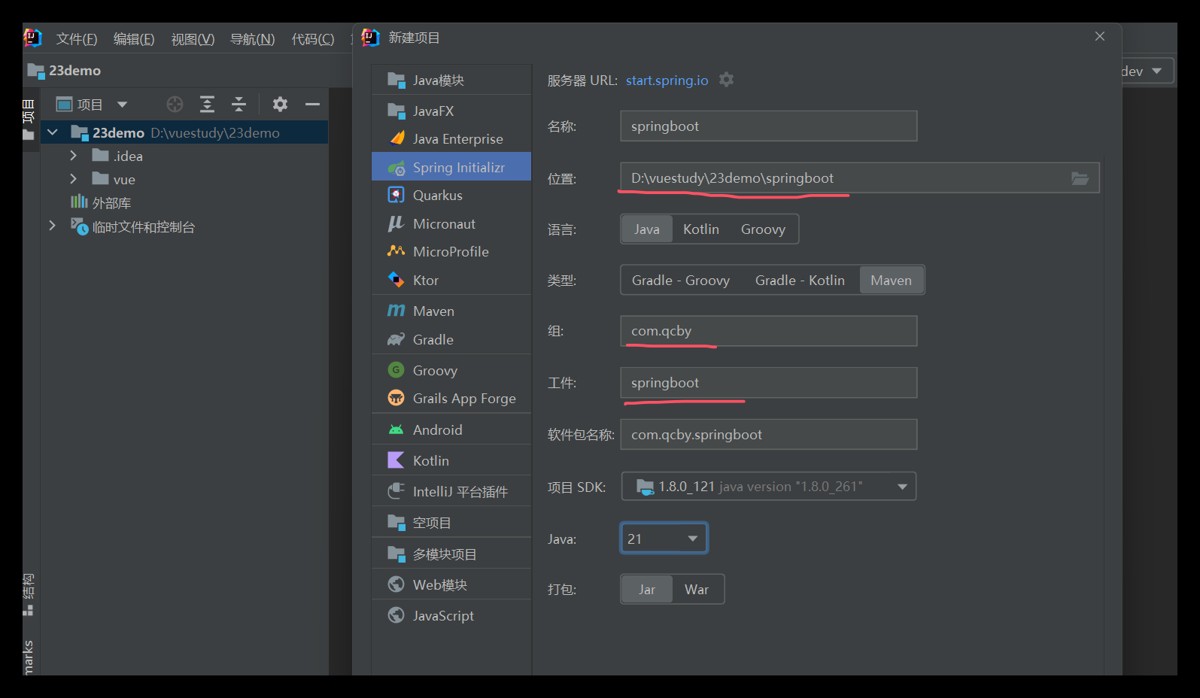
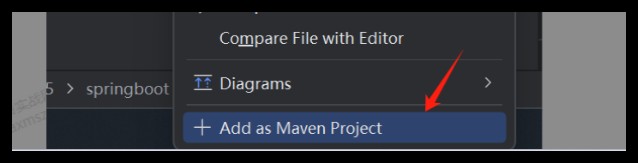
二、idea创建spring boot
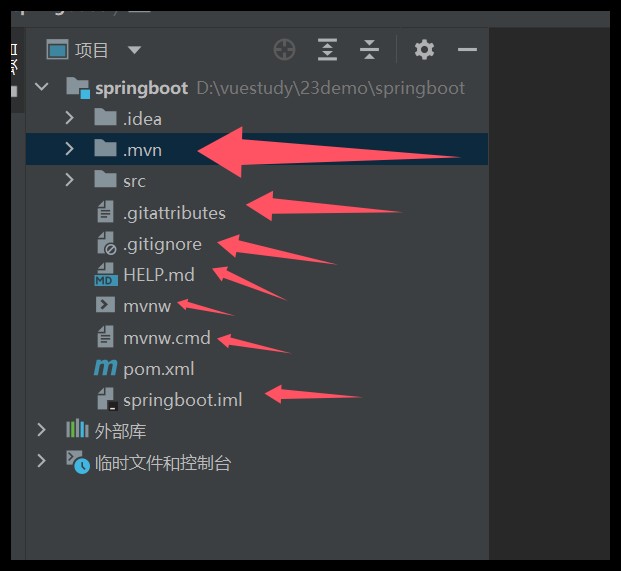
删除无用的文件
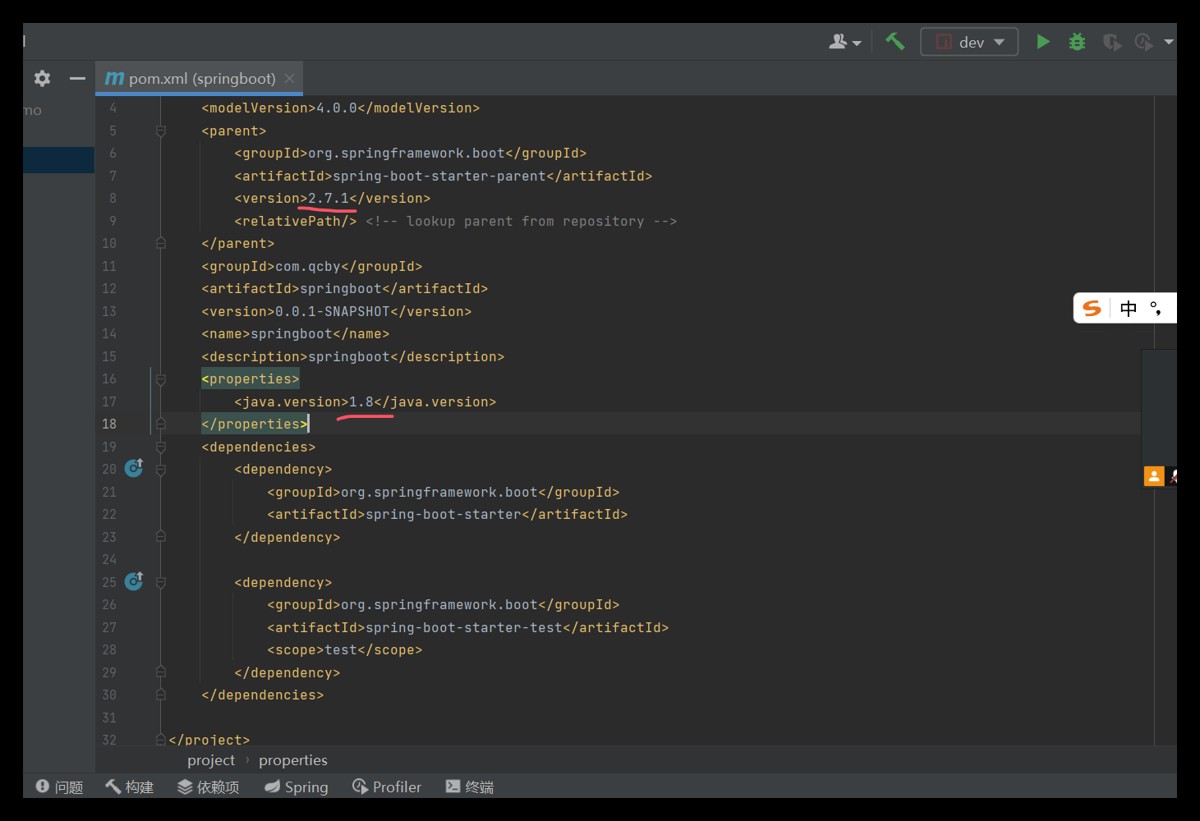
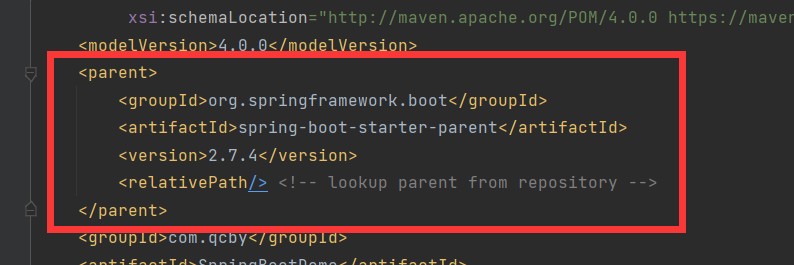
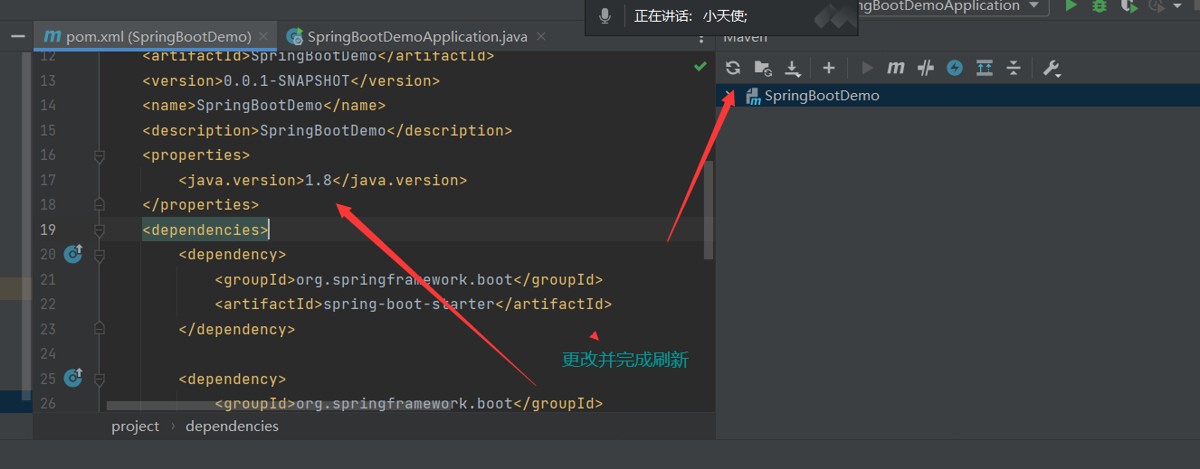
然后在pom.xml文件当中进行配置
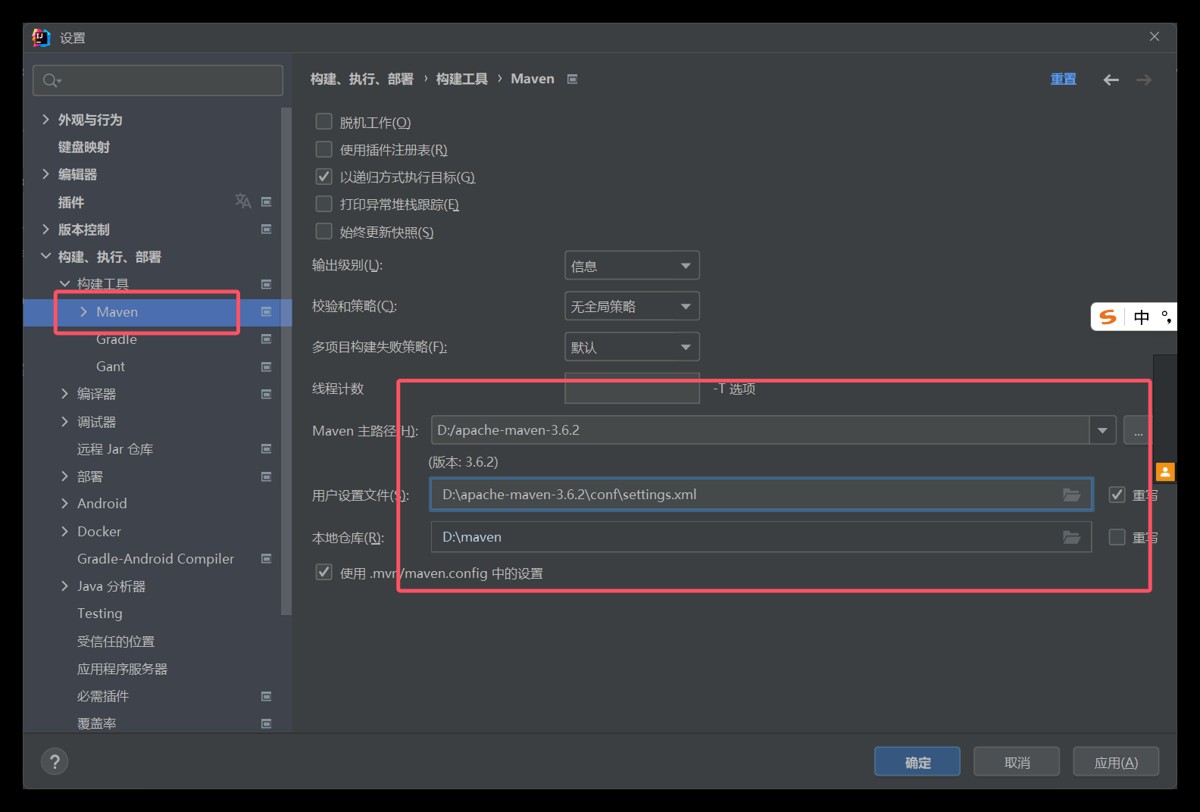
配置maven
选择 pom.xml 然后加载依赖
三、spring boot内容简介

四、pom.xml文件
spring-boot-dependencies:核心依赖在父工程里面
我们在写或者引入一些springboot依赖的时候,不需要指定版本
启动器
 <dependency>
     <groupid>org.springframework.boot</groupid>
     <artifactid>spring-boot-starter</artifactid>
</dependency>
启动器:说白了就是springboot启动的场景
比如spring-boot-srarter-web,他会帮助我们自动导入web环境所有的依赖
springboot会将所有的功能场景,都变成一个个的启动器
我们需要使用的功能,只需要找到他们的启动器便可以进行使用
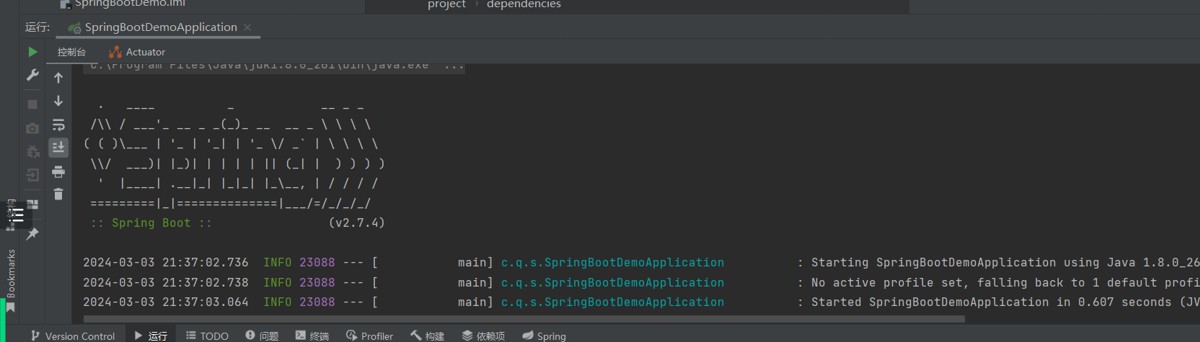
启动成功
加载web启动
<!--加载web-->
<dependency>
    <groupid>org.springframework.boot</groupid>
    <artifactid>spring-boot-starter-web</artifactid>
</dependency>
controller层
@restcontroller
public class hellocontroller {
@requestmapping("/hello")
public string gethello(){
return "hello world";
}
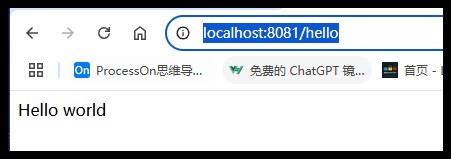
}配置文件
server.port=8081
访问地址:http://localhost:8081/hello
五、统一返回包装类 result
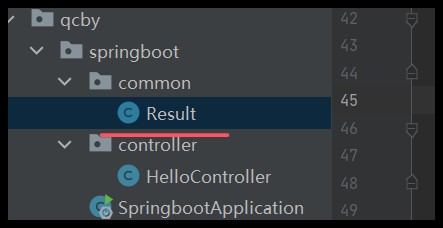
包装类:作用是统一后端返回的数据类型,code 是作为前端判断请求成功的依据,msg 是错误的信息,data 是返回给前端的数据
public class result {
    private string code;
    private object data;
    private string msg;
    public static result success() {
        result result = new result();
        result.setcode("200");
        result.setmsg("请求成功");
        return result;
    }
    public static result success(object data) {
        result result = new result();
        result.setcode("200");
        result.setdata(data);
        result.setmsg("请求成功");
        return result;
    }
    public static result error(string msg) {
        result result = new result();
        result.setcode("500");
        result.setmsg(msg);
        return result;
    }
    public static result error(string code, string msg) {
        result result = new result();
        result.setcode(code);
        result.setmsg(msg);
        return result;
    }
    public string getcode() {
        return code;
    }
    public void setcode(string code) {
        this.code = code;
    }
    public object getdata() {
        return data;
    }
    public void setdata(object data) {
        this.data = data;
    }
    public string getmsg() {
        return msg;
    }
    public void setmsg(string msg) {
        this.msg = msg;
    }
}
更改返回的数据形式
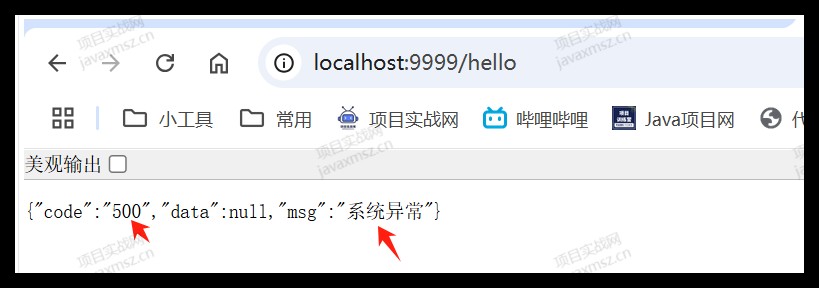
六、500 错误:常见的系统的错误
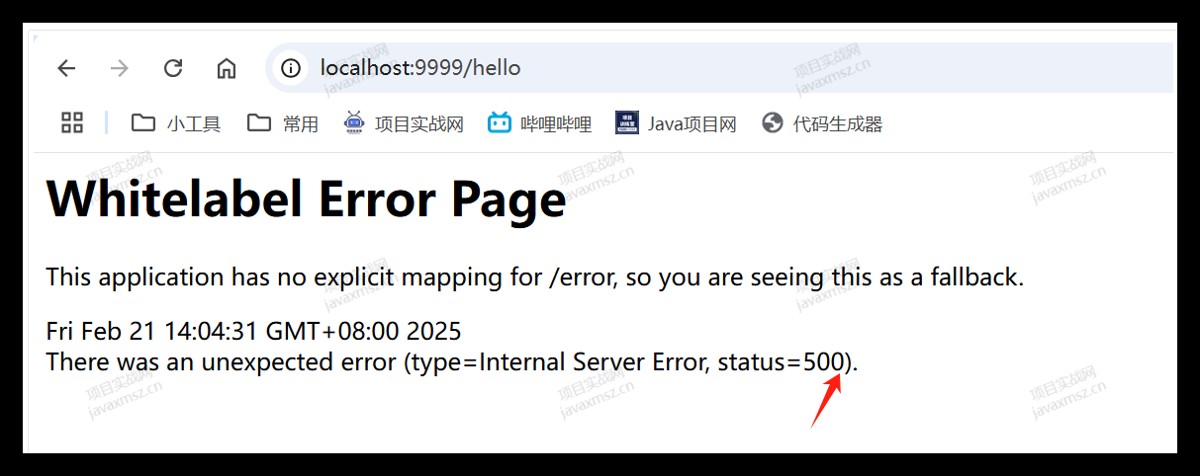
抛出这些错误非常不友好,我们应该使用统一的处理方式
配置日志
<dependency>
    <groupid>log4j</groupid>
    <artifactid>log4j</artifactid>
    <version>1.2.17</version>
</dependency>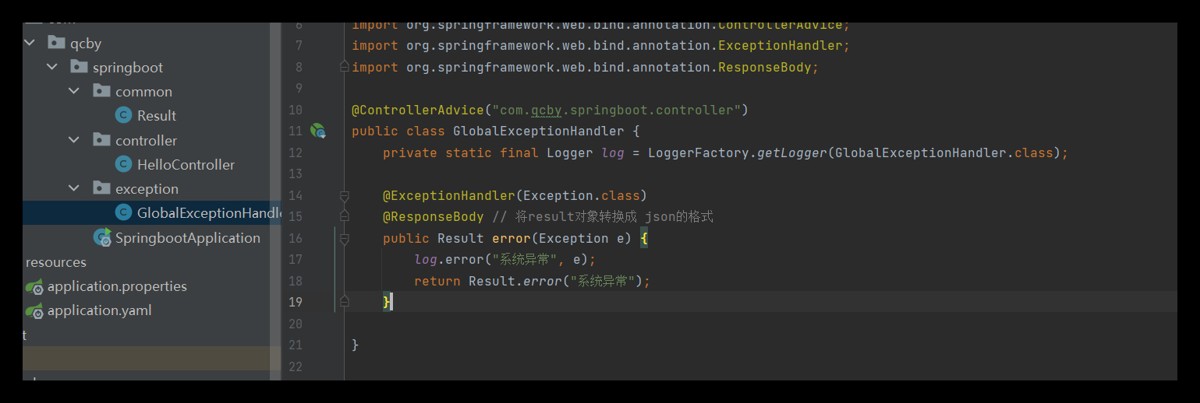
@controlleradvice("com.qcby.springboot.controller")
public class globalexceptionhandler {
    private static final logger log = loggerfactory.getlogger(globalexceptionhandler.class);
    @exceptionhandler(exception.class)
    @responsebody // 将result对象转换成 json的格式
    public result error(exception e) {
        log.error("系统异常", e);
        return result.error("系统异常");
    }
}
系统异常怎么办
你得看你的控制台,然后找到报错的代码位置,具体去修正代码
自定义异常

/**
 * 自定义异常
 * 运行时异常
 */
public class customerexception extends runtimeexception {
    private string code;
    private string msg;
    public customerexception(string code, string msg) {
        this.code = code;
        this.msg = msg;
    }
    public customerexception(string msg) {
        this.code = "500";
        this.msg = msg;
    }
    public customerexception() {}
    public string getcode() {
        return code;
    }
    public void setcode(string code) {
        this.code = code;
    }
    public string getmsg() {
        return msg;
    }
    public void setmsg(string msg) {
        this.msg = msg;
    }
}
最终版全局异常
/**
 * 全局异常捕获器
 * @controlleradvice("com.qcby.springboot.controller")
 *                 指定该全局异常处理器作用于 com.qcby.springboot.controller 包下的控制器。
 */
@controlleradvice("com.qcby.springboot.controller")
public class globalexceptionhandler {
    private static final logger log = loggerfactory.getlogger(globalexceptionhandler.class);
    /**
     * 全局异常捕获器
     * @param e
     * @return
     */
    @exceptionhandler(exception.class)
    @responsebody // 将result对象转换成 json的格式
    public result error(exception e) {
        log.error("系统异常", e);
        return result.error("系统异常");
    }
    /**
     * 自定义异常捕获器
     * @param e
     * @return
     */
    @exceptionhandler(customerexception.class)
    @responsebody // 将result对象转换成 json的格式
    public result customererror(customerexception e) {
        log.error("自定义错误", e);
        return result.error(e.getcode(), e.getmsg());
    }
}
测试自定义异常
controller测试接口
@getmapping("/admin")
public result admin(string name) {
    string admin = adminservice.admin(name);
    return result.success(admin);
}
service
package com.example.service;
import com.example.exception.customerexception;
import org.springframework.stereotype.service;
@service
public class adminservice {
    public string admin(string name) {
        if ("admin".equals(name)) {
            return "admin";
        } else {
            throw new customerexception("账号错误");
        }
    }
}
到此这篇关于springboot3 框架快速搭建与项目工程详解的文章就介绍到这了,更多相关springboot内容请搜索代码网以前的文章或继续浏览下面的相关文章希望大家以后多多支持代码网!


发表评论