项目概述
python 在线调试器是一个基于 web 的 python 代码执行和调试工具,支持在线编写、运行和交互式调试 python 代码。项目采用前后端分离架构,前端负责用户界面和交互,后端负责代码执行和调试逻辑。
技术栈
后端技术栈
| 技术/框架 | 版本 | 用途 |
|---|---|---|
| java | 17 | 编程语言 |
| spring boot | 3.1.5 | web框架 |
| spring web | - | restful api支持 |
| spring validation | - | 参数验证 |
| jackson | - | json序列化/反序列化 |
| maven | 3.6+ | 项目构建和依赖管理 |
| python | 3.x | 代码执行环境 |
核心依赖:
spring-boot-starter-web: web开发支持spring-boot-starter-websocket: websocket支持(预留扩展)spring-boot-starter-validation: 参数验证jackson-databind: json处理
前端技术栈
| 技术/框架 | 版本 | 用途 |
|---|---|---|
| vue.js | 3.3.4 | 前端框架 |
| vite | 5.0.0 | 构建工具和开发服务器 |
| codemirror 6 | 6.x | 代码编辑器 |
| axios | 1.6.0 | http客户端 |
| node.js | 16+ | 运行环境 |
| npm | - | 包管理器 |
核心依赖:
@codemirror/lang-python: python语言支持@codemirror/view: 编辑器视图@codemirror/state: 编辑器状态管理@codemirror/theme-one-dark: 深色主题@vitejs/plugin-vue: vite vue插件
架构设计
整体架构
┌─────────────────────────────────────────────────────────┐
│ 浏览器 (browser) │
│ ┌──────────────────────────────────────────────────┐ │
│ │ vue 3 前端应用 │ │
│ │ ┌──────────────┐ ┌──────────────────┐ │ │
│ │ │ codemirror 6 │ │ axios http │ │ │
│ │ │ 编辑器 │ │ 客户端 │ │ │
│ │ └──────────────┘ └──────────────────┘ │ │
│ └──────────────────────────────────────────────────┘ │
└─────────────────┬───────────────────────────────────────┘
│ http/rest api
┌─────────────────┴───────────────────────────────────────┐
│ spring boot 后端 (port: 8080) │
│ ┌──────────────────────────────────────────────────┐ │
│ │ pythoncontroller │ │
│ │ (rest api 端点) │ │
│ └────────────────┬─────────────────────────────────┘ │
│ │ │
│ ┌────────────────┴─────────────────────────────────┐ │
│ │ pythonexecutionservice │ │
│ │ (代码执行和调试逻辑) │ │
│ └────────────────┬─────────────────────────────────┘ │
│ │ │
│ ┌────────────────┴─────────────────────────────────┐ │
│ │ processbuilder + python process │ │
│ │ (执行python代码) │ │
│ └────────────────┬─────────────────────────────────┘ │
│ │ │
│ ┌────────────────┴─────────────────────────────────┐ │
│ │ python 3.x (系统安装) │ │
│ │ - pdb (python调试器) │ │
│ │ - 代码执行 │ │
│ └──────────────────────────────────────────────────┘ │
└──────────────────────────────────────────────────────────┘
分层架构
后端分层
controller层 (pythoncontroller)
↓
service层 (pythonexecutionservice)
↓
process层 (java processbuilder)
↓
python运行时环境
前端分层
视图层 (app.vue template)
↓
逻辑层 (app.vue script - composition api)
↓
编辑器层 (codemirror 6)
↓
http层 (axios)
核心实现方法
1. 代码执行实现
1.1 后端实现 (pythonexecutionservice.executecode)
核心步骤:
创建临时文件
path pythonfile = paths.get(tempdir, "python_" + sessionid + ".py");
files.write(pythonfile, code.getbytes("utf-8"));
启动python进程
processbuilder processbuilder = new processbuilder(pythoncmd, pythonfile.tostring());
processbuilder.environment().put("pythonioencoding", "utf-8");
process process = processbuilder.start();
读取输出
bufferedreader reader = new bufferedreader(
    new inputstreamreader(process.getinputstream(), "utf-8"));
// 设置30秒超时
boolean finished = process.waitfor(30, timeunit.seconds);
清理资源
files.deleteifexists(pythonfile);
runningprocesses.remove(sessionid);
关键技术点:
- 使用
processbuilder创建独立的python进程 - 设置
pythonioencoding=utf-8确保中文输出正确 - 使用临时文件存储用户代码
- 设置执行超时防止死循环
- utf-8编码处理确保字符正确传输
2. 调试功能实现
2.1 断点插入机制
实现方法:
行号映射表构建
map<integer, integer> linemapping = new hashmap<>();
// 实际行号 -> 原始行号
断点代码注入
// 在断点行之前插入 pdb.set_trace()
result.append(indentstr).append("pdb.set_trace()  # breakpoint at line ")
    .append(originallinenumber).append("\n");
行号映射记录
- 为所有插入的代码行建立映射
- 包括
import pdb、空行、pdb.set_trace()等 - 确保能准确还原原始行号
2.2 交互式调试会话管理
debugsession 类:
private static class debugsession {
    process process;              // python进程
    bufferedwriter stdin;         // 标准输入流(发送pdb命令)
    path pythonfile;              // 临时python文件
    boolean isactive;             // 会话是否激活
    int currentline;              // 当前执行行号
    stringbuilder outputbuffer;   // 输出缓冲区
    stringbuilder errorbuffer;    // 错误缓冲区
    map<integer, integer> linemapping; // 行号映射表
}
会话管理:
- 使用
concurrenthashmap存储多个调试会话 - 支持并发调试多个用户
- 自动清理会话资源
2.3 pdb命令映射
支持的调试操作:
| 操作 | pdb命令 | 说明 |
|---|---|---|
| 继续执行 | c\n | continue - 继续到下一个断点 |
| 单步执行 | n\n | next - 执行下一行(不进入函数) |
| 步入 | s\n | step - 进入函数内部 |
| 步出 | u\n | up - 返回到调用者 |
实现方式:
string pdbcommand;
switch (action) {
    case "continue": pdbcommand = "c\n"; break;
    case "step": pdbcommand = "s\n"; break;
    case "stepover": pdbcommand = "n\n"; break;
    case "stepout": pdbcommand = "u\n"; break;
}
session.stdin.write(pdbcommand);
session.stdin.flush();
2.4 行号解析和映射
pdb输出格式解析:
// pdb输出格式: > /path/to/file.py(行号)function_name()
pattern pattern = pattern.compile(">\\s+[^\\(]*\\(\\s*(\\d+)\\s*\\)[^\n]*");
行号转换:
- 从pdb输出中提取实际行号
- 通过映射表转换为原始行号
- 如果没有精确匹配,向上查找最接近的行号
- 返回给前端显示
3. 前端编辑器实现
3.1 codemirror 6 集成
编辑器初始化:
editorview.value = new editorview({
    doc: codecontent,
    extensions: [
        basicsetup,           // 基础功能
        python(),             // python语言支持
        onedark,              // 深色主题
        breakpointgutter,     // 断点gutter
        currentlinehighlight  // 当前行高亮
    ],
    parent: editorcontainer.value
})
3.2 断点可视化
实现原理:
- 使用
guttermarker创建断点标记 - 使用
statefield管理断点状态 - 使用
rangeset存储断点位置 - 支持点击gutter区域切换断点
关键代码:
// 断点标记类
class breakpointmarker extends guttermarker {
    todom() {
        const span = document.createelement('span')
        span.classname = 'breakpoint-marker'
        span.textcontent = '●'
        return span
    }
}

// 断点状态字段
const breakpointstate = statefield.define({
    create() { return rangeset.empty },
    update(breakpoints, tr) {
        // 处理断点变更
    }
})
3.3 当前行高亮
实现方法:
// 当前行装饰器
const currentlinedecoration = decoration.line({
    class: 'cm-current-line'
})

// 当前行状态字段
const currentlinestate = statefield.define({
    create() { return rangeset.empty },
    update(currentline, tr) {
        // 更新当前行位置
    },
    provide: f => editorview.decorations.from(f)
})
样式定义:
.cm-current-line {
    background-color: rgba(78, 148, 255, 0.15);
    outline: 1px solid rgba(78, 148, 255, 0.3);
}
关键技术点
1. 进程管理
进程启动:
- 使用
processbuilder创建独立进程 - 分离标准输出和错误输出
- 设置环境变量确保编码正确
进程控制:
- 使用
process.waitfor(timeout)实现超时控制 - 使用
process.destroyforcibly()强制终止 - 使用
concurrenthashmap管理多个进程
2. 异步i/o处理
输出读取:
thread outputthread = new thread(() -> {
    try (bufferedreader reader = ...) {
        string line;
        while ((line = reader.readline()) != null && session.isactive) {
            synchronized (session.outputbuffer) {
                session.outputbuffer.append(line).append("\n");
            }
        }
    }
});
outputthread.start();
关键点:
- 使用独立线程读取进程输出
- 使用同步块保证线程安全
- 实时解析行号并更新状态
3. 行号映射算法
问题:
- 插入
import pdb和pdb.set_trace()后行号会偏移 - pdb显示的是插入后的行号,需要转换为原始行号
解决方案:
- 构建完整的行号映射表
- 精确匹配优先
- 向上查找最接近的行号(最多10行)
- 如果找不到,使用估算方法
4. 编码处理
utf-8编码设置:
// 后端
processbuilder.environment().put("pythonioencoding", "utf-8");
files.write(pythonfile, code.getbytes("utf-8"));
new inputstreamreader(process.getinputstream(), "utf-8")

// 前端
// axios自动处理utf-8编码
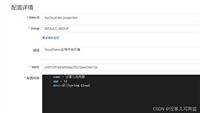
配置文件:
server.servlet.encoding.charset=utf-8
server.servlet.encoding.enabled=true
server.servlet.encoding.force=true
spring.http.encoding.charset=utf-8
spring.http.encoding.enabled=true
spring.http.encoding.force=true
5. 会话管理
会话存储:
concurrenthashmap<string, debugsession> debugsessions
concurrenthashmap<string, process> runningprocesses
会话生命周期:
- 开始调试时创建会话
- 执行调试命令时更新会话
- 调试完成或停止时清理会话
- 自动清理临时文件
api接口设计
1. 代码执行接口
接口: post /api/python/execute
请求体:
{
    "code": "print('hello, world!')",
    "sessionid": "session_123"
}
响应:
{
    "output": "hello, world!\n",
    "error": "",
    "success": true,
    "sessionid": "session_123"
}
2. 调试接口
接口: post /api/python/debug
请求体:
{
    "code": "def func():\n    x = 10\n    return x",
    "sessionid": "session_123",
    "breakpoints": [2, 3],
    "action": "start" | "continue" | "step" | "stepover" | "stepout"
}
响应:
{
    "output": "> file.py(2)func()\n-> x = 10",
    "error": "",
    "success": true,
    "currentline": 2,
    "sessionid": "session_123"
}
3. 停止执行接口
接口: post /api/python/stop/{sessionid}
响应:
执行已停止
调试功能实现原理
1. 断点插入流程
原始代码 插入后代码
───────────────── ─────────────────
1 def func(): 1 import pdb
2 x = 10 2
3 return x 3 def func():
4 pdb.set_trace() # breakpoint at line 2
5 x = 10
6 return x
行号映射:
实际行号 -> 原始行号
4 -> 2
5 -> 2
2. pdb交互流程
前端 后端 python进程
│ │ │
│-- startdebug ---->│ │
│ │-- 创建临时文件 ----->│
│ │-- 启动进程 --------->│
│ │<-- pdb暂停在第n行 ---│
│<-- 返回行号n -----│ │
│ │ │
│-- step ---------->│ │
│ │-- 发送 's\n' ------->│
│ │ │-- 步入函数
│ │<-- pdb暂停在第m行 ---│
│<-- 返回行号m -----│ │
3. 行号解析流程
pdb输出: "> file.py(15)func()\n-> x = 10"
↓
正则匹配: pattern.compile(">\s+[^\(]*\(\s*(\d+)\s*\)")
↓
提取行号: 15
↓
查找映射: linemapping.get(15) = 12
↓
返回前端: currentline = 12
前端交互实现
1. vue 3 composition api
响应式状态:
const breakpoints = ref([])
const currentdebugline = ref(null)
const isindebugmode = ref(false)
生命周期管理:
onmounted(() => {
    initeditor()
    sessionid.value = generatesessionid()
    window.addeventlistener('keydown', handlekeypress)
})

onunmounted(() => {
    window.removeeventlistener('keydown', handlekeypress)
})
2. 断点管理
添加断点:
const addbreakpoint = () => {
    if (newbreakpoint.value && newbreakpoint.value > 0) {
        if (!breakpoints.value.includes(linenum)) {
            breakpoints.value.push(linenum)
            breakpoints.value.sort((a, b) => a - b)
            syncbreakpointstoeditor()
        }
    }
}
断点同步:
watch(breakpoints, () => {
    nexttick(() => {
        syncbreakpointstoeditor()
    })
}, { deep: true })
3. 调试控制
调试命令执行:
const executedebugcommand = async (action) => {
    const response = await axios.post(`${api_base}/debug`, {
        code: '',
        sessionid: sessionid.value,
        breakpoints: [],
        action: action  // 'continue', 'step', 'stepover', 'stepout'
    })

    // 更新当前行号并高亮
    if (result.currentline) {
        currentdebugline.value = result.currentline
        highlightcurrentline(result.currentline)
    }
}
键盘快捷键:
- f5: 继续执行
- f7: 步入
- f8: 单步执行
- shift+f8: 步出
4. 实时更新机制
当前行高亮更新:
const highlightcurrentline = (linenum) => {
    const view = editorview.value
    const line = view.state.doc.line(linenum)
    view.dispatch({
        effects: [
            editorview.scrollintoview(line.from, { y: 'center' }),
            setcurrentlineeffect.of(line.from)
        ]
    })
}
部署方案
附代码仓库链接:https://gitee.com/ghostmen/python-debug-demo
开发环境
后端:
- 端口:8080
- 启动:
mvn spring-boot:run - 或使用:
start-backend.bat/start-backend.sh
前端:
- 端口:3000
- 启动:
npm run dev - 或使用:
start-frontend.bat/start-frontend.sh - vite代理:
/api→http://localhost:8080
生产环境建议
后端:
- 打包:
mvn clean package - 运行:
java -jar target/python-debug-backend-1.0.0.jar - 配置:修改
application.properties - 反向代理:nginx
前端:
- 构建:
npm run build - 输出目录:
dist/ - 静态资源服务器:nginx / apache
- 或集成到后端静态资源
安全建议
代码执行限制
- 添加沙箱机制
- 限制系统调用
- 限制资源使用(cpu、内存)
网络安全
- 配置具体的cors允许域名
- 使用https
- 添加身份验证
输入验证
- 验证代码长度
- 过滤危险操作
- 设置执行超时
性能优化
1. 进程管理优化
- 限制并发执行的进程数
- 及时清理已完成的进程
- 使用线程池管理i/o操作
2. 前端优化
- 代码编辑器懒加载
- 输出内容虚拟滚动(大量输出时)
- 防抖处理频繁的断点操作
3. 缓存策略
- 缓存python命令检测结果
- 复用调试会话(如果可能)
扩展方案
1. websocket实时交互
优势:
- 实时双向通信
- 更好的调试体验
- 支持断点处的变量查看
实现方向:
- 使用 spring websocket
- 前端使用 websocket api
- 实时推送调试状态
2. 使用debugpy替代pdb
优势:
- 更专业的调试协议(dap)
- 更好的性能
- 支持更多调试功能
实现方向:
- 集成debugpy库
- 实现dap协议客户端
- 支持变量查看、表达式求值等
3. 多文件支持
实现方向:
- 文件管理器组件
- 多标签编辑器
- 文件间依赖管理
4. 代码补全
实现方向:
- 集成python语言服务器(如pyright)
- codemirror自动补全扩展
- 提供代码提示和错误检查
技术难点与解决方案
难点1: 行号映射准确性
问题: 插入调试代码后,行号偏移,需要准确映射回原始行号。
解决方案:
- 建立完整的行号映射表
- 使用向上查找算法作为备选
- 智能匹配最接近的行号
难点2: pdb输出解析
问题: pdb输出格式多样,需要准确提取当前行号。
解决方案:
- 使用正则表达式匹配多种格式
- 从后往前查找最新的pdb提示符
- 容错处理,支持多种输出格式
难点3: 异步i/o同步
问题: 异步读取输出与同步操作之间的时序问题。
解决方案:
- 使用同步块保护共享资源
- 合理的等待时间
- 状态标志控制异步读取
难点4: 编码问题
问题: windows系统默认gbk编码,导致中文乱码。
解决方案:
- 设置
pythonioencoding=utf-8环境变量 - 统一使用utf-8编码
- spring boot配置utf-8响应编码
总结
本项目采用前后端分离架构,使用spring boot 3.x和vue 3构建,通过processbuilder执行python代码,使用pdb实现交互式调试。核心特点:
- 技术选型合理:现代化的技术栈,易于维护和扩展
- 实现方案可行:使用成熟的processbuilder和pdb,稳定性好
- 用户体验良好:可视化断点、当前行高亮、快捷键支持
- 扩展性强:预留websocket接口,可升级到更专业的调试方案
改进方向:
- 使用debugpy实现更专业的调试
- 添加websocket实现实时交互
- 增强安全性和性能优化
- 支持更多调试功能(变量查看、表达式求值等)
以上就是springboot结合vue实现python在线调试器的详细内容,更多关于springboot在线调试python的资料请关注代码网其它相关文章!


发表评论