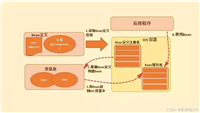
在传统的java web开发中,spring mvc基于servlet api构建,采用的是同步阻塞的i/o模型。这种模型在高并发、高io等待的场景下会面临性能瓶颈——每个请求都需要占用一个独立的线程,大量线程的创建和切换会消耗过多的系统资源。为了解决这一问题,响应式编程应运而生。
本文将带你深入了解java响应式编程的核心,重点讲解spring webflux框架与reactor响应式库的实战用法,通过大量可运行的示例代码,帮助你快速上手并理解响应式编程的精髓。
一、响应式编程核心概念
在开始实战之前,我们先明确几个响应式编程的核心概念,为后续学习打下基础。
1.1 什么是响应式编程?
响应式编程是一种基于数据流(data stream)和变化传播(propagation of change)的编程范式。简单来说,就是当数据发生变化时,系统会自动响应这些变化,而无需主动轮询或等待。
其核心特性包括:
- 非阻塞:操作不会阻塞当前线程,而是在任务完成后通过回调函数通知结果,极大提升了线程利用率。
- 异步:任务的执行与结果的处理不在同一时间线,避免了线程的闲置等待。
- 数据流驱动:一切操作围绕数据流展开,支持对数据流的过滤、转换、合并等多种操作。
- 背压(backpressure):消费者可以告知生产者自己的处理能力,避免生产者发送数据过快导致消费者过载,这是响应式编程区别于传统异步编程的关键特性。
1.2 reactor:java响应式编程的基石
reactor是spring官方推荐的响应式编程库,也是spring webflux的底层依赖。它实现了reactive streams规范,提供了两个核心的数据流类型:mono和flux,用于处理01个元素和0n个元素的场景。
reactive streams是一个行业标准,定义了响应式数据流的发布者(publisher)、订阅者(subscriber)、订阅(subscription)和处理器(processor)四个核心接口,目的是实现不同响应式库之间的互操作性。
1.2.1 mono与flux的区别
| 类型 | 描述 | 适用场景 |
|---|---|---|
| mono | 表示0或1个元素的异步序列,可能成功完成或失败 | 查询单个对象(如根据id查询用户)、执行无返回值的操作(如插入数据) |
| flux | 表示0到n个元素的异步序列,支持背压机制 | 查询列表数据(如分页查询用户)、处理流式数据(如日志流、消息流) |
二、环境搭建:spring webflux+reactor入门
接下来我们搭建一个基础的spring webflux项目,体验响应式编程的基本用法。
2.1 项目依赖配置(maven)
创建一个maven项目,在pom.xml中添加以下依赖:
<parent>
    <groupid>org.springframework.boot</groupid>
    <artifactid>spring-boot-starter-parent</artifactid>
    <version>2.7.15</version>
    <relativepath/>
</parent>
<dependencies>
    <!-- spring webflux 核心依赖 -->
    <dependency>
        <groupid>org.springframework.boot</groupid>
        <artifactid>spring-boot-starter-webflux</artifactid>
    </dependency>
    <!-- reactor 测试依赖 -->
    <dependency>
        <groupid>io.projectreactor</groupid>
        <artifactid>reactor-test</artifactid>
        <scope>test</scope>
    </dependency>
    <!-- lombok 简化代码 -->
    <dependency>
        <groupid>org.projectlombok</groupid>
        <artifactid>lombok</artifactid>
        <optional>true</optional>
    </dependency>
    <!-- spring boot 测试依赖 -->
    <dependency>
        <groupid>org.springframework.boot</groupid>
        <artifactid>spring-boot-starter-test</artifactid>
        <scope>test</scope>
    </dependency>
</dependencies>
说明:spring-boot-starter-webflux已经包含了reactor的核心依赖(reactor-core),无需额外引入。
2.2 启动类编写
创建spring boot启动类,与spring mvc的启动类类似,只需添加@springbootapplication注解:
import org.springframework.boot.springapplication;
import org.springframework.boot.autoconfigure.springbootapplication;
@springbootapplication
public class webfluxreactorapplication {
    public static void main(string[] args) {
        springapplication.run(webfluxreactorapplication.class, args);
    }
}
三、reactor核心实战:mono与flux操作
reactor提供了丰富的操作符(operator)用于处理mono和flux数据流,本节通过示例讲解常用操作。
3.1 数据流的创建
常用的创建方法:just()、fromiterable()、empty()、error()等。
import io.projectreactor.core.publisher.flux;
import io.projectreactor.core.publisher.mono;
import org.junit.test;
public class reactorcreatetest {
    // 测试flux创建
    @test
    public void testfluxcreate() {
        // 1. 创建包含多个元素的flux
        flux<string> flux1 = flux.just("java", "spring", "webflux");
        flux1.subscribe(system.out::println); // 订阅并打印元素
        system.out.println("=====");
        // 2. 从集合创建flux
        list<integer> list = arrays.aslist(1, 2, 3, 4);
        flux<integer> flux2 = flux.fromiterable(list);
        flux2.subscribe(num -> system.out.println("数字:" + num));
        system.out.println("=====");
        // 3. 创建空flux(会触发oncomplete回调)
        flux<void> flux3 = flux.empty();
        flux3.subscribe(
                null,
                error -> system.err.println("错误:" + error),
                () -> system.out.println("flux3 完成")
        );
    }
    // 测试mono创建
    @test
    public void testmonocreate() {
        // 1. 创建包含单个元素的mono
        mono<string> mono1 = mono.just("hello reactor");
        mono1.subscribe(system.out::println);
        system.out.println("=====");
        // 2. 创建空mono
        mono<string> mono2 = mono.empty();
        mono2.subscribe(
                str -> system.out.println("元素:" + str),
                error -> system.err.println("错误:" + error),
                () -> system.out.println("mono2 完成")
        );
        system.out.println("=====");
        // 3. 创建包含错误的mono
        mono<string> mono3 = mono.error(new runtimeexception("测试错误"));
        mono3.subscribe(
                str -> system.out.println("元素:" + str),
                error -> system.err.println("错误:" + error.getmessage()),
                () -> system.out.println("mono3 完成")
        );
    }
}
运行测试方法,可以看到不同创建方式的输出结果。注意:reactor的数据流只有在被订阅(subscribe)后才会开始执行,这就是“惰性求值”特性。
3.2 常用操作符实战
操作符用于对数据流进行转换、过滤、聚合等处理,以下是最常用的操作符示例。
3.2.1 转换操作:map与flatmap
map:同步转换,将一个元素转换为另一个元素;flatmap:异步转换,将一个元素转换为一个新的数据流(mono/flux),并合并这些数据流。
import io.projectreactor.core.publisher.flux;
import org.junit.test;
public class reactormaptest {
    @test
    public void testmap() {
        // map:将字符串转换为其长度
        flux<string> flux = flux.just("java", "spring", "webflux");
        flux.map(string::length)
            .subscribe(length -> system.out.println("字符串长度:" + length));
    }
    @test
    public void testflatmap() {
        // flatmap:将每个数字转换为一个新的flux(0到该数字),并合并所有flux
        flux<integer> flux = flux.just(2, 3);
        flux.flatmap(num -> flux.range(0, num))
            .subscribe(system.out::println);
        // 输出:0,1,0,1,2
    }
}
3.2.2 过滤操作:filter与take
filter:根据条件过滤元素;take:获取前n个元素。
import io.projectreactor.core.publisher.flux;
import org.junit.test;
public class reactorfiltertest {
    @test
    public void testfilter() {
        // 过滤出偶数
        flux<integer> flux = flux.range(1, 10); // 生成1到10的数字
        flux.filter(num -> num % 2 == 0)
            .subscribe(even -> system.out.println("偶数:" + even));
    }
    @test
    public void testtake() {
        // 获取前3个元素
        flux<string> flux = flux.just("a", "b", "c", "d", "e");
        flux.take(3)
            .subscribe(str -> system.out.println("前3个元素:" + str));
    }
}
3.2.3 聚合操作:reduce与collectlist
reduce:将数据流中的元素聚合为一个值;collectlist:将数据流中的所有元素收集到一个list中,返回mono。
import io.projectreactor.core.publisher.flux;
import org.junit.test;
public class reactoraggregatetest {
    @test
    public void testreduce() {
        // 计算1到10的和
        flux<integer> flux = flux.range(1, 10);
        flux.reduce((a, b) -> a + b)
            .subscribe(sum -> system.out.println("1到10的和:" + sum));
    }
    @test
    public void testcollectlist() {
        // 将元素收集到list中
        flux<string> flux = flux.just("java", "spring", "webflux");
        flux.collectlist()
            .subscribe(list -> system.out.println("元素列表:" + list));
    }
}
四、spring webflux实战:响应式web开发
spring webflux支持两种编程模型:基于注解的编程模型(类似spring mvc)和基于函数式的编程模型。本节分别讲解两种模型的实战用法。
4.1 基于注解的编程模型(常用)
这种模型与spring mvc非常相似,使用@restcontroller、@getmapping、@postmapping等注解,上手成本低。
4.1.1 实体类定义
import lombok.allargsconstructor;
import lombok.data;
import lombok.noargsconstructor;
@data
@noargsconstructor
@allargsconstructor
public class user {
    private long id;
    private string name;
    private integer age;
}
4.1.2 模拟数据服务
创建userservice,模拟数据库操作:
import io.projectreactor.core.publisher.flux;
import io.projectreactor.core.publisher.mono;
import org.springframework.stereotype.service;
import java.util.hashmap;
import java.util.map;
@service
public class userservice {
    // 模拟数据库
    private static final map<long, user> user_map = new hashmap<>();
    static {
        user_map.put(1l, new user(1l, "张三", 20));
        user_map.put(2l, new user(2l, "李四", 25));
        user_map.put(3l, new user(3l, "王五", 30));
    }
    // 查询所有用户
    public flux<user> findall() {
        return flux.fromiterable(user_map.values());
    }
    // 根据id查询用户
    public mono<user> findbyid(long id) {
        return mono.justorempty(user_map.get(id));
    }
    // 添加用户
    public mono<user> adduser(user user) {
        // 生成唯一id(简化处理)
        long id = user_map.keyset().stream().max(long::compare).orelse(0l) + 1;
        user.setid(id);
        user_map.put(id, user);
        return mono.just(user);
    }
    // 更新用户
    public mono<user> updateuser(long id, user user) {
        if (!user_map.containskey(id)) {
            return mono.error(new runtimeexception("用户不存在"));
        }
        user.setid(id);
        user_map.put(id, user);
        return mono.just(user);
    }
    // 删除用户
    public mono<void> deleteuser(long id) {
        user_map.remove(id);
        return mono.empty(); // 无返回值,用mono<void>表示
    }
}
4.1.3 控制器编写
import io.projectreactor.core.publisher.flux;
import io.projectreactor.core.publisher.mono;
import org.springframework.beans.factory.annotation.autowired;
import org.springframework.web.bind.annotation.*;
@restcontroller
@requestmapping("/users")
public class usercontroller {
    @autowired
    private userservice userservice;
    // 查询所有用户
    @getmapping
    public flux<user> findall() {
        return userservice.findall();
    }
    // 根据id查询用户
    @getmapping("/{id}")
    public mono<user> findbyid(@pathvariable long id) {
        return userservice.findbyid(id);
    }
    // 添加用户
    @postmapping
    public mono<user> adduser(@requestbody mono<user> usermono) {
        // 接收请求体为mono<user>,通过flatmap调用服务方法
        return usermono.flatmap(userservice::adduser);
    }
    // 更新用户
    @putmapping("/{id}")
    public mono<user> updateuser(@pathvariable long id, @requestbody mono<user> usermono) {
        return usermono.flatmap(user -> userservice.updateuser(id, user));
    }
    // 删除用户
    @deletemapping("/{id}")
    public mono<void> deleteuser(@pathvariable long id) {
        return userservice.deleteuser(id);
    }
}
4.1.4 接口测试
启动项目后,使用postman或curl测试接口:
- 查询所有用户:get http://localhost:8080/users → 返回所有用户的json数组
- 根据id查询:get http://localhost:8080/users/1 → 返回张三的信息
- 添加用户:post http://localhost:8080/users,请求体{“name”:“赵六”,“age”:35} → 返回添加后的用户信息
- 更新用户:put http://localhost:8080/users/4,请求体{“name”:“赵六更新”,“age”:36} → 返回更新后的用户信息
- 删除用户:delete http://localhost:8080/users/4 → 无返回值,状态码200
4.2 基于函数式的编程模型
spring webflux的函数式模型基于routerfunction和handlerfunction,更符合响应式编程的函数式风格,适用于简单的api场景。
4.2.1 编写处理器(handler)
处理器负责处理具体的请求逻辑,类似控制器中的方法:
import io.projectreactor.core.publisher.flux;
import io.projectreactor.core.publisher.mono;
import org.springframework.beans.factory.annotation.autowired;
import org.springframework.http.mediatype;
import org.springframework.stereotype.component;
import org.springframework.web.reactive.function.server.serverrequest;
import org.springframework.web.reactive.function.server.serverresponse;
import static org.springframework.web.reactive.function.bodyinserters.fromvalue;
@component
public class userhandler {
    @autowired
    private userservice userservice;
    // 查询所有用户
    public mono<serverresponse> findall(serverrequest request) {
        flux<user> userflux = userservice.findall();
        // 返回json数组,媒体类型为application_json
        return serverresponse.ok()
                .contenttype(mediatype.application_json)
                .body(userflux, user.class);
    }
    // 根据id查询用户
    public mono<serverresponse> findbyid(serverrequest request) {
        long id = long.valueof(request.pathvariable("id"));
        mono<user> usermono = userservice.findbyid(id);
        // 如果用户存在,返回200;不存在,返回404
        return usermono.flatmap(user -> serverresponse.ok()
                        .contenttype(mediatype.application_json)
                        .body(fromvalue(user)))
                .switchifempty(serverresponse.notfound().build());
    }
    // 添加用户
    public mono<serverresponse> adduser(serverrequest request) {
        mono<user> usermono = request.bodytomono(user.class);
        return usermono.flatmap(user -> serverresponse.ok()
                        .contenttype(mediatype.application_json)
                        .body(userservice.adduser(user), user.class));
    }
}
4.2.2 编写路由配置(router)
路由配置用于将请求路径映射到对应的处理器方法:
import org.springframework.context.annotation.bean;
import org.springframework.context.annotation.configuration;
import org.springframework.web.reactive.function.server.routerfunction;
import org.springframework.web.reactive.function.server.routerfunctions;
import org.springframework.web.reactive.function.server.serverresponse;
import static org.springframework.web.reactive.function.server.requestpredicates.*;
@configuration
public class userrouter {
    @bean
    public routerfunction<serverresponse> userroutes(userhandler userhandler) {
        return routerfunctions
                .route(get("/func/users"), userhandler::findall)
                .androute(get("/func/users/{id}"), userhandler::findbyid)
                .androute(post("/func/users"), userhandler::adduser);
    }
}
4.2.3 测试函数式接口
启动项目后,测试函数式接口:
- 查询所有用户:get http://localhost:8080/func/users
- 根据id查询:get http://localhost:8080/func/users/1
- 添加用户:post http://localhost:8080/func/users,请求体{“name”:“孙七”,“age”:40}
五、关键拓展知识点
掌握以下拓展知识点,能帮助你更好地应对实际开发中的问题。
5.1 背压机制详解
背压是响应式编程的核心特性之一,用于解决“生产者速度大于消费者处理速度”的问题。reactor通过subscription接口实现背压:消费者通过request(n)方法告知生产者自己最多能处理n个元素,生产者根据这个需求发送数据。
import io.projectreactor.core.publisher.flux;
import org.junit.test;
public class backpressuretest {
    @test
    public void testbackpressure() {
        flux.range(1, 100) // 生产者生成1到100的数字
            .subscribe(
                num -> {
                    system.out.println("处理元素:" + num);
                    try {
                        thread.sleep(100); // 模拟消费者处理耗时
                    } catch (interruptedexception e) {
                        e.printstacktrace();
                    }
                },
                error -> system.err.println("错误:" + error),
                () -> system.out.println("处理完成"),
                subscription -> subscription.request(2) // 初始请求2个元素
            );
        try {
            thread.sleep(10000);
        } catch (interruptedexception e) {
            e.printstacktrace();
        }
    }
}
上述代码中,消费者初始请求2个元素,处理完后会自动请求后续元素(reactor的默认行为),避免了数据堆积。
5.2 异常处理策略
响应式数据流中的异常会终止数据流,reactor提供了多种异常处理操作符:
- onerrorreturn:当发生异常时,返回一个默认值;
- onerrorresume:当发生异常时,切换到一个新的数据流;
- retry:当发生异常时,重试指定次数。
import io.projectreactor.core.publisher.mono;
import org.junit.test;
public class errorhandletest {
    @test
    public void testonerrorreturn() {
        mono.error(new runtimeexception("测试异常"))
            .onerrorreturn("默认值") // 发生异常时返回默认值
            .subscribe(system.out::println); // 输出:默认值
    }
    @test
    public void testonerrorresume() {
        mono.error(new runtimeexception("测试异常"))
            .onerrorresume(error -> mono.just("从异常中恢复")) // 切换到新的mono
            .subscribe(system.out::println); // 输出:从异常中恢复
    }
    @test
    public void testretry() {
        mono<integer> mono = mono.defer(() -> {
            system.out.println("执行方法");
            return math.random() > 0.5 ? mono.just(1) : mono.error(new runtimeexception("随机异常"));
        });
        mono.retry(2) // 最多重试2次
            .subscribe(
                num -> system.out.println("成功:" + num),
                error -> system.err.println("最终失败:" + error)
            );
    }
}
5.3 spring webflux与spring mvc的对比
| 特性 | spring mvc | spring webflux |
|---|---|---|
| 编程模型 | 基于注解(@controller等) | 注解模型 + 函数式模型 |
| io模型 | 同步阻塞io | 异步非阻塞io |
| 底层依赖 | servlet api | reactor + netty(默认)/servlet 3.1+ |
| 适用场景 | 普通web应用,cpu密集型场景 | 高并发、高io等待场景(如api网关、消息处理) |
| 数据访问 | jpa、mybatis(同步) | r2dbc(响应式关系型数据库)、mongodb reactive等 |
六、总结
本文从响应式编程的核心概念出发,详细讲解了reactor库的mono与flux操作,以及spring webflux的两种编程模型(注解式和函数式),并通过完整的实战示例帮助你快速上手。同时,我们还拓展了背压机制、异常处理等关键知识点,以及spring webflux与spring mvc的区别。
响应式编程的核心价值在于提升高并发场景下的系统吞吐量和资源利用率,但它也带来了一定的学习成本,需要转变传统的同步编程思维。建议在实际项目中,根据业务场景选择合适的技术框架:如果是高并发、高io等待的场景,spring webflux是不错的选择;如果是普通web应用,spring mvc依然是更成熟、更易维护的方案。
后续可以进一步学习响应式数据访问(如r2dbc、mongodb reactive)、spring cloud gateway(基于webflux的api网关)等内容,深入挖掘响应式编程的潜力。
到此这篇关于java 响应式编程之spring webflux+reactor 实战攻略的文章就介绍到这了,更多相关spring webflux reactor 实战内容请搜索代码网以前的文章或继续浏览下面的相关文章希望大家以后多多支持代码网!


发表评论