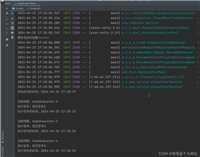
在 spring boot 中连接 mysql 数据库是一个常见的任务。spring boot 提供了自动配置功能,使得连接 mysql 数据库变得非常简单。以下是详细的步骤:
一、添加依赖
首先,确保你的pom.xml文件中包含了 spring boot 的 starter data jpa 和 mysql 驱动依赖。
<dependencies>
    <!-- spring boot starter data jpa -->
    <dependency>
        <groupid>org.springframework.boot</groupid>
        <artifactid>spring-boot-starter-data-jpa</artifactid>
    </dependency>
    <!-- mysql driver -->
    <dependency>
        <groupid>mysql</groupid>
        <artifactid>mysql-connector-java</artifactid>
        <scope>runtime</scope>
    </dependency>
</dependencies>
二、配置数据库连接
在application.properties或application.yml文件中配置数据库连接信息。
1.使用application.properties
# 数据库连接配置
spring.datasource.url=jdbc:mysql://localhost:3306/your_database_name?usessl=false&servertimezone=utc
spring.datasource.username=your_username
spring.datasource.password=your_password
# jpa 配置
spring.jpa.hibernate.ddl-auto=update
spring.jpa.show-sql=true
spring.jpa.properties.hibernate.format_sql=true
2.使用application.yml
spring:
  datasource:
    url: jdbc:mysql://localhost:3306/your_database_name?usessl=false&servertimezone=utc
    username: your_username
    password: your_password
  jpa:
    hibernate:
      ddl-auto: update
    show-sql: true
    properties:
      hibernate:
        format_sql: true
三、创建实体类
创建一个实体类来映射数据库表。例如,创建一个user实体类:
package com.example.demo.model;
import javax.persistence.entity;
import javax.persistence.generatedvalue;
import javax.persistence.generationtype;
import javax.persistence.id;
@entity
public class user {
    @id
    @generatedvalue(strategy = generationtype.identity)
    private long id;
    private string name;
    private string email;
    // getters and setters
    public long getid() {
        return id;
    }
    public void setid(long id) {
        this.id = id;
    }
    public string getname() {
        return name;
    }
    public void setname(string name) {
        this.name = name;
    }
    public string getemail() {
        return email;
    }
    public void setemail(string email) {
        this.email = email;
    }
}
四、创建仓库接口
创建一个仓库接口来操作数据库。spring data jpa 会自动实现这个接口。
package com.example.demo.repository;
import com.example.demo.model.user;
import org.springframework.data.jpa.repository.jparepository;
public interface userrepository extends jparepository<user, long> {
}
五、创建服务类
创建一个服务类来处理业务逻辑。
package com.example.demo.service;
import com.example.demo.model.user;
import com.example.demo.repository.userrepository;
import org.springframework.beans.factory.annotation.autowired;
import org.springframework.stereotype.service;
import java.util.list;
@service
public class userservice {
    @autowired
    private userrepository userrepository;
    public list<user> getallusers() {
        return userrepository.findall();
    }
    public user getuserbyid(long id) {
        return userrepository.findbyid(id).orelse(null);
    }
    public user saveuser(user user) {
        return userrepository.save(user);
    }
    public void deleteuser(long id) {
        userrepository.deletebyid(id);
    }
}
六、创建控制器
创建一个控制器来处理 http 请求。
package com.example.demo.controller;
import com.example.demo.model.user;
import com.example.demo.service.userservice;
import org.springframework.beans.factory.annotation.autowired;
import org.springframework.web.bind.annotation.*;
import java.util.list;
@restcontroller
@requestmapping("/users")
public class usercontroller {
    @autowired
    private userservice userservice;
    @getmapping
    public list<user> getallusers() {
        return userservice.getallusers();
    }
    @getmapping("/{id}")
    public user getuserbyid(@pathvariable long id) {
        return userservice.getuserbyid(id);
    }
    @postmapping
    public user createuser(@requestbody user user) {
        return userservice.saveuser(user);
    }
    @putmapping("/{id}")
    public user updateuser(@pathvariable long id, @requestbody user user) {
        user.setid(id);
        return userservice.saveuser(user);
    }
    @deletemapping("/{id}")
    public void deleteuser(@pathvariable long id) {
        userservice.deleteuser(id);
    }
}
七、运行应用程序
确保你的 mysql 数据库正在运行,并且已经创建了相应的数据库和表。然后运行你的 spring boot 应用程序。
mvn spring-boot:run
八、测试 api
使用 postman 或其他工具测试你的 api。例如:
• 获取所有用户:
• gethttp://localhost:8080/users
• 获取单个用户:
• gethttp://localhost:8080/users/{id}
• 创建用户:
• posthttp://localhost:8080/users
• body:
    {
      "name": "john doe",
      "email": "john.doe@example.com"
    }
    ```
• 更新用户:
• put`http://localhost:8080/users/{id}`
• body:
```json
    {
      "name": "jane doe",
      "email": "jane.doe@example.com"
    }
• 删除用户:
• deletehttp://localhost:8080/users/{id}
九、常见问题
1.数据库连接失败
• 确保 mysql 服务正在运行。
• 检查application.properties或application.yml文件中的数据库连接信息是否正确。
• 确保 mysql 用户具有访问数据库的权限。
2.数据库表未自动创建
• 确保spring.jpa.hibernate.ddl-auto配置正确。例如,update会自动创建表,create会删除现有表并重新创建。
• 确保实体类的注解正确。
十、总结
通过上述步骤,你可以在 spring boot 中成功连接并操作 mysql 数据库。spring boot 的自动配置功能使得连接数据库变得非常简单,你只需要添加必要的依赖、配置数据库连接信息、创建实体类、仓库接口和服务类,即可实现对数据库的操作。
到此这篇关于在 spring boot 中连接 mysql 数据库的详细步骤的文章就介绍到这了,更多相关spring boot 连接 mysql 数据库内容请搜索代码网以前的文章或继续浏览下面的相关文章希望大家以后多多支持代码网!


发表评论