1 创建java类
使用idea创建一个maven项目,名为jni-demo,并创建一个类jnitest:
package com.example;

public class jnitest {

    public native void printext();

}
整体结构如下:

2 生成jni头文件
利用java类生成c头文件,命令如下,注意要在包的根路径执行,也就是src\main\java目录下:
javah -classpath . -jni com.example.jnitest
如果文件中有中文,需要指定格式,如格式为utf-8 需要添加
-encoding utf-8参数解析:
-classpath [class]指定类的路径-jni [类名]需要生成的类名称,注意不带.java
执行后生成了如下头文件com_example_jnitest.h:
/* do not edit this file - it is machine generated */
#include <jni.h>
/* header for class com_example_jnitest */

#ifndef _included_com_example_jnitest
#define _included_com_example_jnitest
#ifdef __cplusplus
extern "c" {
#endif
/*
 * class:     com_example_jnitest
 * method:    printext
 * signature: ()v
 */
jniexport void jnicall java_com_example_jnitest_printext
  (jnienv *, jobject);

#ifdef __cplusplus
}
#endif
#endif
3 使用visual studio2022创建dll项目
3.1 选择模板中(windows桌面向导)
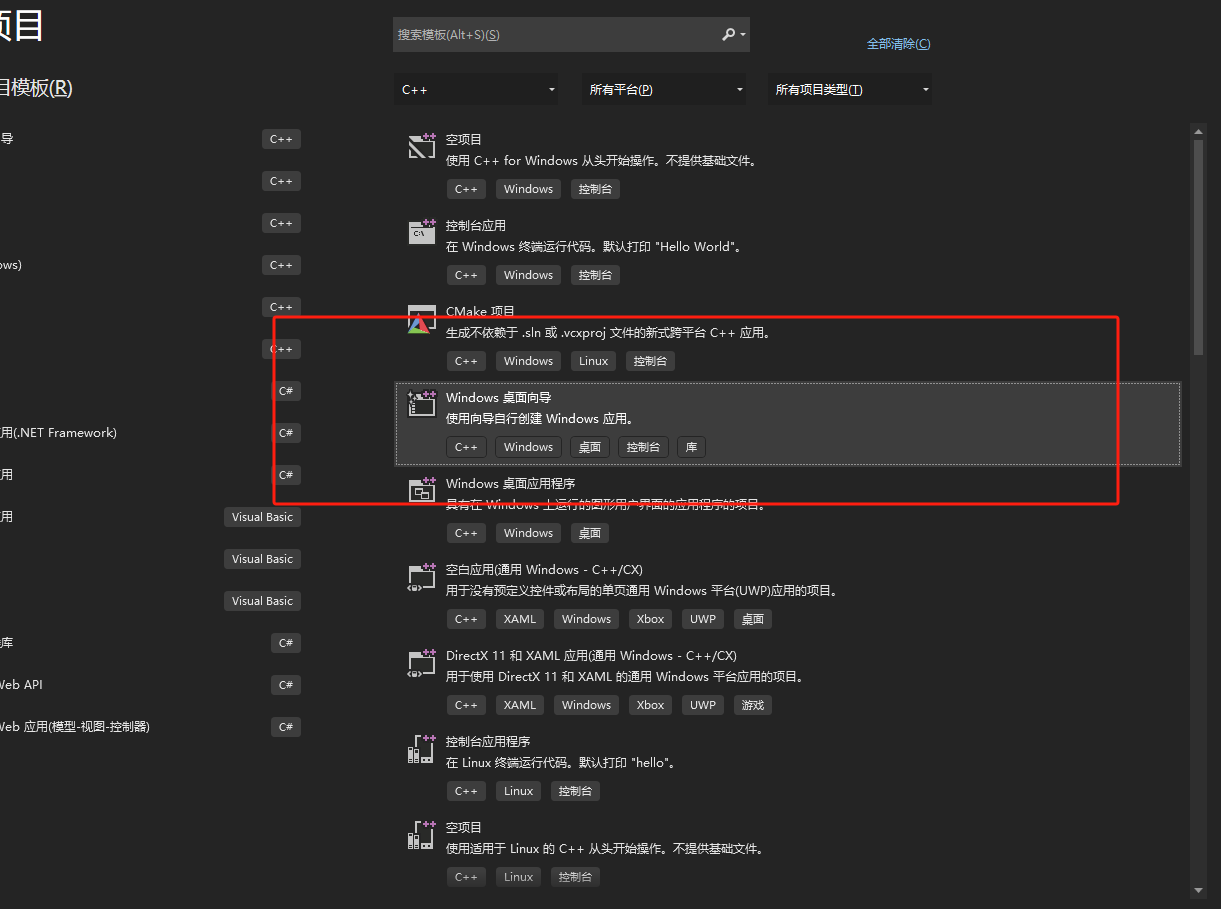
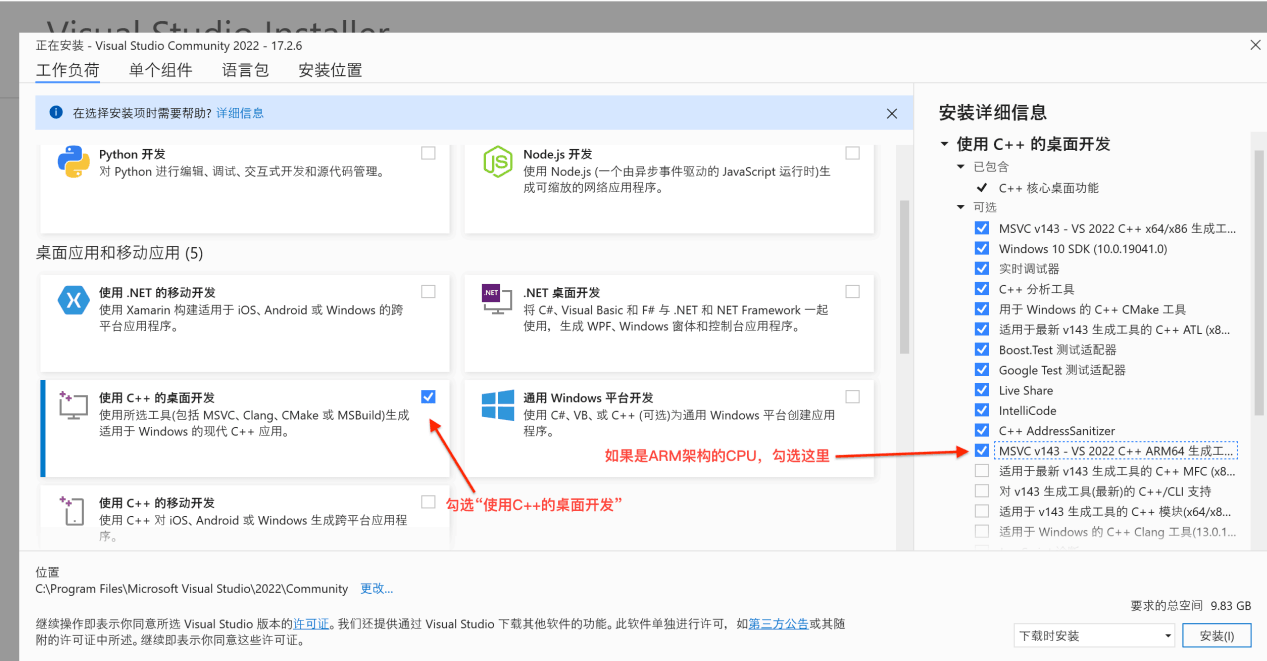
如果没有这个模板则安装:
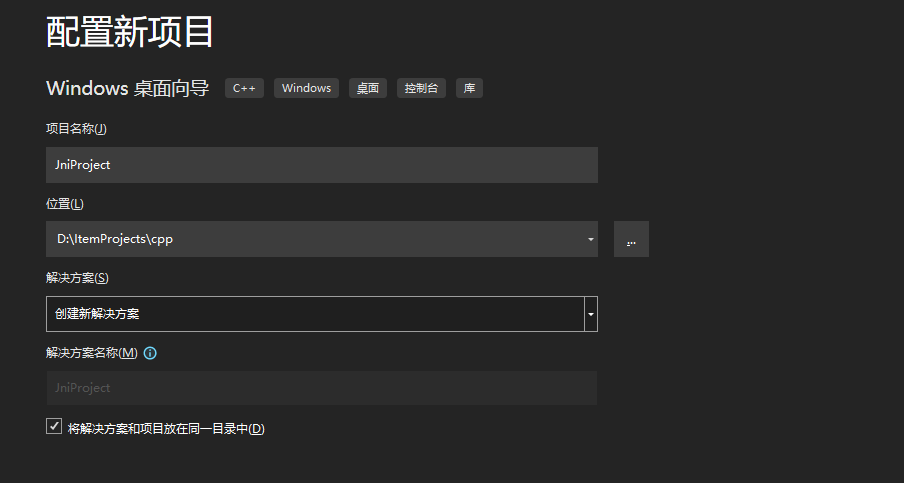
3.2 为项目命名
3.3 选择应用程序类型为动态链接库

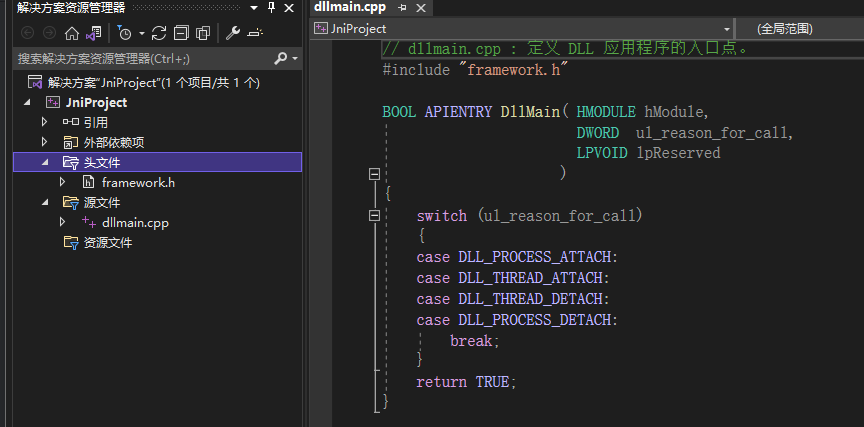
3.4 项目概览
4 导入需要的头文件
4.1 导入需要的头文件
将第二步生成的com_example_jnitest.h文件、jdk目录的include目录下有一个jni.h文件、和jdk目录下的\include\win32下的jni_md.h文件复制到visual studio2022创建的项目中,如下:
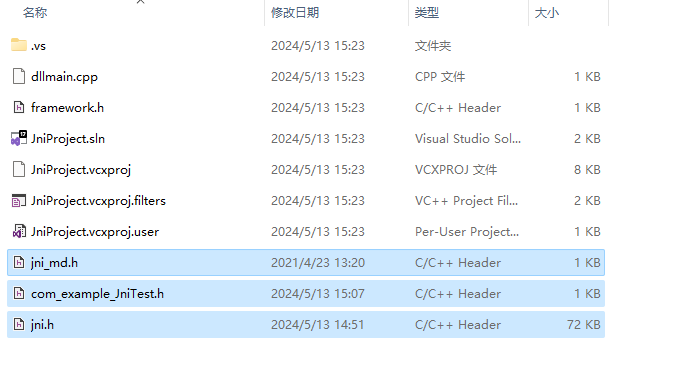
然后在visual studio2022中点击头文件->添加->现有项,找到上述三个头文件,添加即可。
4.2 修改头文件
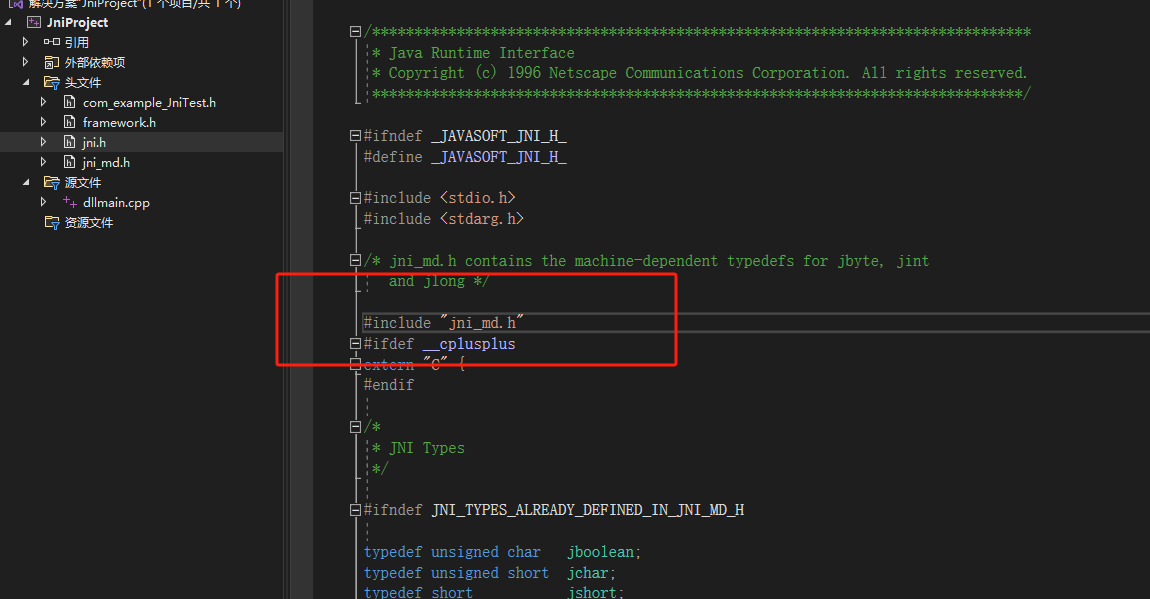
找到jni.h文件中#include <jni_md.h>修改为#include "jni_md.h",如下:
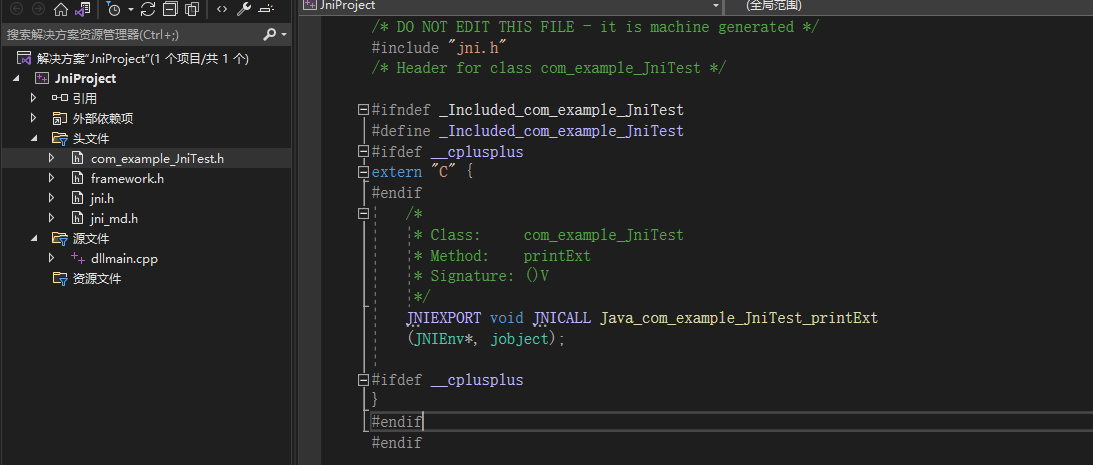
找到com_example_jnitest.h文件中#include <jni.h>修改为#include "jni.h"",如下:
5 编写c++实现
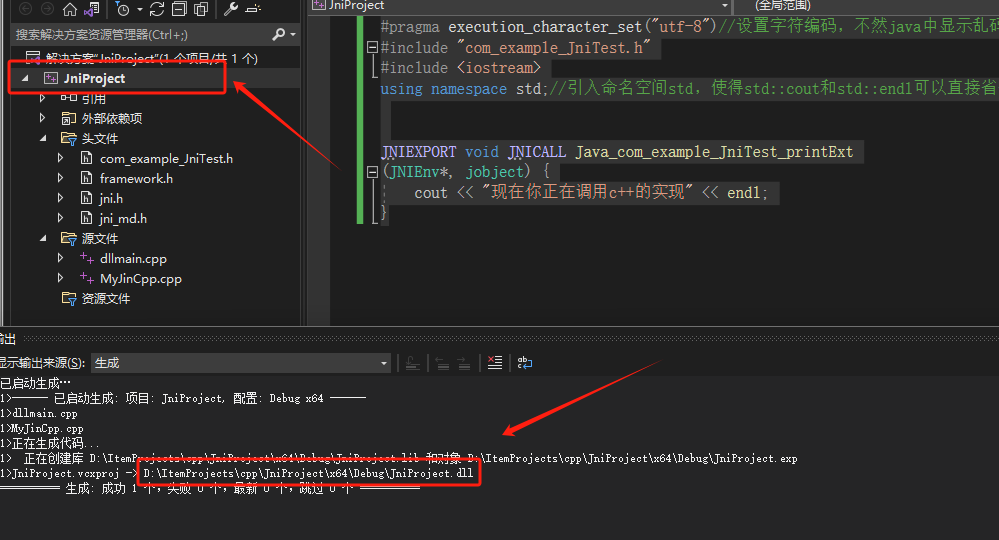
在visual studio2022中点击源文件->添加->新建项,选择c++文件,命名为myjincpp.cpp,然后在myjincpp.cpp编写如下内容:
#pragma execution_character_set("utf-8")//设置字符编码,不然java中显示乱码
#include "com_example_jnitest.h"
#include <iostream>
using namespace std;//引入命名空间std,使得std::cout和std::endl可以直接省去std::


jniexport void jnicall java_com_example_jnitest_printext
(jnienv*, jobject) {
	cout << "现在你正在调用c++的实现" << endl;
}
6 生成dll文件
在visual studio2022中右键点击生成,输出会显示一个dll的地址,复制这个地址,接下来java要用:
7 在java中进行测试
修改main类,如下:
注意:
- 使用
system.load直接加载任意位置的动态链接库,需要指定全路径以及扩展名 - 使用
system.loadlibrary加载java.library.path这一jvm变量所指向的路径中位置的动态链接库,不需要指定全路径以及扩展名可以通过system.getproperty("java.library.path")方法来获得该变量的值
package com.example;

// press shift twice to open the search everywhere dialog and type `show whitespaces`,
// then press enter. you can now see whitespace characters in your code.
public class main {

    static {
        system.load("d:\\itemprojects\\cpp\\jniproject\\x64\\debug\\jniproject.dll");
    }

    public static void main(string[] args) {
        new jnitest().printext();
    }
}
运行结果:
现在你正在调用c++的实现
process finished with exit code 0
到此这篇关于visual studio2022 jni开发流程的实现的文章就介绍到这了,更多相关visual studio2022 jni开发内容请搜索代码网以前的文章或继续浏览下面的相关文章希望大家以后多多支持代码网!


发表评论