在开发 spring boot 应用时,数据访问是不可或缺的部分。为了提高开发效率并减少样板代码,mybatis-plus 提供了强大的功能,能够简化与数据库交互的操作。本文将详细介绍如何在 spring boot 中使用 mybatis-plus,并结合具体代码示例来讲解它的使用方法和常见配置。
1. 什么是 mybatis-plus
mybatis-plus 是 mybatis 的增强工具,它对 mybatis 进行了封装和优化,提供了更简洁的操作方式,减少了大量的样板代码。通过 mybatis-plus,开发者无需编写复杂的 sql 语句和大量的 mapper 接口方法,可以通过其提供的 api 来快速实现常见的数据库操作。
2. mybatis-plus 的优势
无侵入设计:可以在不修改原有 mybatis 配置和 sql 的情况下进行增强。
自动 crud 操作:提供了常见的增、删、改、查操作的自动实现。
分页功能:内置了强大的分页插件,无需手动编写分页 sql。
条件构造器:提供了丰富的查询条件构造器,方便实现复杂的查询条件。
3. spring boot 中整合 mybatis-plus
为了更好地理解 mybatis-plus 的使用,我们通过一个简单的项目实例来讲解它在 spring boot 中的配置与使用。
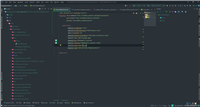
3.1 项目结构
假设我们要开发一个新闻管理系统,在这个系统中,我们需要对新闻进行增、删、改、查等操作。
项目的结构如下:
src
└── main
└── java
└── com
└── example
└── algosphere
├── controller
├── mapper
├── service
├── serviceimpl
└── pojo
3.2 引入依赖
在 pom.xml 中引入 mybatis-plus 和 mysql 数据库的相关依赖:
<dependencies>
    <!-- spring boot starter -->
    <dependency>
        <groupid>org.springframework.boot</groupid>
        <artifactid>spring-boot-starter-web</artifactid>
    </dependency>
    <dependency>
        <groupid>org.springframework.boot</groupid>
        <artifactid>spring-boot-starter-data-jpa</artifactid>
    </dependency>

    <!-- mybatis-plus -->
    <dependency>
        <groupid>com.baomidou</groupid>
        <artifactid>mybatis-plus-boot-starter</artifactid>
        <version>3.5.1</version>
    </dependency>

    <!-- mysql database -->
    <dependency>
        <groupid>mysql</groupid>
        <artifactid>mysql-connector-java</artifactid>
    </dependency>
</dependencies>
3.3 配置数据源
在 application.yml 中配置数据库连接信息:
spring:
  datasource:
    url: jdbc:mysql://localhost:3306/your_database?useunicode=true&characterencoding=utf-8&servertimezone=utc
    username: root
    password: password
    driver-class-name: com.mysql.cj.jdbc.driver
  mybatis-plus:
    # 配置 mybatis-plus 的全局配置
    global-config:
      db-config:
        # 主键策略
        id-type: auto
3.4 创建实体类
我们创建一个 news 实体类,代表新闻数据表的结构:
package com.example.algosphere.pojo;

import com.baomidou.mybatisplus.annotation.tableid;
import com.baomidou.mybatisplus.annotation.tablename;
import lombok.data;

@data
@tablename("news")
public class news {
    @tableid
    private long id;
    private string title;
    private string content;
    private string author;
    private string createddate;
}
在 news 类中,使用了 @tableid 注解来标识主键,使用 @tablename 注解来指定表名。
3.5 创建 mapper 接口
接下来,我们创建 newsmapper 接口,并继承 mybatis-plus 提供的 basemapper 接口。basemapper 提供了常见的数据库操作方法,例如 insert、update、delete、select 等,开发者无需再手动编写这些方法。
package com.example.algosphere.mapper;

import com.baomidou.mybatisplus.core.mapper.basemapper;
import com.example.algosphere.pojo.news;
import org.apache.ibatis.annotations.mapper;

@mapper
public interface newsmapper extends basemapper<news> {
}
3.6 创建 service 接口和实现类
在 service 层,我们创建了一个接口 inewsservice,并继承了 mybatis-plus 提供的 iservice 接口,iservice 接口提供了常用的 crud 方法。
package com.example.algosphere.service;

import com.baomidou.mybatisplus.extension.service.iservice;
import com.example.algosphere.pojo.news;

public interface inewsservice extends iservice<news> {
}
newsserviceimpl 实现类:
package com.example.algosphere.service.impl;

import com.baomidou.mybatisplus.extension.service.impl.serviceimpl;
import com.example.algosphere.mapper.newsmapper;
import com.example.algosphere.pojo.news;
import com.example.algosphere.service.inewsservice;
import org.springframework.stereotype.service;

@service
public class newsserviceimpl extends serviceimpl<newsmapper, news> implements inewsservice {
}
通过继承 serviceimpl 类,newsserviceimpl 自动获得了常见的 crud 功能。
3.7 创建 controller 层
最后,我们创建一个 newscontroller 类,提供一个接口来查询所有新闻:
package com.example.algosphere.controller;

import com.example.algosphere.service.inewsservice;
import com.example.algosphere.pojo.news;
import com.example.algosphere.common.result;
import org.springframework.beans.factory.annotation.autowired;
import org.springframework.web.bind.annotation.getmapping;
import org.springframework.web.bind.annotation.restcontroller;

import java.util.list;

@restcontroller
public class newscontroller {

    @autowired
    private inewsservice newsservice;

    @getmapping("/news")
    public result findall() {
        list<news> newslist = newsservice.list();
        return result.success(newslist);
    }
}
result.success() 是一个自定义的响应封装类,用于统一返回格式。它封装了查询结果,可以让前端以一致的方式处理。
4. 常见问题与解决方案
分页查询:mybatis-plus 提供了分页插件,只需在 application.yml 配置分页插件,并使用 page 对象即可实现分页查询。
性能优化:在查询时,我们可以利用 mybatis-plus 提供的 querywrapper 和 lambdaquerywrapper 来构建复杂的查询条件。
querywrapper<news> querywrapper = new querywrapper<>();
querywrapper.eq("author", "张三");
list<news> newslist = newsservice.list(querywrapper);
5. 总结
mybatis-plus 作为 mybatis 的增强工具,能够大幅度简化数据访问层的代码,提高开发效率。通过自动生成常见的 crud 操作代码、支持分页和复杂查询条件,开发者可以专注于业务逻辑的实现而不是数据访问的细节。在 spring boot 项目中整合 mybatis-plus 更是简单,通过上述步骤,我们能够快速搭建一个高效的数据访问层。
到此这篇关于springboot如何使用mybatis-plus实现高效的数据访问层的文章就介绍到这了,更多相关springboot mybatis-plus数据访问层内容请搜索代码网以前的文章或继续浏览下面的相关文章希望大家以后多多支持代码网!


发表评论