源码在这里:https://github.com/darrenji/useidentitycruduserinmvc,本地下载
在vs2013中创建一个mvc项目,用默认的"无身份验证"作为身份验证机制。
通过控制台下载bootstrap。
install-package -version 3.0.3 bootstrap
下载成功后,在解决方案下的content和scripts多了该版本的css和js文件。
把创建项目默认homecontroller中的所有action以及/views/home下的所有视图删除。
热热身
先来做一个简单练习。
在homecontroller中的index方法中,把一个字典传递给视图。
    public class homecontroller : controller
    {
        public actionresult index()
        {
            dictionary<string, object> data = new dictionary<string, object>();
            data.add("placeholder", "placeholder");
            return view(data);
        }
    }
_layout.cshtml设置如下:
<head>
<meta http-equiv="content-type" content="text/html; charset=utf-8"/>
    <meta charset="utf-8" />
    <meta name="viewport" content="width=device-width, initial-scale=1.0">
    <title>asp.net identity实战</title>
    <link href="~/content/bootstrap.min.css" rel="external nofollow"  rel="stylesheet" />
    <link href="~/content/bootstrap-theme.min.css" rel="external nofollow"  rel="stylesheet" />
    <style>
        .container {padding-top:10px;}
        .validation-summary-errors{color:red;}
    </style>
</head>
<body>

    <div class="container">
        @renderbody()
    </div>
    @scripts.render("~/bundles/jquery")
    @scripts.render("~/bundles/bootstrap")
    @rendersection("scripts", required: false)
</body>
home/index.cshtml视图中:
@{
    viewbag.title = "index";
    layout = "~/views/shared/_layout.cshtml";
}
<div class="panel panel-primary">
    <div class="panel-heading">用户明细</div>
    <table class="table table-striped">
        @foreach (string key in model.keys)
        {
            <tr>
                <th>@key</th>
                <td>@model[key]</td>
            </tr>
        }
    </table>
</div>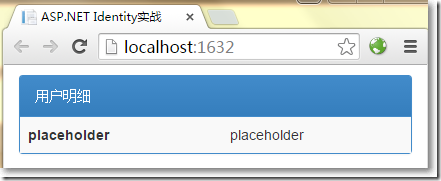
前期准备
分别安装如下组件。
install-package microsoft.aspnet.identity.entityframework –version 2.0.0
install-package microsoft.aspnet.identity.owin -version 2.0.0
install-package microsoft.owin.host.systemweb -version 2.1.0
配置web.config如下:
<?xml version="1.0" encoding="utf-8"?>
<!--
  有关如何配置 asp.net 应用程序的详细信息,请访问
  http://go.microsoft.com/fwlink/?linkid=301880
  -->
<configuration>
  <configsections>
    <!-- for more information on entity framework configuration, visit http://go.microsoft.com/fwlink/?linkid=237468 -->
    <section name="entityframework" type="system.data.entity.internal.configfile.entityframeworksection, entityframework, version=6.0.0.0, culture=neutral, publickeytoken=b77a5c561934e089" requirepermission="false" />
  </configsections>
  <connectionstrings>
    <add name="identitydb" providername="system.data.sqlclient" connectionstring="data source=(localdb)\v11.0;initial catalog=identitydb;integrated security=true;connect timeout=15;encrypt=false;trustservercertificate=false;multipleactiveresultsets=true"/>
</connectionstrings>
  <appsettings>
    <add key="webpages:version" value="3.0.0.0" />
    <add key="webpages:enabled" value="false" />
    <add key="clientvalidationenabled" value="true" />
    <add key="unobtrusivejavascriptenabled" value="true" />
    <add key="owin:appstartup" value="webapplication4.identityconfig" />
  </appsettings>
  <system.web>
    <compilation debug="true" targetframework="4.5" />
    <httpruntime targetframework="4.5" />
  </system.web>
  <runtime>
    <assemblybinding xmlns="urn:schemas-microsoft-com:asm.v1">
      <dependentassembly>
        <assemblyidentity name="system.web.helpers" publickeytoken="31bf3856ad364e35" />
        <bindingredirect oldversion="1.0.0.0-3.0.0.0" newversion="3.0.0.0" />
      </dependentassembly>
      <dependentassembly>
        <assemblyidentity name="system.web.mvc" publickeytoken="31bf3856ad364e35" />
        <bindingredirect oldversion="1.0.0.0-5.0.0.0" newversion="5.0.0.0" />
      </dependentassembly>
      <dependentassembly>
        <assemblyidentity name="system.web.optimization" publickeytoken="31bf3856ad364e35" />
        <bindingredirect oldversion="1.0.0.0-1.1.0.0" newversion="1.1.0.0" />
      </dependentassembly>
      <dependentassembly>
        <assemblyidentity name="system.web.webpages" publickeytoken="31bf3856ad364e35" />
        <bindingredirect oldversion="1.0.0.0-3.0.0.0" newversion="3.0.0.0" />
      </dependentassembly>
      <dependentassembly>
        <assemblyidentity name="webgrease" publickeytoken="31bf3856ad364e35" />
        <bindingredirect oldversion="0.0.0.0-1.5.2.14234" newversion="1.5.2.14234" />
      </dependentassembly>
    </assemblybinding>
  </runtime>
  <entityframework>
    <defaultconnectionfactory type="system.data.entity.infrastructure.sqlconnectionfactory, entityframework" />
    <providers>
      <provider invariantname="system.data.sqlclient" type="system.data.entity.sqlserver.sqlproviderservices, entityframework.sqlserver" />
    </providers>
  </entityframework>
</configuration>
以上,
- 增加了connectionstrings节点,将自动创建localdb数据库
- 在appsettings节点中增加了一个key为owin:appstartup项,这是确保owin运行正常的全局配置
在models文件夹下创建如下类。
    public class appuser : identityuser
    {
    }
在解决方案下创建infrastructure文件夹。
在infrastructure文件夹下创建一个上下文类,需要实现identitydbcontext<>接口。
   public class appidentitydbcontext : identitydbcontext<appuser>
    {
        public appidentitydbcontext()
            : base("identitydb")
        {
        }
        static appidentitydbcontext()
        {
            //使用ef code first第一次创建的时候调用
            database.setinitializer<appidentitydbcontext>(new identitydbinit());
        }
        public static appidentitydbcontext create()
        {
            return new appidentitydbcontext();
        }
    }
    //初始化
    public class identitydbinit : dropcreatedatabaseifmodelchanges<appidentitydbcontext>
    {
        protected override void seed(appidentitydbcontext context)
        {
            performinitialsetup(context);
            base.seed(context);
        }
        //初始化工作
        public void performinitialsetup(appidentitydbcontext context)
        { }
    }
在infrastructure文件夹下创建一个管理用户的类,需要继承usermanager<appuser>类。
还记得,先前在appsettings节点中配置了一个如下方式:
<add key="owin:appstartup" value="webapplication4.identityconfig" />
owin需要一个全局启动文件,默认会到项目的顶级命名空间下找identityconfig这个类。
那就在app_start中创建identityconfig这个类,这个类在webapplication4这个命名空间下。
namespace webapplication4
{
    public class identityconfig
    {
        public void configuration(iappbuilder app)
        {
            app.createperowincontext<appidentitydbcontext>(appidentitydbcontext.create);
            app.createperowincontext<appusermanager>(appusermanager.create);
            app.usecookieauthentication(new cookieauthenticationoptions {
                authenticationtype = defaultauthenticationtypes.applicationcookie,
                loginpath = new microsoft.owin.pathstring("/account/login")
            });
        }
    }
}
显示用户
创建admincontroller,现在可以向视图传递所有的用户了,编写如下:
    public class admincontroller : controller
    {
        public actionresult index()
        {
            return view(usermanager.users);
        }
        private appusermanager usermanager
        {
            get
            {
                return httpcontext.getowincontext().getusermanager<appusermanager>();
            }
        }
    }
再创建admin/index.cshtml类型为ienumerable<appuser>的强类型视图。
@model ienumerable<webapplication4.models.appuser>
@{
    viewbag.title = "index";
    layout = "~/views/shared/_layout.cshtml";
}
<div class="panel panel-primary">
    <div class="panel-heading">
        所有用户账户
    </div>
    <table class="table table-striped">
        <tr><th>id</th><th>name</th><th>email</th><th></th></tr>
        @if (model.count() == 0)
        {
            <tr><td colspan="4" class="text-center">还没有创建用户</td></tr>
        }
        else
        {
            foreach (webapplication4.models.appuser user in model)
            {
                <tr>
                    <td>@user.id</td>
                    <td>@user.username</td>
                    <td>@user.email</td>
                    <td>
                        @using (html.beginform("delete", "admin",
                            new { id = user.id }))
                        {
                            @html.actionlink("编辑", "edit", new { id = user.id },
                                    new { @class = "btn btn-primary btn-xs" })
                            <button class="btn btn-danger btn-xs"
                                    type="submit">
                                删除
                            </button>
                        }
                    </td>
                </tr>
            }
        }
    </table>
</div>
@html.actionlink("创建用户", "create", null, new { @class = "btn btn-primary" })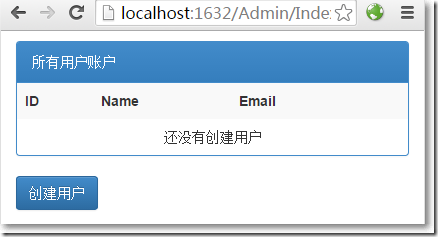
创建用户
在models文件夹下创建一个视图模型。
namespace webapplication4.models
{
    public class createmodel
    {
        public string id { get; set; }
        [required]
        public string name { get; set; }
        [required]
        public string email { get; set; }
        [required]
        public string password { get; set; }
    }
}
在admincontroller中添加创建用户相关的方法。
   public class admincontroller : controller
    {
        public actionresult index()
        {
            return view(usermanager.users);
        }
        //创建显示
        public actionresult create()
        {
            return view();
        }
        [httppost]
        public async task<actionresult> create(createmodel model)
        {
            if(modelstate.isvalid)
            {
                var user = new appuser{username = model.name, email = model.email};
                identityresult result = await usermanager.createasync(user, model.password);
                if(result.succeeded)
                {
                    return redirecttoaction("index");
                }else{
                    adderrorsfromresult(result);
                }
            }
            return view(model);
        }
        //创建接收
        private void adderrorsfromresult(identityresult result)
        {
            foreach(var error in result.errors)
            {
                modelstate.addmodelerror("", error);
            }
        }
        private appusermanager usermanager
        {
            get
            {
                return httpcontext.getowincontext().getusermanager<appusermanager>();
            }
        }
    }
在admin/create.cshtml视图页中:
@model webapplication4.models.createmodel
@{
    viewbag.title = "create";
    layout = "~/views/shared/_layout.cshtml";
}
<h2>create</h2>
@using (html.beginform())
{
    @html.antiforgerytoken()

    <div class="form-horizontal">
        <h4>创建用户</h4>
        <hr />
        @html.validationsummary(true)
        <div class="form-group">
            @html.labelfor(model => model.name, new { @class = "control-label col-md-2" })
            <div class="col-md-10">
                @html.editorfor(model => model.name)
                @html.validationmessagefor(model => model.name)
            </div>
        </div>
        <div class="form-group">
            @html.labelfor(model => model.email, new { @class = "control-label col-md-2" })
            <div class="col-md-10">
                @html.editorfor(model => model.email)
                @html.validationmessagefor(model => model.email)
            </div>
        </div>
        <div class="form-group">
            @html.labelfor(model => model.password, new { @class = "control-label col-md-2" })
            <div class="col-md-10">
                @html.editorfor(model => model.password)
                @html.validationmessagefor(model => model.password)
            </div>
        </div>
        <div class="form-group">
            <div class="col-md-offset-2 col-md-10">
                <input type="submit" value="创建用户" class="btn btn-default" />
            </div>
        </div>
    </div>
}
<div>
    @html.actionlink("返回", "index")
</div>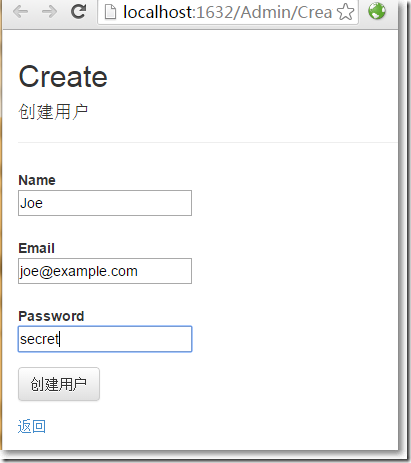
点击"创建"按钮,创建成功返回显示用户页面。
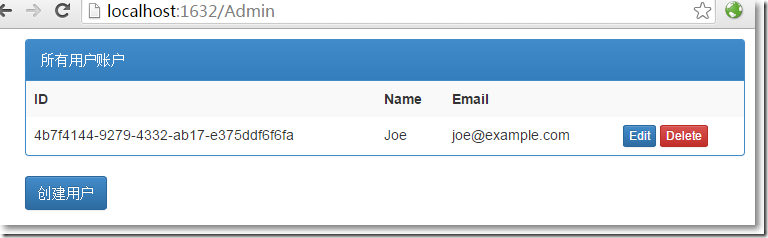
oh, my god,只是配置了一下就有数据了? 数据在哪呢?
点击左上角的"服务器资源管理器",右键"identitydb",点击"刷新"。
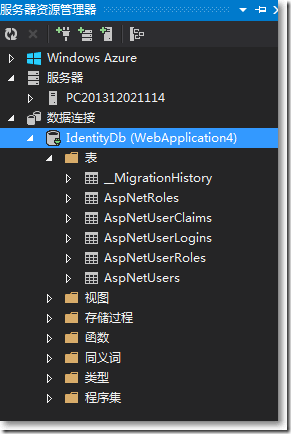
再打开aspnetusers表,刚创建的用户赫然在列。

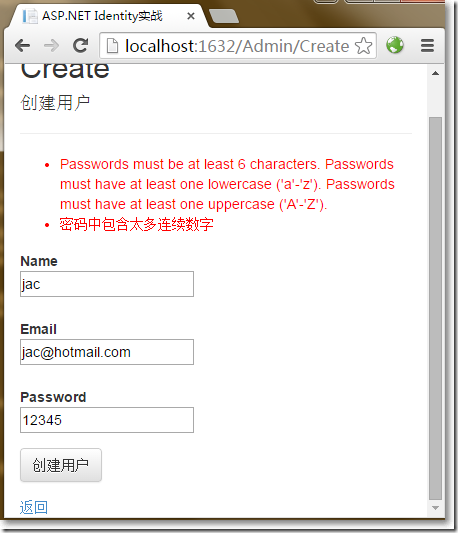
好像还有点欠缺,用户输入密码的时候,总应该有些限制吧。
能想到的,asp.net identity都为我们准备好了。有一个passwordvalidator类就是干这个的。
在infrastructure文件夹中创建一个passwordvalidator类的继承子类。
namespace webapplication4.infrastructure
{
    public class custompasswordvalidator : passwordvalidator
    {
        public override async task<identityresult> validateasync(string pass)
        {
            identityresult result = await base.validateasync(pass);
            if (pass.contains("12345"))
            {
                var errors = result.errors.tolist();
                errors.add("密码中包含太多连续数字");
                result = new identityresult(errors);
            }
            return result;
        }
    }
}
然后需要把这个规则告诉usermanager。
namespace webapplication4.infrastructure
{
    public class appusermanager : usermanager<appuser>
    {
        public appusermanager(iuserstore<appuser> store) : base(store) { }
        public static appusermanager create(identityfactoryoptions<appusermanager> options, iowincontext context)
        {
            //identity ef上下文
            appidentitydbcontext db = context.get<appidentitydbcontext>();
            //与identity ef相关的userstore
            iuserstore<appuser> us = new userstore<appuser>(db);
            appusermanager manager = new appusermanager(us);
            //密码相关
            manager.passwordvalidator = new custompasswordvalidator {
                requiredlength = 6,
                requirenonletterordigit = false,
                requiredigit = false,
                requirelowercase = true,
                requireuppercase = true
            };
            return manager;
        }
    }
}
再次运行程序,创建用户页面,尝试输入不通过的密码。
不过,关于密码的规则,似乎可以在view model的验证层面就可以解决掉。
编辑和删除用户
在admincontroller中增加编辑和删除的部分。
    public class admincontroller : controller
    {
        public actionresult index()
        {
            return view(usermanager.users);
        }
        //创建显示
        public actionresult create()
        {
            return view();
        }
        //创建接收
        [httppost]
        public async task<actionresult> create(createmodel model)
        {
            if(modelstate.isvalid)
            {
                var user = new appuser{username = model.name, email = model.email};
                identityresult result = await usermanager.createasync(user, model.password);
                if(result.succeeded)
                {
                    return redirecttoaction("index");
                }else{
                    adderrorsfromresult(result);
                }
            }
            return view(model);
        }
        //编辑显示
        public async task<actionresult> edit(string id)
        {
            appuser user = await usermanager.findbyidasync(id);

            if(user != null)
            {
                createmodel createmodel = new createmodel();
                createmodel.id = user.id;
                createmodel.email = user.email;
                createmodel.name = user.username;
                createmodel.password = user.passwordhash;
                return view(createmodel);
            }
            else
            {
                return redirecttoaction("index");
            }
        }
        //接收编辑
        [httppost]
        public async task<actionresult> edit(createmodel createmodel)
        {

            if(modelstate.isvalid)
            {
                appuser user = await usermanager.findbyidasync(createmodel.id);
                if (user != null)
                {
                    //关于邮箱
                    user.email = createmodel.email;
                    identityresult validemail = await usermanager.uservalidator.validateasync(user);
                    if (!validemail.succeeded)
                    {
                        adderrorsfromresult(validemail);
                    }
                    user.username = createmodel.name;
                    //关于密码
                    identityresult validpass = null;
                    if (createmodel.password != string.empty)
                    {
                        validpass = await usermanager.passwordvalidator.validateasync(createmodel.password);
                        if (validpass.succeeded)
                        {
                            user.passwordhash = usermanager.passwordhasher.hashpassword(createmodel.password);
                        }
                        else
                        {
                            adderrorsfromresult(validpass);
                        }
                    }
                    user.email = createmodel.email;
                    //验证结果
                    if ((validemail.succeeded && validpass == null) || (validemail.succeeded
    && createmodel.password != string.empty && validpass.succeeded))
                    {
                        identityresult result = await usermanager.updateasync(user);
                        if (result.succeeded)
                        {
                            return redirecttoaction("index");
                        }
                        else
                        {
                            adderrorsfromresult(result);
                        }
                    }
                    else
                    {
                        modelstate.addmodelerror("", "无此用户");
                    }
                }
                return view(createmodel);
            }
            else
            {
                return view(createmodel);
            }

        }
        //删除
        [httppost]
        public async task<actionresult> delete(string id)
        {
            appuser user = await usermanager.findbyidasync(id);
            if(user != null)
            {
                identityresult result = await usermanager.deleteasync(user);
                if(result.succeeded)
                {
                    return redirecttoaction("index");
                }
                else
                {
                    return view("error", result.errors);
                }
            }
            else
            {
                return view("error", new string[] { "没有此用户" });
            }
        }
        private void adderrorsfromresult(identityresult result)
        {
            foreach(var error in result.errors)
            {
                modelstate.addmodelerror("", error);
            }
        }
        private appusermanager usermanager
        {
            get
            {
                return httpcontext.getowincontext().getusermanager<appusermanager>();
            }
        }
    }
admin/edit.cshtml视图。
@model webapplication4.models.createmodel
@{
    viewbag.title = "edit";
    layout = "~/views/shared/_layout.cshtml";
}
<h2>edit</h2>
@using (html.beginform())
{
    @html.antiforgerytoken()

    <div class="form-horizontal">
        <hr />
        @html.validationsummary(true)
        @html.hiddenfor(model => model.id)
        <div class="form-group">
            @html.labelfor(model => model.name, new { @class = "control-label col-md-2" })
            <div class="col-md-10">
                @html.editorfor(model => model.name)
                @html.validationmessagefor(model => model.name)
            </div>
        </div>
        <div class="form-group">
            @html.labelfor(model => model.email, new { @class = "control-label col-md-2" })
            <div class="col-md-10">
                @html.editorfor(model => model.email)
                @html.validationmessagefor(model => model.email)
            </div>
        </div>
        <div class="form-group">
            @html.labelfor(model => model.password, new { @class = "control-label col-md-2" })
            <div class="col-md-10">
                @html.editorfor(model => model.password)
                @html.validationmessagefor(model => model.password)
            </div>
        </div>
        <div class="form-group">
            <div class="col-md-offset-2 col-md-10">
                <input type="submit" value="保存" class="btn btn-default" />
            </div>
        </div>
    </div>
}
<div>
    @html.actionlink("返回", "index")
</div>
另外,如果删除失败,跳转到shared/error.cshtml视图页。
@model ienumerable<string>
@{ viewbag.title = "error";}
<div class="alert alert-danger">
    @switch (model.count())
    {
        case 0:
            @: something went wrong. please try again
            break;
        case 1:
        @model.first();
                          break;
        default:
        @: 发现如下错误:
        <ul>
            @foreach (string error in model)
            {
                <li>@error</li>
            }
        </ul>
            break;
    }
</div>
@html.actionlink("确定", "index", null, new { @class = "btn btn-default" })
至此,使用asp.net identy实现对用户的增删改查完毕,asp.net identity真的很好很强大!
以上就是这篇文章的全部内容了,希望本文的内容对大家的学习或者工作具有一定的参考学习价值,谢谢大家对代码网的支持。如果你想了解更多相关内容请查看下面相关链接

发表评论