什么是pipeline
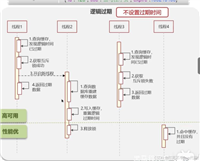
在 redis 中,pipeline(管道)是一种客户端与服务器间通信的优化机制,旨在减少网络往返时间和提高命令执行效率。以下是 redis pipeline 的具体定义和特点:
1.批量发送与接收:
- 使用 pipeline 时,客户端不再逐条发送命令,而是将多个命令一次性打包成一个请求包发送给 redis 服务器。相应地,服务器在接收到这个请求包后,不是立即返回每条命令的执行结果,而是先将所有命令依次执行完毕,然后将所有结果打包成一个响应包返回给客户端。
- 这种做法显著减少了客户端与服务器之间网络通信的次数,尤其是对于需要执行大量命令的场景,能够极大地降低网络延迟带来的影响。
2.异步执行
- 尽管 redis pipeline 中的所有命令是在服务器端按顺序执行的,但由于客户端与服务器之间的通信是批量进行的,客户端可以在发送完一批命令后立刻开始处理其他任务,而无需等待每个命令的单独响应。这种异步处理方式可以更好地利用客户端的计算资源,提高整体应用程序的并发性能。
3.命令隔离
- 在 pipeline 中,每个命令的执行互不影响,即一个命令的执行结果不会影响后续命令的执行。这意味着即使某条命令执行失败,也不会阻止后续命令的执行。客户端在解析响应包时,可以根据响应内容判断每条命令的执行结果。
4.使用场景
- pipeline 主要适用于需要对 redis 执行大量命令的操作,如数据批量导入、大规模数据更新、复杂查询等。这些操作若不使用 pipeline,可能会因为网络延迟导致整体执行时间显著增加。
- 对于涉及事务(transaction)的操作,虽然也可以使用 pipeline 来打包命令,但需要注意的是,pipeline 不提供事务的原子性和一致性保证。如果需要确保一组命令作为一个原子单位执行,应使用 redis 的 multi/exec 命令来开启事务。
5.注意事项
- 虽然 pipeline 能够显著提高命令执行效率,但一次性发送的命令数量不宜过大,否则可能导致数据包过大,增加网络传输压力,甚至超过 redis 服务器或客户端的缓冲区限制,引发错误。合理的命令打包大小需要根据实际环境和网络状况进行调整
- 在使用 pipeline 时,由于命令的响应是延迟返回的,客户端需要做好错误处理和重试策略,尤其是在网络不稳定或服务器负载较高的情况下。
总结来说,redis pipeline 是一种客户端与服务器间高效通信的技术,通过批量发送和接收命令,减少网络往返次数,提高命令执行效率,尤其适用于大量命令操作的场景。在使用时需注意命令打包大小的控制以及错误处理。
场景一:我要向redis新增大批量的数据
redis pipeline允许一次性发送多个命令到redis服务器,而无需等待每个命令的响应,显著减少了网络往返时间和潜在的延迟。在spring boot应用中,可以使用redistemplate的executepipelined()方法实现:
@autowired
private stringredistemplate redistemplate

public void batchinsertuserswithpipeline(list<user> users, string keyprefix, long ttlseconds) {
    redistemplate.executepipelined((rediscallback<object>) connection -> {
        for (user user : users) {
            string key = generatekey(keyprefix, user.getid());
            string value = objectmapper.writevalueasstring(user);

            connection.setex(key.getbytes(), (int) ttlseconds, value.getbytes());
        }
        return null;
    });
}
分批处理
尽管pipeline提高了效率,但对于千万级数据,一次性发送所有命令可能导致内存溢出或网络阻塞。因此,建议将数据分批处理,每批包含适量的记录(如1000条),逐批发送至redis:
public void insertusersinbatches(list<user> users, string keyprefix, long ttlseconds, int batchsize) {
    int start = 0;
    while (start < users.size()) {
        int end = math.min(start + batchsize, users.size());
        list<user> batch = users.sublist(start, end);
        batchinsertuserswithpipeline(batch, keyprefix, ttlseconds);
        start = end;
    }
}
batchinsertuserswithpipeline方法利用redis pipeline机制发送批量命令,可以在一定程度上提高插入操作的并发性,减少网络往返时间和整体耗时。然而,pipeline本身并不能严格保证所有命令同时成功或失败,其主要特性如下:
1.原子性:
- redis命令在pipeline内部是原子性的,即单个命令的执行不会被其他命令中断。
- 注意:这并不意味着整个pipeline的所有命令作为一个整体具有原子性。pipeline中的命令仍然是依次执行的,只是客户端与服务器之间的通信过程被优化了。
2.响应顺序
- redis服务器会按接收到命令的顺序返回结果。即使在pipeline中并发发送多个命令,客户端接收到的响应也将按照命令发送的顺序排列。
3.故障处理
- 如果pipeline中的某个命令执行失败(如语法错误、key不存在等),后续命令通常仍会继续执行。
- 错误信息会包含在相应命令的响应中,客户端可以根据这些信息判断哪些命令执行成功,哪些失败。
综上所述,batchinsertuserswithpipeline方法不能严格保证所有命令同时成功或失败。在实际使用中,如果需要确保一批数据要么全部成功插入,要么全部失败回滚,可以采取以下策略:
事务( multi/exec/discard ):
- redis提供了事务(transaction)功能,通过multi、exec和discard等命令,可以将一组命令打包在一起执行,只有当所有命令都能成功执行时,整个事务才会提交;否则,任何命令失败都将导致整个事务回滚。
- 尽管redis事务不支持回滚到某一特定状态(即不保证隔离性),但在批量插入场景下,它可以满足“全有或全无”的要求。
lua脚本:
- 使用lua脚本编写批量插入逻辑,脚本在redis服务器端执行,具备原子性。即使在网络中断或服务器重启等异常情况下,脚本要么完全执行,要么完全不执行,不会出现部分成功部分失败的情况。
batchinsertuserswithpipeline方法中的connection中各个方法的区别是什么?
1.connection.setex(key.getbytes(), (int) ttlseconds, value.getbytes());
这一行调用了redisconnection的setex方法,用于设置一个带有过期时间(time to live,ttl)的键值对。参数说明如下:
- key.getbytes(): 将给定的键(字符串)转换为字节数组,这是redis底层通信协议所要求的格式。
- (int) ttlseconds: 将过期时间(以秒为单位)转换为整数类型,表示键值对在指定秒数后自动过期并被删除。
- value.getbytes(): 同样将给定的值(用户对象序列化后的json字符串)转换为字节数组
setex方法确保在设置键值对的同时为其设定一个过期时间。如果键已经存在,该方法会更新键的值和过期时间。这个操作在pipeline模式下是原子的,即在同一时刻只有一个setex命令被执行。
2.connection.multi(); 和 connection.exec();
这两个方法涉及redis的事务(transaction)功能。在pipeline模式下,由于我们希望保持较高的性能,一般不会使用这两个方法。但如果确实需要保证一批命令的原子性,可以使用如下方式:
- connection.multi(): 开启一个事务块,后续的所有命令都会被放入这个事务中,直到调用exec方法。在pipeline模式下,调用multi方法可能会破坏原有的性能优化效果。
- connection.exec(): 提交并执行事务中的所有命令。如果事务中有任何一个命令执行失败,其他命令也会被取消执行,整个事务被视为失败。
在您的batchinsertuserswithpipeline方法中并没有使用multi和exec,因为pipeline已经提供了高效的批量执行机制,而且这里的目的是提高插入性能,而不是实现严格的事务行为。
综上所述,batchinsertuserswithpipeline方法中直接使用了setex方法,利用pipeline来高效地批量插入带有过期时间的键值对。如果需要实现更严格的事务控制,应考虑使用redis的事务(multi/exec)或lua脚本,但这通常会牺牲一定的性能,并且与pipeline机制不完全兼容。在实际应用场景中,应根据业务需求权衡选择合适的操作方式。
3.connection.set()和connection.setnx有什么区别
connection.set() 和 connection.setnx() 都是redis的键值对设置方法,它们的主要区别在于是否存在条件以及对已有键的处理方式:
1.connection.set(key, value)
这是最基础的设置键值对的方法,无论键是否存在,都会直接覆盖(或创建)对应的键值对。参数说明如下:
- key: 要设置的键。
- value: 要关联的值。
行为特点:
- 无条件设置:不论键是否存在,都会执行设置操作。
- 覆盖已有键:如果键已存在,其原有值会被新的值覆盖。
- 创建新键:如果键不存在,会创建一个新的键值对。
2.connection.setnx(key, value)
这是带有条件的设置键值对方法,仅当键不存在时才会设置键值对。参数与set()相同:
- key: 要设置的键
- value: 要关联的值。
行为特点
- 有条件设置:仅在键不存在的情况下执行设置操作。
- 不覆盖已有键:如果键已存在,该方法不会有任何动作,既不会改变键的值,也不会抛出错误。
- 创建新键:如果键不存在,会创建一个新的键值对。
总结来说,connection.set()无条件地设置或更新键值对,而connection.setnx()则是在键不存在时才设置键值对,如果键已存在,则不会执行任何操作。前者适用于常规的键值更新或插入,后者常用于实现锁机制、唯一性检查等场景,确保某个键的值只在首次设置时有效。在您的batchinsertuserswithpipeline方法中,由于目标是批量插入新数据,所以使用了setex方法(带有过期时间的set),确保每个用户数据作为一个新的键值对被添加到redis中。如果您需要在插入前检查键的唯一性,可以考虑使用setnx方法。不过,对于批量插入场景,通常假设数据是新的且键不存在,因此直接使用setex更为常见。
场景二:大批量删除redis中的数据
public void batchdeletekeyswithpipeline(list<string> keys) {
    redistemplate.executepipelined((rediscallback<object>) connection -> {
        for (string key : keys) {
            connection.del(key.getbytes());
        }
        return null;
    });
}
- redistemplate.executepipelined() 方法创建了一个pipeline上下文,允许您在回调函数内发送多个命令而不等待响应。
- 回调函数遍历要删除的键列表,对每个键调用 connection.del(key.getbytes())。del 方法用于删除指定键,将键名转换为字节数组后传递给redis。
- 所有del命令在pipeline中被连续发送至redis服务器,期间客户端不会等待任何响应。
- 当回调函数执行完毕并返回时,pipeline中的命令会被一次性发送至redis,并接收所有命令的响应。由于命令是在一次网络往返中批量发送的,因此比单独执行每个删除命令效率更高。
场景三:删除redis中千万级别的数据
1.批量删除策略
- 使用 scan 命令结合 del 命令实现批量删除。
scan 命令用于增量式地迭代数据集,避免一次性获取所有键导致内存溢出。
del 命令用于删除单个或多个键。
2.并行处理
- 利用多线程或异步任务将批量删除操作分散到多个工作线程中,提高删除效率。
3.redis 客户端优化:
- 选择高性能、支持批量操作和管道(pipeline)功能的 redis 客户端库,如 jedis 或 lettuce。
4.监控与故障恢复:
- 在执行大规模删除操作时,密切关注 redis 的性能指标(如 cpu、内存、网络带宽等)以及客户端程序的状态。
- 准备应对可能的异常情况,如断连重试、数据一致性检查等。
基于jedis客户端实现
import redis.clients.jedis.jedis;
import redis.clients.jedis.scanparams;
import redis.clients.jedis.scanresult;

public class redisdatadeleter {

    private static final int scan_batch_size = 1000; // 可根据实际情况调整
    private static final string match_pattern = "*"; // 匹配所有键

    public void deleteallkeys(jedis jedis) {
        scanparams scanparams = new scanparams().count(scan_batch_size).match(match_pattern);

        string cursor = "0";
        while (true) {
            scanresult<string> scanresult = jedis.scan(cursor, scanparams);
            cursor = scanresult.getcursor();

            list<string> keystodelete = scanresult.getresult();
            if (!keystodelete.isempty()) {
                // 使用 pipeline 批量删除键
                pipeline pipeline = jedis.pipelined();
                for (string key : keystodelete) {
                    pipeline.del(key);
                }
                pipeline.sync(); // 执行批量命令
            }

            if ("0".equals(cursor)) {
                break; // 扫描完成
            }
        }
    }
}
注意
- 请确保在生产环境中适当调整 scan_batch_size 参数,使其既能充分利用系统资源,又不会对 redis 服务器造成过大压力。
- 在执行大规模删除操作前,最好先备份重要数据,并在非高峰期进行操作,以减少对业务的影响。
如果条件允许,建议升级到 redis 6.x 版本,并启用 activedefrag 配置项,有助于在删除大量数据后及时进行碎片整理,保持 redis 内存的高效利用。同时,监控 redis 的内存使用情况和碎片率,必要时手动触发 bgrewriteaof 或 bgsave 操作。
maven
<dependencies>
    <!-- ... 其他依赖 ... -->
    <dependency>
        <groupid>redis.clients</groupid>
        <artifactid>jedis</artifactid>
        <version>3.7.0</version> <!-- 根据实际版本号调整 -->
    </dependency>
</dependencies>
jedis连接池配置
spring.redis.host=192.168.1.100
spring.redis.port=6379
spring.redis.password=mysecretpassword  # 如果有密码,请填写

# jedis 连接池配置
spring.redis.jedis.pool.max-active=10
spring.redis.jedis.pool.max-idle=6
spring.redis.jedis.pool.min-idle=2
spring.redis.jedis.pool.max-wait=2000ms
jedisconfig
@configuration
public class jedisconfig {

    @value("${spring.redis.host}")
    private string host;

    @value("${spring.redis.port}")
    private int port;

    @value("${spring.redis.password}")
    private string password;

    @bean
    public jedispool jedispool() {
        jedispoolconfig poolconfig = new jedispoolconfig();
        poolconfig.setmaxtotal(integer.parseint(env.getproperty("spring.redis.jedis.pool.max-active")));
        poolconfig.setmaxidle(integer.parseint(env.getproperty("spring.redis.jedis.pool.max-idle")));
        poolconfig.setminidle(integer.parseint(env.getproperty("spring.redis.jedis.pool.min-idle")));
        poolconfig.setmaxwaitmillis(long.parselong(env.getproperty("spring.redis.jedis.pool.max-wait")));

        return new jedispool(poolconfig, host, port, protocol.default_timeout, password);
    }
}
实现 redis 数据删除服务
@service
public class redisdatadeleterservice {

    @autowired
    private jedispool jedispool;

    public void deleteallkeys() {
        try (jedis jedis = jedispool.getresource()) {
            scanparams scanparams = new scanparams().match("*").count(1000);

            string cursor = "0";
            while (true) {
                scanresult<string> scanresult = jedis.scan(cursor, scanparams);
                cursor = scanresult.getcursor();

                list<string> keystodelete = scanresult.getresult();
                if (!keystodelete.isempty()) {
                    pipeline pipeline = jedis.pipelined();
                    for (string key : keystodelete) {
                        pipeline.del(key);
                    }
                    pipeline.sync();
                }

                if ("0".equals(cursor)) {
                    break;
                }
            }
        }
    }
}
调用删除服务
@restcontroller
@requestmapping("/redis")
public class rediscontroller {

    @autowired
    private redisdatadeleterservice redisdatadeleterservice;

    @getmapping("/delete-all-keys")
    public responseentity<?> deleteallkeys() {
        redisdatadeleterservice.deleteallkeys();
        return responseentity.ok().build();
    }
}
基于lettuce
maven
<dependencies>
    <!-- ... 其他依赖 ... -->
    <dependency>
        <groupid>io.lettuce</groupid>
        <artifactid>lettuce-core</artifactid>
        <version>6.2.¼</version> <!-- 根据实际版本号调整 -->
    </dependency>
</dependencies>
配置lettuce
spring boot 自动配置会为 lettuce 提供连接池支持。在 application.properties 或 application.yml 中配置 redis 连接信息:
spring.redis.host=192.168.1.100
spring.redis.port=6379
spring.redis.password=mysecretpassword  # 如果有密码,请填写
使用 lettuce 客户端执行批量删除操作:
@service
public class redisdatadeleterservice {

    @autowired
    private redisconnectionfactory connectionfactory;

    public void deleteallkeys() {
        redisasynccommands<string, string> asynccommands = connectionfactory.getconnection().async();

        scanargs scanargs = scanargs.builder.matches("*").count(1000);
        redisfuture<scanresult<string>> scanfuture = asynccommands.scan(scancursor.initial, scanargs);

        atomicboolean isrunning = new atomicboolean(true);
        atomicreference<scancursor> lastcursor = new atomicreference<>(scancursor.initial);

        // 异步处理扫描结果
        scanfuture.thenaccept(scanresult -> {
            lastcursor.set(scanresult.getcursor());
            list<string> keystodelete = scanresult.getkeys();
            if (!keystodelete.isempty()) {
                redisfuture<long> delfuture = asynccommands.del(keystodelete.toarray(new string[0]));
                delfuture.thenaccept(count -> {
                    if (isrunning.get()) {
                        // 如果仍在运行,继续扫描
                        deleteallkeysrecursive(asynccommands, scanargs, lastcursor, isrunning);
                    }
                });
            } else {
                isrunning.set(false);
            }
        });

        // 设置超时时间(可根据实际情况调整)
        completablefuture.runasync(() -> {
            try {
                thread.sleep(120000); // 2分钟超时
            } catch (interruptedexception e) {
                thread.currentthread().interrupt();
            }
            isrunning.set(false);
        });
    }

    private void deleteallkeysrecursive(redisasynccommands<string, string> asynccommands,
                                       scanargs scanargs,
                                       atomicreference<scancursor> lastcursor,
                                       atomicboolean isrunning) {
        if (isrunning.get()) {
            asynccommands.scan(lastcursor.get(), scanargs).thenaccept(scanresult -> {
                lastcursor.set(scanresult.getcursor());
                list<string> keystodelete = scanresult.getkeys();
                if (!keystodelete.isempty()) {
                    asynccommands.del(keystodelete.toarray(new string[0])).thenaccept(count -> {
                        if (isrunning.get()) {
                            deleteallkeysrecursive(asynccommands, scanargs, lastcursor, isrunning);
                        }
                    });
                } else {
                    isrunning.set(false);
                }
            });
        }
    }
}
调用
@restcontroller
@requestmapping("/redis")
public class rediscontroller {

    @autowired
    private redisdatadeleterservice redisdatadeleterservice;

    @getmapping("/delete-all-keys")
    public responseentity<?> deleteallkeys() {
        redisdatadeleterservice.deleteallkeys();
        return responseentity.ok().build();
    }
}
到此这篇关于redis中管道操作pipeline的实现的文章就介绍到这了,更多相关redis管道操作pipeline内容请搜索代码网以前的文章或继续浏览下面的相关文章希望大家以后多多支持代码网!


发表评论