使用ai4j快速接入openai大模型
本博文给大家介绍一下如何使用ai4j快速接入openai大模型,并且如何实现流式与非流式的输出,以及对函数调用的使用。
介绍
由于springai需要使用jdk17和spring boot3,但是目前很多应用依旧使用的jdk8版本,所以使用可以支持jdk8的ai4j来接入openai大模型。
ai4j是一款javasdk用于快速接入ai大模型应用,整合多平台大模型,如openai、智谱zhipu(chatglm)、深度求索deepseek、月之暗面moonshot(kimi)、腾讯混元hunyuan、零一万物(01)等等,提供统一的输入输出(对齐openai)消除差异化,优化函数调用(tool call),优化rag调用、支持向量数据库(pinecone),并且支持jdk1.8,为用户提供快速整合ai的能力。
ai4j-github
快速使用
目前较多的应用场景为spring应用,而ai4j接入springboot应用也是非常简单的,本篇博文先带着大家为springboot应用集成openai服务,后续会介绍如何再非spring项目中搭建。
创建springboot项目
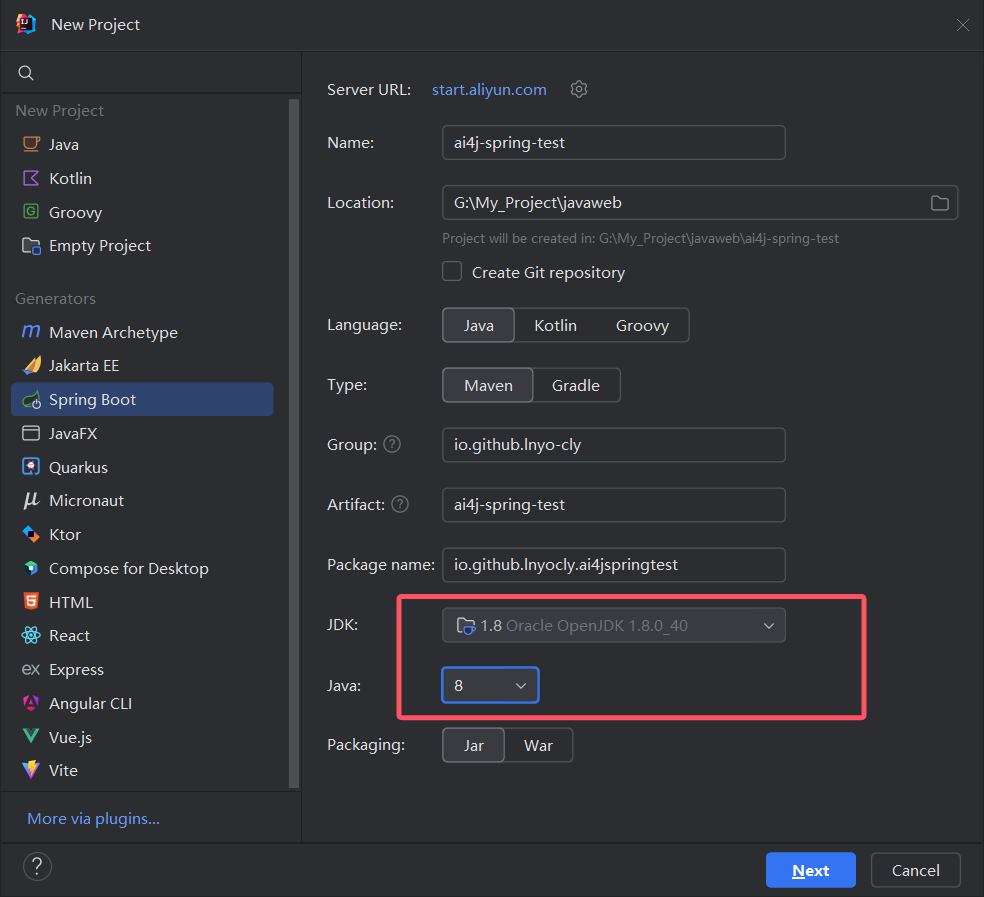
这里以jdk1.8为例创建springboot2项目,当然你也可以创建jdk17、springboot3。
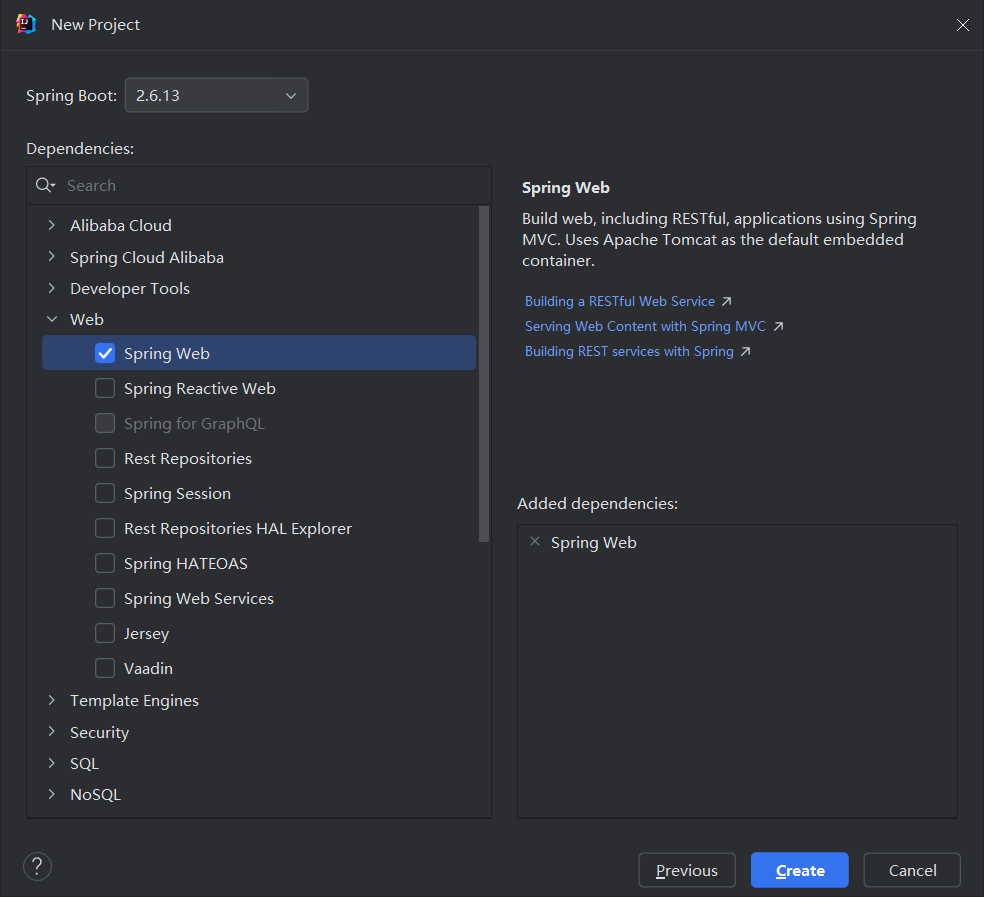
引入ai4j依赖
<!-- spring应用 -->
<dependency>
    <groupid>io.github.lnyo-cly</groupid>
    <artifactid>ai4j-spring-boot-stater</artifactid>
    <version>0.5.2</version>
</dependency>
如果你使用阿里源无法引入,可能是阿里云镜像还没有同步。
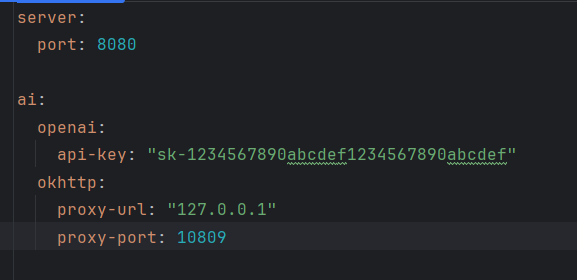
配置application.yml
给大家两种配置方法
第一种:使用官网的url,自己有代理
第二种:使用中转代理地址(或第三方中转平台)
如:https://api.openai-proxy.com
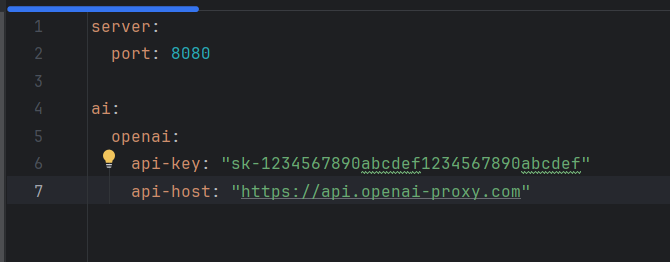
上面任意配置一种即可。
搭建聊天服务controller
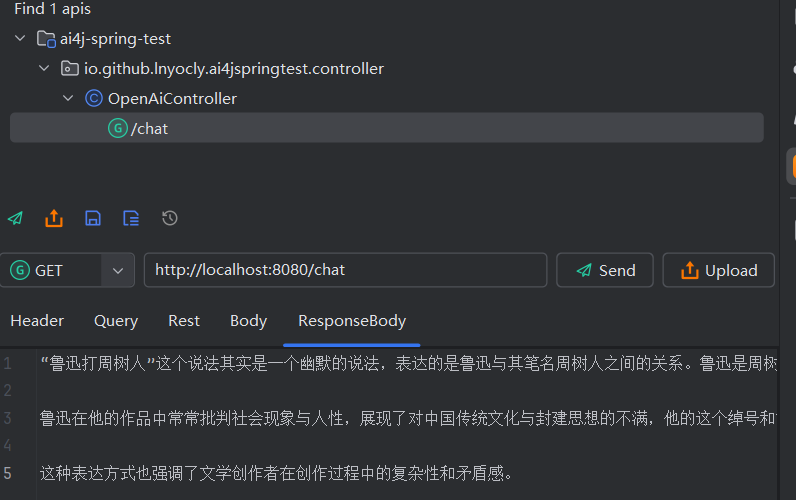
下面是一个小的demo演示:
@restcontroller
public class openaicontroller {
// 注入ai服务
@autowired
private aiservice aiservice;
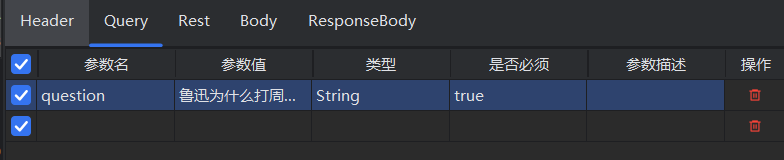
@getmapping("/chat")
public string getchatmessage(@requestparam string question) throws exception {
// 获取openai的聊天服务
ichatservice chatservice = aiservice.getchatservice(platformtype.openai);
// 创建请求参数
chatcompletion chatcompletion = chatcompletion.builder()
.model("gpt-4o-mini")
.message(chatmessage.withuser(question))
.build();
system.out.println(chatcompletion);
// 发送chat请求
chatcompletionresponse chatcompletionresponse = chatservice.chatcompletion(chatcompletion);
// 获取聊天内容和token消耗
string content = chatcompletionresponse.getchoices().get(0).getmessage().getcontent();
long totaltokens = chatcompletionresponse.getusage().gettotaltokens();
system.out.println("总token消耗: " + totaltokens);
return content;
}
}
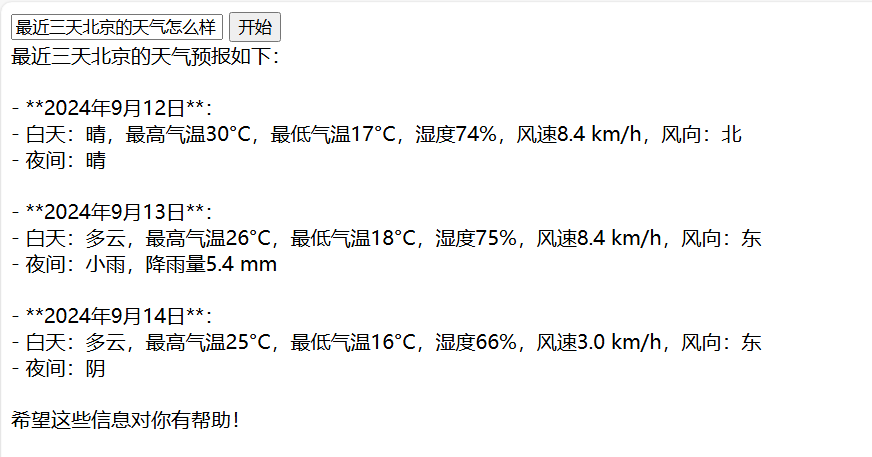
实现stream流式输出(打字机效果)
编写stream.html:
<!doctype html>
<html>
<head>
    <meta charset="utf-8">
    <title>stream example</title>
</head>
<body>
<input id="question" type="text" placeholder="输入需要提问的问题"/>
<button id="startbutton">开始</button>
<div id="output"></div>
<script>
    const input = document.getelementbyid("question");
    const outputdiv = document.getelementbyid('output');
    const startbutton = document.getelementbyid('startbutton');
    async function getresponse(){
        const question = input.value;
        const resp = await fetch("/chatstream" + "?question=" + question,{
            method: 'get'
        })
        const reader = resp.body.getreader();
        const textdecoder = new textdecoder();
        while (1){
            const { done , value } = await reader.read()
            if(done) break;
            const str = textdecoder.decode(value);
            outputdiv.innertext += str;
            console.log(str)
        }
    }
    startbutton.addeventlistener("click", getresponse)
</script>
</body>
</html>
向controller中添加stream接口:
    @getmapping("/chatstream")
    public void getchatmessagestream(@requestparam string question, httpservletresponse response) throws exception {
        // 中文乱码问题
        response.setcharacterencoding("utf-8");
        // 获取openai的聊天服务
        ichatservice chatservice = aiservice.getchatservice(platformtype.openai);
        // 创建请求参数
        chatcompletion chatcompletion = chatcompletion.builder()
                .model("gpt-4o-mini")
                .message(chatmessage.withuser(question))
                .build();
        printwriter writer = response.getwriter();
        // 发送chat请求
        sselistener sselistener = new sselistener() {
            @override
            protected void send() {
                writer.write(this.getcurrstr());
                writer.flush();
                system.out.println(this.getcurrstr());
            }
        };
        chatservice.chatcompletionstream(chatcompletion, sselistener);
        writer.close();
        system.out.println(sselistener.getoutput());
    }
注意:上面只是一个简单的示例,你也可以使用其它方法,比如:
    @getmapping("/chatstream")
    public responsebodyemitter getchatmessagestream(@requestparam string question) {
        responsebodyemitter emitter = new responsebodyemitter();
        // 获取openai的聊天服务
        ichatservice chatservice = aiservice.getchatservice(platformtype.openai);
        // 创建请求参数
        chatcompletion chatcompletion = chatcompletion.builder()
                .model("gpt-4o-mini")
                .message(chatmessage.withuser(question))
                .build();
        executors.newsinglethreadexecutor().submit(() -> {
            try {
                sselistener sselistener = new sselistener() {
                    @override
                    protected void send() {
                        try {
                            emitter.send(this.getcurrstr());
                            system.out.println(this.getcurrstr());  // 打印当前发送的内容
                        } catch (ioexception e) {
                            emitter.completewitherror(e);
                        }
                    }
                };
                // 发送流式数据
                chatservice.chatcompletionstream(chatcompletion, sselistener);
                // 完成后关闭连接
                emitter.complete();
            } catch (exception e) {
                emitter.completewitherror(e);
            }
        });
        return emitter;
    }
实现函数调用
首先我们需要编写一个函数,以天气预报为例子:
@functioncall(name = "queryweather", description = "查询目标地点的天气预报")
public class queryweatherfunction implements function<queryweatherfunction.request, string> {
    @override
    public string apply(request request) {
        final string key = "abcdefg";
        // https://api.seniverse.com/v3/weather/hourly.json?key=your_api_key&location=beijing&start=0&hours=24
        // https://api.seniverse.com/v3/weather/daily.json?key=your_api_key&location=beijing&start=0&days=5
        string url = string.format("https://api.seniverse.com/v3/weather/%s.json?key=%s&location=%s&days=%d",
                request.type.name(),
                key,
                request.location,
                request.days);
        okhttpclient client = new okhttpclient();
        okhttp3.request http = new okhttp3.request.builder()
                .url(url)
                .get()
                .build();
        try (response response = client.newcall(http).execute()) {
            if (response.issuccessful()) {
                // 解析响应体
                return response.body() != null ? response.body().string() : "";
            } else {
                return "获取天气失败 当前天气未知";
            }
        } catch (exception e) {
            // 处理异常
            e.printstacktrace();
            return "获取天气失败 当前天气未知";
        }
    }
    @data
    @functionrequest
    public static class request{
        @functionparameter(description = "需要查询天气的目标位置, 可以是城市中文名、城市拼音/英文名、省市名称组合、ip 地址、经纬度")
        private string location;
        @functionparameter(description = "需要查询未来天气的天数, 最多15日")
        private int days = 15;
        @functionparameter(description = "预报的天气类型,daily表示预报多天天气、hourly表示预测当天24天气、now为当前天气实况")
        private type type;
    }
    public enum type{
        daily,
        hourly,
        now
    }
}
其中有三个核心注解:
@functioncall:标识这个类为一个函数@functionrequest:标识为该类为函数的请求类@functionparameter:标识为函数的具体参数
接下来稍微修改下刚刚编写的stream实现函数:
    @getmapping("/chatstream")
    public void getchatmessagestream(@requestparam string question, httpservletresponse response) throws exception {
        // ......
        // 创建请求参数
        chatcompletion chatcompletion = chatcompletion.builder()
                .model("gpt-4o-mini")
                .message(chatmessage.withuser(question))
                .functions("queryweather") // 这里传入刚刚我们定义的函数名称即可
                .build();
        // ......
    }
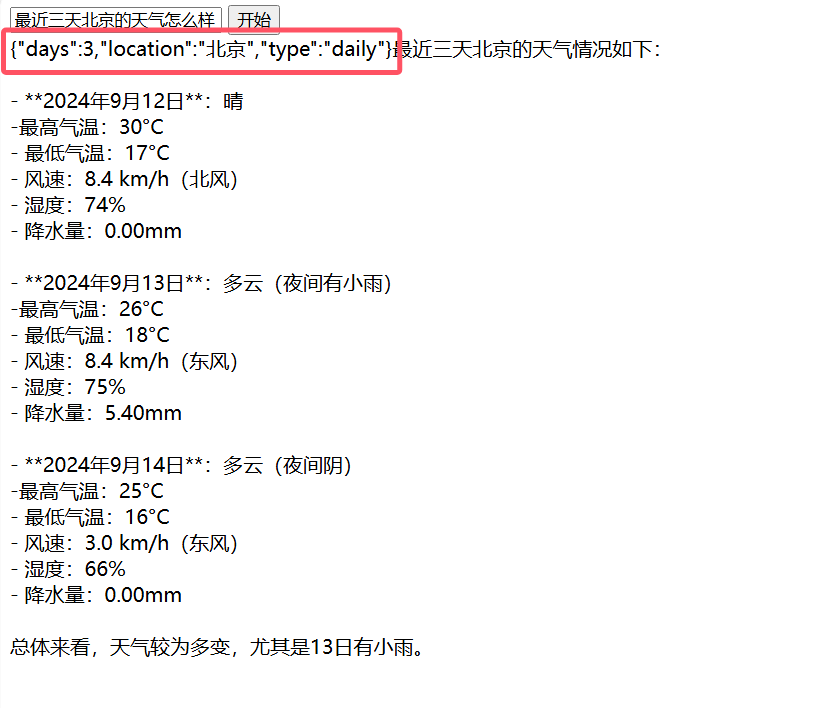
如果想要知道函数调用的参数,只需要在刚刚的代码中,添加下面这一行即可:
sselistener.setshowtoolargs(true);
更换其它平台
细心的你可能已经发现,我们在创建chatservice的时候传入了platformtype.openai,如果我们想要更换其它平台,只需要更换platformtype即可。如果你不懂,那下篇博文再详细的说说
ichatservice chatservice = aiservice.getchatservice(platformtype.openai);
其它功能
篇幅有限,其它功能使用,下篇再讲
到此这篇关于springboot快速接入openai大模型(jdk8)的文章就介绍到这了,更多相关springboot接入openai大模型内容请搜索代码网以前的文章或继续浏览下面的相关文章希望大家以后多多支持代码网!


发表评论