在 vue 项目中实现导出 pdf 文件、调整文件页面大小和页面方向的功能,使用 html2canvas 将 html 内容转换为图片,再使用 jspdf 把图片添加到 pdf 文件中。以下是详细的实现步骤和代码示例:
步骤 1:安装依赖
首先,在项目中安装 html2canvas 和 jspdf:
npm install html2canvas jspdf
步骤 2:创建 vue 组件
以下是一个完整的 vue 组件示例,包含导出 pdf、调整页面大小和方向的功能:
<template>
<div>
<!-- 选择页面大小的下拉框 -->
<select v-model="selectedpagesize">
<option value="a4">a4</option>
<option value="a3">a3</option>
<option value="letter">letter</option>
</select>
<!-- 选择页面方向的下拉框 -->
<select v-model="selectedpageorientation">
<option value="portrait">纵向</option>
<option value="landscape">横向</option>
</select>
<!-- 导出 pdf 的按钮 -->
<button @click="exporttopdf">导出为 pdf</button>
<!-- 需要导出为 pdf 的内容区域 -->
<div id="contenttoexport">
<h1>这是要导出为 pdf 的内容</h1>
<p>可以在这里添加更多文本、图片、表格等元素。</p>
</div>
</div>
</template>
<script>
// 引入 html2canvas 用于将 html 元素转换为 canvas 图像
import html2canvas from 'html2canvas';
// 引入 jspdf 用于创建和保存 pdf 文件
import jspdf from 'jspdf';
export default {
data() {
return {
// 存储用户选择的页面大小,默认为 a4
selectedpagesize: 'a4',
// 存储用户选择的页面方向,默认为纵向
selectedpageorientation: 'portrait'
};
},
methods: {
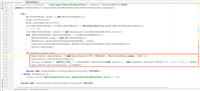
async exporttopdf() {
// 获取需要导出为 pdf 的 html 元素
const element = document.getelementbyid('contenttoexport');
try {
// 使用 html2canvas 将 html 元素转换为 canvas 图像
const canvas = await html2canvas(element);
// 将 canvas 图像转换为 base64 编码的 png 图片数据
const imgdata = canvas.todataurl('image/png');
// 根据用户选择的页面大小和方向创建 jspdf 实例
const pdf = new jspdf({
orientation: this.selectedpageorientation, // 页面方向
unit: 'mm', // 单位为毫米
format: this.selectedpagesize // 页面大小
});
// 获取 pdf 页面的宽度和高度
const pdfwidth = pdf.internal.pagesize.getwidth();
const pdfheight = pdf.internal.pagesize.getheight();
// 计算图像的宽度和高度,使图像按比例适应页面
const imgwidth = pdfwidth;
const imgheight = (canvas.height * imgwidth) / canvas.width;
let heightleft = imgheight;
let position = 0;
// 将图像添加到第一页 pdf
pdf.addimage(imgdata, 'png', 0, position, imgwidth, imgheight);
heightleft -= pdfheight;
// 如果图像高度超过一页,进行分页处理
while (heightleft >= 0) {
position = heightleft - imgheight;
pdf.addpage();
pdf.addimage(imgdata, 'png', 0, position, imgwidth, imgheight);
heightleft -= pdfheight;
}
// 保存 pdf 文件,文件名为 exported.pdf
pdf.save('exported.pdf');
} catch (error) {
// 捕获并打印导出过程中可能出现的错误
console.error('导出 pdf 时出错:', error);
}
}
}
};
</script>
<style scoped>
/* 为需要导出的内容区域添加样式 */
#contenttoexport {
padding: 20px;
border: 1px solid #ccc;
margin-top: 20px;
}
</style>
代码解释
模板部分(<template>):
两个 select 元素分别用于选择页面大小和页面方向,通过 v-model 指令绑定到组件的数据 selectedpagesize 和 selectedpageorientation。
一个按钮,点击时触发 exporttopdf 方法进行 pdf 导出操作。
一个 div 元素,其 id 为 contenttoexport,该元素内的内容将被导出为 pdf。
脚本部分(<script>):
data 函数返回两个数据项,分别存储用户选择的页面大小和页面方向。
exporttopdf 方法是核心逻辑:
使用 document.getelementbyid 获取要导出的 html 元素。
调用 html2canvas 将 html 元素转换为 canvas 图像,并将其转换为 base64 编码的 png 图片数据。
根据用户选择的页面大小和方向创建 jspdf 实例。
计算图像的宽度和高度,使其按比例适应页面。
将图像添加到 pdf 中,如果图像高度超过一页,进行分页处理。
最后使用 pdf.save 方法保存 pdf 文件。
样式部分(<style>):
为 #contenttoexport 元素添加了一些样式,使其在页面上有边框和内边距。
使用方法
将上述代码保存为一个 vue 组件(例如 exportpdf.vue),然后在其他组件中引入并使用:
<template>
  <div>
    <exportpdf />
  </div>
</template>

<script>
import exportpdf from './exportpdf.vue';

export default {
  components: {
    exportpdf
  }
};
</script>
到此这篇关于vue使用html2canvas和jspdf实现pdf文件导出的文章就介绍到这了,更多相关vue pdf导出内容请搜索代码网以前的文章或继续浏览下面的相关文章希望大家以后多多支持代码网!


发表评论