配置文件加密,集成enc
引入pom依赖
 <!-- enc配置文件加密 -->
    <dependency>
        <groupid>com.github.ulisesbocchio</groupid>
        <artifactid>jasypt-spring-boot-starter</artifactid>
        <version>2.1.2</version>
    </dependency>
【注意】开始使用的3.1.5版本,启动报错:
reason: org.springframework.boot.context.properties.bind.bindexception: failed to bind properties under 'spring.redis.password' to java.lang.string报错原因:因为3.x版本的默认加密算法变了,所以对应配置文件加密算法配置得修改,同时加密的方法也得用新的加密算法计算出加密字符串。
使用工具类对明文数据进行加密处理,使用完后为了安全起见,可以删除加密盐值
package com.basic.test;

import org.jasypt.util.text.basictextencryptor;
import org.junit.test;

/**
 * classname: crypttest
 * package: com.basic.test
 * description:
 *
 * @author 王涵
 * @date 2024/12/17 14:18
 * @version 1.0
 */
public class crypttest {

    /**
     * 加密盐值,使用完成后进行删除,或者不能提交到`生产环境`,比如:
     */
    private final static string password = "basic";

    @test
    public void enctest() {
        basictextencryptor encryptor = new basictextencryptor();
        // 用于设置加密密钥。密钥是用于加密和解密字符串的关键信息。
        encryptor.setpassword(password);

        // 明文1
        string name_encrypt = "wwwbaiducom";
        // 明文2
        string password_encrypt = "123456";

        // 明文加密
        string encrypt1 = encryptor.encrypt(name_encrypt);
        string encrypt2 = encryptor.encrypt(password_encrypt);
        system.out.println("明文加密1:" + encrypt1);
        system.out.println("明文加密2:" + encrypt2);

        // 密文解密
        string decrypt1 = encryptor.decrypt(encrypt1);
        string decrypt2 = encryptor.decrypt(encrypt2);
        system.out.println("密文解密1:" + decrypt1);
        system.out.println("密文解密2:" + decrypt2);
    }
}
将加密后的密码配置到配置文件,使用
enc()包裹。不需要enc时可以直接写密码,不用enc包裹即可
 # 主库数据源
 master:
     url: jdbc:mysql://127.0.0.1:3306/test?useunicode=true&characterencoding=utf8&zerodatetimebehavior=converttonull&usessl=true&servertimezone=gmt%2b8
     username: root
     password: enc(dbofmyydjokjykt1dx/jmzpbcipbhhep)
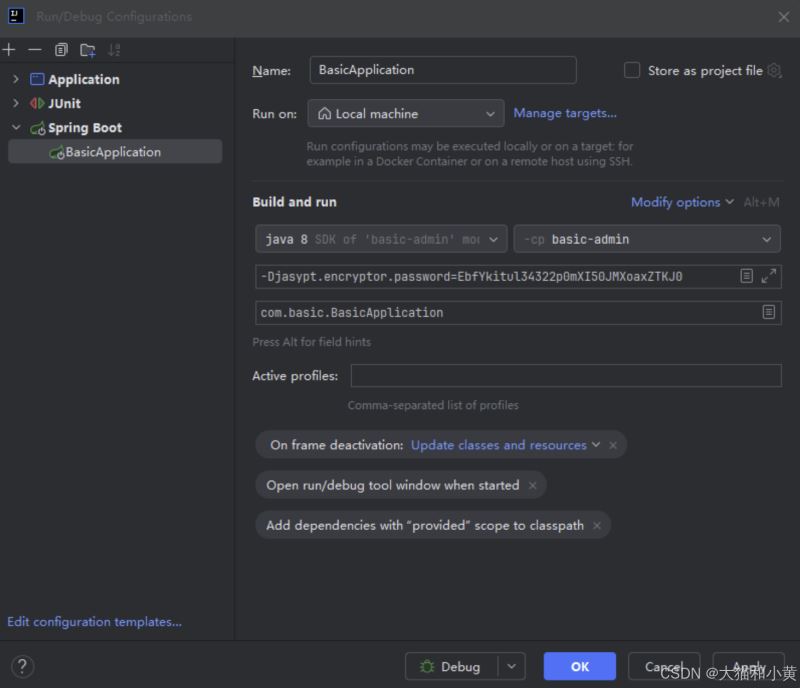
运行时配置
打开run/debug configuratios
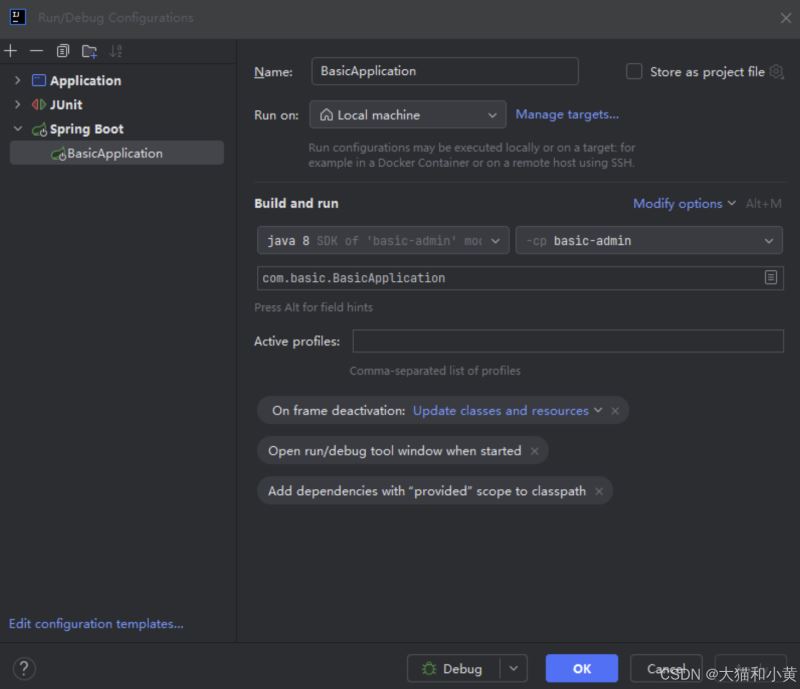
打开
modify options选择add vm optiosn配置
vm options为自己的加密盐值
启动类配置@enableencryptableproperties
package com.basic;

import com.ulisesbocchio.jasyptspringboot.annotation.enableencryptableproperties;
import org.springframework.boot.springapplication;
import org.springframework.boot.autoconfigure.springbootapplication;
import org.springframework.boot.autoconfigure.jdbc.datasourceautoconfiguration;

/**
 * @author wanghan
 * 心中那自由的世界,如此的清澈高远。
 * @date 2024/12/6 14:47
 * @description 启动程序
 */
@springbootapplication(exclude = { datasourceautoconfiguration.class })
@enableencryptableproperties
public class basicapplication
{
    public static void main(string[] args)
    {
        // 热部署生效 true 开启热部署 false 关闭热部署
        system.setproperty("spring.devtools.restart.enabled", "false");
        springapplication.run(basicapplication.class, args);
        system.out.println("(♥◠‿◠)ノ゙  基础框架启动成功   ლ(´ڡ`ლ)゙");
    }
}
jar包运行指定加密规则
cd /opt/home/test/
nohup java -xms512m -xmx512m -jar -djasypt.encryptor.password=0tjtdbl6lwk73gclvnd2gc1rdbfgcx test-base.jar --spring.profiles.active=dev > test-base.out 2>&1 &
echo start test-base
部署到tomcat
export java_opts="-djasypt.encryptor.password=0tjtdbl6lwk73gclvnd2gc1rdbfgcx"
以上就是springboot集成enc对配置文件进行加密的流程步骤的详细内容,更多关于springboot enc配置文件加密的资料请关注代码网其它相关文章!


发表评论