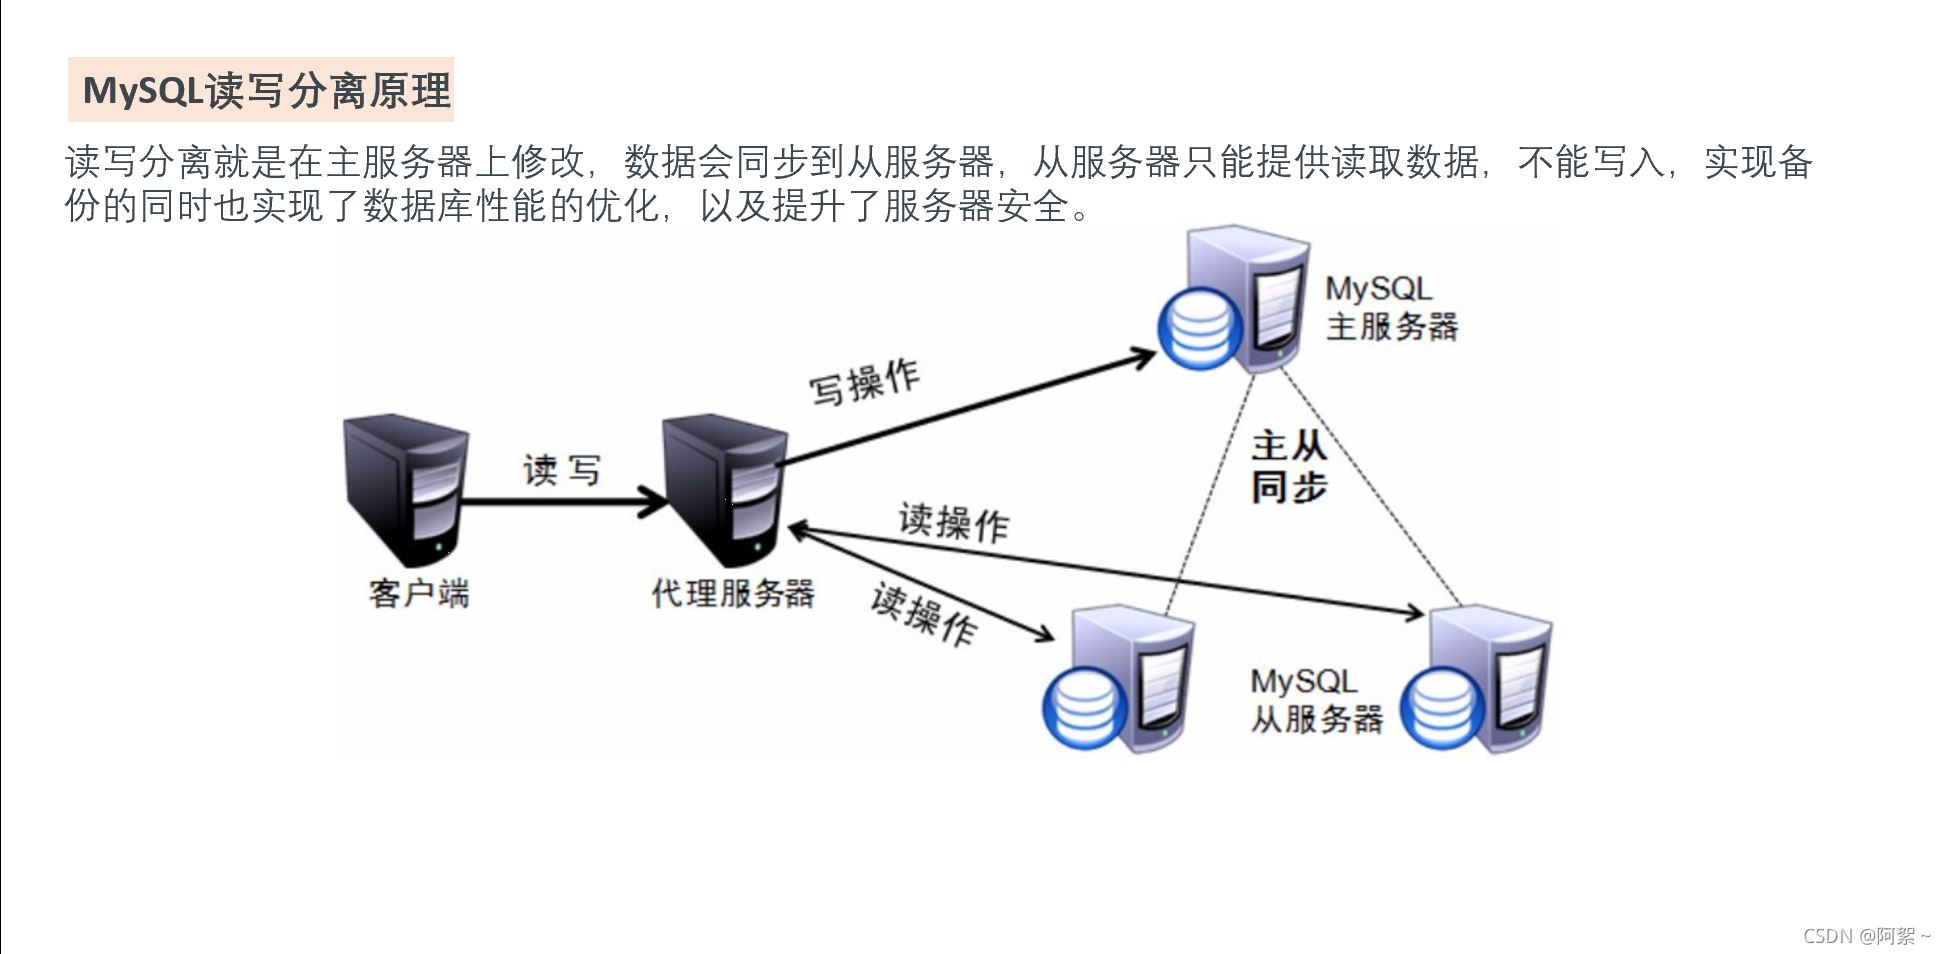
mysql读写分离
使用mycat实现
原理
前提准备步骤
(都在代理服务器上执行)
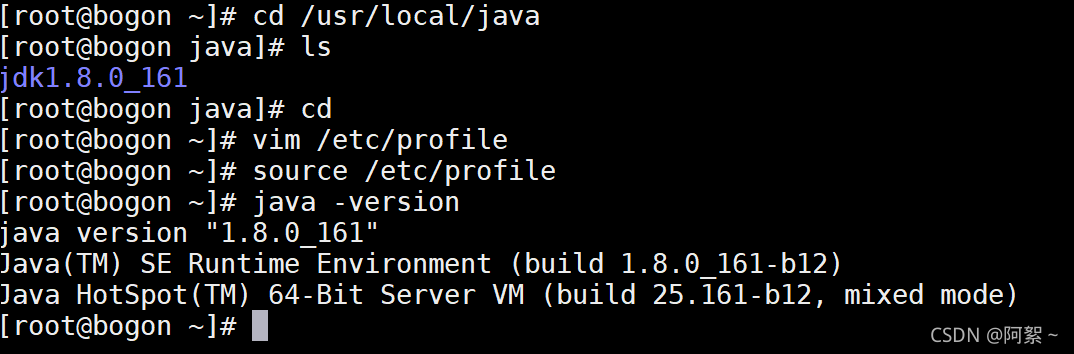
安装jdk1.8(代理服务器上执行)
1.解压缩包:
tar -xzvf jdk-8u161-linux-x64.tar.gz -c /usr/local/java
2.环境变量文件/etc/profile配置
export java_home=/usr/local/java/jdk1.8.0_161
export jre_home=${java_home}/jre
export classpath=.:${java_home}/lib:${jre_home}/lib:$classpath
export java_path=${java_home}/bin:${jre_home}/bin
export path=$path:${java_path}
注意:配置环境变量时,中间不能有空格
3. 使用source命令使修改即时生效,无需重启服务器
source /etc/profile
4. 解压缩包:
tar -zxvf mycat-server-1.6.7.1-release-20190627191042-linux.tar.gz
(任意目录都可以)
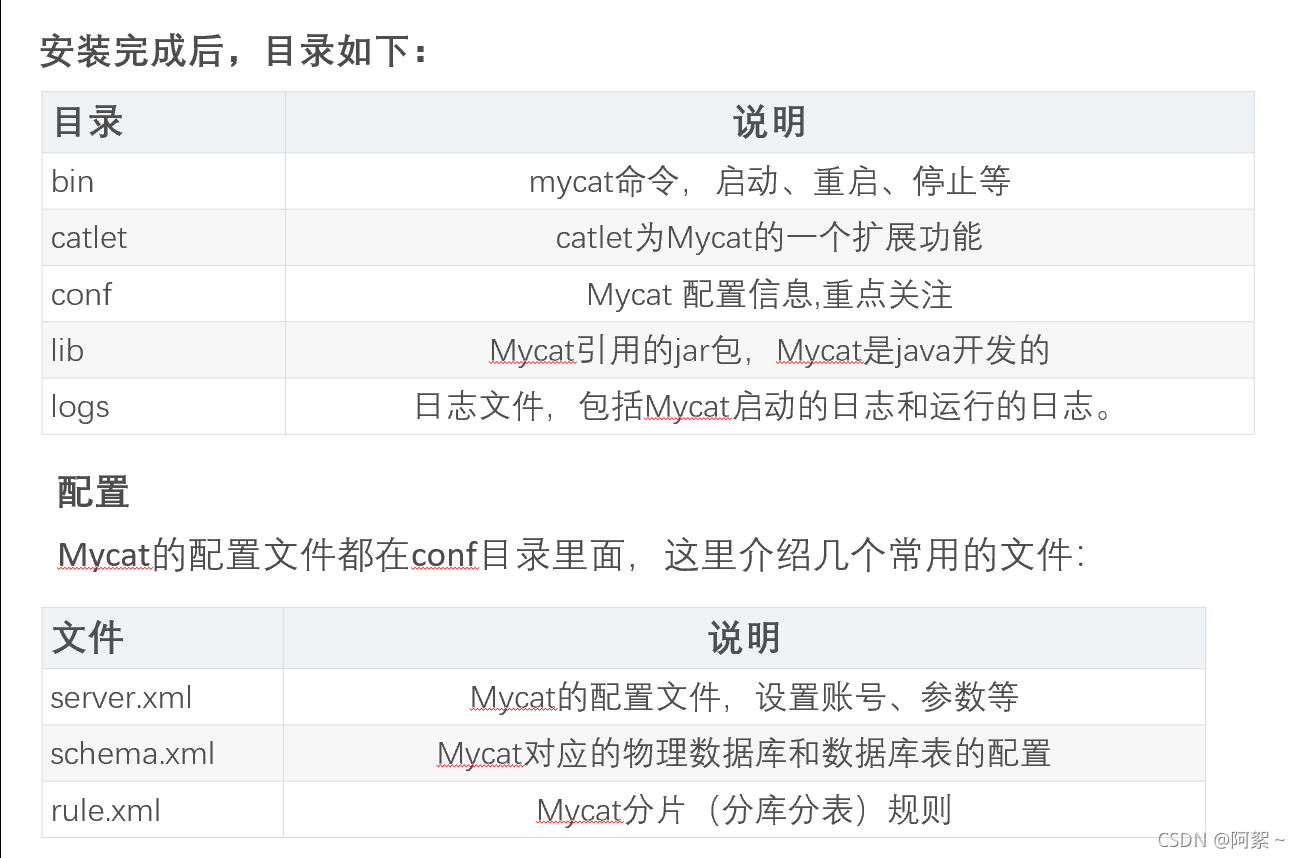
配置mycat
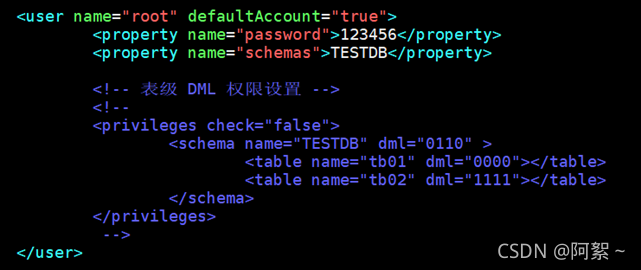
server.xml
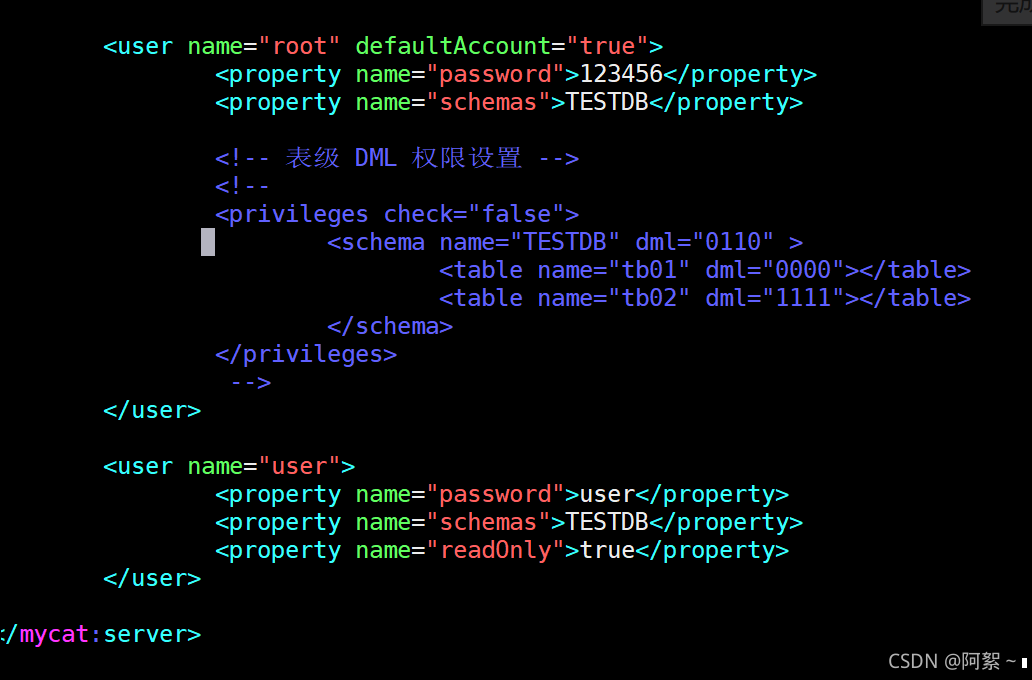
把下面 user name ="usr"等删掉
schema.xml
schema.xml是最主要的配置项,首先看我的配置文件database=“mytest” 必须是主从库都存在的数据库。
vim schema.xml (全部删完)
重新加进去
<?xml version="1.0"?>
<!doctype mycat:schema system "schema.dtd">
<mycat:schema xmlns:mycat="http://io.mycat/">
    <schema name="testdb" checksqlschema="false" sqlmaxlimit="100" datanode="dn1"/>
    <datanode name="dn1" datahost="auth" database="mytest"/>
    <datahost name="auth" maxcon="1000" mincon="10" balance="3" writetype="0" dbtype="mysql" dbdriver="native" switchtype="1"  slavethreshold="100">
        <heartbeat> select user() </heartbeat>
        <writehost host="hostm" url="192.168.202.145:3306" user="root" password="nebula@123">
            <readhost host="hosts1" url="192.168.202.148:3306" user="root" password="nebula@123" />
        </writehost>
    </datahost>
</mycat:schema>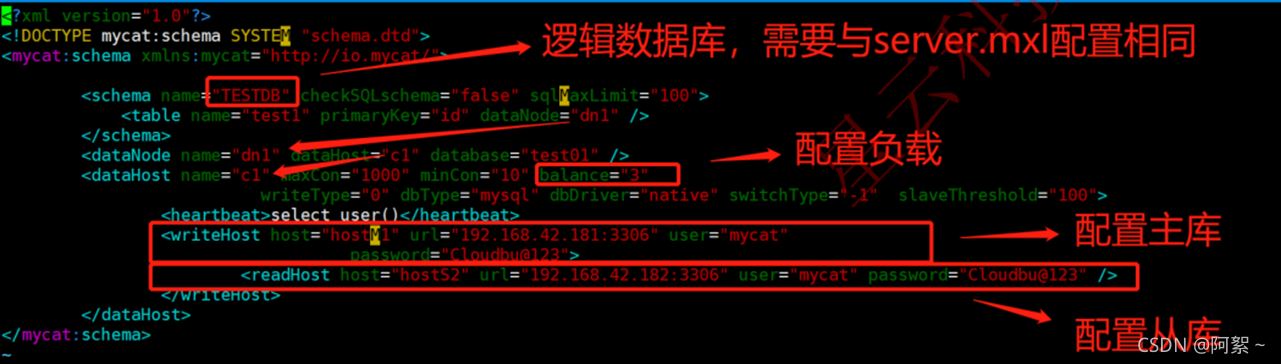
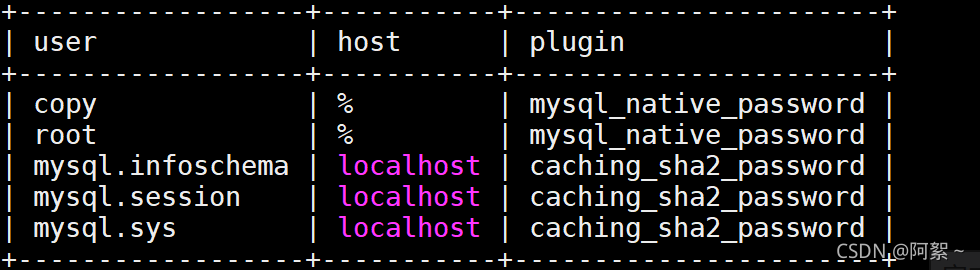
启动mycat之前需改变数据库用户的访问权限和设置新密码
查询用户密码命令:select host,user,authentication_string from mysql.user
问题一: 增加远程访问
use mysql;
update user set host='%' where user='root';
flush privileges;
select host,user from user ;
问题二:密码编码方式不同,改
alter user 'root'@'%' identified with mysql_native_password by
对比

启动mycat
需进入bin目录下
- 启动:./mycat start(后台启动) ./mycat console(前台启动)
- 停止:./mycat stop
- 重启:./mycat restart
如果在启动时发现异常,在logs目录中查看日志。
- wrapper.log 为程序启动的日志,启动时的问题看这个
- mycat.log 为脚本执行时的日志,sql脚本执行报错后的具体错误内容,查看这个文件。
- mycat.log是最新的错误日志,历史日志会根据时间生成目录保存。
成功的mycat.log
2021-11-26 23:24:44.684 info [$_nioreactor-0-rw] (io.mycat.backend.datasource.physicaldatasource$1$1.connectionacquired(physicaldatasource.java:514)) - connection id is 14
2021-11-26 23:24:44.685 info [$_nioreactor-0-rw] (io.mycat.backend.mysql.nio.handler.newconnectionresphandler.connectionacquired(newconnectionresphandler.java:44)) - connectionacquired mysqlconnection [id=14, lasttime=1637940284685, user=root, schema=test, old shema=test, borrowed=true, fromslavedb=true, threadid=18, charset=utf8, txisolation=3, autocommit=true, attachment=null, resphandler=null, host=192.168.202.151, port=3306, statussync=null, writequeue=0, modifiedsqlexecuted=false]
2021-11-26 23:24:44.685 info [$_nioreactor-0-rw] (io.mycat.backend.datasource.physicaldatasource$1$1.connectionacquired(physicaldatasource.java:514)) - connection id is 15
2021-11-26 23:24:44.685 info [$_nioreactor-0-rw] (io.mycat.backend.mysql.nio.handler.newconnectionresphandler.connectionacquired(newconnectionresphandler.java:44)) - connectionacquired mysqlconnection [id=15, lasttime=1637940284685, user=root, schema=test, old shema=test, borrowed=true, fromslavedb=true, threadid=19, charset=utf8, txisolation=3, autocommit=true, attachment=null, resphandler=null, host=192.168.202.151, port=3306, statussync=null, writequeue=0, modifiedsqlexecuted=false]
2021-11-26 23:29:44.676 info [timer0] (io.mycat.backend.datasource.physicaldatasource.createbyidlelitte(physicaldatasource.java:397)) - create connections ,because idle connection not enough ,cur is 5, mincon is 10 for hosts1
2021-11-26 23:29:44.685 info [$_nioreactor-0-rw] (io.mycat.backend.datasource.physicaldatasource$1$1.connectionacquired(physicaldatasource.java:514)) - connection id is 16
成功的wrapper.log
vim wrapper.log
 status | wrapper  | 2021/11/26 23:19:39 | term trapped.  shutting down.
status | wrapper  | 2021/11/26 23:19:40 | <-- wrapper stopped
status | wrapper  | 2021/11/26 23:19:41 | --> wrapper started as daemon
status | wrapper  | 2021/11/26 23:19:41 | launching a jvm...
info   | jvm 1    | 2021/11/26 23:19:41 | java hotspot(tm) 64-bit server vm warning: ignoring option maxpermsize=64m; support was removed in 8.0
info   | jvm 1    | 2021/11/26 23:19:43 | wrapper (version 3.2.3) http://wrapper.tanukisoftware.org
info   | jvm 1    | 2021/11/26 23:19:43 |   copyright 1999-2006 tanuki software, inc.  all rights reserved.
info   | jvm 1    | 2021/11/26 23:19:43 |
info   | jvm 1    | 2021/11/26 23:19:44 | mycat server startup successfully. see logs in logs/mycat.log
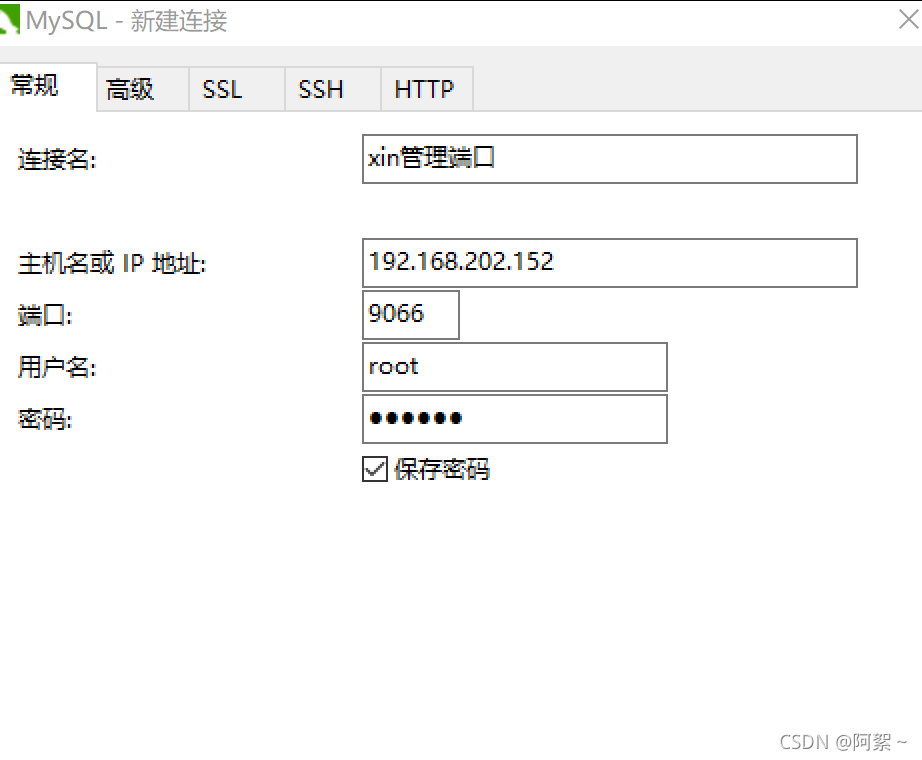
查看端口:netstat -anultp
8066业务端口 9066管理端口
最后一步
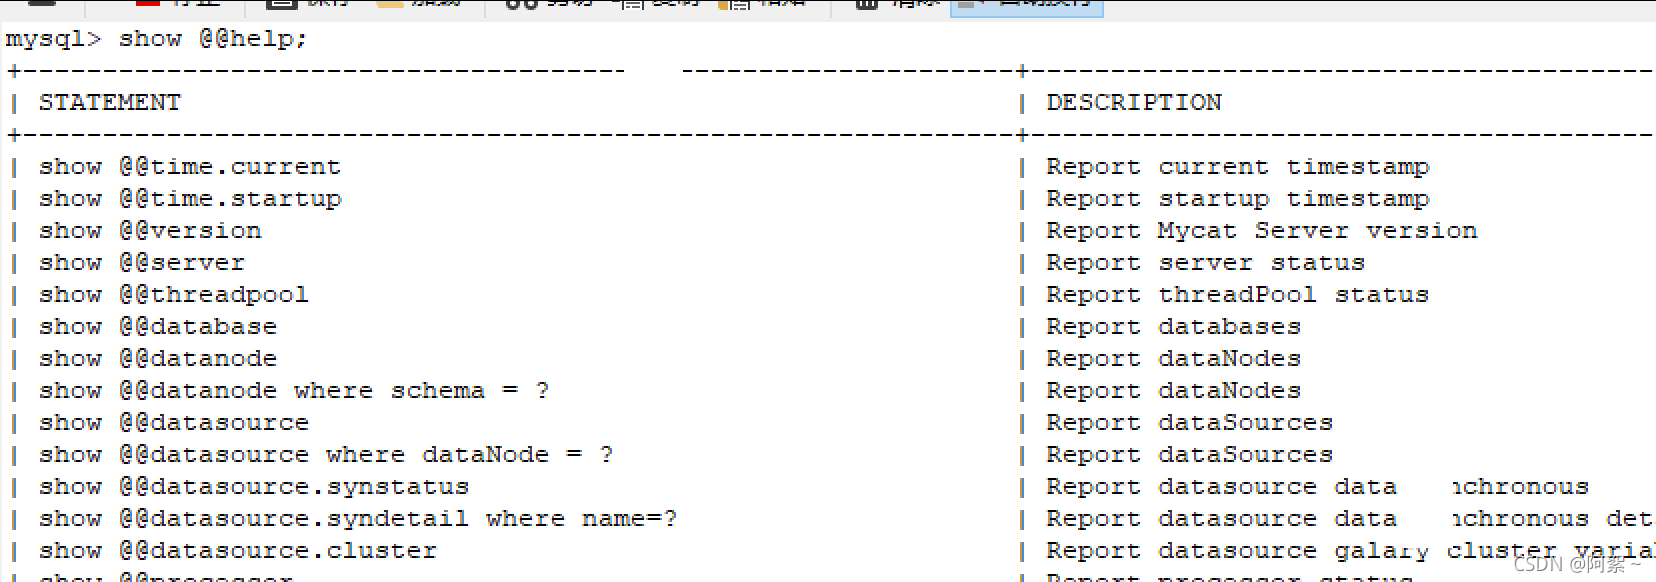
show @@help; #查看帮助
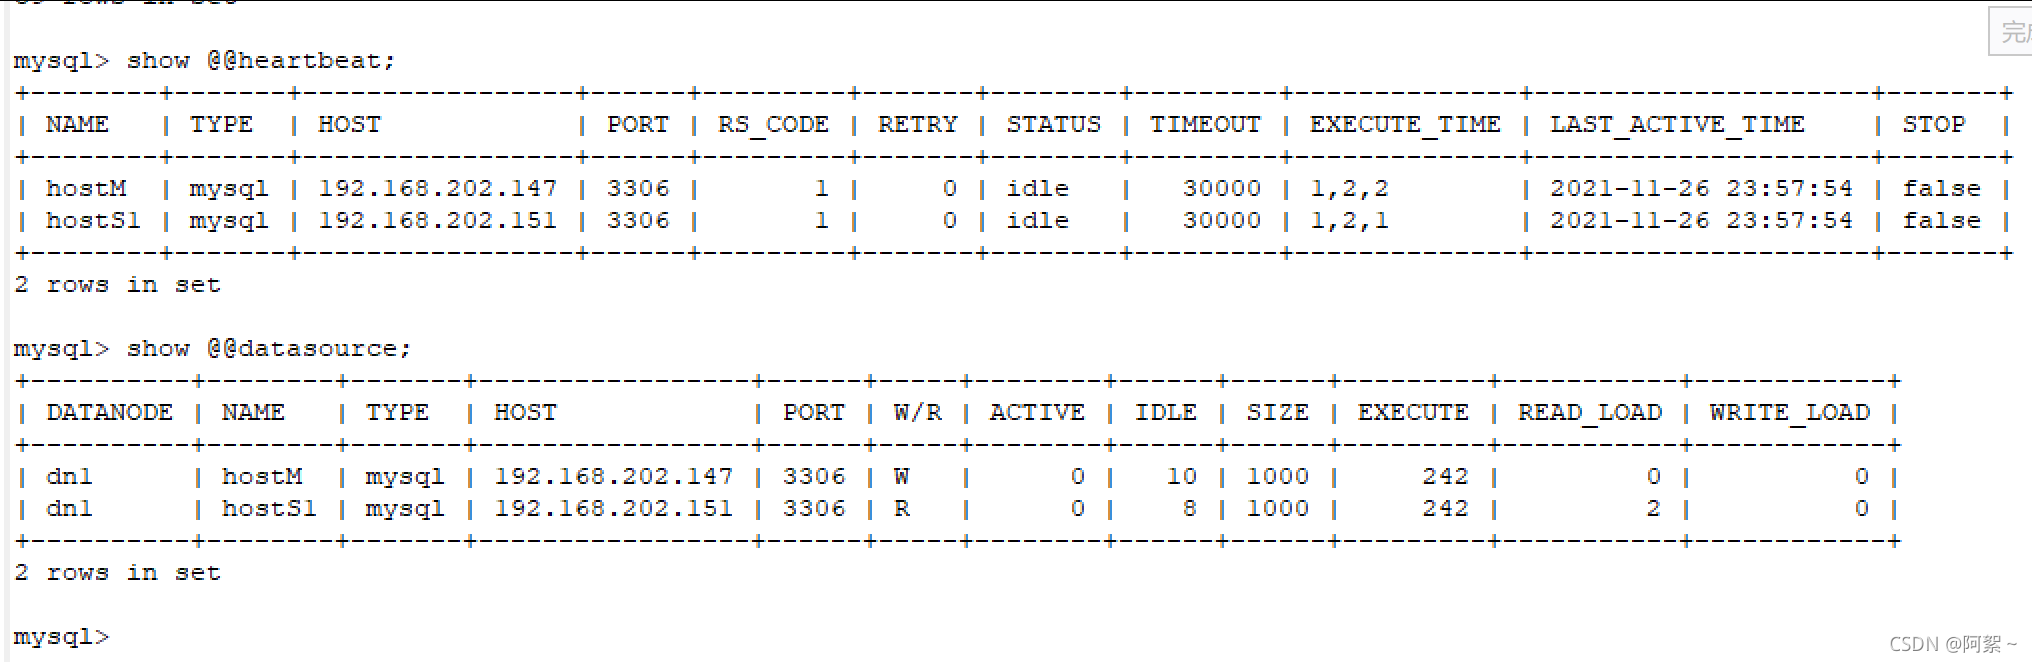
show @@heartbeat;#查看心跳rs_code 1 表示正常show @@datasource; #查看读写配置情况w 写 r 读
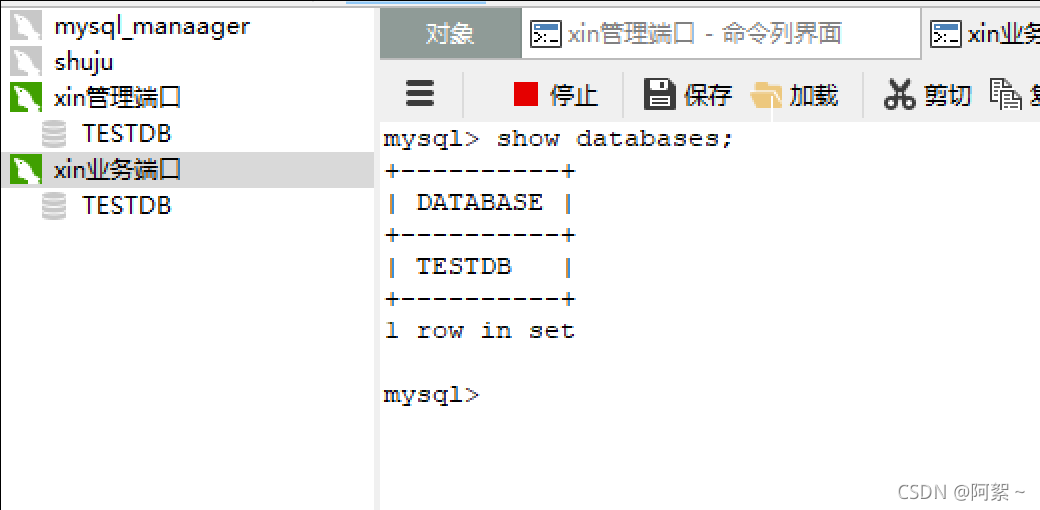
8066端口  在此进行业务操作
端口都在代理机上
途中遇到的问题
1.堆内存jvm不够
jvm exited while loading the application.
启动mycat后异常次 jvm exited while loading the application.
原因:初始化堆指定过小
info   | jvm 1    | 2018/10/12 17:12:25 | # there is insufficient memory for the java runtime environment to continue.
info   | jvm 1    | 2018/10/12 17:12:25 | # native memory allocation (mmap) failed to map 715849728 bytes for committing reserved memory.
info   | jvm 1    | 2018/10/12 17:12:25 | # an error report file with more information is saved as:
info   | jvm 1    | 2018/10/12 17:12:25 | # /usr/local/software/mycat/hs_err_pid8956.log
error  | wrapper  | 2018/10/12 17:12:26 | jvm exited while loading the application.
status | wrapper  | 2018/10/12 17:12:31 | launching a jvm...
info   | jvm 2    | 2018/10/12 17:12:32 | java hotspot(tm) 64-bit server vm warning: ignoring option maxpermsize=64m; support was removed in 8.0
info   | jvm 2    | 2018/10/12 17:12:32 | java hotspot(tm) 64-bit server vm warning: info: os::commit_memory(0x0000000715550000, 715849728, 0) failed; error='cannot allocate memory' (errno=12)
修改mycat/conf/wrapper.conf
第40行 wrapper.java.initmemory=30  将3改为30
./mycat start    再次启动
./mycat status  查看状态
问题我自己虚拟机本来就是30,并且加##默认
去除井号改30为40 成功
2.自己配置的问题
例如:没有添加好数据库test等。
总结
以上为个人经验,希望能给大家一个参考,也希望大家多多支持代码网。


发表评论