说下总体思路,创建一个组件,里面放多个span字段,然后根据父组件传入的参数,生成子组件,最好我们打印子组件的信息即可。通过我多次ai,探索最后成功了。
子组件代码
@media print 这个我要讲一下,这是控制在打印界面,打印的参数,这是css中的知识,我一开始不晓得,慢慢问ai和网上查资料晓得的。
<template>
  <div id="printable-area">
    <div v-for="(item, index) in printdata" :key="index" class="print-item">
      <div class="centered-content" style="font-size: 40px; margin-top: 55px">
        图号:<span style="border-bottom: 1px solid black; display: inline-block; width: 300px;">{{ item.figurenumber }}</span><br>
        名称:<span style="border-bottom: 1px solid black; display: inline-block; width: 300px;">{{ item.name }}</span><br>
        编号:<span style="border-bottom: 1px solid black; display: inline-block; width: 300px; ">{{ item.number }}</span><br>
        研制阶段:<span style="border-bottom: 1px solid black; display: inline-block; width: 300px; ">{{ item.developmentphase }}</span><br>
        出厂时间:<span style="border-bottom: 1px solid black; display: inline-block; width: 300px; ">{{ item.factorytime }}</span><br>
      </div>
      <br>
      <div v-if="index < printdata.length - 1" class="page-break"></div>
    </div>
  </div>
</template>

<script>
import {definecomponent} from 'vue';

export default definecomponent({
  props: {
    queryparam: array
  },
  setup(props) {
    const printdata = props.queryparam;
    return { printdata };
  }
});
</script>

<style>
@media print {
  body {
    background: none !important;
    text-align: center; /* 让 body 内容居中 */
  }
  @page {
    size: 15cm 12cm; /* 设置纸张大小为a4 */
    margin:0; /* 设置页边距 */
  }
  .noprint {
    display: none;
  }
  body {
    background: none !important;
  }
  .page-break {
    page-break-before: always;
  }

}
</style>
父组件
这是element 抽屉,我是为了看参数有没有传入进去,用来测试的。我是通过一个按钮,来实现对子组件传参,把参数传给子组件。
   <div  id="printarea">
      <el-drawer v-model="drawer" title="i am the title" :with-header="false">
      <print ref="printcomponent" :query-param="printdata"></print>
    </el-drawer>
    </div>
<el-button type="success" plain @click="print">打印</el-button>
这里也很关键,中间我遇到一个问题,那就是经常第一次点击按钮,dom元素没有加载完,就弹出打印框了,所以我加了一个异步事件,还有记得把抽屉关了。
  //这里获取后端参数
        state.drawer = true
        // 使用nexttick确保dom更新后执行
        nexttick(() => {
          const printableelement = document.queryselectorall('.print-item');
          console.log(printableelement);
          func.getprint()
          // 确保在抽屉隐藏之前获取到元素
          state.drawer = false;
        });
func.getprint() 就是我打印功能实际实现,为什么我这里是func,因为公司把所有方法都放在fun里面,节约了导出,免得一个个导出。我们要用直接点就行了。
中间注释的,是windo打印的方法,但是不晓得为啥子,关于打印的分页功能没有实现,我其实很迷惑。
但是使用这个popupwin就成功了。
讲一下大概思路,因为我前端写了比较少,所以理解这些还是花了一点点时间。
queryselectorall 因为我们组件有class名字,根据class名字获取 了nodelist,一个元素数组。其实每个元素数组中就是前端的信息。
对了千万不要使用queryselectorone,我ai生成的时候,发现为什么只打印了一个信息,一开始我以为是我分页没有生效,其实是我只获取了一个node。
 const printablehtml = array.from(printableelement).map(el => {
          return el.outerhtml;
        }).join('');
这是获取子组件的html元素,因为node节点,里面要通过outerhtml才能获取,反正里面也有很多方法,可以看看,我有点记不到了。
后面的思路就简单,开一个新窗口,然后把你从子节点获取的html元素放到这个窗口中,然后打印这个窗口,最后实现。
getprint:()=>{
const printableelement = document.queryselectorall('.print-item');
console.log(printableelement);
// 将 nodelist 转换为字符串,并添加分页符
// const printablehtml = array.from(printableelement).map(el => {
// return `<div style="page-break-after: always;">${el.outerhtml}</div>`;
// }).join('');
const printablehtml = array.from(printableelement).map(el => {
return el.outerhtml;
}).join('');
// console.log(printablehtml)
// let bodyhtml = document.body.innerhtml //获取整个页面内容
// document.body.innerhtml = printablehtml
// window.print() //打印
// document.body.innerhtml = bodyhtml//还原页面内容
// location.reload()
const popupwin = window.open('', '_blank', 'width=700,height=1000,scrollbars=no,menubar=no,toolbar=no,location=no,status=no,titlebar=no');
popupwin.document.write(`
<html>
<head>
<title>print tab</title>
<style>
body {
background: none !important;
text-align: center; /* 让 body 内容居中 */
}
@media print {
.noprint {
display: none;
}
@page {
size: 18cm 15cm; /* 设置纸张大小为a4 */
margin:0; /* 设置页边距 */
}
.noprint {
display: none;
}
.page-break {
page-break-before: always;
}
}
</style>
</head>
<body>
${printablehtml}
</body>
</html>
`);
popupwin.document.close();
popupwin.focus();
popupwin.print();
popupwin.close();
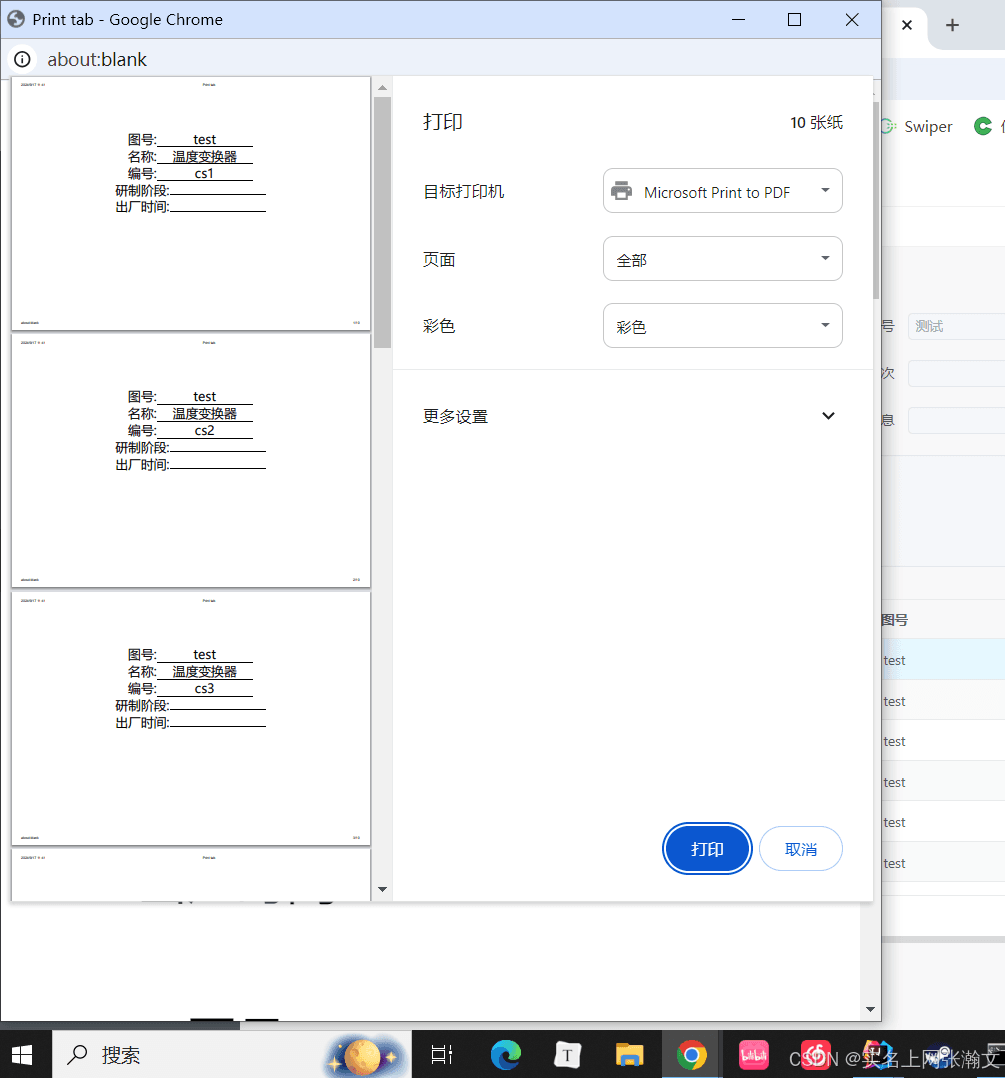
},最后我给大家放下效果图,还有多多点赞,我为了完成这个功能,网上看了博客,都没找到。
虽然最好我是通过ai加上自己人脑慢慢摸索的,哈哈。
总结
到此这篇关于前端vue3打印功能实现的文章就介绍到这了,更多相关前端vue3打印内容请搜索代码网以前的文章或继续浏览下面的相关文章希望大家以后多多支持代码网!


发表评论