由于开发需求要实现人脸识别,顺便在此记录一下,希望给各位前端爱好者带来帮助。
1、安装依赖
首先,确保你已经安装了vue.js,并且创建了一个vue项目。然后,安装face-api.js及其相关依赖。由于face-api.js依赖于tensorflow.js,你可能还需要安装这个库。可以通过npm或yarn来安装:
npm install face-api.js
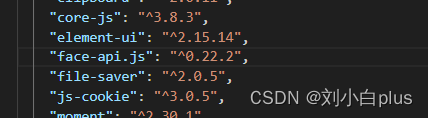
这是我安装的版本
2、下载模型文件
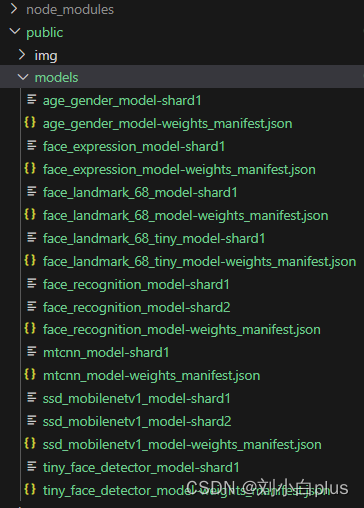
face-api.js需要一些预先训练好的模型文件来执行人脸检测和识别。你需要从github仓库中下载这些文件,并放置在项目的public目录下,或者配置一个正确的路径指向这些文件。可以从face-api.js的github页面下载模型。
- 在这个页面上,你会看到多个模型文件,例如
ssd_mobilenetv1_model-weights_manifest.json、face_landmark_68_model-weights_manifest.json等。为了使用face-api.js的不同功能,如人脸检测、特征点定位、表情识别等,你需要下载相应的模型文件。 - 你可以手动下载,也可以直接克隆,你也可以私聊我一下我给你发。
git clone https://github.com/justadudewhohacks/face-api.js.git
3.克隆完之后你需要把模型文件放到 public下的models没有models自己创建,你也可以自己规定路径,只要路径正确就行。
到此准备工作就做完了,当然你需要配置好vue框架。
3、封装组件
为了更好地组织代码并使其可复用,我们可以将人脸识别的功能封装成一个vue组件。下面是一个更完善的示例,展示了如何创建一个名为facerecognition.vue的自定义组件,该组件负责处理视频流、人脸检测、以及展示检测结果。完整代码块在这
<template>
  <div class="face-recognition">
    <video ref="video" width="640" height="480" autoplay></video>
    <canvas ref="canvas" width="640" height="480"></canvas>
    <div>当前人流量:{{ peoplecount }}</div>
  </div>
</template>
<script>
import * as faceapi from 'face-api.js';
export default {
  name: 'facerecognition',
  data() {
    return {
      isloaded: false,
      lastdetections: [], // 上一帧检测到的人脸
      peoplecount: 0, // 当前人流量计数
    };
  },
  mounted() {
    this.loadmodels();
  },
  methods: {
    async loadmodels() {
      try {
        await promise.all([
          faceapi.nets.facerecognitionnet.loadfromuri('/models'),
          faceapi.nets.facelandmark68net.loadfromuri('/models'),
          faceapi.nets.ssdmobilenetv1.loadfromuri('/models'),
        ]);
        this.isloaded = true;
        this.startvideo();
      } catch (error) {
        console.error('failed to load models:', error);
      }
    },
    startvideo() {
      if (navigator.mediadevices && this.isloaded) {
        navigator.mediadevices.getusermedia({ video: true })
          .then(stream => {
            this.$refs.video.srcobject = stream;
            this.$refs.video.onloadedmetadata = () => {
              this.detectfaces();
            };
          })
          .catch(error => console.error('getusermedia error:', error));
      }
    },
    async detectfaces() {
      const video = this.$refs.video;
      const canvas = this.$refs.canvas;
      const ctx = canvas.getcontext('2d');
      const detectionoptions = new faceapi.ssdmobilenetv1options({ minconfidence: 0.9 });
      let recentdetections = [];
      const detectionhistorylength = 5;
      setinterval(async () => {
        if (video.readystate === video.have_enough_data) {
          ctx.drawimage(video, 0, 0, canvas.width, canvas.height);
          const detections = await faceapi.detectallfaces(video, detectionoptions).withfacelandmarks();
          // console.log('查看获取帧',validdescriptors)
          // 确保只收集有效的面部描述符
          const validdescriptors = detections
          console.log('查看获取帧',validdescriptors)
          recentdetections.push(...validdescriptors.map(face => face.descriptor));
          // 限制历史长度并去重
          recentdetections = recentdetections.slice(-detectionhistorylength);
          // console.log('查看获取帧',recentdetections)
          const uniquedescriptors = array.from(new set(recentdetections));
          this.peoplecount = uniquedescriptors.length; // 直接使用去重后的数组长度,因已排除undefined,无需json.stringify和parse
          faceapi.draw.drawdetections(canvas, detections);
          faceapi.draw.drawfacelandmarks(canvas, detections);
        }
      }, 100);
    }
  },
  beforedestroy() {
    // 清理视频流
    if (this.$refs.video.srcobject) {
      this.$refs.video.srcobject.gettracks().foreach(track => track.stop());
    }
  },
};
</script>
<style scoped>
.face-recognition {
  position: relative;
}
</style>
4、使用组件
创建文件直接引入组件然后注册使用即可
<template>
    <div id="app">
      <facedetection />
    </div>
  </template>
  <script>
  import facedetection from '@/components/facedetection/facedetection.vue';
  export default {
    name: 'app',
    components: {
      facedetection,
    },
  };
  </script>
5、实现逻辑
- 在
mounted()生命周期钩子中,首先加载模型,然后启动视频流。 - 创建一个方法如
detectfaces()来周期性地从视频流中捕获帧,使用faceapi.detectallfaces()来检测人脸,并绘制检测结果到<canvas>上。 - 根据需要,你可以扩展此逻辑来实现更复杂的人脸识别功能,比如与已知人脸匹配等。
6、注意事项
- 确保你的应用有访问用户媒体设备的权限。
- 处理好异步加载模型和获取视频流的错误情况。
- 由于浏览器的安全策略,你可能需要在https环境下运行此应用,或者在localhost上进行开发。
- 考虑性能优化,避免频繁的重绘导致的性能问题。
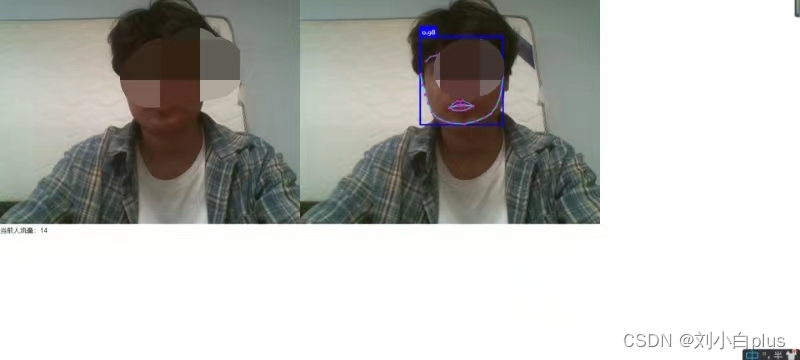
7、实现效果
到此这篇关于vue2使用face-api.js实现人脸识别功能的文章就介绍到这了,更多相关vue face-api.js人脸识别内容请搜索代码网以前的文章或继续浏览下面的相关文章希望大家以后多多支持代码网!


发表评论