1. 使用@value和@configurationproperties
这里不加赘述了,前面我也发过,这里就放个链接吧
@value获取值和@configurationproperties获取值用法及比较(springboot)
2. 使用@propertysource
创建person.java
package com.example.springbootdaily2.model;

import org.springframework.format.annotation.datetimeformat;

import java.util.date;
import java.util.list;
import java.util.map;

@component
@propertysource(value = "classpath:person.properties")
// 这个是前缀的意思
@configurationproperties(prefix = "person2")
public class personx {
    private string name;
    private character sex;
    @datetimeformat(pattern = "yyyy-mm-ss")
    private date birthday;
    private integer age;
    private string address;
    private map<string, integer> maps;
    private list<string> lists;
    private dog dog;

    public string getname() {
        return name;
    }

    public void setname(string name) {
        this.name = name;
    }

    public character getsex() {
        return sex;
    }

    public void setsex(character sex) {
        this.sex = sex;
    }

    public date getbirthday() {
        return birthday;
    }

    public void setbirthday(date birthday) {
        this.birthday = birthday;
    }

    public string getaddress() {
        return address;
    }

    public void setaddress(string address) {
        this.address = address;
    }

    public dog getdog() {
        return dog;
    }

    public void setdog(dog dog) {
        this.dog = dog;
    }

    public integer getage() {
        return age;
    }

    public void setage(integer age) {
        this.age = age;
    }

    public map<string, integer> getmaps() {
        return maps;
    }

    public void setmaps(map<string, integer> maps) {
        this.maps = maps;
    }

    public list<string> getlists() {
        return lists;
    }

    public void setlists(list<string> lists) {
        this.lists = lists;
    }

    @override
    public string tostring() {
        return "person{" +
                "name='" + name + '\'' +
                ", sex=" + sex +
                ", birthday=" + birthday +
                ", age=" + age +
                ", address='" + address + '\'' +
                ", maps=" + maps +
                ", lists=" + lists +
                ", dog=" + dog +
                '}';
    }
}
创建person.properties
person2.name="李四"
person2.sex=男
person2.birthday=2022-02-07
person2.age=18
person2.maps.keys1=16
person2.maps.keys2=16
person2.lists=[12,24,57]
person2.address="保定廉耻"
person2.dog.name=${random.value}
写一个测试类
package com.example.springbootdaily;
import com.example.springbootdaily.model.dog;
import com.example.springbootdaily.model.person;
import com.example.springbootdaily.model.person2;
import com.example.springbootdaily.model.personx;
import org.junit.test;
import org.junit.runner.runwith;
import org.springframework.beans.factory.annotation.autowired;
import org.springframework.boot.test.context.springboottest;
import org.springframework.test.context.junit4.springrunner;

@runwith(springrunner.class)
@springboottest
public class springtest {
    @autowired
    personx personx;

    @test
    public void print4(){
        system.out.println(personx);
    }
}
输出结果:
person{name='"岳轩子"', sex=m,
birthday=sun dec 26 00:00:00 cst 2021, age=18,
address='"保定武汉"', maps={keys2=16, keys1=16}, lists=[[12, 24, 57]],
dog=dog{name='cdab390f55c9f8a6bbb420cd15607add'}}
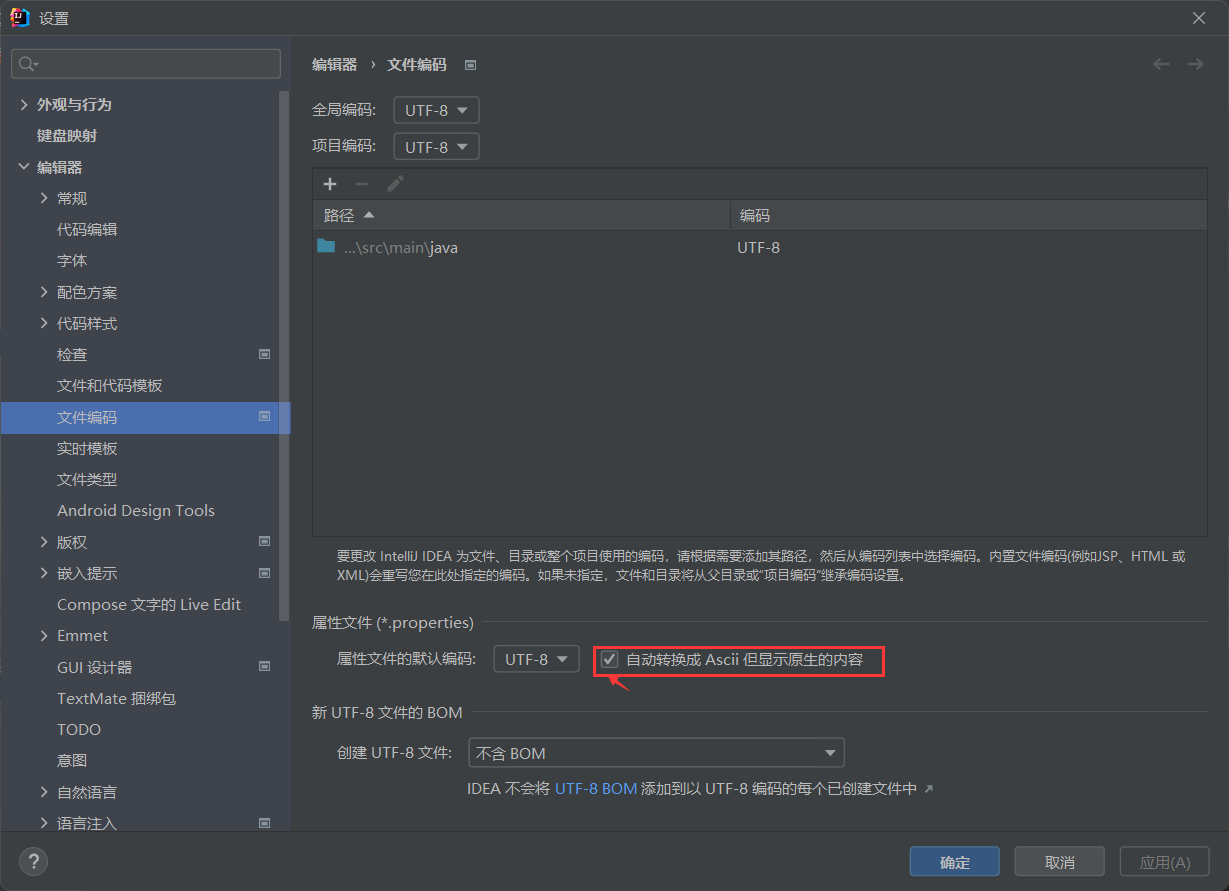
注:如果显示乱码,设置文件编码为utf-8
3. 使用@importresource
student类
package com.example.springbootdaily.model;

public class student {
    private string name;
    private integer age;

    public string getname() {
        return name;
    }

    public void setname(string name) {
        this.name = name;
    }

    public integer getage() {
        return age;
    }

    public void setage(integer age) {
        this.age = age;
    }

    @override
    public string tostring() {
        return "student{" +
                "name='" + name + '\'' +
                ", age=" + age +
                '}';
    }
}
创建beans.xml
<?xml version="1.0" encoding="utf-8"?>
<beans xmlns="http://www.springframework.org/schema/beans"
       xmlns:xsi="http://www.w3.org/2001/xmlschema-instance"
       xsi:schemalocation="http://www.springframework.org/schema/beans http://www.springframework.org/schema/beans/spring-beans.xsd">

    <bean id="student" class="com.example.springbootdaily.model.student">
        <property name="name" value="李四"/>
        <property name="age" value="18"/>
    </bean>
</beans>
在主类中引入
package com.example.springbootdaily;

import org.springframework.boot.springapplication;
import org.springframework.boot.autoconfigure.springbootapplication;
import org.springframework.context.annotation.importresource;

@springbootapplication
@importresource(locations = "classpath:beans.xml")
public class springbootdailyapplication {

    public static void main(string[] args) {
        springapplication.run(springbootdailyapplication.class, args);
    }

}
测试
package com.example.springbootdaily;


import com.example.springbootdaily.model.*;
import org.junit.test;
import org.junit.runner.runwith;
import org.springframework.beans.factory.annotation.autowired;
import org.springframework.boot.test.context.springboottest;
import org.springframework.test.context.junit4.springrunner;

@runwith(springrunner.class)
@springboottest
public class springtest {
    @autowired
    student student;

    @test
    public void print5(){
        system.out.println(student);
    }
}
运行结果:
student{name='李四', age=18}
其他
我们可以导入配置文件处理器,以后编写配置就有提示了
<!‐‐导入配置文件处理器,配置文件进行绑定就会有提示‐‐>
依赖:
<dependency>
     <groupid>org.springframework.boot</groupid>
     <artifactid>spring‐boot‐configuration‐processor</artifactid>
     <optional>true</optional>
</dependency>
以上就是springboot给类进行赋初值的四种方式的详细内容,更多关于springboot给类进行赋初值的资料请关注代码网其它相关文章!


发表评论