grpc gateway的原理官网有介绍。总结一下就是:
grpc-gateway帮助你同时以grpc和restful风格提供你的api。grpc-gateway旨在为您的grpc服务提供http+json接口。 做法就是:在服务中附加http语义的少量配置就是使用该库生成反向代理所需的全部内容。客户端的restful api请求通过反向代理自动转换成grpc可识别的请求去调用grpc服务端。
具体实现步骤:
1、新增echo.proto文件,定义好http接口:
syntax = "proto3";
package pb;
option go_package = "go_grpc/grpc_gateway/proto/hello";
// 导入google/api/annotations.proto
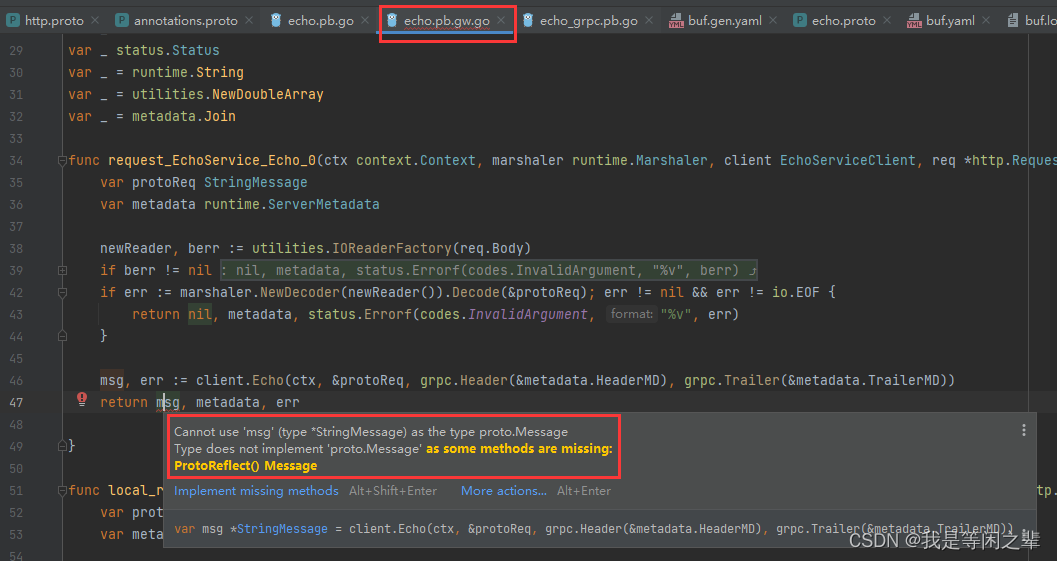
import "google/api/annotations.proto"; //🌙这里在goland会提示:proto/hello/echo.proto: import "google/api/annotations.proto" was not found or had errors.神奇的是:当我换vscode编辑器就没有这个问题。
service echoservice {
rpc echo(stringmessage) returns (stringmessage) {
// // 这里添加了google.api.http注释
option (google.api.http) = {
post: "/v1/echo"
body: "*"
};
}
}
message stringmessage {
string value = 1;
}
2、生成对应的pb文件:
2.1 普通方式(推荐第二种方式:buf工具)
执行目录是在项目根目录下,即go_grpc目录下:
protoc -i=proto --grpc-gateway_out=./proto --grpc-gateway_opt=paths=source_relative --go_out=proto --go_opt=paths=source_relative --go-grpc_out=proto --go-grpc_opt=paths=source_relative .\proto\hello\echo.proto

执行完毕后,就在如上图所示,在proto/hello目录下生成三个文件:
echo.pb.go
echo_grpc.pb.go
echo.pb.gw.go
如果会提示:

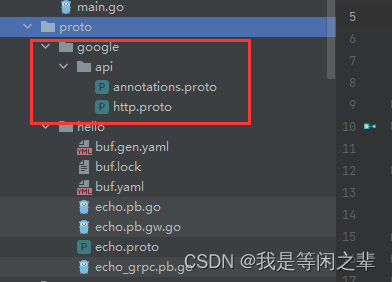
需要在本地目录引入下面两个文件(目录保持一致),点击下面链接进行下载:
https://github.com/googleapis/googleapis/tree/master/google/api
2.2 使用buf工具生成pb文件
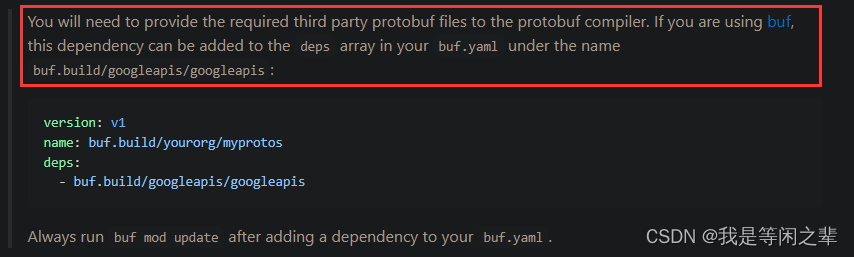
grpc-gateway项目的readme文件有推荐一款工具:buf(官网链接),这个工具使我们不需要手动下载google/api/annotations.proto这些依赖包到我们的项目中。而且对于生成pb文件也会更加简单方便。
安装buf:
https://github.com/bufbuild/buf/releases
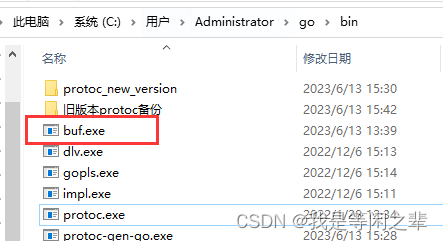
点击选择window版本下载,下载后的文件名是buf-windows-x86_64.exe。将其重命名为buf.exe。然后放到$gopath/bin目录下,其实就是和protoc.exe同个目录。
buf的用法:
1. 先在proto/hello目录下(即放proto文件的目录下),初始化buf:
go mod init
执行该命令后会生成buf.yaml。
然后在buf.yaml引入第三方依赖:
version: v1
breaking:
  use:
    - file
lint:
  use:
    - default
name: buf.build/mygrpc/gateway
deps:
  - buf.build/googleapis/googleapis
  - buf.build/grpc-ecosystem/grpc-gateway
其中,name参数第一个值buf.build是固定的,后面两个单词可以自定义。
加入依赖后,记得执行 buf mod update -v 更新一下。(每次对buf.yaml修改都要执行update)
2. 定义buf.gen.yaml文件
version: v1
plugins:
  - plugin: go
    out: ./
    opt:
      - paths=source_relative
# protoc_path可以指定不同版本的protoc工具,但是我在window测试无效。
#    protoc_path: /c/users/administrator/go/bin/protoc_new_version/protoc
  - plugin: go-grpc
    out: ./
    opt:
      - paths=source_relative
  - plugin: grpc-gateway
    out: ./
    opt:
      - paths=source_relative
#    protoc_path: /c/users/administrator/go/bin/protoc_new_version
- 执行下面命令,生成pb文件
buf generate -v --debug
执行成功后,会在proto文件的目录下生成三个pb文件:
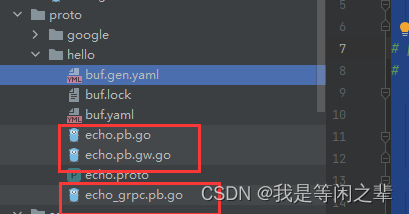
遇到的bug:
因为我的电脑的protoc.exe和protoc-gen-go.exe用的是老版本,导致我生成的echo.pb.gw.go文件报错(这里应该是echo.pb.go文件有误影响到了gw文件):
所以去gopath/bin目录下,把旧版本先备份后移除,然后下载比较新的版本。再执行puf generate就能生成正确无误的文件。

接下来就是测试http post请求是否成功。
这里我们需要启动rpc服务,再启动http服务。
package main

import (
	"context"
	"fmt"
	"log"
	"net"
	"net/http"

	pb "go_grpc/grpc_gateway/proto/hello"

	"github.com/golang/glog"
	"github.com/grpc-ecosystem/grpc-gateway/v2/runtime"
	"google.golang.org/grpc"
	"google.golang.org/grpc/credentials/insecure"
)

const port = ":4399"

type echoservice struct {
	*pb.unimplementedechoserviceserver
}

func newechoservice() *echoservice {
	return &echoservice{}
}

func (c *echoservice) echo(ctx context.context, msg *pb.stringmessage) (*pb.stringmessage, error) {
	reply := fmt.sprintf("我收到你的信息了,你发送的信息是:%s", msg)
	return &pb.stringmessage{value: reply}, nil
}

//启动 http server
func runhttpservice() error {
	ctx := context.background()
	ctx, cancel := context.withcancel(ctx)
	defer cancel()

	// register grpc server endpoint
	// note: make sure the grpc server is running properly and accessible
	mux := runtime.newservemux()
	opts := []grpc.dialoption{grpc.withtransportcredentials(insecure.newcredentials())}
	err := pb.registerechoservicehandlerfromendpoint(ctx, mux, "localhost:4399", opts)
	if err != nil {
		return err
	}
	println("http service start!")
	// start http server (and proxy calls to grpc server endpoint)
	return http.listenandserve(":8081", mux)
}

//启动 rpc service
func runrpcservice() error {
	listener, err := net.listen("tcp", port)
	if err != nil {
		return err
	}

	srv := newechoservice()
	rpcserver := grpc.newserver()
	pb.registerechoserviceserver(rpcserver, srv)
	log.println("start grpc listen on port " + port)
	return rpcserver.serve(listener)
}

func main() {
	//flag.parse()
	defer glog.flush()

	//得用一个协程启动rpc服务,不能先启动rpc服务,再启动http服务。不然启动rpc服务后会阻塞住
	go func() {
		if err := runrpcservice(); err != nil {
			fmt.printf("runrpcservice err:%#v\n", err)
			glog.fatal(err)
		}
	}()
	println("cowboy very busy")
	//再启动http service
	if err := runhttpservice(); err != nil {
		fmt.printf("runhttpservice err:%#v\n", err)
		glog.fatal(err)
	}
}
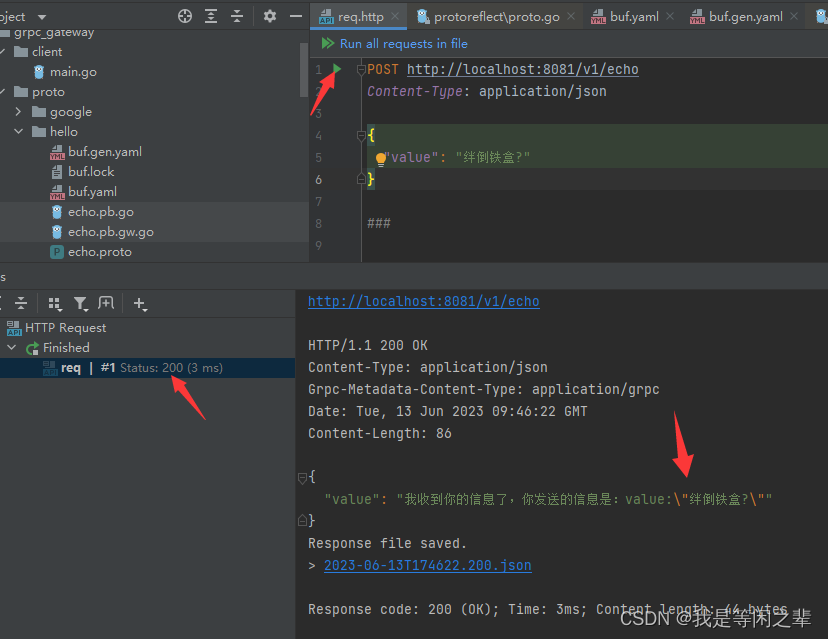
接下来启动service/main.go。然后用goland快速建立一个post请求:
file => new => http request
我们也用rpc客户端进行测试调用:
package main

import (
	"context"
	"fmt"
	pb "go_grpc/grpc_gateway/proto/hello"
	"google.golang.org/grpc"
	"google.golang.org/grpc/credentials/insecure"
	"log"
)

const (
	address = "localhost:4399"
)

func main() {
	conn, err := grpc.dial(address, grpc.withtransportcredentials(insecure.newcredentials()))
	if err != nil {
		log.println("did not connect.", err)
		return
	}
	defer conn.close()

	client := pb.newechoserviceclient(conn)
	ctx := context.background()

	req := &pb.stringmessage{value: "crazy thursday"}
	reply, err := client.echo(ctx, req)
	if err != nil {
		log.println("fail:", err)
		return
	}
	fmt.printf("reply:%#v\n", reply)
}
同样,请求也是成功:

说明grpc网关实现成功了!!!


发表评论