文章目录
基于docker容器devops应用方案
环境
| 主机名 | ip地址 | 功能 | 安装的软件 | 系统版本 |
|---|---|---|---|---|
| gitlab.server | 192.168.179.13 | 本地代码仓库 | gitlab-ce | centos8 |
| jenkins.server | 192.168.179.14 | 编译代码、打包镜像、项目发布 | jenkins、docker、git、maven | centos8 |
| harbor.server | 192.168.179.15 | 本地容器镜像仓库(存储镜像) | harbor、docker-compose、docker | centos8 |
| docker | 192.168.179.16 | 制作镜像、上传镜像 | docker | centos8 |
| webs | 192.168.179.10 | 测试环境( 项目发布在此主机) | docker | centos8 |
基础配置
1.所有主机永久关闭防火墙和selinux
//永久关闭防火墙
systemctl disable --now firewalld.service

//永久关闭selinux
setenforce 0
sed -i 's/^selinux=enforcing/selinux=disabled/g' /etc/selinux/config
2.配置yum源
所有主机配置对应系统的yum源,gitlab主机需要安装epel源
//删除自带的默认yum源
rm -rf /etc/yum.repos.d/*

//配置国内yum源(阿里云源)
curl -o /etc/yum.repos.d/centos-base.repo https://mirrors.aliyun.com/repo/centos-vault-8.5.2111.repo

sed -i -e '/mirrors.cloud.aliyuncs.com/d' -e '/mirrors.aliyuncs.com/d' /etc/yum.repos.d/centos-base.repo


//安装epel源
yum install -y https://mirrors.aliyun.com/epel/epel-release-latest-8.noarch.rpm

sed -i 's|^#baseurl=https://download.example/pub|baseurl=https://mirrors.aliyun.com|' /etc/yum.repos.d/epel*

sed -i 's|^metalink|#metalink|' /etc/yum.repos.d/epel*
3.docker的安装教程
不是每一台都要安装docker
//centos系统安装docker过程(不是每一台都要装)
yum install -y yum-utils device-mapper-persistent-data lvm2

yum-config-manager --add-repo https://mirrors.aliyun.com/docker-ce/linux/centos/docker-ce.repo

sed -i 's+download.docker.com+mirrors.aliyun.com/docker-ce+' /etc/yum.repos.d/docker-ce.repo

yum makecache

yum -y install docker-ce

systemctl enable --now docker.service
配置主机名与ip地址解析
所有主机都写在/etc/hosts 文件里面添加如下内容
//编辑 /etc/hosts 文件
[root@gitlab ~]# vi /etc/hosts
[root@gitlab ~]# cat /etc/hosts
127.0.0.1   localhost localhost.localdomain localhost4 localhost4.localdomain4
::1         localhost localhost.localdomain localhost6 localhost6.localdomain6
#添加如下内容
192.168.179.13	gitlab.server
192.168.179.14	jenkins.server
192.168.179.15	harbor.server
192.168.179.16	docker
192.168.179.10	webs
[root@gitlab ~]#
部署gitlab.server主机
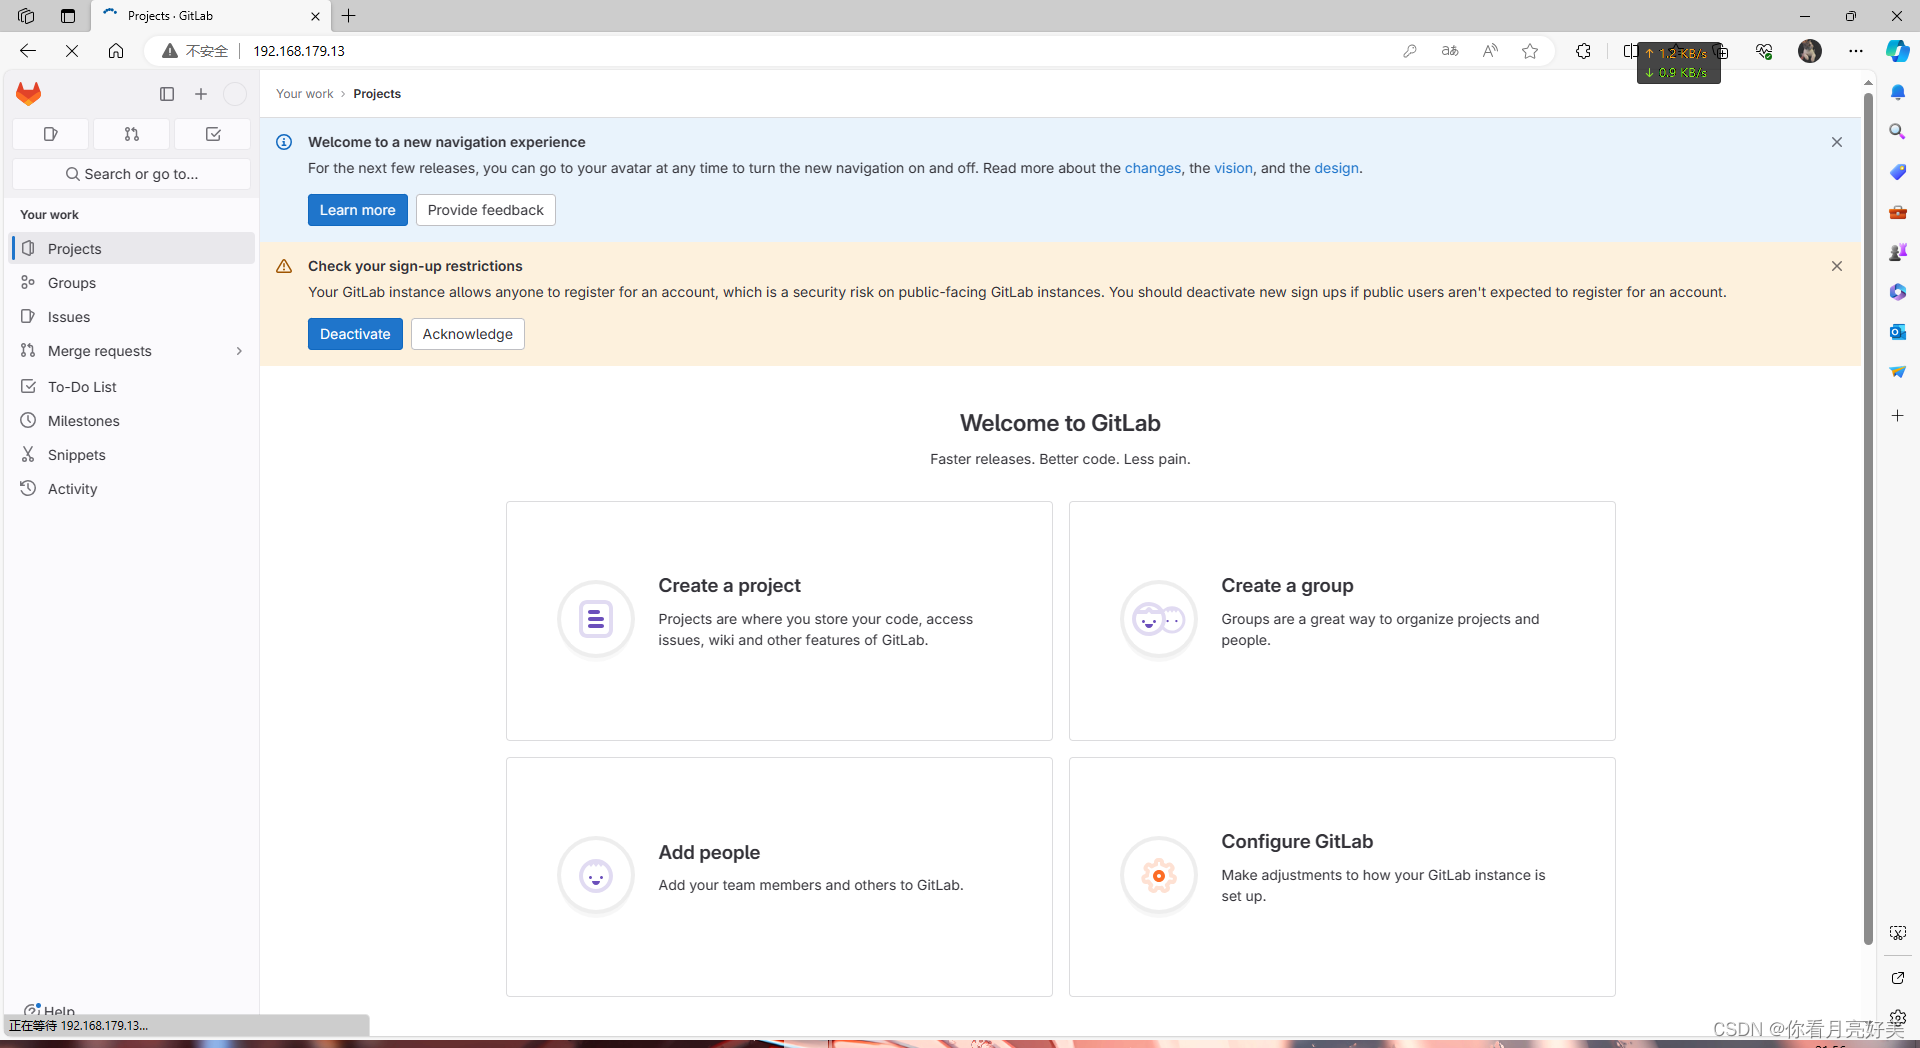
1.安装gitlab
安装和使用的详细过程请阅读gitlab版本控制
//安装依赖包
[root@gitlab ~]# yum -y install git wget curl vim openssh-server openssh-clients postfix cronie perl

//启动postfix并设置开机自启
[root@gitlab ~]# systemctl enable --now postfix


//下载并安装policycoreutils-python
[root@gitlab ~]# wget http://mirror.centos.org/centos/7/os/x86_64/packages/policycoreutils-python-2.5-34.el7.x86_64.rpm

[root@gitlab ~]# rpm -ivh --nodeps policycoreutils-python-2.5-34.el7.x86_64.rpm --force


//下载gitlab软件包
[root@gitlab ~]# wget https://mirrors.tuna.tsinghua.edu.cn/gitlab-ce/yum/el7/gitlab-ce-16.4.1-ce.0.el7.x86_64.rpm

[root@gitlab ~]# rpm -ivh gitlab-ce-16.4.1-ce.0.el7.x86_64.rpm
(省略)
it looks like gitlab has not been configured yet; skipping the upgrade script.

       *.                  *.
      ***                 ***
     *****               *****
    .******             *******
    ********            ********
   ,,,,,,,,,***********,,,,,,,,,
  ,,,,,,,,,,,*********,,,,,,,,,,,
  .,,,,,,,,,,,*******,,,,,,,,,,,,
      ,,,,,,,,,*****,,,,,,,,,.
         ,,,,,,,****,,,,,,
            .,,,***,,,,
                ,*,.


     _______ __  __          __
    / ____(_) /_/ /   ____ _/ /_
   / / __/ / __/ /   / __ `/ __ \
  / /_/ / / /_/ /___/ /_/ / /_/ /
  \____/_/\__/_____/\__,_/_.___/


thank you for installing gitlab!
(看见这个狐狸标志就代表安装成功)
2.配置gitlab
//修改 /etc/gitlab/gitlab.rb 的第32行、1011行、1115行
[root@gitlab ~]# vim /etc/gitlab/gitlab.rb
##! https://docs.aws.amazon.com/awsec2/latest/userguide/instancedata-data-retrieval.html
external_url 'http://192.168.179.13'   //改成自己主机的域名或ip

## roles for multi-instance gitlab
(省略)
# gitlab_workhorse['listen_addr'] = "/var/opt/gitlab/gitlab-workhorse/sockets/socket"
  gitlab_workhorse['auth_backend'] = "http://localhost:8080"   //取消注释

##! enable redis keywatcher, if this setting is not present it defaults to true
(省略)
# puma['listen'] = '127.0.0.1'
  puma['port'] = 8080     //取消注释
# puma['socket'] = '/var/opt/gitlab/gitlab-rails/sockets/gitlab.socket'
(省略)


//重载配置文件
[root@gitlab ~]# gitlab-ctl reconfigure
(耐心等待,过程省略...)

//重启gitlab
[root@gitlab ~]# gitlab-ctl restart
ok: run: alertmanager: (pid 21903) 0s
ok: run: gitaly: (pid 21913) 0s
ok: run: gitlab-exporter: (pid 21930) 1s
ok: run: gitlab-kas: (pid 21943) 0s
ok: run: gitlab-workhorse: (pid 21953) 0s
ok: run: logrotate: (pid 21971) 1s
ok: run: nginx: (pid 21977) 0s
ok: run: node-exporter: (pid 21985) 1s
ok: run: postgres-exporter: (pid 21991) 0s
ok: run: postgresql: (pid 22001) 0s
ok: run: prometheus: (pid 22010) 1s
ok: run: puma: (pid 22027) 0s
ok: run: redis: (pid 22032) 1s
ok: run: redis-exporter: (pid 22039) 0s
ok: run: sidekiq: (pid 22048) 1s
[root@gitlab-server ~]#


//查看各端口号
[root@gitlab ~]# ss -anlt
state   recv-q  send-q    local address:port     peer address:port  process
listen  0       1024          127.0.0.1:8154          0.0.0.0:*
listen  0       1024          127.0.0.1:8155          0.0.0.0:*
listen  0       128           127.0.0.1:8092          0.0.0.0:*
listen  0       511             0.0.0.0:8060          0.0.0.0:*
listen  0       1024          127.0.0.1:9121          0.0.0.0:*
listen  0       1024          127.0.0.1:9090          0.0.0.0:*
listen  0       1024          127.0.0.1:9187          0.0.0.0:*
listen  0       1024          127.0.0.1:9093          0.0.0.0:*
listen  0       1024          127.0.0.1:9100          0.0.0.0:*
listen  0       1024          127.0.0.1:9229          0.0.0.0:*
listen  0       1024          127.0.0.1:8080          0.0.0.0:*
listen  0       511             0.0.0.0:80            0.0.0.0:*
listen  0       128           127.0.0.1:9168          0.0.0.0:*
listen  0       128           127.0.0.1:8082          0.0.0.0:*
listen  0       1024          127.0.0.1:9236          0.0.0.0:*
listen  0       1024          127.0.0.1:8150          0.0.0.0:*
listen  0       128             0.0.0.0:22            0.0.0.0:*
listen  0       1024          127.0.0.1:8151          0.0.0.0:*
listen  0       1024          127.0.0.1:8153          0.0.0.0:*
listen  0       100           127.0.0.1:25            0.0.0.0:*
listen  0       1024                  *:9094                *:*
listen  0       128               [::1]:9168             [::]:*
listen  0       128                [::]:22               [::]:*
listen  0       100               [::1]:25               [::]:*
[root@gitlab ~]#
3.破解管理员密码
//存放初始密码的文件
[root@gitlab ~]# cd /etc/gitlab/
[root@gitlab gitlab]# ls
gitlab.rb  gitlab-secrets.json  initial_root_password  trusted-certs
[root@gitlab gitlab]# cat initial_root_password
# warning: this value is valid only in the following conditions
#          1. if provided manually (either via `gitlab_root_password` environment variable or via `gitlab_rails['initial_root_password']` setting in `gitlab.rb`, it was provided before database was seeded for the first time (usually, the first reconfigure run).
#          2. password hasn't been changed manually, either via ui or via command line.
#
#          if the password shown here doesn't work, you must reset the admin password following https://docs.gitlab.com/ee/security/reset_user_password.html#reset-your-root-password.

password: etv80gpy/pmq2jjcpsks80euotfxprgxok79lju2wks=        //这是初始密码

# note: this file will be automatically deleted in the first reconfigure run after 24 hours.
[root@gitlab gitlab]#

//破解密码过程
[root@gitlab ~]# gitlab-rails console -e production
--------------------------------------------------------------------------------
 ruby:         ruby 3.0.6p216 (2023-03-30 revision 23a532679b) [x86_64-linux]
 gitlab:       16.4.1 (e6801ed8d44) foss
 gitlab shell: 14.28.0
 postgresql:   13.11
------------------------------------------------------------[ booted in 18.81s ]
loading production environment (rails 7.0.6)
irb(main):001:0> user = user.where(id: 1).first   //定义一个超级管理员(id为1)
=> #<user id:1 @root>
irb(main):002:0> user.password = 'lcwanf001'      //设置密码
=> "lcwanf001"
irb(main):003:0> user.password_confirmation = 'lcwanf001'   //确定密码
=> "lcwanf001"
irb(main):004:0> user.save!            //保存用户
=> true
irb(main):005:0> exit          //退出
[root@gitlab ~]#
4.验证web页面
安装完毕
部署jenkins.server主机
安装与使用的详细过程请阅读jenkins部署与应用
1.部署tomcat
jenkins是一个java程序,所以要依赖tomcat
//安装java环境
[root@jenkins ~]# yum -y install java-1.8.0-openjdk java-1.8.0-openjdk-devel wget
[root@jenkins ~]# java -version
openjdk version "1.8.0_312"
openjdk runtime environment (build 1.8.0_312-b07)
openjdk 64-bit server vm (build 25.312-b07, mixed mode)
[root@jenkins ~]#

//下载tomcat软件包
[root@jenkins ~]# wget https://archive.apache.org/dist/tomcat/tomcat-9/v9.0.79/bin/apache-tomcat-9.0.79.tar.gz
[root@jenkins ~]# ls
anaconda-ks.cfg  apache-tomcat-9.0.79.tar.gz

//解压部署,解压到哪个目录,该目录就是安装目录
[root@jenkins ~]# tar -xf apache-tomcat-9.0.79.tar.gz -c /usr/local/
[root@jenkins ~]# cd /usr/local/
[root@jenkins local]# ls
apache-tomcat-9.0.79  etc    include  lib64    sbin   src
bin                   games  lib      libexec  share

//软链接
[root@jenkins local]# ln -s apache-tomcat-9.0.79/ tomcat
[root@jenkins local]# ls
apache-tomcat-9.0.79  etc    include  lib64    sbin   src
bin                   games  lib      libexec  share  tomcat
[root@jenkins local]#

//启动tomcat服务
[root@jenkins local]# /usr/local/tomcat/bin/startup.sh
using catalina_base:   /usr/local/tomcat
using catalina_home:   /usr/local/tomcat
using catalina_tmpdir: /usr/local/tomcat/temp
using jre_home:        /usr
using classpath:       /usr/local/tomcat/bin/bootstrap.jar:/usr/local/tomcat/bin/tomcat-juli.jar
using catalina_opts:
tomcat started.
[root@jenkins local]#

//8005和8080端口已经起来了
[root@jenkins local]# ss -anlt
state   recv-q  send-q        local address:port   peer address:port process
listen  0       128                 0.0.0.0:22          0.0.0.0:*
listen  0       128                    [::]:22             [::]:*
listen  0       1        [::ffff:127.0.0.1]:8005              *:*
listen  0       100                       *:8080              *:*
[root@jenkins local]#
2.安装jenkins
//安装jenkins所需要的java17
[root@jenkins ~]# yum -y install java-17-openjdk java-17-openjdk-devel

//由于安装tomcat时安装的java1.8,但是jenkins需要java17,所以切换一下java版本
[root@jenkins ~]# alternatives --config java

there are 2 programs which provide 'java'.

  selection    command
-----------------------------------------------
*+ 1           java-1.8.0-openjdk.x86_64 (/usr/lib/jvm/java-1.8.0-openjdk-1.8.0.312.b07-2.el8_5.x86_64/jre/bin/java)
   2           java-17-openjdk.x86_64 (/usr/lib/jvm/java-17-openjdk-17.0.1.0.12-2.el8_5.x86_64/bin/java)

enter to keep the current selection[+], or type selection number: 2  //选择2
[root@jenkins ~]#


//下载jenkins的.war包
[root@jenkins ~]# wget https://get.jenkins.io/war-stable/2.414.2/jenkins.war
[root@jenkins ~]# ls
anaconda-ks.cfg  apache-tomcat-9.0.79.tar.gz  jenkins.war
[root@jenkins ~]# java -jar jenkins.war

//把jenkins包cp到 /usr/local/tomcat/webapps/去
[root@jenkins ~]# cp jenkins.war /usr/local/tomcat/webapps/

//重启tomca服务,就会自动解压jenkins.war
[root@jenkins ~]#/usr/local/tomcat/bin/shutdown.sh
[root@jenkins ~]#/usr/local/tomcat/bin/startup.sh

[root@jenkins ~]# cd /usr/local/tomcat/webapps/
[root@jenkins webapps]# ls
docs  examples  host-manager  jenkins  jenkins.war  manager  root
3.验证web页面
查看临时密码,登录进去,后面会重新设置一个管理员密码的
[root@jenkins ~]# cat /root/.jenkins/secrets/initialadminpassword
fc67568de10348528e5735461cde70d9
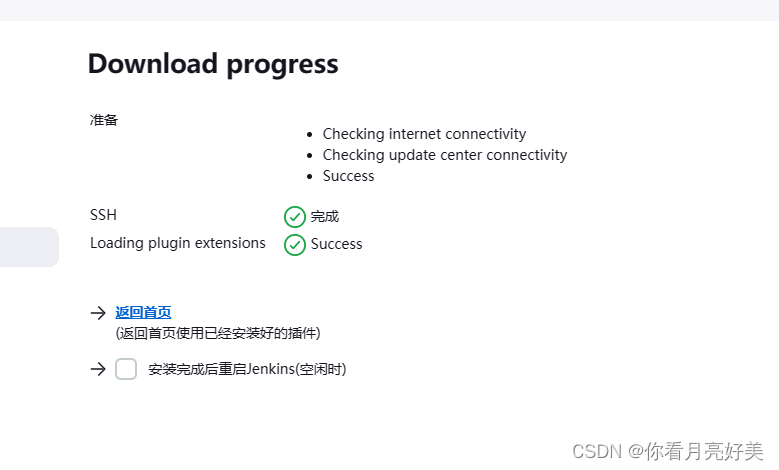
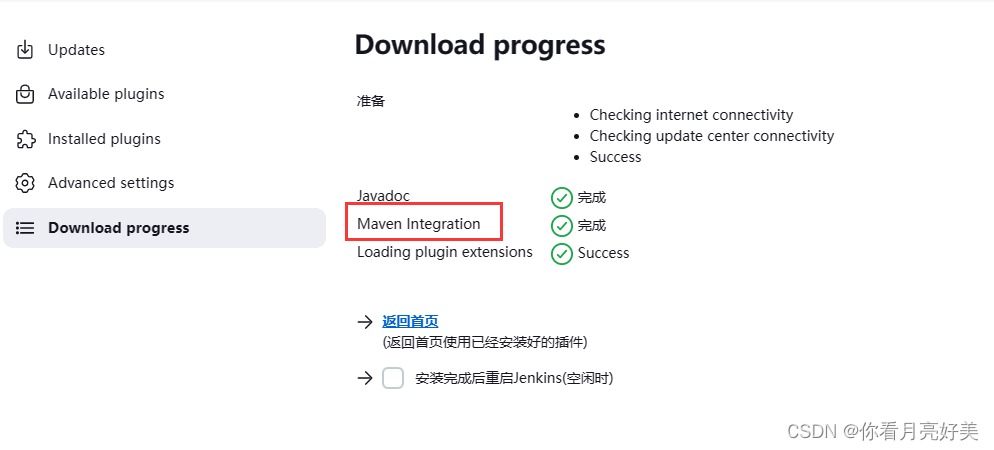
建议直接安装全部插件

额外安装ssh、maven integration插件
4.安装git、maven、docker
//安装git
[root@jenkins ~]# yum -y install git

//安装maven
[root@jenkins ~]# yum -y install maven

//验证
[root@jenkins ~]# git version
git version 2.27.0

[root@jenkins ~]# mvn -v
apache maven 3.5.4 (red hat 3.5.4-5)
maven home: /usr/share/maven
java version: 1.8.0_312, vendor: red hat, inc., runtime: /usr/lib/jvm/java-1.8.0-openjdk-1.8.0.312.b07-2.el8_5.x86_64/jre
default locale: en_us, platform encoding: utf-8
os name: "linux", version: "4.18.0-499.el8.x86_64", arch: "amd64", family: "unix"
[root@jenkins ~]#
5.安装docker
[root@jenkins ~]# yum install -y yum-utils device-mapper-persistent-data lvm2

[root@jenkins ~]# yum-config-manager --add-repo https://mirrors.aliyun.com/docker-ce/linux/centos/docker-ce.repo

[root@jenkins ~]# sed -i 's+download.docker.com+mirrors.aliyun.com/docker-ce+' /etc/yum.repos.d/docker-ce.repo

[root@jenkins ~]# yum makecache

[root@jenkins ~]# yum -y install docker-ce

[root@jenkins ~]# systemctl enable --now docker.service
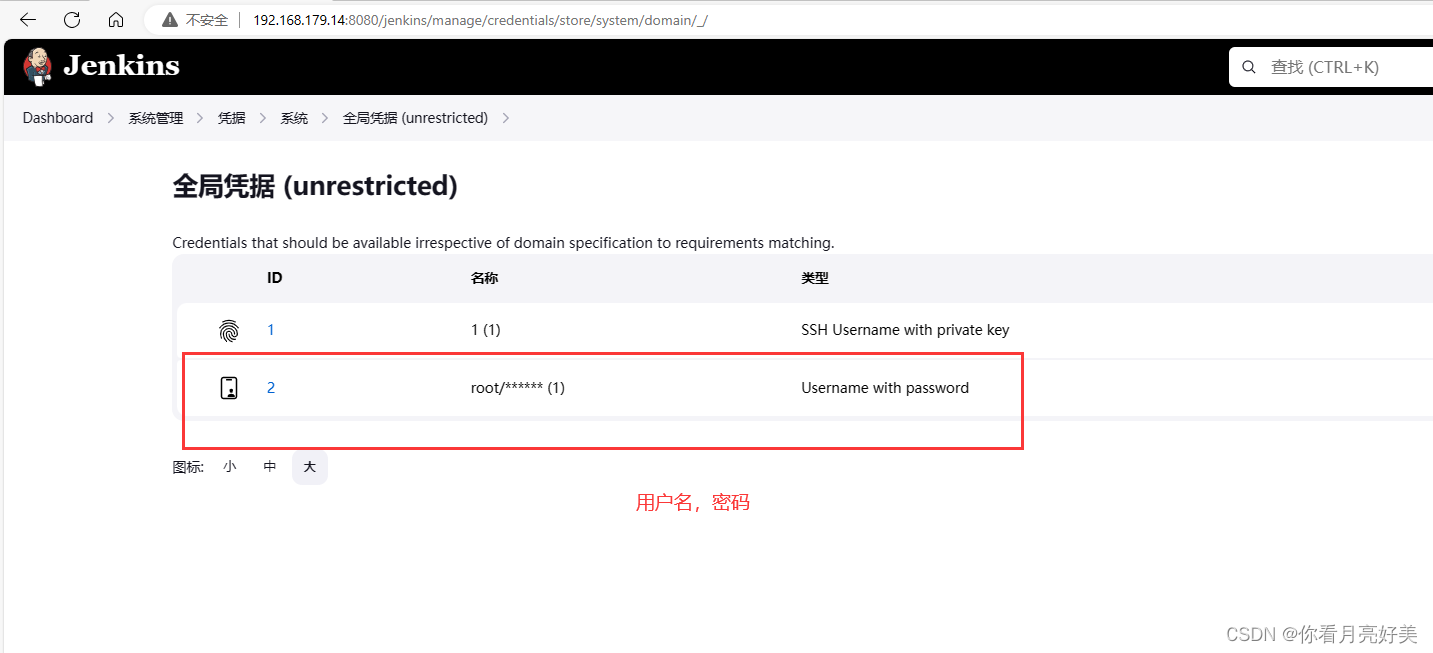
6.配置免密登录
配置jenkins主机可以从harbor主机拉取镜像,以及免密登录
//配置可以拉取harbor的镜像
[root@jenkins ~]# vi /etc/docker/daemon.json
[root@jenkins ~]# cat /etc/docker/daemon.json
{
    "insecure-registries": ["harbor.server"]
}
[root@jenkins ~]#


//配置免密登录,先生成密钥
[root@jenkins ~]# ssh-keygen -t rsa
generating public/private rsa key pair.
enter file in which to save the key (/root/.ssh/id_rsa):
created directory '/root/.ssh'.
enter passphrase (empty for no passphrase):
enter same passphrase again:
your identification has been saved in /root/.ssh/id_rsa.
your public key has been saved in /root/.ssh/id_rsa.pub.
the key fingerprint is:
sha256:lf23zkhvykbho41qccp7wvszwot1bf5eq5rwk80kbnw root@jenkins
the key's randomart image is:
+---[rsa 3072]----+
|      o..  .+.++.|
|     o o   .oboe.|
|    . o = + +*oo |
|     . @ x o o.  |
|      * s o b .  |
|       * . = .   |
|      .   .      |
|                 |
|                 |
+----[sha256]-----+

//发送密钥给gitlab、harbor、webs
[root@jenkins ~]# ssh-copy-id root@192.168.179.13
/usr/bin/ssh-copy-id: info: source of key(s) to be installed: "/root/.ssh/id_rsa.pub"
the authenticity of host '192.168.179.13 (192.168.179.13)' can't be established.
ecdsa key fingerprint is sha256:mapkiuhuhgpxh7gusx8rzomlghvoliiwcnxihncxt3q.
are you sure you want to continue connecting (yes/no/[fingerprint])? yes
/usr/bin/ssh-copy-id: info: attempting to log in with the new key(s), to filter out any that are already installed
/usr/bin/ssh-copy-id: info: 1 key(s) remain to be installed -- if you are prompted now it is to install the new keys
root@192.168.179.13's password:

number of key(s) added: 1

now try logging into the machine, with:   "ssh 'root@192.168.179.13'"
and check to make sure that only the key(s) you wanted were added.

[root@jenkins ~]#

[root@jenkins ~]# ssh-copy-id root@192.168.179.15
/usr/bin/ssh-copy-id: info: source of key(s) to be installed: "/root/.ssh/id_rsa.pub"
/usr/bin/ssh-copy-id: info: attempting to log in with the new key(s), to filter out any that are already installed
/usr/bin/ssh-copy-id: info: 1 key(s) remain to be installed -- if you are prompted now it is to install the new keys
root@192.168.179.15's password:

number of key(s) added: 1

now try logging into the machine, with:   "ssh 'root@192.168.179.15'"
and check to make sure that only the key(s) you wanted were added.

[root@jenkins ~]#

[root@jenkins ~]# ssh-copy-id root@192.168.179.10
/usr/bin/ssh-copy-id: info: source of key(s) to be installed: "/root/.ssh/id_rsa.pub"
the authenticity of host '192.168.179.10 (192.168.179.10)' can't be established.
ecdsa key fingerprint is sha256:+i67m51giqhkrkg7bhq2y6wsnmd0x1kky8gbhz/ib+m.
are you sure you want to continue connecting (yes/no/[fingerprint])? yes
/usr/bin/ssh-copy-id: info: attempting to log in with the new key(s), to filter out any that are already installed
/usr/bin/ssh-copy-id: info: 1 key(s) remain to be installed -- if you are prompted now it is to install the new keys
root@192.168.179.10's password:

number of key(s) added: 1

now try logging into the machine, with:   "ssh 'root@192.168.179.10'"
and check to make sure that only the key(s) you wanted were added.

添加jenkins.server访问webs凭据
[root@jenkins ~]# cat /root/.ssh/id_rsa
-----begin openssh private key-----
b3blbnnzac1rzxktdjeaaaaabg5vbmuaaaaebm9uzqaaaaaaaaabaaablwaaaadzc2gtcn
nhaaaaaweaaqaaayeanc8xhh90xejgr77j0aglhbtg33qso8shbubjllals6awev4wtuym
anvp/zpr3+foakshr+/zgi/+kqzewnjx9k4cofzxf4yj2ekygatoiqbehhve5ulv4ryu2u
7ezyep7ziertkja/nc7y7tkrkwlz2irhpf5osuzyp0sr331qeln85xmlcuxbqppprtipgc
bru9qoiglfyjmxvmrnbyl+yrjzcdycxutfr5dee5seejpz3iqtmv2vvuskmsb4gl8iwtvx
jmwamt5xn2j36d0b5dypggzrqumqoptdl8aze99r/0tznhj1fadhzx0miuxzwaq7qer6gk
lqxw5snzt/vvjq3pry5fzwofyo44tko8bjidpbq6n5p+okumy0tn3imjudzrta9blow08p
izsocs1ont6nmuhk0t83vm7cxmonkorawxwfcifsoets9aj++oevxiarxvfrhxdehdzxkq
nafczpc2k28zn0ojeslknhcmhfr+v9tlgewxt/nhaaafikn309ujd9pbaaaab3nzac1yc2
eaaagbaj3pf4yfdmxoxq++49abpyw7rt96kjveow1ayy5qc7ogfhl+me7spgdb6f2t0d/h
tgjeoufv2ycp/iqs3sdy1/suhdhc13+mo9nishmrtokarbx73ubpb+k2fnlo3mwbke2yhe
u5i2vzqu8u7zezmjwdik4t3+trlmcqdeq999ahc5/ovzjxfmw6jz6a7skrgga7vajoocxc
itmb5q5wwjfmk48wncgl1lra+qxhubhniac9yeltfdlb1lcprg+ijfcfrb145sajrevzdi
d+g9g+xwkyim60lpkdqu3zfgmxvfuf9e2tr49x2g4c8ddclswcgqu0bk+ojjuf1uup2bf1
byat6uwox2cdhcjuoe5kpasynt20ojeafqjlpstltdydi7nc67wvw5tsnpd4s0jgrntju+
p5rostlfn1zu3mzjjzkk2smvhxihbkhrbpwifvqbfvygkv730r8xxh3wczejwbqszwtitv
gz9do3rjsp4xjh30fr/bsxhmmu/zyqaaaambaaeaaagaalieobckkzm3djs0tloc/2wxug
d8vxe7fmbd6kpqibkhzotfzfqahp1o/49yfkdkxxijllvb/qcpr/6dq3g6jxjk47oof0nz
cyn4kjsv3zbaaq7o0k8iok22nca0sqoweuderxklummpjdoubu9kyf6z7uddeongvzhddj
5weyw3swqyrp0++z+9owvorujoco3zbberawu9pp9ls4lej57kvrcr/t+tksm1j0khpb9c
h6rmfajdw4o+9qub+tlbwrzom7k2byme66fvtqx3pu5vlfhzqyqvvzmv9iar861q6rtijm
5c9bf2i8eerlixrxz9btxul8cynfyzdkux0v5fgl8xtegf3m+nrzrsregilwxmarzmbl6w
uqlnswjgxdjp49avyt228rtgzchr1tkwalww+iwa983+3kswamzvodvdaiytuusxs17kyv
ttethcva3hon4h8viejickctheo0w7wgjoqz/nmmflewnbtawxjen1t/jphtmvijabaaaa
wcpcqo6twx/7/slokgym+eej47buscknsm01s5zqxgfb+5srhbwtycqwjhy0tnygffyk1a
ozu4mvparve4xzskh6mkqo2nuts+rcy0tjotj4oyas1hlm2kflydq1c8dz27fgmdlcubgr
3jzeywpd5faaozlov3szpv4bh6skgmxc+igj2wf2jc71ecfixae2fl6fg+m7+ikjdsrblo
acctgke9sfyxjxi3kqmsgyyejeqkc807o7qef8eonp0sh87waaameazkkcaaeu2/+u+n6z
xbwoqqxobuefvj1eziced1+djm7thvet1ruan51dafbbvibzqbgapbe5unmouvy8hxfcof
n2pyava0lxfivjcaxt5lmgstmcq7cphu+/24ihdeghorpa2mh8anjkoweb1nyqrxbd6obe
osrlhd9q1wafthjb9qbwg4xpuzggsut934ac2r6najyywzgik6dwe+++cf0fbmf2bdctbe
g82cvkeprkhj7aaygnu2y3oiorjqxbaaaawqdfzun4iv36gqww9xclhwgsf5tc1qw5zchj
47zmbt+f7zccr1/ydn3wj43ssvrodinchreagtmymwepwxbw/sevmhjv9zumcp3cpeui0w
uyuplt2mtwe3bmnudbvtahsle74cvksoy4y8qildyekolhi8jlk8jjbgoe5vd/tohf/n9z
zaubfr3rekjj7dfum0vgjqe2lu/t7znowaxy4guwagbffkyiwqqmyjv8zvy8pnye2x4yv8
zgf6lslzetnyeaaaatcm9vdebqzw5raw5zlxnlcnzlcg==
-----end openssh private key-----
[root@jenkins ~]#
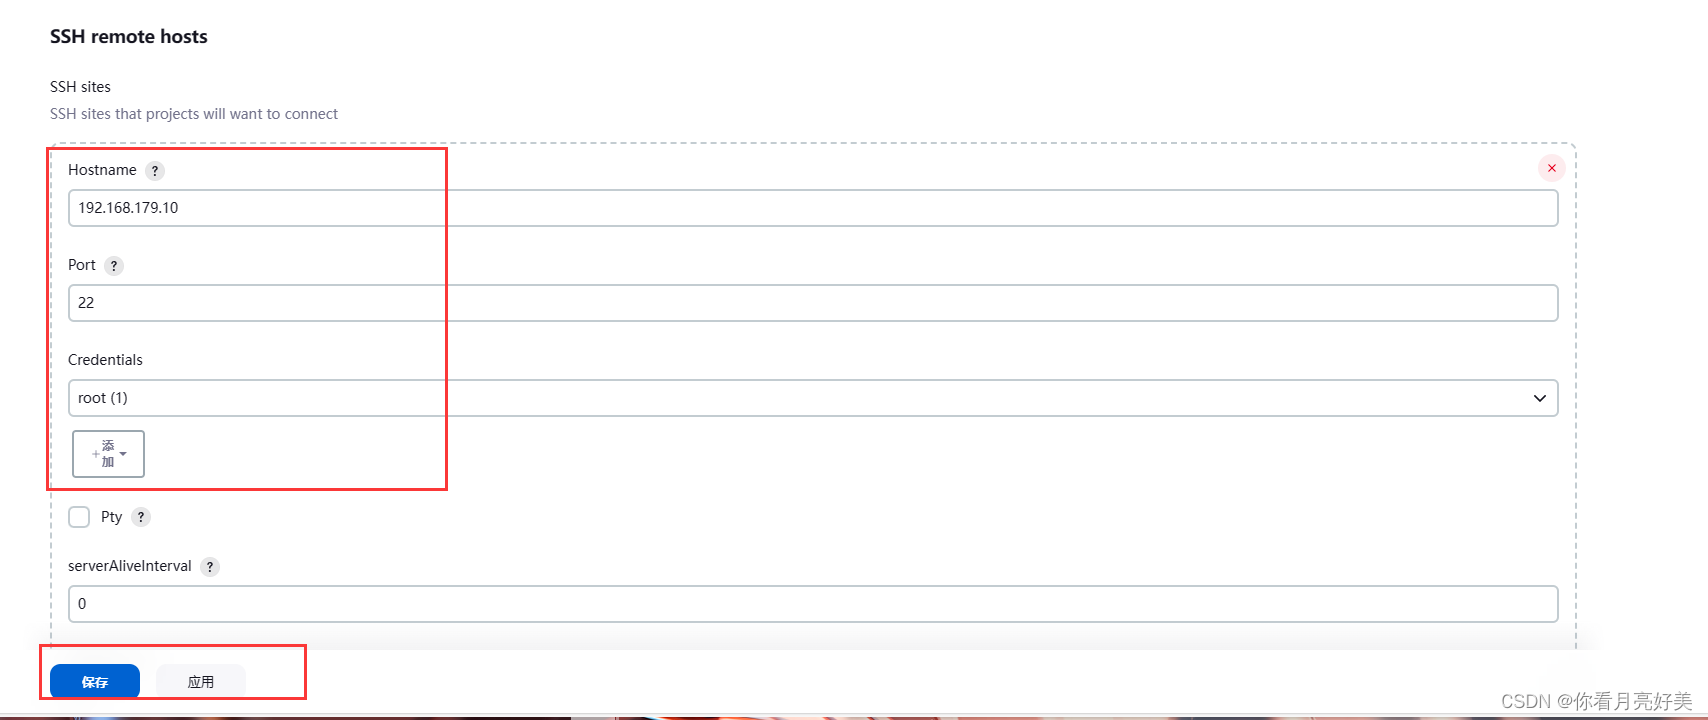
配置jenkins使用ssh连接webs主机
部署harbor.server主机
1.安装和配置harbor
//先安装docker,前面有教程

//安装docker-compose
[root@harbor ~]# curl -sl https://github.com/docker/compose/releases/download/v2.23.0/docker-compose-linux-x86_64 -o /usr/local/bin/docker-compose

[root@harbor ~]# chmod +x /usr/local/bin/docker-compose
[root@harbor ~]# ln -s /usr/local/bin/docker-compose /usr/bin/docker-compose

//安装harbor
[root@harbor ~]# wget https://github.com/goharbor/harbor/releases/download/v2.9.1/harbor-offline-installer-v2.9.1.tgz

[root@harbor ~]# tar -xf harbor-offline-installer-v2.9.1.tgz -c /usr/local/
[root@harbor ~]# cd /usr/local/harbor/
[root@harbor harbor]# ls
common.sh             harbor.yml.tmpl  license
harbor.v2.9.1.tar.gz  install.sh       prepare
[root@harbor harbor]#

//配置harbor
[root@harbor ~]# cd /usr/local/harbor/
[root@harbor harbor]# cp harbor.yml.tmpl harbor.yml
[root@harbor harbor]# yum -y install vim
[root@harbor harbor]# vim harbor.yml
(省略)
#修改这几行
hostname: harbor.server							//修改主机名
# https related config							//注释https
#https:											//注释https
  # https port for harbor, default is 443		//注释https
  # port: 443									//注释https
  # the path of cert and key files for nginx	//注释https
  # certificate: /your/certificate/path			//注释https
  # private_key: /your/private/key/path  		//注释https
harbor_admin_password: 123456					//修改密码
insecure: true									//开启不检查注册表
(省略)
[root@harbor harbor]# ./prepare
[root@harbor harbor]# ./install.sh
2.访问web页面
安装完毕
部署docker主机
1.安装docker服务
//安装docker,前面有教程
...

//配置连接harbor-server所有镜像仓库
[root@docker ~]# vim /etc/docker/daemon.json
[root@docker ~]# cat /etc/docker/daemon.json
{
    "insecure-registries": ["harbor.server"]
}
[root@docker ~]#
[root@docker ~]# systemctl daemon-reload
[root@docker ~]# systemctl restart docker.service
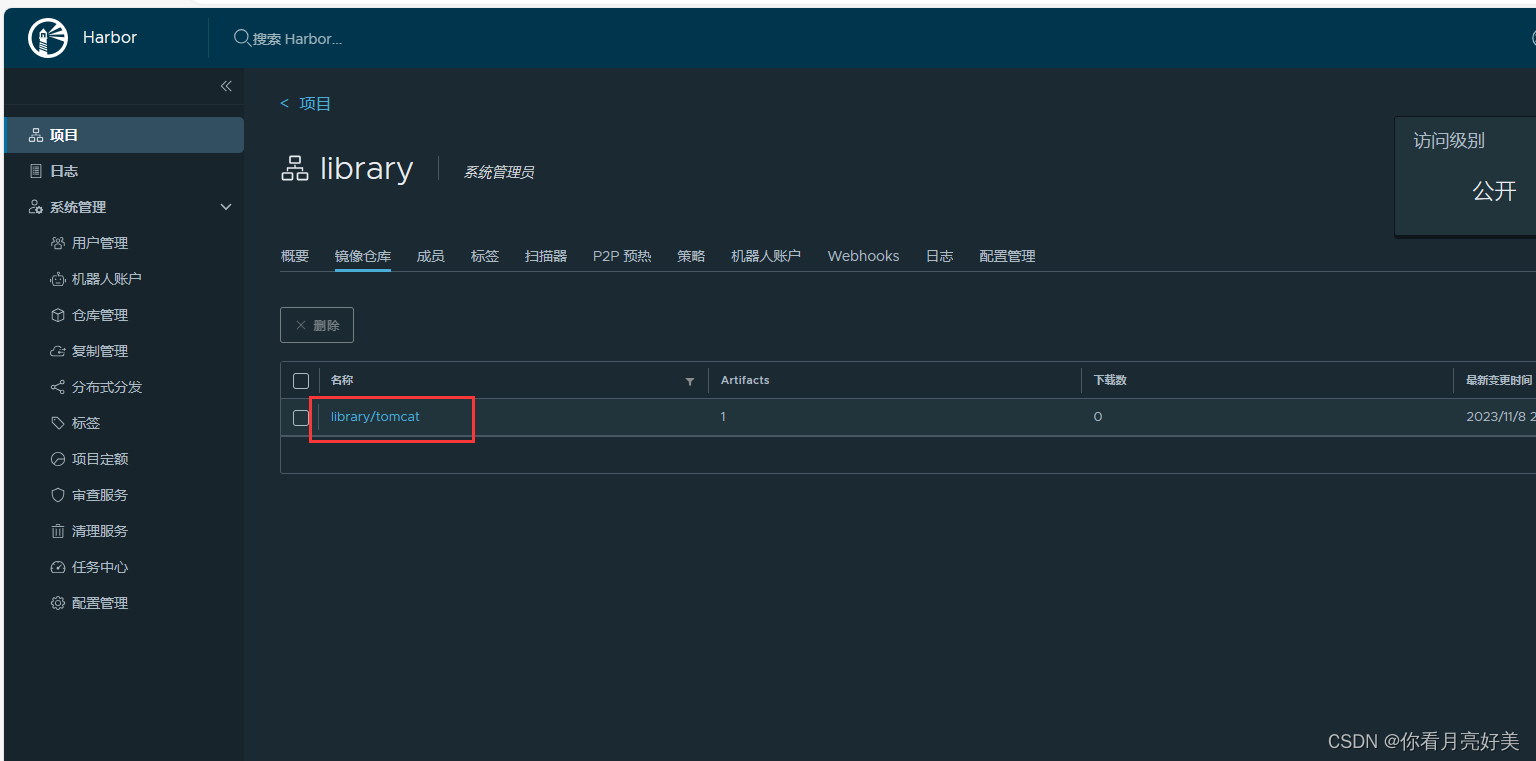
2.制作一个基础的tomcat镜像,并上传到私有镜像仓库
//制作tomcat镜像,并上传到harbor-server主机
[root@docker ~]# vim dockerfile
[root@docker ~]# cat dockerfile
from centos:8

run rm -rf /etc/yum.repos.d/* && \
    curl -o /etc/yum.repos.d/centos-base.repo https://mirrors.aliyun.com/repo/centos-vault-8.5.2111.repo && \
    sed -i -e '/mirrors.cloud.aliyuncs.com/d' -e '/mirrors.aliyuncs.com/d' /etc/yum.repos.d/centos-base.repo && \
    yum clean all && \
    yum makecache && \
    yum -y install java-1.8.0-openjdk java-1.8.0-openjdk-devel && \
    yum -y install wget && \
    wget https://archive.apache.org/dist/tomcat/tomcat-9/v9.0.79/bin/apache-tomcat-9.0.79.tar.gz && \
    tar -xf apache-tomcat-9.0.79.tar.gz && \
    mv apache-tomcat-9.0.79 /usr/local/tomcat && \
    /usr/local/tomcat/bin/startup.sh

cmd ["/usr/local/tomcat/bin/catalina.sh","run"]
[root@docker ~]# docker build -t harbor.server/library/tomcat:v1.0 .

[root@docker ~]# docker images
repository                     tag       image id       created          size
harbor.server/library/tomcat   v0.1      7d4846b6b9ea   19 seconds ago   539mb
[root@docker ~]#

//上传镜像到私有仓库harbor-server主机
//先登录
[root@docker ~]# docker login harbor.server
username: admin
password:

//上传到私有镜像仓库
[root@docker ~]# docker push harbor.server/library/tomcat:v1.0
部署webs主机
//安装docker,前面有教程

//配置连接私有镜像仓库
[root@webs ~]# vim /etc/docker/daemon.json
[root@webs ~]# cat /etc/docker/daemon.json
{
  "insecure-registries": ["harbor.server"]
}
[root@webs ~]#

//重启docker服务
[root@webs ~]# systemctl daemon-reload
[root@webs ~]# systemctl restart docker.service
企业业务代码项目发布流程
1.将代码上传到gitlab主机
这通常是代码开发人员的事情
如何在gitlab创建项目请阅读gitlab版本控制
//从公共代码仓库拉取需要的代码
[root@gitlab ~]# git clone 'https://gitee.com/forgotten/tomcat-java-demo.git'


//上传代码到本地代码仓库的操作
[root@gitlab ~]# git config --global user.name "root"
[root@gitlab ~]# git config --global user.email "12345678@qq.com"
[root@gitlab ~]# git clone http://192.168.179.13/root/wanf.git
[root@gitlab ~]# mv tomcat-java-demo/* wanf/
mv: overwrite 'wanf/readme.md'? y
[root@gitlab ~]# cd wanf/
[root@gitlab wanf]# ls
db  deploy.yaml  dockerfile  jenkinsfile  license  pom.xml  readme.md  src

[root@gitlab wanf]#
[root@gitlab wanf]# git add *
[root@gitlab wanf]# git commit -m "test"
[root@gitlab wanf]# git push --set-upstream origin
username for 'http://192.168.179.13': root
password for 'http://root@192.168.179.13':
enumerating objects: 849, done.
counting objects: 100% (849/849), done.
compressing objects: 100% (754/754), done.
writing objects: 100% (847/847), 649.86 kib | 7.30 mib/s, done.
total 847 (delta 228), reused 0 (delta 0), pack-reused 0
remote: resolving deltas: 100% (228/228), done.
to http://192.168.179.13/root/wanf.git
   3d32c31..58d6311  main -> main
branch 'main' set up to track remote branch 'main' from 'origin'.
[root@gitlab wanf]#
后期开发人员上传的新代码会自动更新在此
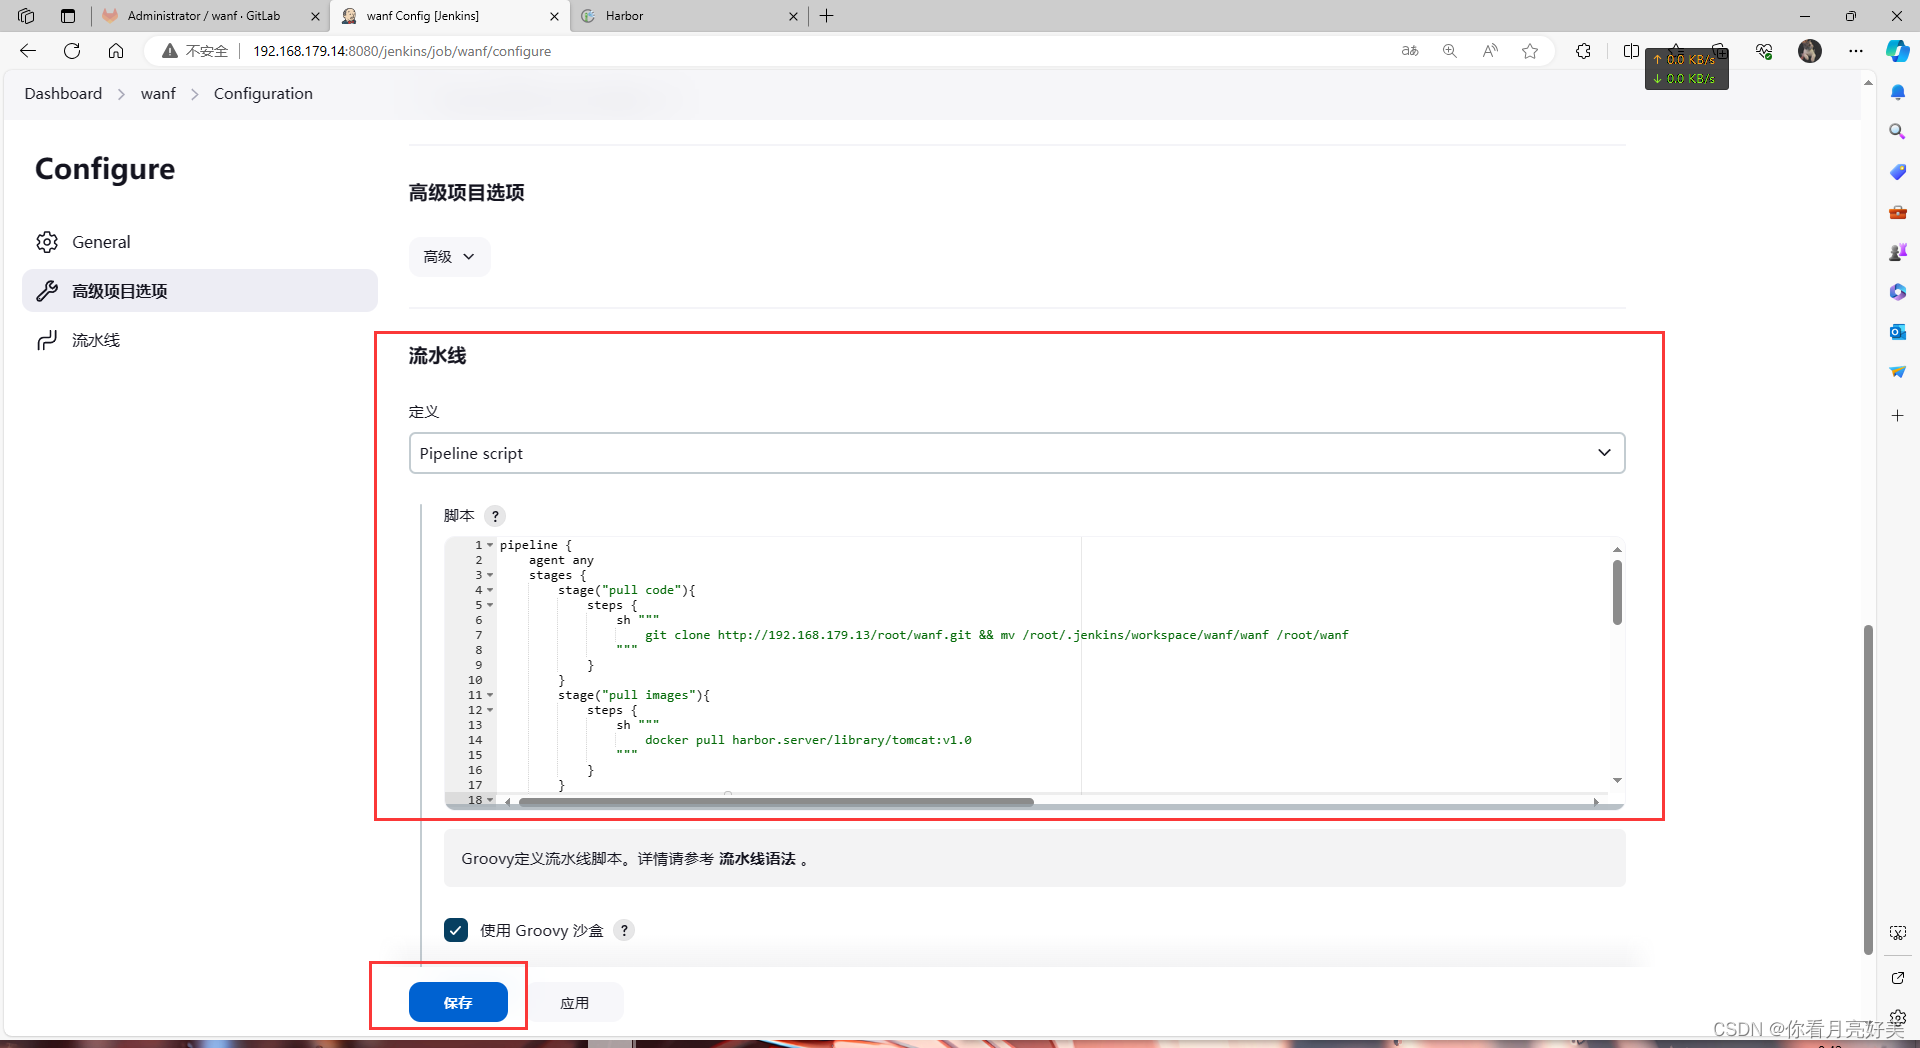
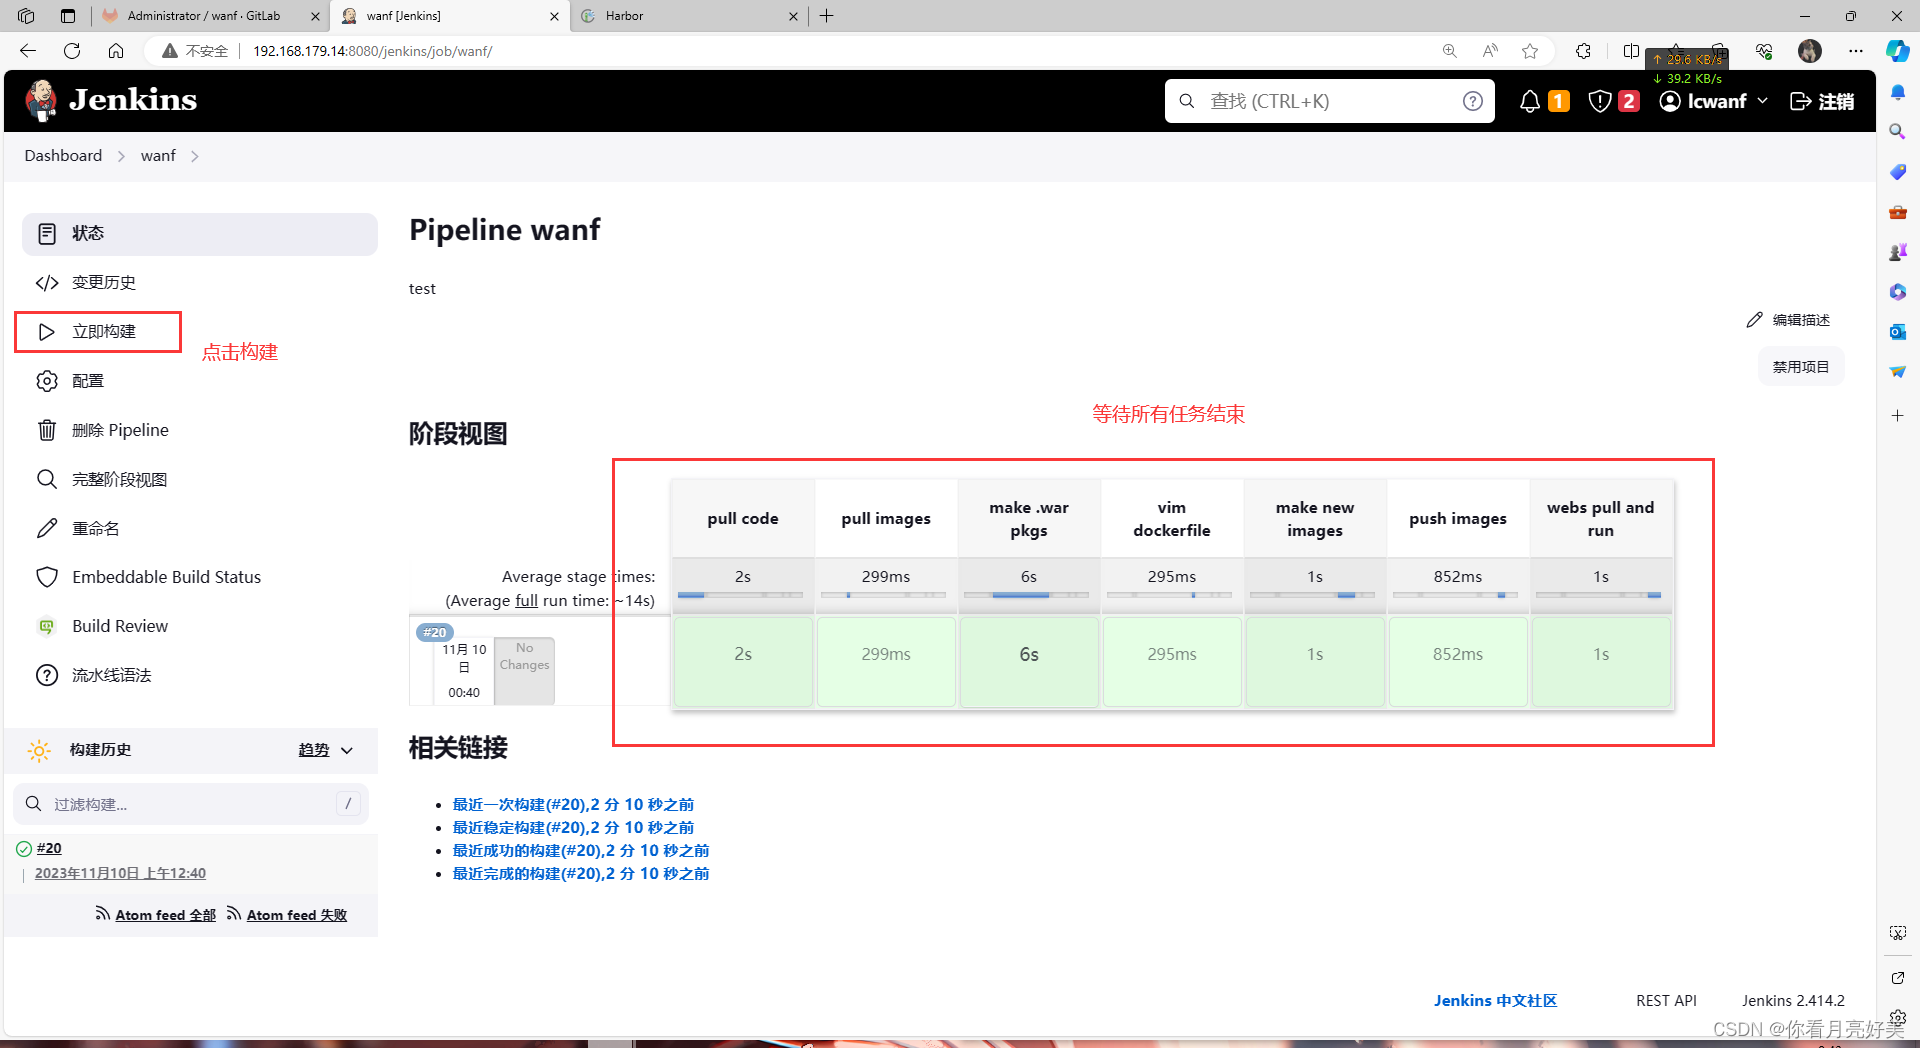
2.在jenkins创建项目,并写流水线脚本,运行项目
jenkins使用方法请阅读jenkins部署与应用
jenkins流水线脚本如下:
pipeline {
    agent any
    stages {
        stage("pull code"){
            steps {
                sh """
                    git clone http://192.168.179.13/root/wanf.git && mv /root/.jenkins/workspace/wanf/wanf /root/wanf
                """
            }
        }
        stage("pull images"){
            steps {
                sh """
                    docker pull harbor.server/library/tomcat:v1.0
                """
            }
        }
        stage("make .war pkgs"){
            steps {
                sh """
                    cd /root/wanf && mvn clean package -dmaven.test.skip=true && mv /root/wanf/target/ly-simple-tomcat-0.0.1-snapshot.war /root/test.war
                """
            }
        }
        stage("vim dockerfile"){
            steps {
                sh """
                    echo "from harbor.server/library/tomcat:v1.0" >> /root/dockerfile && echo "run rm -rf /usr/local/tomcat/webapps/root" >> /root/dockerfile && echo "copy ./test.war /usr/local/tomcat/webapps/root.war" >> /root/dockerfile && echo 'cmd ["/usr/local/tomcat/bin/catalina.sh","run"]' >> /root/dockerfile
                """
            }
        }
        stage("make new images"){
            steps {
                sh """
                    cd /root && docker build -t harbor.server/library/wanf:v0.1 .
                """
            }
        }
        stage("push images"){
            steps {
                sh """
                    docker login harbor.server -u admin -p 123456 && docker push harbor.server/library/wanf:v0.1
                """
            }
        }
        stage("webs pull and run"){
            steps {
                sh """
                    ssh webs "docker pull harbor.server/library/wanf:v0.1" && ssh webs "docker run -d --name test -p 80:8080 -it harbor.server/library/wanf:v0.1"
                """
            }
        }
    }
}
3.在webs服务器上测试
在浏览器访问webs服务器的ip地址

成功部署


发表评论