netty实现http服务
主要的变化是在初始化器中引入了新的编解码器
一些创建的类作用和netty helloworld的小demo一样我这里就不再次重复了
1、http服务端代码
public class httpserver {
    public static void main(string[] args) {

        // 创建reactor
        // 用来管理channel 监听事件 ,是无限循环的事件组(线程池)
        eventloopgroup bossloopgroup = new nioeventloopgroup();
        eventloopgroup workerloopgroup = new nioeventloopgroup();
        // 服务端的启动对象
        serverbootstrap serverbootstrap = new serverbootstrap();
        // 设置相关参数  这是一个链式编程
        serverbootstrap.group(bossloopgroup,workerloopgroup)
                // 声明通道类型
                .channel(nioserversocketchannel.class)
                // 设置处理器  我这里设置了netty提供的handler 处理器
                .handler(new logginghandler(loglevel.info))
                // 定义客户连接端处理器的使用
                // channelinitializer 通道处理化
                // 可以自定义通道初始化器,如实现编码解码器时
                .childhandler(new channelinitializer<socketchannel>() {
                    protected void initchannel(socketchannel ch) throws exception {
                        // 需要处理的是客户端通道
                        // 通道代表的是 连接的角色 管道代表的是 处理业务的逻辑管理
                        // 管道相当与一个链表, 将不同的处理器连接起来,管理的是处理器的顺序
                        ch.pipeline().addlast(new httpmyinitializer());

                    }
                });

        system.out.println("服务端初始化完成");

        // 启动需要设置端口  还需要设置是异步启动
        try {
            // 设置异步的future
            channelfuture future = serverbootstrap.bind(9988).sync();


            // 将关闭的通道也设置成异步的
            // 阻塞finally 中的代码
            future.channel().closefuture().sync();
        } catch (interruptedexception e) {
            e.printstacktrace();
        }finally {
            // 优雅关闭
            bossloopgroup.shutdowngracefully();
            workerloopgroup.shutdowngracefully();
        }
    }
}
1.1 http服务自定义初始化器
下面是需要了解的组件
请求和响应的编码解码器:
客户端
httpresponsedecoder 解码器,
处理服务端的响应(客户端)
httprequestencoder 编码器,
处理服务端的请求(客户端)
服务端
httprequestdecoder 解码器,
处理客户端的请求(服务端)
httpresponseencoder 编码器,
处理客户端的响应(服务端)
由于上面的编码解码器都比较绕,所以还有两个组合的类提供
httpclientcodec :
编码解码器,用于客户端 httpresponsedecoder + httprequestencoder
httpservercodec:
编码解码器,用于服务端 httprequestdecoder + httpresponseencoder
聚合
由于http的请求和响应,可能由很多部分组成,需要聚合成一个完整的消息
httpobjectaggregator -> fullhttprequest / fullhttpresponse
压缩
由于网络上有些情况文件或者图片需要压缩,所以需要压缩处理器
httpcontentcompressor 压缩,用于服务端
httpcontentdecompressor 解压缩,用于客户端
public class httpmyinitializer extends channelinitializer<channel> {
    @override
    protected void initchannel(channel ch) throws exception {
        channelpipeline pipeline = ch.pipeline();
        // 先解码后编码
//        pipeline.addlast("decoder",new httprequestdecoder());
//        pipeline.addlast("encoder",new httpresponseencoder());
        // 相当于上面两行
        pipeline.addlast("codec",new httpservercodec());
        // 压缩数据
        pipeline.addlast("compressor",new httpcontentcompressor());
        // 聚合成完整的消息  参数代表处理的最大值
        pipeline.addlast("aggregator",new httpobjectaggregator(512 * 1024));

        // 添加处理器
        pipeline.addlast(new myhttphandler());

    }
}
1.2 http服务自定义处理器
/**
 * 泛型需要定义为 fullhttprequest
 *
 */
public class myhttphandler extends simplechannelinboundhandler<fullhttprequest> {
    /**
     *
     * @param ctx 通道处理器上下文
     * @param msg 接收客户端数据消息
     * @throws exception
     */
    @override
    protected void channelread0(channelhandlercontext ctx, fullhttprequest msg) throws exception {
        // 设定 版本 、响应码、响应的数据(bytebuf) 等
        defaultfullhttpresponse response =new defaultfullhttpresponse(
                httpversion.http_1_1, httpresponsestatus.ok, unpooled.wrappedbuffer("http hello netty demo ".getbytes()));
        // 还需要设置响应头 httpheaders 来接收
        // 设置字段名 使用httpheadernames ,字段值使用httpheadervalues
        httpheaders headers = response.headers();
        //content/type ;text/plain
        headers.add(httpheadernames.content_type,httpheadervalues.text_plain+"charset=utf-8");
        // 设置包的大小时, 调用 readablebytes方法
        headers.add(httpheadernames.content_length,response.content().readablebytes());

        // 将response 写入通道  这里不用writeandflush方法, 而是在channelreadcomplete读完成的方法内来刷新通道
        ctx.write(response);


    }

    /**
     *  用来刷新channelread0 写入通道里面的response 数据
     * @param ctx
     * @throws exception
     */
    @override
    public void channelreadcomplete(channelhandlercontext ctx) throws exception {
        ctx.flush();
    }
}
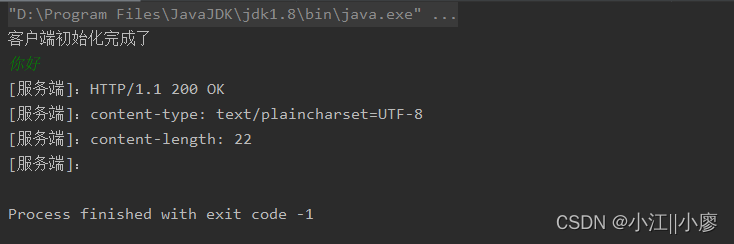
1.3 http服务最后展示结果
启动服务端、客户端我展示代码,可以随便启动一个我之前的客户端记得改端口9988就行
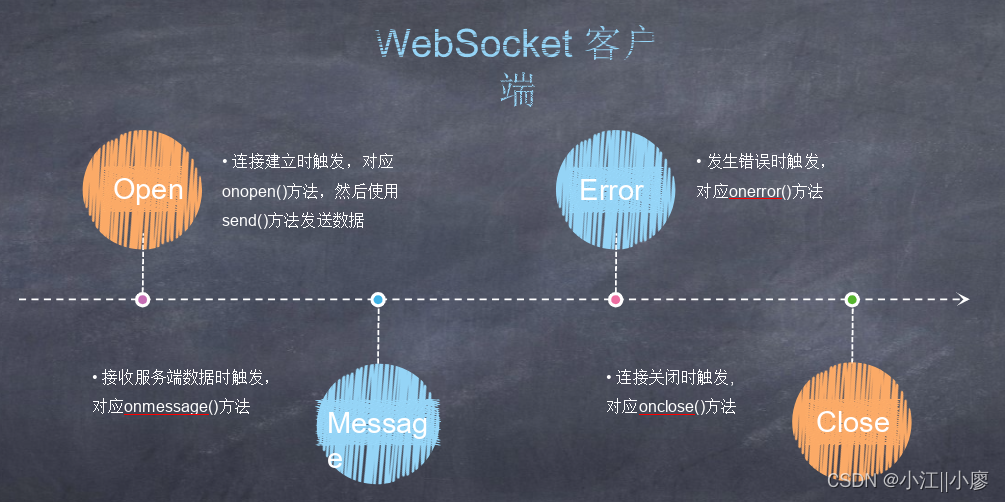
netty实现websocket服务
http协议的缺陷: 通信只能由客户端发起。需要一种服务端能够主动推送的能力—websocket。这种双向通信的能力,也叫“全双工”。
协议标识符: http://127.0.0.1/ -> ws://127.0.0.1/
通信的最小单位是帧frame。
2、websocket服务服务端代码
public class websocketserver {
    public static void main(string[] args) {
        // 创建reactor
        // 用来管理channel 监听事件 ,是无限循环的事件组(线程池)
        eventloopgroup bossloopgroup = new nioeventloopgroup();
        eventloopgroup workerloopgroup = new nioeventloopgroup();
        // 服务端的启动对象
        serverbootstrap serverbootstrap = new serverbootstrap();
        // 设置相关参数  这是一个链式编程
        serverbootstrap.group(bossloopgroup,workerloopgroup)
                // 声明通道类型
                .channel(nioserversocketchannel.class)
                // 设置处理器  我这里设置了netty提供的handler 处理器
                .handler(new logginghandler(loglevel.info))
                // 定义客户连接端处理器的使用
                // channelinitializer 通道处理化
                // 可以自定义通道初始化器,如实现编码解码器时
                .childhandler(new websocketinitializer());

        system.out.println("服务端初始化完成");

        // 启动需要设置端口  还需要设置是异步启动
        try {
            // 设置异步的future
            channelfuture future = serverbootstrap.bind(7777).sync();


            // 将关闭的通道也设置成异步的
            // 阻塞finally 中的代码
            future.channel().closefuture().sync();
        } catch (interruptedexception e) {
            e.printstacktrace();
        }finally {
            // 优雅关闭
            bossloopgroup.shutdowngracefully();
            workerloopgroup.shutdowngracefully();
        }


    }
}
2.1 websocket服务自定义初始化器
public class websocketinitializer extends channelinitializer<socketchannel> {
    /**
     *
     * @param ch
     * @throws exception
     */
    @override
    protected void initchannel(socketchannel ch) throws exception {
        channelpipeline pipeline = ch.pipeline();
        // 设置编码解码器
        pipeline.addlast(new httpservercodec());
        // 用于处理较大的数据
        pipeline.addlast(new chunkedwritehandler());
        // 设置聚合器
        pipeline.addlast(new httpobjectaggregator(512 * 1024));
        // 声明请求路径 ws://127.0.0.1:7777/hello
        pipeline.addlast(new websocketserverprotocolhandler("/hello"));

        // 自定义处理器
        pipeline.addlast(new websockethandler());

    }
}
2.2 websocket服务自定义处理器
/**
 *  本次业务处理的数据是文本, websocket通信是通过帧来传输
 *  所以泛型为 textwebsocketframe
 */
public class websockethandler extends simplechannelinboundhandler<textwebsocketframe> {
    // 当多个通道传入handler , 使用通道组的管理方法
    // globaleventexecutor 全局事件执行器
    //instance 代表的是单例
    private  static channelgroup channelgroup = new defaultchannelgroup(globaleventexecutor.instance);


    /**
     *
     * @param ctx 通道处理器上下文
     * @param msg 文本消息帧
     * @throws exception
     */
    @override
    protected void channelread0(channelhandlercontext ctx, textwebsocketframe msg) throws exception {
        // 浏览器返回的信息帧
        system.out.println("msg:"+msg.text());
        channel channel = ctx.channel();
        // 需要响应会浏览器的信息, 需要是textwebsocketframe 类型

        textwebsocketframe websocketframe = new textwebsocketframe(ctx.channel().remoteaddress()+"客户端:"+msg.text()+"\r\n");
        channel.writeandflush(websocketframe);

    }


    /**
     *  连接成功, 此时通道是活跃的时候触发
     * @param ctx
     * @throws exception
     */
    @override
    public void channelactive(channelhandlercontext ctx) throws exception {
        localdate today = localdate.now();
        string datestr = today.tostring(); // 默认格式为 "yyyy-mm-dd"
        ctx.writeandflush("welcome to server-- now :"+datestr+"\r\n");
    }

    /**
     *  通道不活跃 ,用于处理用户下线的逻辑
     * @param ctx
     * @throws exception
     */
    @override
    public void channelinactive(channelhandlercontext ctx) throws exception {
        system.out.println(ctx.channel().remoteaddress()+"下线了\r\n");
    }

    /**
     *
     * @param ctx 通道处理器上下文
     * @throws exception
     * 连接刚刚建立时 ,第一个被执行的方法,
     */
    @override
    public void handleradded(channelhandlercontext ctx) throws exception {

        system.out.println("[服务端地址]:"+ctx.channel().remoteaddress()+"连接成功\r\n");
        // 添加到通道组中管理
        channelgroup.add(ctx.channel());
    }

    /**
     *
     * @param ctx  通道处理器上下文
     * @throws exception
     * 当连接断开 最后执行的方法
     * 连接断开时 , channel 会自动从 通道组中移除
     */
    @override
    public void handlerremoved(channelhandlercontext ctx) throws exception {
        system.out.println("[服务端地址]:"+ctx.channel().remoteaddress()+"断开连接\r\n");
    }

    /**
     *  通用异常处理类
     * @param ctx 通道处理器上下文
     * @param cause
     * @throws exception
     */
    @override
    public void exceptioncaught(channelhandlercontext ctx, throwable cause) throws exception {
        // 关闭
        ctx.close();
    }
}
2.3 websocket服务前端界面
<!doctype html>
<html lang="en">
<head>
    <meta charset="utf-8">
    <title>hello websocket</title>
</head>
<body>

<script>
    var socket;
    // 判断当前浏览器是否支持websockt
    if (!window.websocket) {
        alert("不支持websocket")
    } else {
        socket = new websocket("ws://127.0.0.1:7777/hello");
        // 设置开启连接的方法
        socket.onopen = function (ev) {
            var tmp = document.getelementbyid("resptext");
            tmp.value = "连接已开启";
        }
        // 设置关闭连接的方法
        socket.onclose = function (ev) {
            var tmp = document.getelementbyid("resptext");
            tmp.value = tmp.value + "\n" + "连接已关闭";
        }
        // 设置接收数据的方法
        socket.onmessage = function (ev) {
            var tmp = document.getelementbyid("resptext");
            tmp.value = tmp.value + "\n" + ev.data;
        }

    }

    function send(message) {
        // 先判断socket是否已经创建
        if (!window.socket) {
            return
        }

        // 判断socket的状态
        //   connecting  正在连接    closing  正在关闭
        //   closed  已经关闭或打开连接失败
        //   open  连接成功 可以正常通信
        if (socket.readystate == websocket.open) {
            socket.send(message);
        } else {
            alert("连接未开启");
        }
    }
</script>

<!--防止表单自动提交-->
<form onsubmit="return false">
    <textarea name="message" style="height: 400px;width: 400px"></textarea>
    <input type="button" value="发送" onclick="send(this.form.message.value)">
    <textarea id="resptext" style="height: 400px;width: 400px"></textarea>
</form>


</body>
</html>
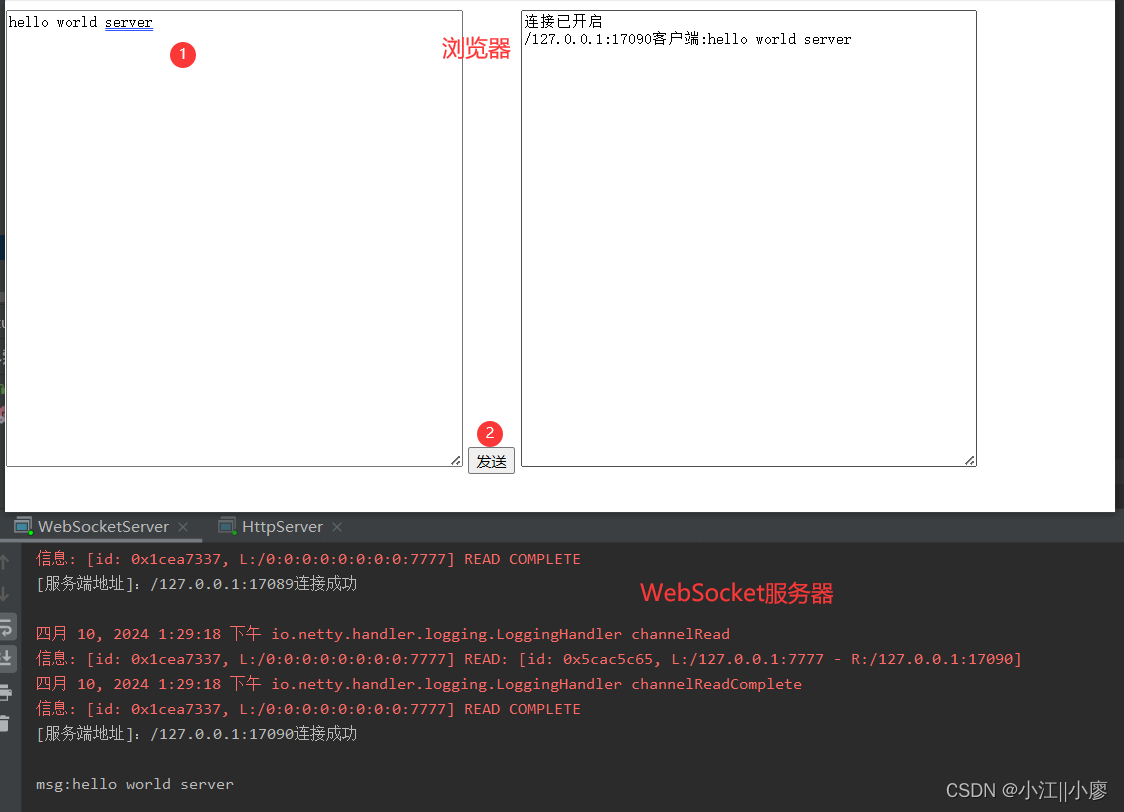
2.3 websocket结果展示
启动websocke服务器,运行前端代码如下如所示:


发表评论