在spring boot中使用rabbitmq涉及多个步骤,包括配置、创建监听器和发送消息。以下是详细的使用指南:
1. 添加依赖
需要在项目的pom.xml 文件中添加spring-boot-starter-amqp依赖:
<dependency>
<groupid>org.springframework.boot </groupid>
<artifactid>spring-boot-starter-amqp</artifactid>
</dependency>
这将触发自动配置。
2. 配置文件
在application.properties 或application.yml 文件中配置rabbitmq的相关参数,例如主机地址、端口、用户名和密码等:
spring.rabbitmq.host =your_rabbitmq_host
spring.rabbitmq.port =5671
spring.rabbitmq.username =your_username
spring.rabbitmq.password =your_password
这些配置项可以通过外部属性来设置,便于管理和维护。
3. 创建监听器
使用@enablerabbit注解启用rabbitmq支持,并通过@rabbitlistener注解定义消息监听器。例如,创建一个监听名为“somequeue”的队列的消息的监听器:
import org.springframework.stereotype.component ;
import org.springframework.web.bind.annotation.exceptionhandler ;
import org.springframework.web.bind.annotation.responsebody ;
import org.springframework.web.bind.annotation.restcontroller ;
import org.springframework.amqp.core.message ;
import org.springframework.amqp.rabbit.annotation.rabbitlistener ;
import org.springframework.stereotype.component ;
@component
public class rabbitmqlistener {
@rabbitlistener(queues = "somequeue")
public void listen(string message, message amqpmessage) {
system.out.println ("received message: " + message);
}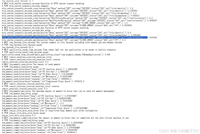
}这里使用了spring提供的工厂类如simplerabbitlistenercontainerfactory来实现自动配置。
4. 发送消息
使用rabbittemplate或rabbitmessagingtemplate来发送消息。例如,使用rabbittemplate发送一条简单消息:
import org.springframework.beans.factory.annotation.autowired ;
import org.springframework.stereotype.service ;
import org.springframework.amqp.core.message ;
import org.springframework.amqp.core.messageproperties ;
import org.springframework.amqp.rabbit.core.rabbittemplate ;
import org.springframework.stereotype.service ;
@service
public class rabbitmqservice {
@autowired
private rabbittemplate rabbittemplate;
public void send消息(string exchange, string routingkey, string message) {
rabbittemplate.convertandsend (exchange, routingkey, message);
}
}
该方法会根据指定的交换机(exchange)和路由键(routingkey)将消息发送到相应的队列。
5. 自定义连接工厂
如果需要更细粒度的控制,可以自定义连接工厂(connectionfactory)。例如,通过cachingconnectionfactory来缓存连接信息:
import org.springframework.context.annotation.bean ;
import org.springframework.context.annotation.configuration ;
import org.springframework.amqpconnectionfactory ;
import org.springframework.amqp.core  amqptemplate;
@configuration
public class rabbitmqconfig {
@bean
public amqptemplate rabbittemplate() {
cachingconnectionfactory connectionfactory = new cachingconnectionfactory();
connectionfactory.sethost ("your_rabbitmq_host");
connectionfactory.setport (5671);
connectionfactory.setusername ("your_username");
connectionfactory.setpassword ("your_password");
return new amqptemplate(connectionfactory);
}
}
这样可以确保每次请求都使用同一个连接实例,提高性能。
6. 其他高级功能
重试机制:可以在rabbittemplate中启用重试功能,以应对网络异常等情况:
spring.rabbitmq.template.retry.enabled =true
这样在发生异常时,系统会自动重试发送消息。
队列声明:在某些情况下,可能需要手动声明队列:
  @bean
  public queue queue() {
return new queue("myqueue", true);
  }
这样可以确保队列在应用程序启动时已经存在。
通过以上步骤,你可以在spring boot项目中成功集成并使用rabbitmq进行消息传递。这不仅提高了系统的解耦能力,还增强了消息处理的灵活性和可靠性。
到此这篇关于rabbitmq在spring boot中的使用的文章就介绍到这了,更多相关spring boot使用rabbitmq内容请搜索代码网以前的文章或继续浏览下面的相关文章希望大家以后多多支持代码网!

发表评论