1. 简介
yolov8 是一种用于目标检测的深度学习模型,它是 yolo(you only look once)系列的最新版本之一。yolo 系列因其高效和准确性而在计算机视觉领域非常受欢迎,特别是在需要实时目标检测的应用中,如视频监控、自动驾驶汽车、机器人视觉等。
以下是 yolov8 的一些关键特点:
- 实时性能:yolov8 旨在提供实时目标检测,即使在资源受限的设备上也能快速运行。
- 准确性:yolov8 在多个标准数据集上展示了其准确性,能够检测图像中的多种对象。
- 单阶段检测器:与多阶段检测器相比,yolov8 采用单阶段检测方法,这意味着它在网络的前向传播过程中只需一次即可完成检测任务。
- 端到端对象识别:yolov8 能够同时预测边界框、对象类别和每个框的置信度。
- 泛化能力:yolov8 在不同大小和形状的对象上都表现出良好的泛化能力。
- 易于部署:yolov8 支持转换为不同的格式,如 tensorflow lite,使得它可以轻松部署在移动设备和嵌入式系统中。
- 自定义训练:yolov8 允许用户使用自己的数据集进行自定义训练,以适应特定的检测任务。
2.模型转换
2.1 tflite模型
tensorflow lite (tflite) 是一种用于移动和嵌入式设备上的机器学习模型的格式。它允许开发者将训练好的 tensorflow 模型转换为一个更小、更快、更高效的格式,以便于在资源受限的环境中运行,比如智能手机和微控制器。
- 模型优化:tensorflow lite 支持将模型量化,以减少模型的大小和提高运行效率。
- 跨平台:tflite 模型可以在多种设备上运行,包括 android、ios 和一些嵌入式设备。
- 实时性能:由于模型体积小,加载快,非常适合需要实时响应的应用,如图像识别、语音识别等。
- 转换过程:tensorflow 提供了工具来将 tensorflow 模型(例如 savedmodel 或 hdf5)转换为 tflite 格式。
- 硬件加速:tflite 支持一些硬件加速器,如 gpu、edge tpu,可以进一步提高运行速度。
- 使用 tensorflow lite interpreter:在应用中,通常使用 tensorflow lite interpreter 来加载和运行 tflite 模型。
- 兼容性:tflite 模型与 tensorflow.js 类似,但专为不同的运行环境设计。tflite 适用于移动和嵌入式设备,而 tensorflow.js 适用于浏览器和 node.js 环境。
- 部署:在 android 或 ios 应用中,tflite 模型可以作为资源文件被打包和部署。
- 更新和维护:tflite 模型可以像其他资源一样被更新,无需重新构建整个应用。
2.2 pytorch 格式转换为 tflite 格式
yolov8 是以 pytorch 格式构建的。将其转换为 tflite,以便在 android 上使用。
安装 ultralytics 框架
使用 pip 安装 ultralytics 框架,该框架包含了 yolov8:
conda create -n yolov8 python=3.8
activate ylolv8
pip install ultralytics
转换模型为 tflite 格式
使用 ultralytics 框架提供的 yolo 类来加载 pytorch 格式的 yolov8 模型,并导出为 tflite 格式:
  from ultralytics import yolo
  model = yolo('yolov8s.pt')  # 这里 'yolov8s.pt' 是模型权重文件
  model.export(format="tflite")
这将生成一个 tflite 文件,例如 yolov8s_saved_model/yolov8s_float16.tflite。
处理转换过程中的错误
如果在转换过程中遇到错误,特别是与 tensorflow 版本相关的问题,需要安装一个特定版本的 tensorflow 来解决兼容性问题:
pip install tensorflow==2.13.0
3.创建项目
3.1 创建项目
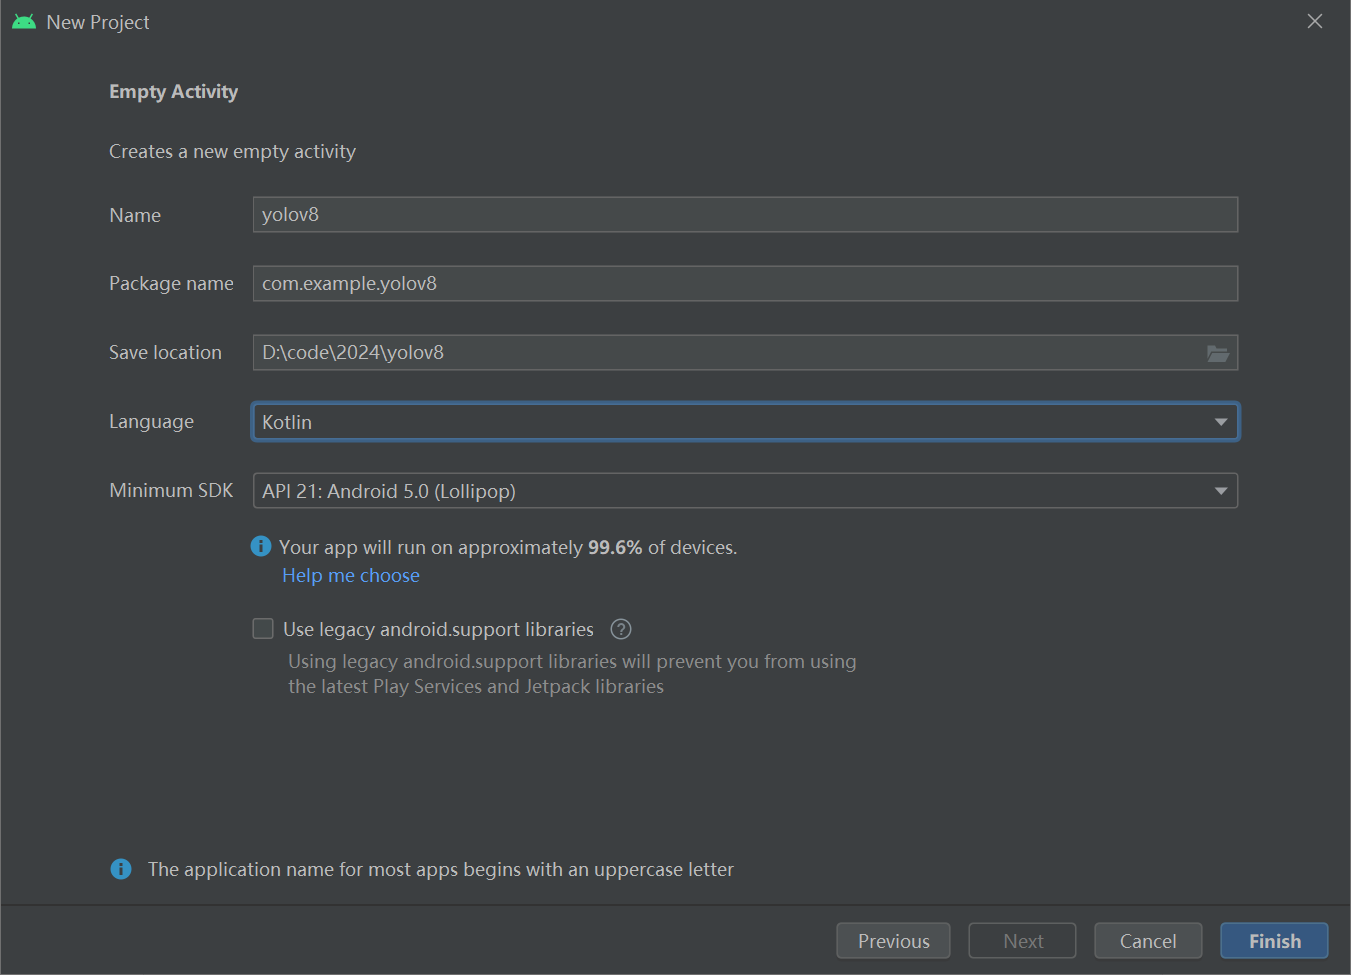
创建一个安卓项目,语言选择kotlin,如下图所示:
然后在 android studio 项目的 app 目录中创建一个 assets 目录(文件 → 新建 → 文件夹 → 资产文件夹),并将 tflite 文件(例如 yolov8s_float32.tflite)和 labels.txt 添加进去。labels.txt其中描述了 yolov8 模型的类别名称。
- 打开 android studio 项目。
- 在项目浏览器中,定位到
app目录。 - 右键点击
app目录,选择new>folder>asset folder。 - 输入文件夹名称
assets并确认创建。 - 打开新创建的
assets文件夹。 - 通过复制和粘贴的方式,将
yolov8s_float32.tflite文件和labels.txt文件添加到此文件夹中。
3.2 添加依赖
将以下内容添加到 app/build.gradle.kts 中的依赖项以安装 tflite 框架。
implementation("org.tensorflow:tensorflow-lite:2.14.0")
implementation("org.tensorflow:tensorflow-lite-support:0.4.4")
导入所需的模块
import org.tensorflow.lite.datatype
import org.tensorflow.lite.interpreter
import org.tensorflow.lite.gpu.compatibilitylist
import org.tensorflow.lite.gpu.gpudelegate
import org.tensorflow.lite.support.common.fileutil
import org.tensorflow.lite.support.common.ops.castop
import org.tensorflow.lite.support.common.ops.normalizeop
import org.tensorflow.lite.support.image.imageprocessor
import org.tensorflow.lite.support.image.tensorimage
import org.tensorflow.lite.support.tensorbuffer.tensorbuffer
import java.io.bufferedreader
import java.io.ioexception
import java.io.inputstream
import java.io.inputstreamreader
3.3 初始化模型
private val modelpath = "yolov8s_float32.tflite"
private val labelpath = "labels.txt"
private var interpreter: interpreter? = null
private var tensorwidth = 0
private var tensorheight = 0
private var numchannel = 0
private var numelements = 0
private var labels = mutablelistof<string>()
private val imageprocessor = imageprocessor.builder()
    .add(normalizeop(input_mean, input_standard_deviation))
    .add(castop(input_image_type))
    .build() // preprocess input
companion object {
    private const val input_mean = 0f
    private const val input_standard_deviation = 255f
    private val input_image_type = datatype.float32
    private val output_image_type = datatype.float32
    private const val confidence_threshold = 0.3f
    private const val iou_threshold = 0.5f
}
初始化 tflite 模型。获取模型文件并将其传递给 tflite 的 interpreter。选择推理使用的线程数。
val model = fileutil.loadmappedfile(context, modelpath)
val options = interpreter.options()
options.numthreads = 4
interpreter = interpreter(model, options)
从 interpreter 获取 yolov8s 输入和输层:
val inputshape = interpreter.getinputtensor(0).shape()
val outputshape = interpreter.getoutputtensor(0).shape()

tensorwidth = inputshape[1]
tensorheight = inputshape[2]
numchannel = outputshape[1]
numelements = outputshape[2]
3.4 从 label.txt 文件中读取类名称
try {
    val inputstream: inputstream = context.assets.open(labelpath)
    val reader = bufferedreader(inputstreamreader(inputstream))
    var line: string? = reader.readline()
    while (line != null && line != "") {
        labels.add(line)
        line = reader.readline()
    }
    reader.close()
    inputstream.close()
} catch (e: ioexception) {
    e.printstacktrace()
}
3.5 对图像进行推理
在 android 应用中,输入是位图(bitmap),需要根据模型的输入格式进行预处理:
- 调整图片大小:将位图调整为模型所需的输入尺寸。yolov8 模型通常有固定的输入尺寸,例如 416x416 或 608x608。
- 转换为张量:将调整大小后的位图转换为一个多维数组(张量),这是模型可以处理的格式。
- 归一化像素值:将像素值从 0 到 255 归一化到 0 到 1 范围内。这通常通过将每个像素值除以 255 来实现。
- 转换为模型的输入类型:根据模型的需要,将张量转换为特定的数据类型(如 float 或 uint8)。
- 输入到 interpreter:将预处理后的张量作为输入传递给 tensorflow lite interpreter 进行推理。
import android.graphics.bitmap;
import android.graphics.imageformat;
import org.tensorflow.lite.interpreter;
import java.nio.bytebuffer;
import java.nio.byteorder;
import java.nio.channels.writablebytechannel;

// 假设 tflite 已经初始化,且 bitmap 是您要处理的位图
bitmap bitmap

val resizedbitmap = bitmap.createscaledbitmap(bitmap, tensorwidth, tensorheight, false)
val tensorimage = tensorimage(datatype.float32)
tensorimage.load(resizedbitmap)
val processedimage = imageprocessor.process(tensorimage)
val imagebuffer = processedimage.buffer
创建一个与模型输出层匹配的输出张量缓冲区,并将其与上面的输入 imagebuffer 一起传递给解释器以执行。
val output = tensorbuffer.createfixedsize(intarrayof(1 , numchannel, numelements), output_image_type)
interpreter.run(imagebuffer, output.buffer)
3.6 处理输出
输出框被视为 boudingbox 类。这是一个具有类别、框和置信度级别的类。其中x1,y1 是起始点。x2, y2 是终点,cx, cy 是中心。w 宽度,h 是高度。
data class boundingbox(
    val x1: float,
    val y1: float,
    val x2: float,
    val y2: float,
    val cx: float,
    val cy: float,
    val w: float,
    val h: float,
    val cnf: float,
    val cls: int,
    val clsname: string
)
提取置信度高于置信度阈值的框,在重叠的框中,留下置信度最高的框。(nms)
private fun bestbox(array: floatarray) : list<boundingbox>? {
    val boundingboxes = mutablelistof<boundingbox>()
    for (c in 0 until numelements) {
        var maxconf = -1.0f        var maxidx = -1        var j = 4        var arrayidx = c + numelements * j
        while (j < numchannel){
            if (array[arrayidx] > maxconf) {
                maxconf = array[arrayidx]
                maxidx = j - 4
            }
            j++
            arrayidx += numelements
        }
        if (maxconf > confidence_threshold) {
            val clsname = labels[maxidx]
            val cx = array[c] // 0            val cy = array[c + numelements] // 1            val w = array[c + numelements * 2]
            val h = array[c + numelements * 3]
            val x1 = cx - (w/2f)
            val y1 = cy - (h/2f)
            val x2 = cx + (w/2f)
            val y2 = cy + (h/2f)
            if (x1 < 0f || x1 > 1f) continue            if (y1 < 0f || y1 > 1f) continue            if (x2 < 0f || x2 > 1f) continue            if (y2 < 0f || y2 > 1f) continue
            boundingboxes.add(
                boundingbox(
                    x1 = x1, y1 = y1, x2 = x2, y2 = y2,
                    cx = cx, cy = cy, w = w, h = h,
                    cnf = maxconf, cls = maxidx, clsname = clsname
                )
            )
        }
    }
    if (boundingboxes.isempty()) return null    return applynms(boundingboxes)
}

private fun applynms(boxes: list<boundingbox>) : mutablelist<boundingbox> {
    val sortedboxes = boxes.sortedbydescending { it.cnf }.tomutablelist()
    val selectedboxes = mutablelistof<boundingbox>()
    while(sortedboxes.isnotempty()) {
        val first = sortedboxes.first()
        selectedboxes.add(first)
        sortedboxes.remove(first)
        val iterator = sortedboxes.iterator()
        while (iterator.hasnext()) {
            val nextbox = iterator.next()
            val iou = calculateiou(first, nextbox)
            if (iou >= iou_threshold) {
                iterator.remove()
            }
        }
    }
    return selectedboxes
}

private fun calculateiou(box1: boundingbox, box2: boundingbox): float {
    val x1 = maxof(box1.x1, box2.x1)
    val y1 = maxof(box1.y1, box2.y1)
    val x2 = minof(box1.x2, box2.x2)
    val y2 = minof(box1.y2, box2.y2)
    val intersectionarea = maxof(0f, x2 - x1) * maxof(0f, y2 - y1)
    val box1area = box1.w * box1.h
    val box2area = box2.w * box2.h
    return intersectionarea / (box1area + box2area - intersectionarea)
}
将获得 yolov8 的输出。
val bestboxes = bestbox(output.floatarray)
将输出框绘制到图像上
fun drawboundingboxes(bitmap: bitmap, boxes: list<boundingbox>): bitmap {
    val mutablebitmap = bitmap.copy(bitmap.config.argb_8888, true)
    val canvas = canvas(mutablebitmap)
    val paint = paint().apply {
        color = color.red
        style = paint.style.stroke
        strokewidth = 8f
    }
    val textpaint = paint().apply {
        color = color.white
        textsize = 40f
        typeface = typeface.default_bold
    }
    for (box in boxes) {
        val rect = rectf(
            box.x1 * mutablebitmap.width,
            box.y1 * mutablebitmap.height,
            box.x2 * mutablebitmap.width,
            box.y2 * mutablebitmap.height
        )
        canvas.drawrect(rect, paint)
        canvas.drawtext(box.clsname, rect.left, rect.bottom, textpaint)
    }
    return mutablebitmap
}
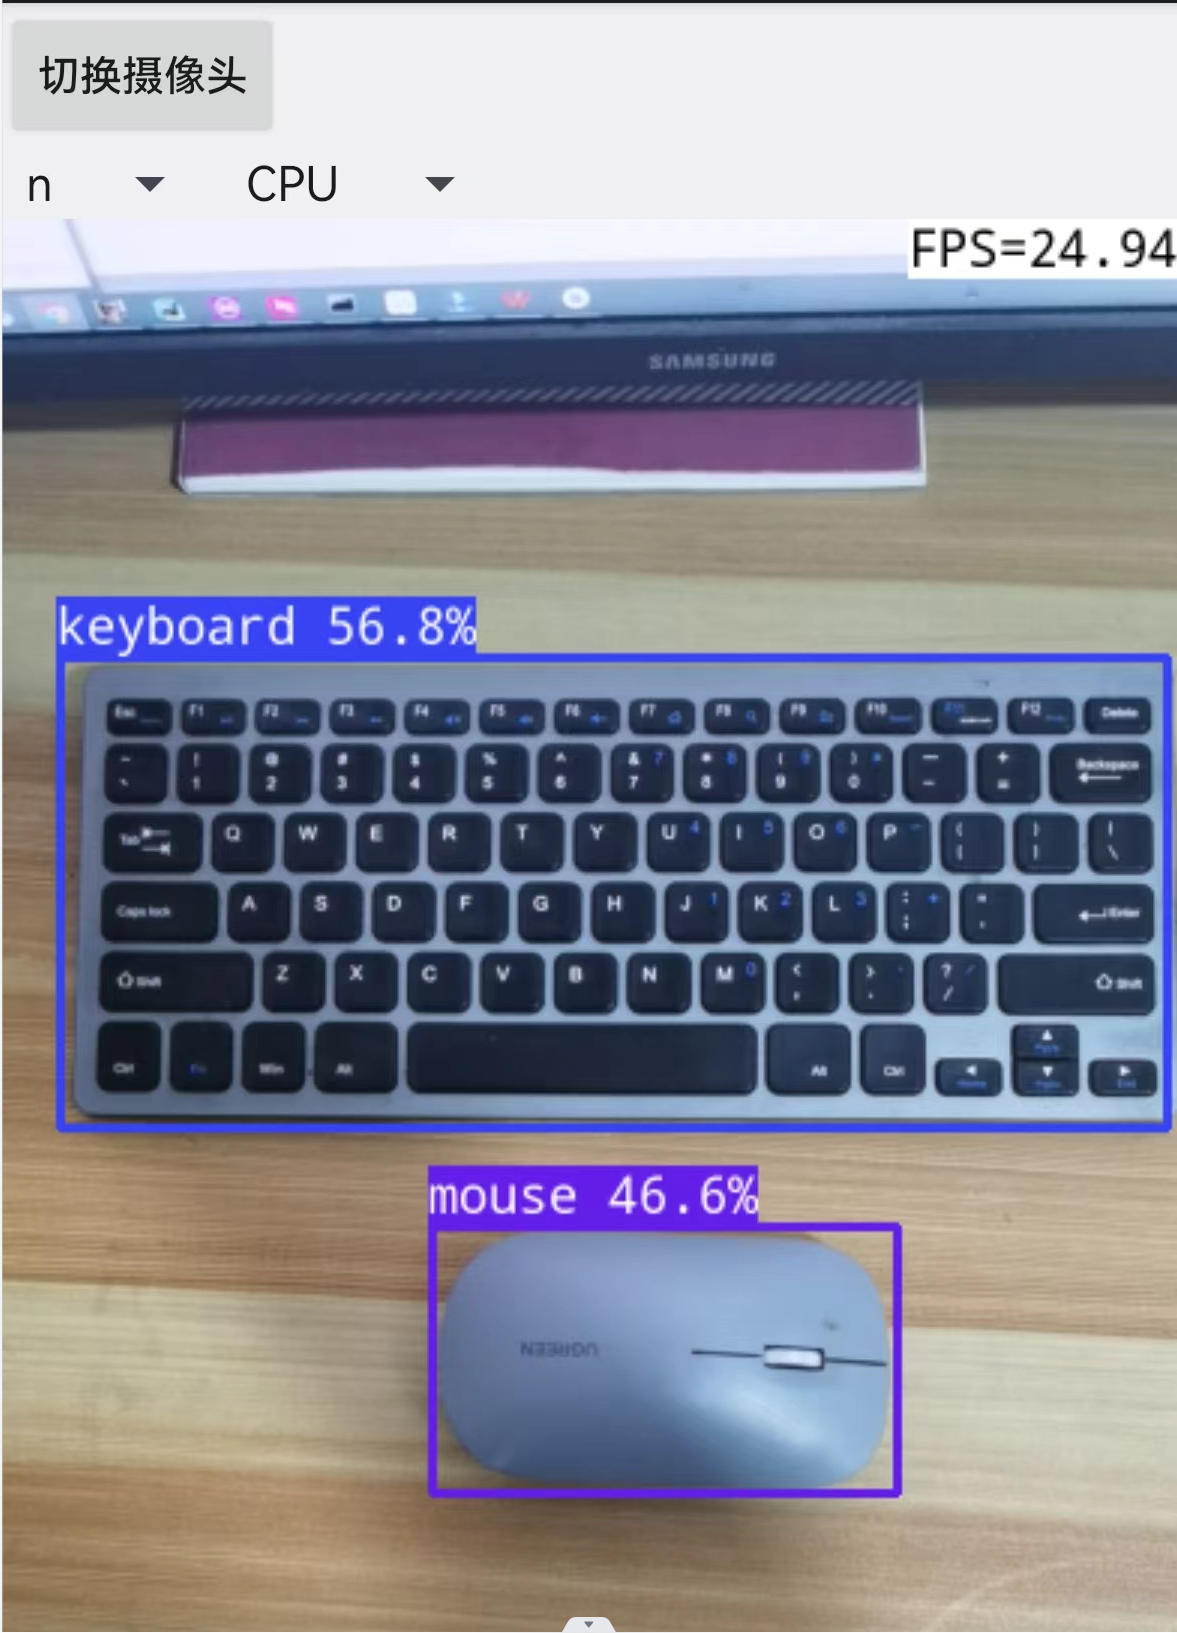
运行结果:


发表评论