一,前言
最近open-mmlab开源了playground项目,将最近引起cv界轰动的sam(segment anything model)模型和open-mmlab多个视觉框架相结合,可实现多种视觉任务的自动标注,本文将采用open-mmlab的playground开源项目,使用sam和labelstudio,实现分割任务的半自动标注。
1,playground官方github地址:
https://github.com/open-mmlab/playground
2,sam官方github地址:https://github.com/facebookresearch/segment-anything
二,sam+labelstudio实现自动标注
经过实测,该项目在windows10和linux系统,使用cpu和gpu都可实现部署。
2.1,采用anaconda创建虚拟环境(python3.9)
创建python3.9版本的基础虚拟环境,虚拟环境名称为rtmdet-sam
conda create -n rtmdet-sam python=3.9 -y
2.2,激活anaconda虚拟环境
conda activate rtmdet-sam
2.3,下载playground的github库
git clone https://github.com/open-mmlab/playground
2.4,环境配置
2.4.1,安装pytorch
1,linux and windows cuda 11.3(gpu版本)
pip install torch==1.10.1+cu113 torchvision==0.11.2+cu113 torchaudio==0.10.1 -f https://download.pytorch.org/whl/cu113/torch_stable.html
2,linux and windows cpu only(cpu版本)
pip install torch==1.10.1+cpu torchvision==0.11.2+cpu torchaudio==0.10.1 -f https://download.pytorch.org/whl/cpu/torch_stable.html
3,osx
pip install torch==1.10.1 torchvision==0.11.2 torchaudio==0.10.1
2.4.2,安装工具包
安装opencv-python,pycocotools,matplotlib,onnxruntime,onnx,这里需要注意以下windows系统安装pycocotools时记得先安装git和visual studio。
pip install opencv-python pycocotools matplotlib onnxruntime onnx
2.4.3,安装sam
pip install git+https://github.com/facebookresearch/segment-anything.git
2.4.4,下载sam预训练权重
可下载以下几个预训练权重文件,文件从小到大依次排列,越大的模型分割效果越好,但是分割时间也越长,建议先使用最小的模型试试效果,目前实测最小的模型分割效果也很不错。
1,sam_vit_b_01ec64.pth
2,sam_vit_l_0b3195.pth
3,sam_vit_h_4b8939.pth
wget https://dl.fbaipublicfiles.com/segment_anything/sam_vit_b_01ec64.pth
wget https://dl.fbaipublicfiles.com/segment_anything/sam_vit_l_0b3195.pth
wget https://dl.fbaipublicfiles.com/segment_anything/sam_vit_h_4b8939.pth
2.4.5,安装label-studio
pip install label-studio
2.4.6,安装label-studio-ml-backend
pip install label-studio-ml
2.5,启动sam后端并加载模型
1,cd到label_anything目录下
cd label_anything
2,启动sam后端并加载模型
label-studio-ml start sam --port 8003 --with sam_config=vit_b sam_checkpoint_file=.\sam_vit_b_01ec64.pth out_poly=true out_mask=true out_bbox=true device=cpu

此时,sam后端推理服务已经启动。接下来,您可以在label-studio web系统中配置http://localhost:8003后端推理服务。上述终端窗口需要保持打开状态。
2.6,启动label-studio的web服务
1,若需要使用vit-h大模型,则需要设置以下环境变量,但是大模型加载时间很长,容易导致与后端连接超时。如果不使用则跳过该步骤,不然会导致与后端连接超时。
linux requires the following commands
export ml_timeout_setup=40
windows requires the following commands
set ml_timeout_setup=40
2,启动web服务
label-studio start

打开浏览器并访问http://localhost:8080/以查看label-studio平台界面,一般会自动跳转。
2.7,注册或登录
启动web服务到label studio平台后,如果之前没有注册,需要进行注册再登陆。
2.8,新建一个项目

2.9,导入本地数据

或者下载官方提供的数据:
wget https://download.openmmlab.com/mmyolo/data/cat_dataset.zip

2.10,设置标签
在settings/labeling界面中配置label-studio关键点、掩码和其他标注信息。在示例图中,keypointlabels用于关键点标注,brushlabels用于掩码标注,polygonlabels用于边界多边形标注,rectanglelabels用于矩形标注。这个例子使用了两个类别,cat和person,自定义数据集的话只需要将类别改为你自定义的类别即可。

将上面的xml复制并添加到label-studio,然后单击save。
<view>
  <image name="image" value="$image" zoom="true"/>
  <keypointlabels name="keypointlabels" toname="image">
    <label value="cat" smart="true" background="#e51515" showinline="true"/>
    <label value="person" smart="true" background="#412cdd" showinline="true"/>
  </keypointlabels>
  <rectanglelabels name="rectanglelabels" toname="image">
  	<label value="cat" background="#ff0000"/>
  	<label value="person" background="#0d14d3"/>
  </rectanglelabels>
  <polygonlabels name="polygonlabels" toname="image">
  	<label value="cat" background="#ff0000"/>
  	<label value="person" background="#0d14d3"/>
  </polygonlabels>
  <brushlabels name="brushlabels" toname="image">
  	<label value="cat" background="#ff0000"/>
  	<label value="person" background="#0d14d3"/>
  </brushlabels>
</view>
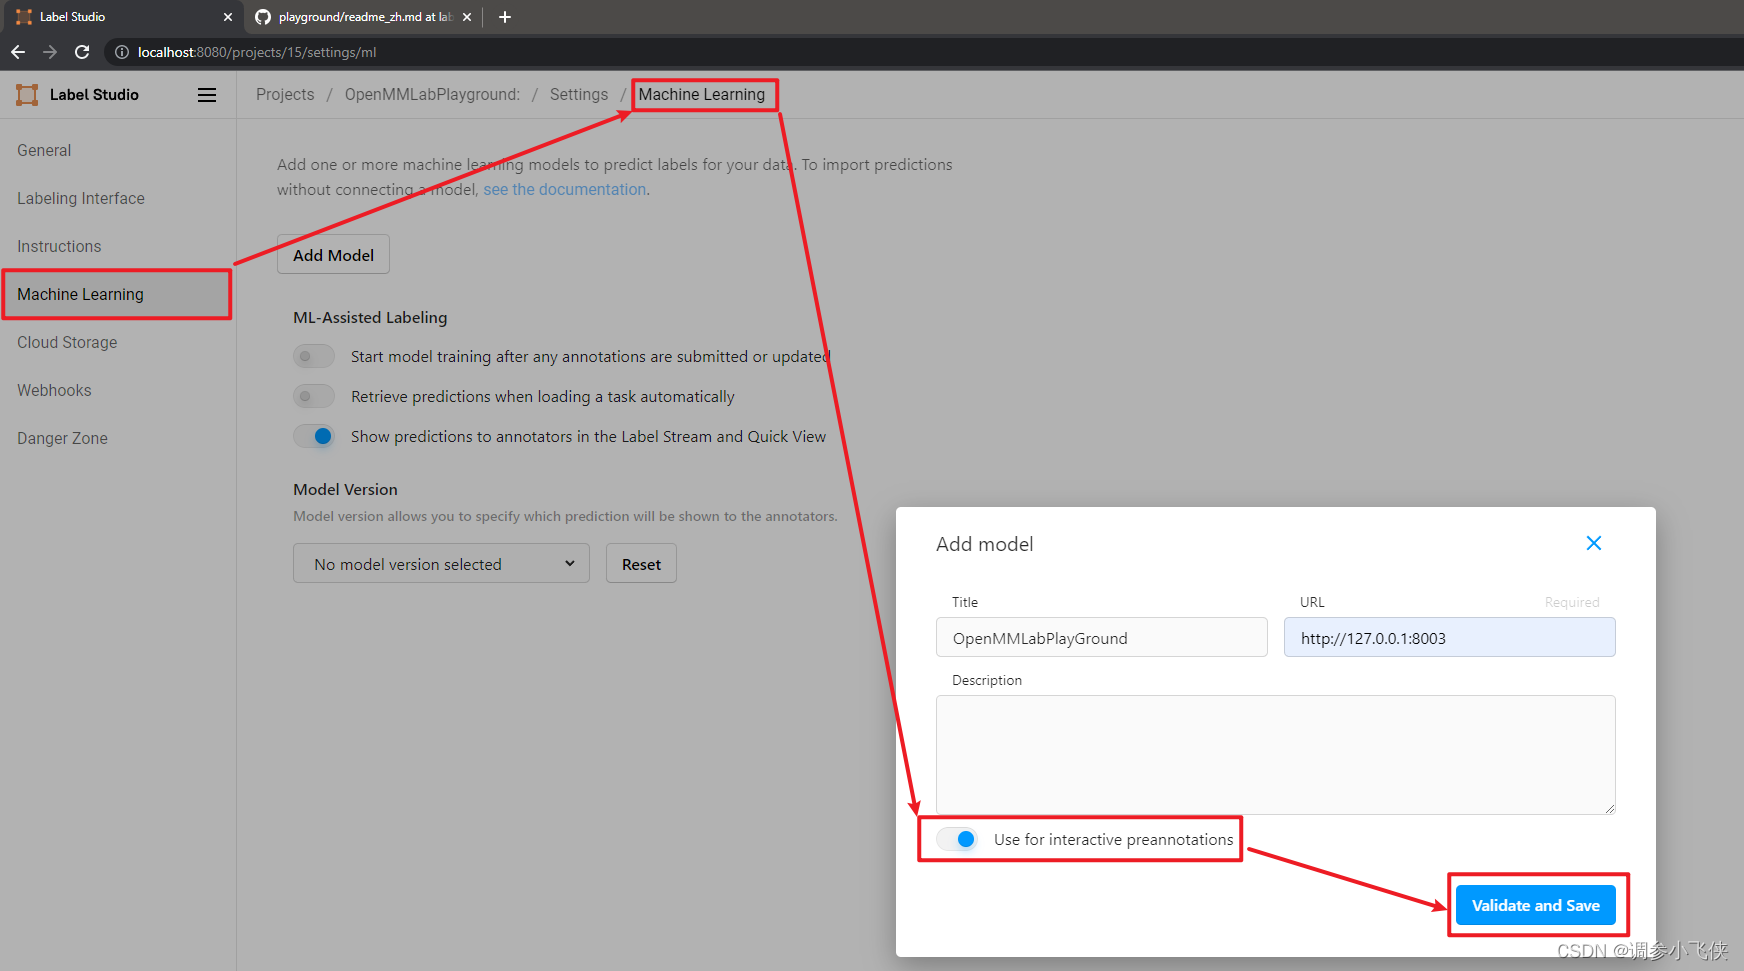
2.11,添加openmmlabplayground后端推理服务
设置并单击add model添加openmmlabgame后端推理服务。为sam后端推断服务设置url,启用use for interactive preannotations,即自动标注开关,并单击validate和save。
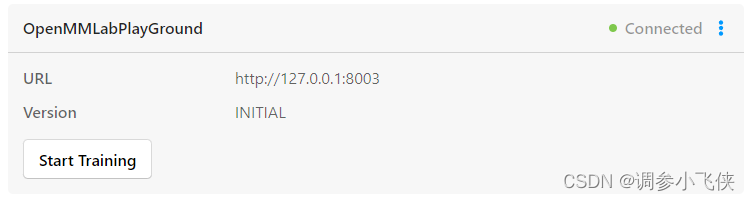
出现以下界面说明添加后端推理服务成功
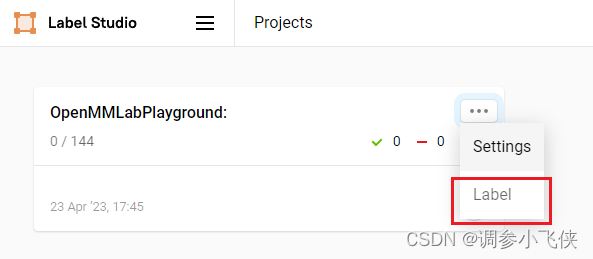
2.12,开始半自动标注
回到项目界面,单击label开始标注
要使用自动标注功能,需要打开auto- annotation开关,并建议勾选auto accept annotation建议选项。然后单击右侧工具栏最下面的按钮,可以切换点、框、矩形框等模式,默认为点模式,并从下面的标签选项中选择你想要标注的类别,在本例中选择“猫”。
1,点模式(在目标中画个点即可自动标注)

2,矩形框模式(在目标中画个框即可自动标注)

注:在切换点模式或者框模式的时候,左下角那个选择类别的地方,有两行选择类别的小按钮,是按照点,框模式的顺序排列的,你选择什么模式,你选择下面的类别的时候也要按顺序来,比如选择的点模式,就选择第一行按钮的类别,选择框模式,就选择第二行按钮的类别
2.13,保存标注结果
标注完所有图片后,点击export,以coco格式(可选)导出带标注的数据集,生成带标注的压缩文件。

你可以使用vs code打开解压后的文件夹,看到带标注的数据集,其中包括图像和带标注的json文件。

最后,若文章有任何问题,欢迎大家批评指正,可在评论区留言一起讨论!


发表评论