前情提要
在之前尝试使用diffusers库来进行stable-diffusion的接口调用以及各种插件功能实现,但发现diffusers库中各复杂功能的添加较为麻烦,而且难以实现对采样器的添加,safetensors格式模型的读取。在官网上找到了webui有专门的api接口,能够极大方便我们进行类似webui界面的api调用。

webui项目部署
这种调用webui自带的api的方法需要先将webui运行起来,无论是自己从官网配置的webui,还是各类启动器一键启动的都是可以的。(我使用的为一键启动包,较为简单)
如果是自己配置的
使用
bash webui.sh --nowebui或者
python launch.py --xformers --apiapi接口调用
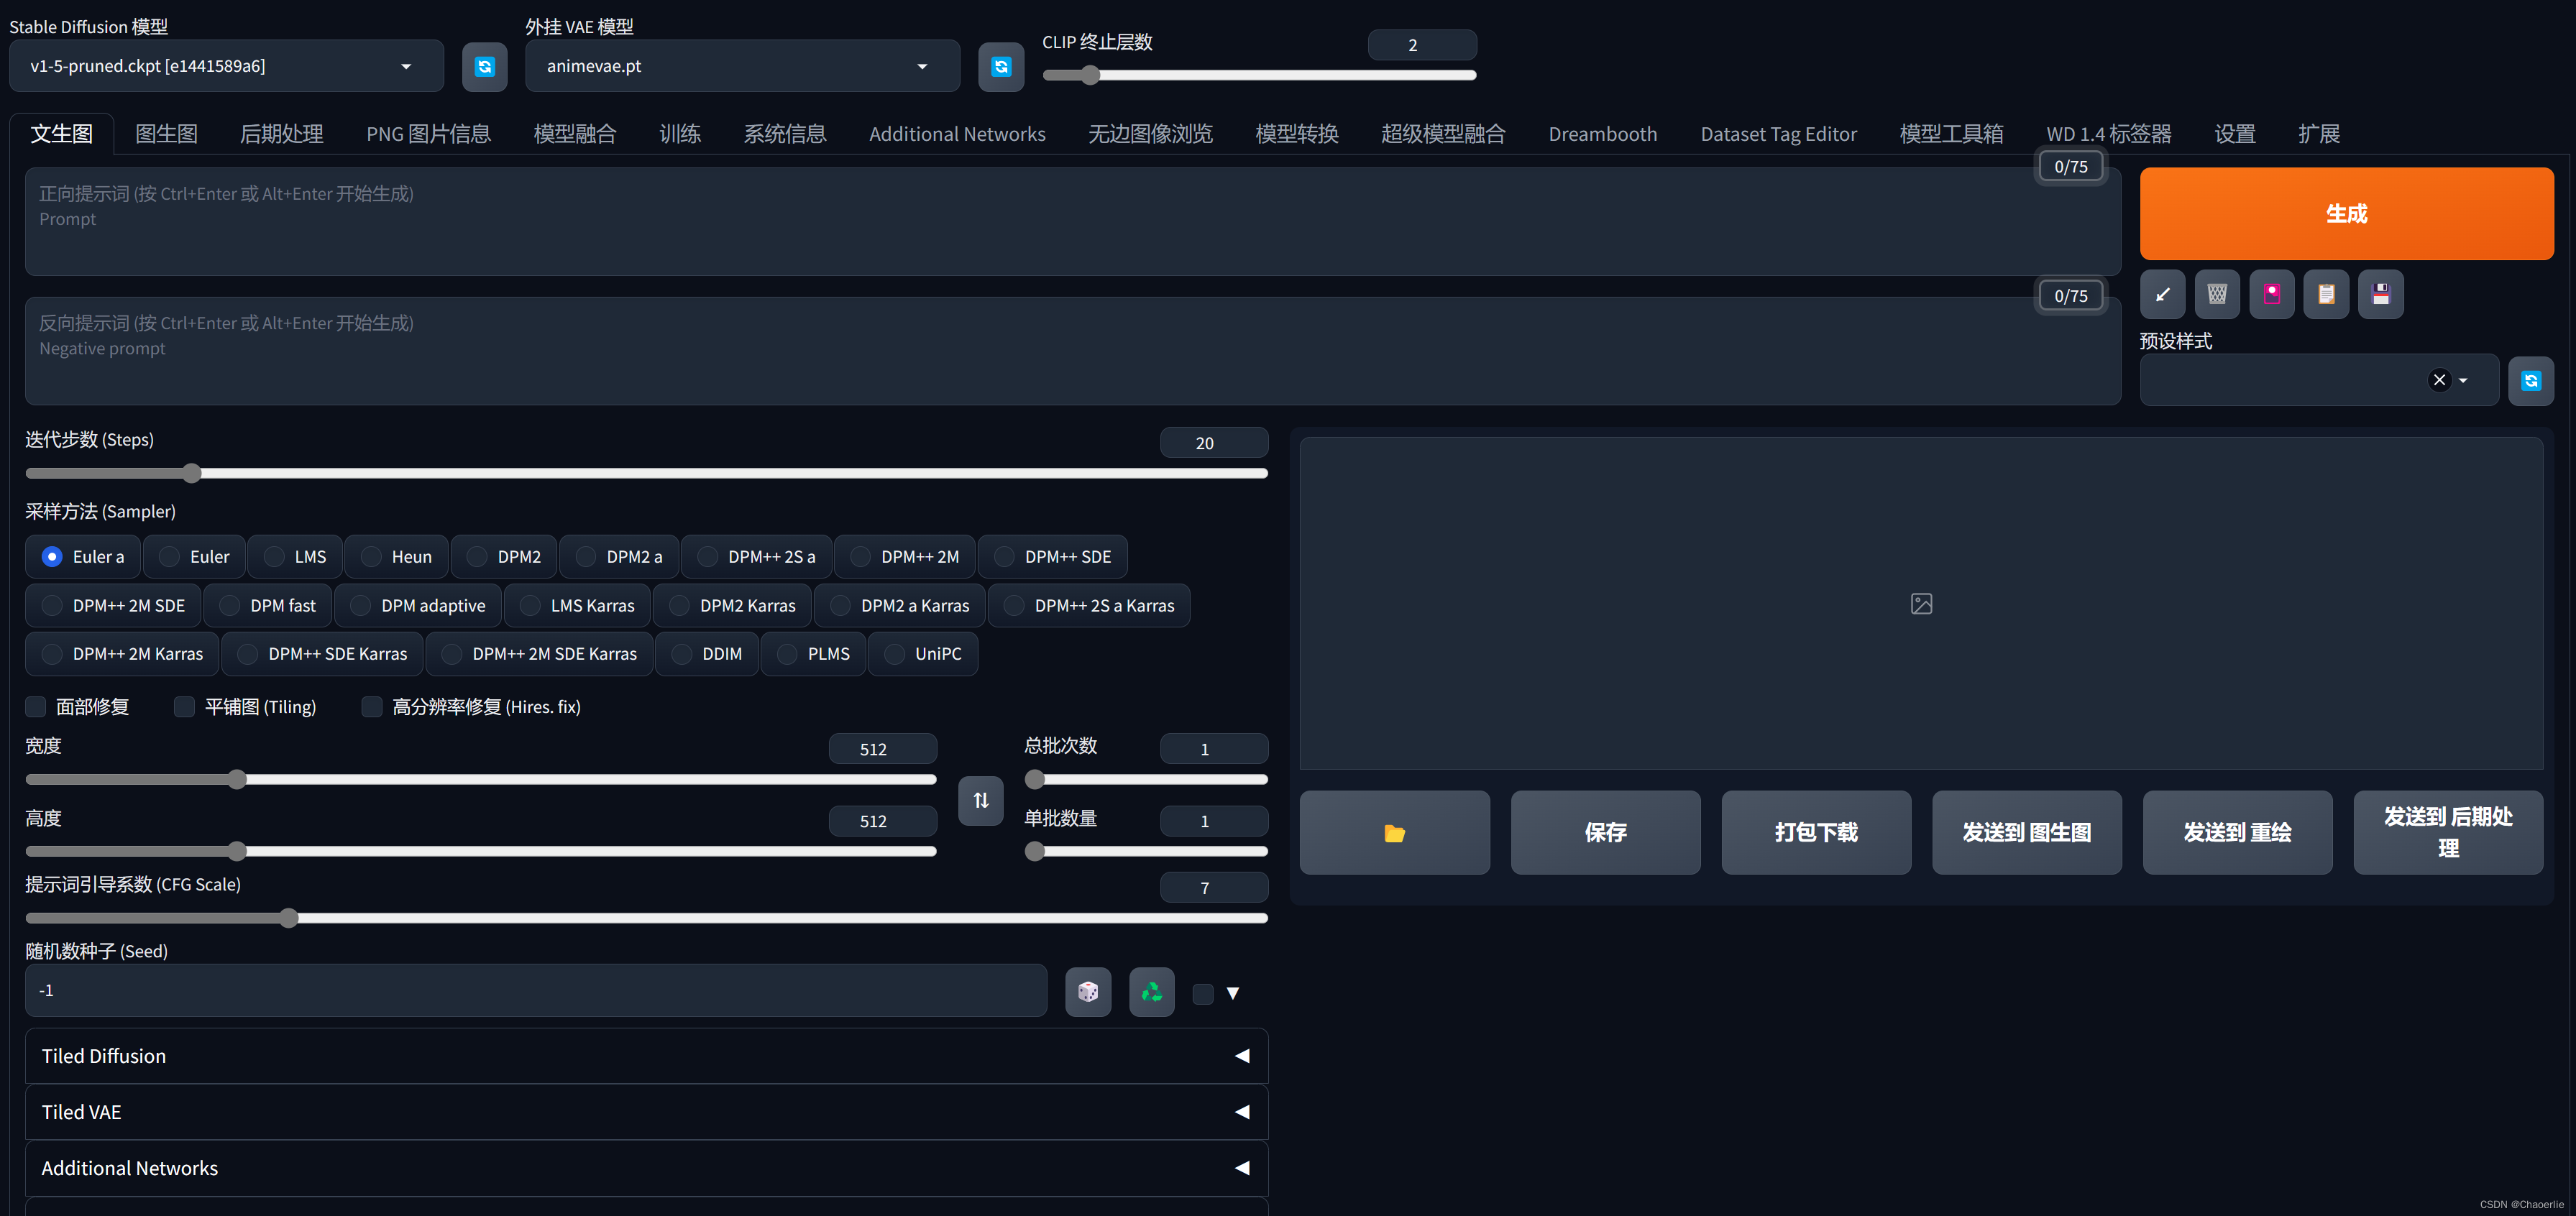
当我们把webui项目启动之后,我们可以看到运行的端口(默认为7860)
可以进行调用
1. 文生图(python示例):
import json
import requests
import io
import base64
from pil import image

url = "http://127.0.0.1:7860"

prompt = "dog"
negative_prompt = ""

payload = {

    # 模型设置
    "override_settings":{
          "sd_model_checkpoint": "v1-5-pruned.ckpt",
          "sd_vae": "animevae.pt",
          "clip_stop_at_last_layers": 2,
    },

    # 基本参数
    "prompt": prompt,
    "negative_prompt": negative_prompt,
    "steps": 30,
    "sampler_name": "euler a",
    "width": 512,
    "height": 512,
    "batch_size": 1,
    "n_iter": 1,
    "seed": 1,
    "clip_stop_at_last_layers": 2,

    # 面部修复 face fix
    "restore_faces": false,

    #高清修复 highres fix
    # "enable_hr": true,
    # "denoising_strength": 0.4,
    # "hr_scale": 2,
    # "hr_upscaler": "latent",

}

response = requests.post(url=f'{url}/sdapi/v1/txt2img', json=payload)
r = response.json()
image = image.open(io.bytesio(base64.b64decode(r['images'][0])))

image.show()
image.save('output.png')
2. 图生图(python 示例)
import json
import requests
import io
import base64
from pil import image
import cv2

url = "http://127.0.0.1:7860"

prompt = "cat"
negative_prompt = ""

# 此处为读取一张图片作为输入图像
img = cv2.imread('image.jpg')

# 编码图像
retval, bytes = cv2.imencode('.png', img)
encoded_image = base64.b64encode(bytes).decode('utf-8')

payload = {

#     # 模型设置
#     "override_settings":{
#           "sd_model_checkpoint": "v1-5-pruned.ckpt",
#           "sd_vae": "animevae.pt",
#           "clip_stop_at_last_layers": 2,
#     },

    # 基本参数
    "prompt": prompt,
    "negative_prompt": negative_prompt,
    "steps": 30,
    "sampler_name": "euler a",
    "width": 512,
    "height": 512,
    "batch_size": 1,
    "n_iter": 1,
    "seed": 1,
    "cfg_scale": 7,
    "clip_stop_at_last_layers": 2,

    "init_images": [encoded_image],

    # 面部修复 face fix
    "restore_faces": false,

    #高清修复 highres fix
    # "enable_hr": true,
    # "denoising_strength": 0.4,
    # "hr_scale": 2,
    # "hr_upscaler": "latent",

}


response = requests.post(url=f'{url}/sdapi/v1/img2img', json=payload)
r = response.json()
image = image.open(io.bytesio(base64.b64decode(r['images'][0])))

image.show()
image.save('output.png')
如要修改其他参数可参照官网文档进行修改。
发表评论