在实际的开发当中,不少的场景中需要我们使用更加安全的认证方式,同时也为了防止一些用户恶意注册,我们可能会需要用户使用一些可以证明个人身份的注册方式,如短信验证、邮箱验证等。
一、前期准备
为了实现邮箱认证服务,我们需要提供出来一个邮箱作为验证码的发送者,这里我使用的是qq邮箱。
1 开启邮箱服务
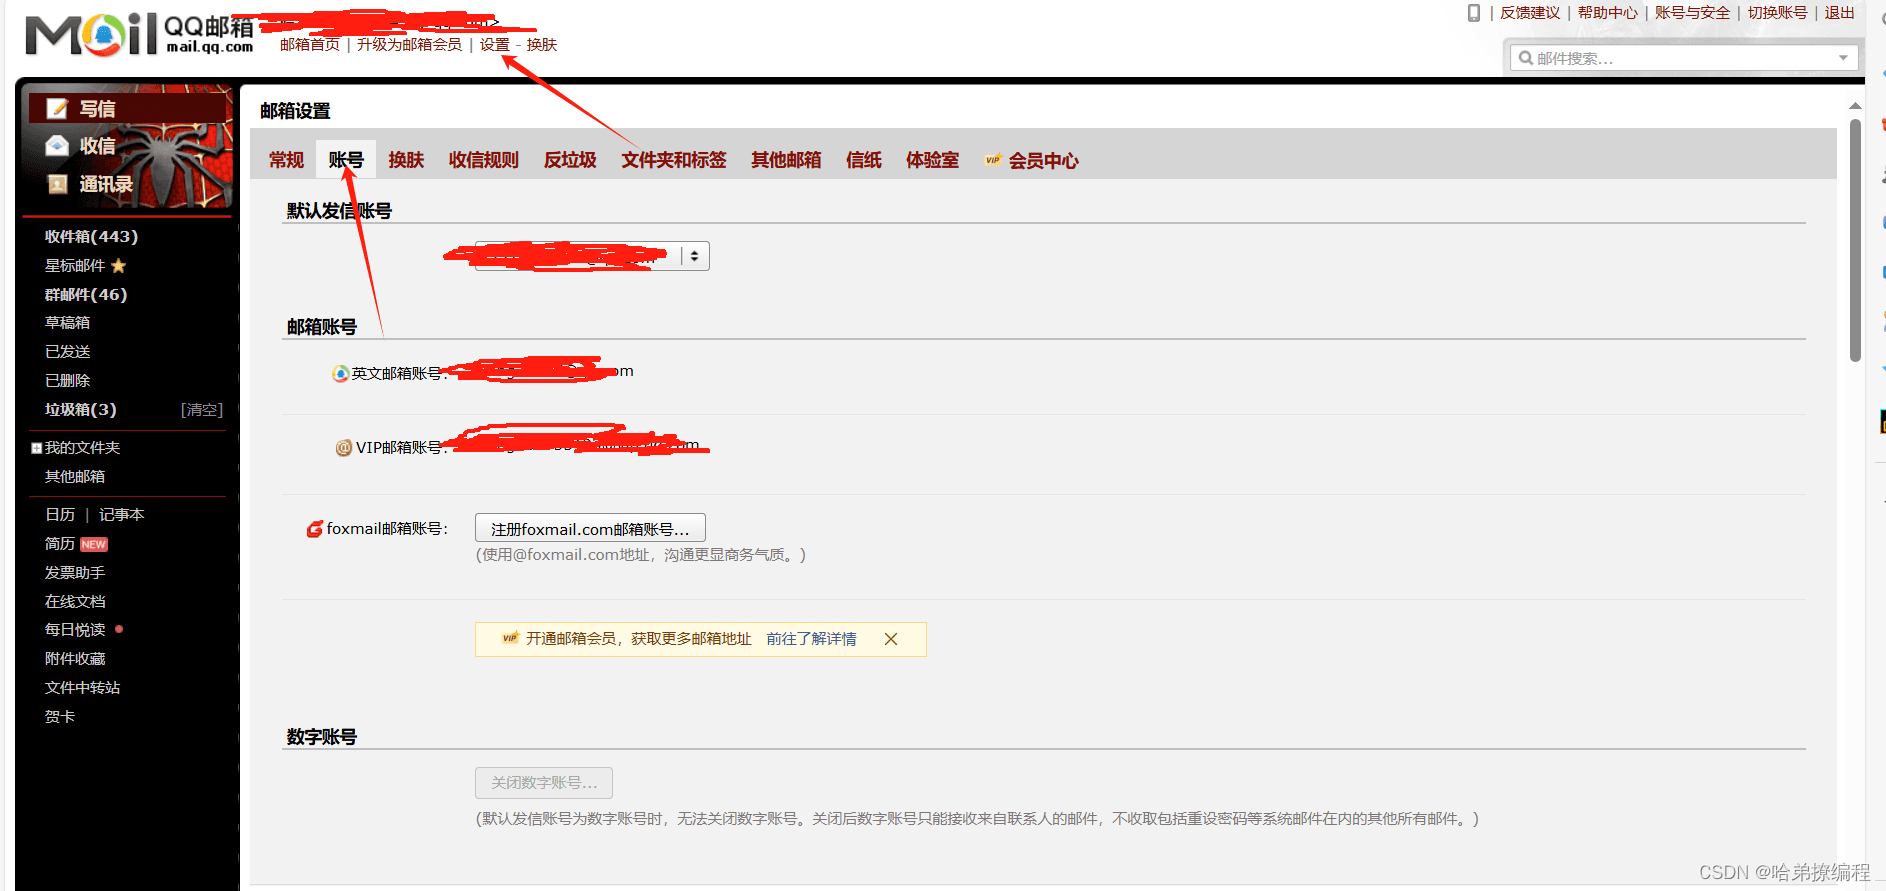
首先打开qq邮箱,然后找到设置,点击账号。
然后找到下方的邮件协议服务,打开。因为这里我已经打开了,而且服务开启也较为简单,需要我们发送一个短信到指定的号码,可能会收取一定的费用,不过不是很多,好像是几毛钱。
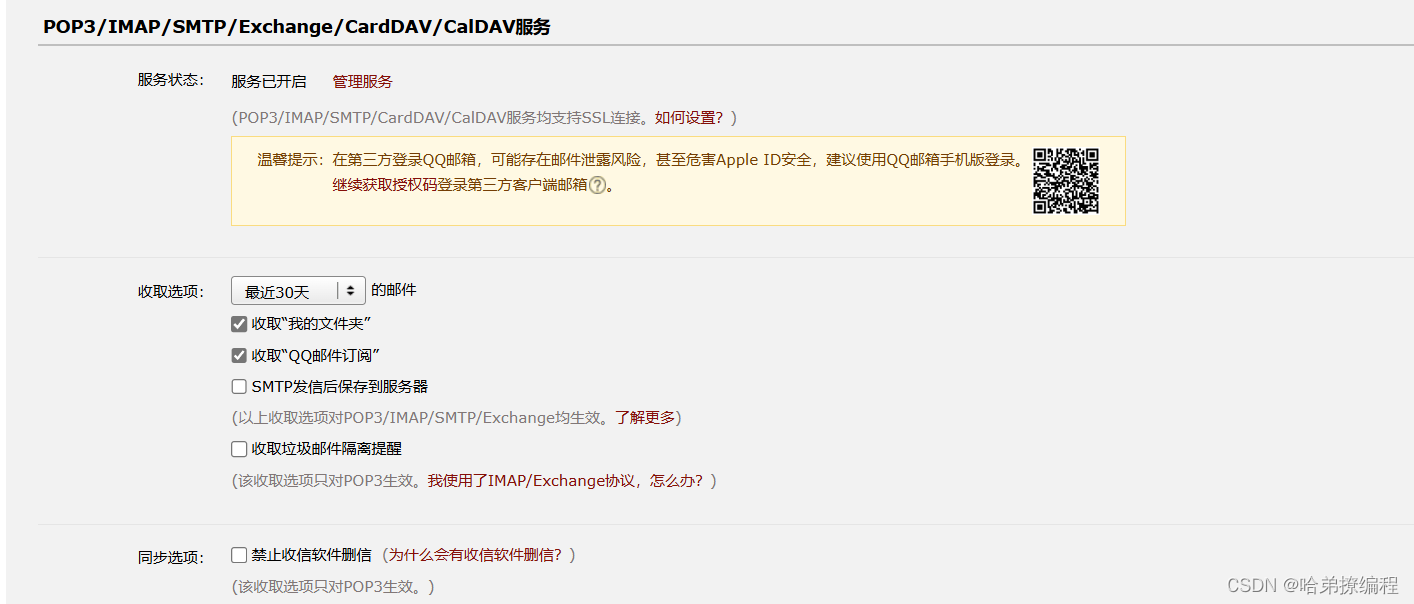
开启之后会给你一个授权码,一定要记住这个授权码,发邮件的时候需要这个。
2 springboot导入依赖
核心的就是mail依赖,因为我这个项目东西不少,为了方便我就全拷贝过来了,可能有的用不到。
 <properties>
        <java.version>1.8</java.version>
        <project.build.sourceencoding>utf-8</project.build.sourceencoding>
        <project.reporting.outputencoding>utf-8</project.reporting.outputencoding>
        <spring-boot.version>2.7.6</spring-boot.version>
        <project.build.sourceencoding>utf-8</project.build.sourceencoding>
        <project.reporting.outputencoding>utf-8</project.reporting.outputencoding>
        <java.version>1.8</java.version>
        <mybatisplus.version>3.4.3.1</mybatisplus.version>
        <mybatisplus.generator>3.3.2</mybatisplus.generator>
        <mybatisplus.velocity>1.7</mybatisplus.velocity>
    </properties>
    <dependencies>
        <dependency>
            <groupid>org.springframework.boot</groupid>
            <artifactid>spring-boot-starter-web</artifactid>
        </dependency>
        <dependency>
            <groupid>org.springframework.boot</groupid>
            <artifactid>spring-boot-starter-mail</artifactid>
        </dependency>
        <dependency>
            <groupid>org.slf4j</groupid>
            <artifactid>slf4j-log4j12</artifactid>
        </dependency>
        <dependency>
            <groupid>org.apache.commons</groupid>
            <artifactid>commons-lang3</artifactid>
        </dependency>
        <dependency>
            <groupid>com.mysql</groupid>
            <artifactid>mysql-connector-j</artifactid>
        </dependency>
        <dependency>
            <groupid>org.projectlombok</groupid>
            <artifactid>lombok</artifactid>
            <optional>true</optional>
        </dependency>
        <dependency>
            <groupid>org.springframework.boot</groupid>
            <artifactid>spring-boot-starter-test</artifactid>
            <scope>test</scope>
        </dependency>
        <dependency>
            <groupid>com.baomidou</groupid>
            <artifactid>mybatis-plus-boot-starter</artifactid>
            <version>${mybatisplus.version}</version>
        </dependency>
        <dependency>
            <groupid>com.baomidou</groupid>
            <artifactid>mybatis-plus-generator</artifactid>
            <version>${mybatisplus.generator}</version>
        </dependency>
        <dependency>
            <groupid>org.apache.velocity</groupid>
            <artifactid>velocity</artifactid>
            <version>${mybatisplus.velocity}</version>
        </dependency>
        <dependency>
            <groupid>org.springframework.boot</groupid>
            <artifactid>spring-boot-devtools</artifactid>
        </dependency>
        <dependency>
            <groupid>org.springframework.boot</groupid>
            <artifactid>spring-boot-starter-data-redis</artifactid>
        </dependency>
        <dependency>
            <groupid>com.alibaba</groupid>
            <artifactid>fastjson</artifactid>
            <version>1.2.56</version>
        </dependency>
    </dependencies>
3 创建application.yml配置文件
spring:
  #邮件服务配置
  mail:
    host: smtp.qq.com #邮件服务器地址
    protocol: smtp #协议
    username:  #发送邮件的邮箱也就是你开通服务的邮箱
    password:  #开通服务后得到的授权码
    default-encoding: utf-8 #邮件内容的编码
  redis:
    host: 127.0.0.1
    port: 6379
  datasource:
    driver-class-name: com.mysql.cj.jdbc.driver
    url: jdbc:mysql://localhost:3306/mail
    username: root
    password:  # 数据库的密码
4 创建数据库文件
在上边的配置文件中你也看到了,我们用到了mysql还有redis。
drop table if exists `user`;
create table `user`  (
  `id` int(11) not null auto_increment,
  `account` varchar(255) character set utf8mb4 collate utf8mb4_general_ci null default null,
  `password` varchar(255) character set utf8mb4 collate utf8mb4_general_ci null default null,
  primary key (`id`) using btree
) engine = innodb auto_increment = 3 character set = utf8mb4 collate = utf8mb4_bin row_format = compact;
-- ----------------------------
-- records of user
-- ----------------------------
insert into `user` values (1, 'admin', '123456');
insert into `user` values (2, '123456', '123456');
set foreign_key_checks = 1;
5 配置redis服务
在之前的文章当中我有说到过安装redis的事情,大家可以看看我这篇文章。【spring】springboot整合redis,用redis实现限流(附redis解压包)_springboot 限流
二、验证邮件发送功能
大家可以先看一下我的项目结构。其中的一些代码是我参考学习另一位大佬的文章,这篇文章也是对该大佬文章的一个总结。参考资料:蒾酒
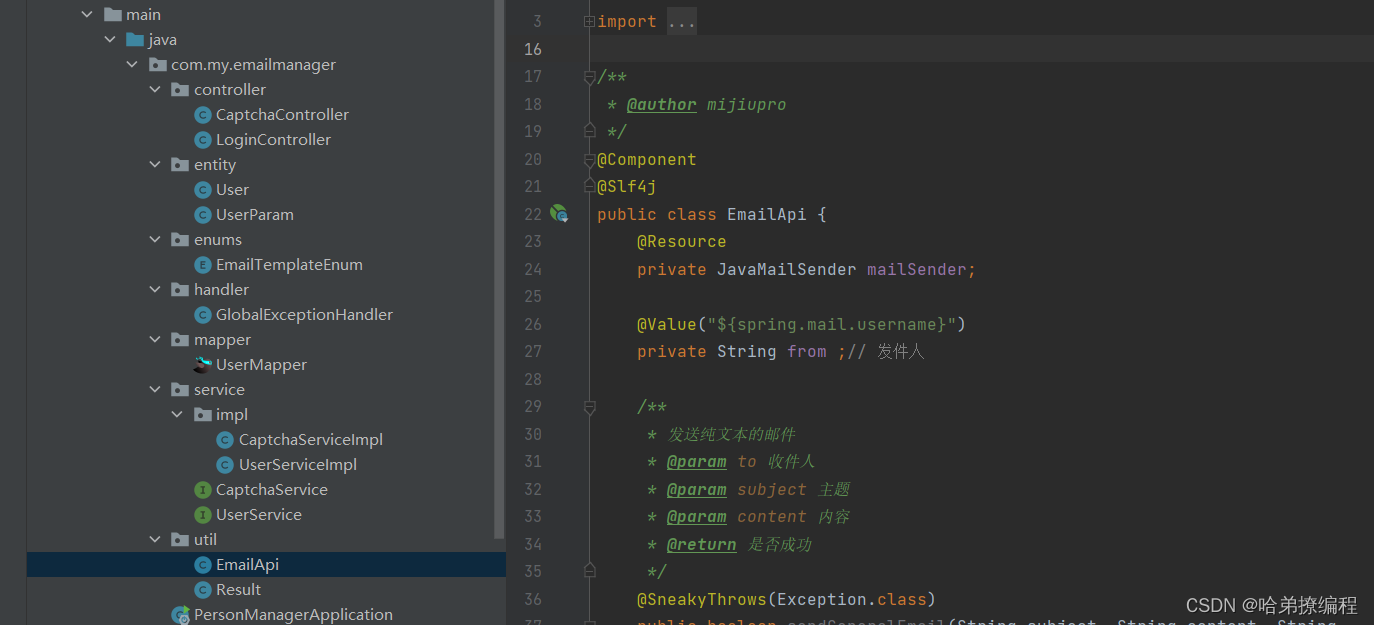
我们最重要的邮件发送工具 就是util包下的emailapi。将以下代码导入后,创建一个测试方法。
import lombok.sneakythrows;
import lombok.extern.slf4j.slf4j;
import org.springframework.beans.factory.annotation.value;
import org.springframework.core.io.filesystemresource;
import org.springframework.mail.simplemailmessage;
import org.springframework.mail.javamail.javamailsender;
import org.springframework.mail.javamail.mimemessagehelper;
import org.springframework.stereotype.component;
import javax.annotation.resource;
import javax.mail.internet.mimemessage;
import java.io.file;
import java.util.objects;
/**
* @author mijiupro
*/
@component
@slf4j
public class emailapi {
@resource
private javamailsender mailsender;
@value("${spring.mail.username}")
private string from ;// 发件人
/**
* 发送纯文本的邮件
* @param to 收件人
* @param subject 主题
* @param content 内容
* @return 是否成功
*/
@sneakythrows(exception.class)
public boolean sendgeneralemail(string subject, string content, string... to){
// 创建邮件消息
simplemailmessage message = new simplemailmessage();
message.setfrom(from);
// 设置收件人
message.setto(to);
// 设置邮件主题
message.setsubject(subject);
// 设置邮件内容
message.settext(content);
// 发送邮件
mailsender.send(message);
return true;
}
/**
* 发送html的邮件
* @param to 收件人
* @param subject 主题
* @param content 内容
* @return 是否成功
*/
@sneakythrows(exception.class)
public boolean sendhtmlemail(string subject, string content, string... to){
// 创建邮件消息
mimemessage mimemessage = mailsender.createmimemessage();
mimemessagehelper helper = new mimemessagehelper(mimemessage, true);
helper.setfrom(from);
// 设置收件人
helper.setto(to);
// 设置邮件主题
helper.setsubject(subject);
// 设置邮件内容
helper.settext(content, true);
// 发送邮件
mailsender.send(mimemessage);
log.info("发送邮件成功");
return true;
}
/**
* 发送带附件的邮件
* @param to 收件人
* @param subject 主题
* @param content 内容
* @param filepaths 附件路径
* @return 是否成功
*/
@sneakythrows(exception.class)
public boolean sendattachmentsemail(string subject, string content, string[] to, string[] filepaths) {
// 创建邮件消息
mimemessage mimemessage = mailsender.createmimemessage();
mimemessagehelper helper = new mimemessagehelper(mimemessage, true);
helper.setfrom(from);
// 设置收件人
helper.setto(to);
// 设置邮件主题
helper.setsubject(subject);
// 设置邮件内容
helper.settext(content,true);
// 添加附件
if (filepaths != null) {
for (string filepath : filepaths) {
filesystemresource file = new filesystemresource(new file(filepath));
helper.addattachment(objects.requirenonnull(file.getfilename()), file);
}
}
// 发送邮件
mailsender.send(mimemessage);
return true;
}
/**
* 发送带静态资源的邮件
* @param to 收件人
* @param subject 主题
* @param content 内容
* @param rscpath 静态资源路径
* @param rscid 静态资源id
* @return 是否成功
*/
@sneakythrows(exception.class)
public boolean sendinlineresourceemail(string subject, string content, string to, string rscpath, string rscid) {
// 创建邮件消息
mimemessage mimemessage = mailsender.createmimemessage();
mimemessagehelper helper = new mimemessagehelper(mimemessage, true);
// 设置发件人
helper.setfrom(from);
// 设置收件人
helper.setto(to);
// 设置邮件主题
helper.setsubject(subject);
//html内容图片
string contenthtml = "<html><body>这是邮件的内容,包含一个图片:<img src=\'cid:" + rscid + "\'>"+content+"</body></html>";
helper.settext(contenthtml, true);
//指定讲资源地址
filesystemresource res = new filesystemresource(new file(rscpath));
helper.addinline(rscid, res);
mailsender.send(mimemessage);
return true;
}
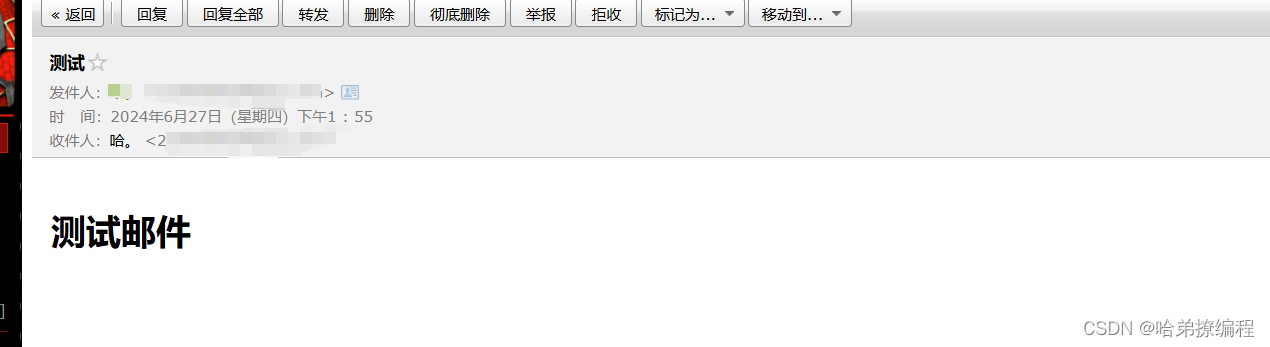
}进行邮件发送的测试。
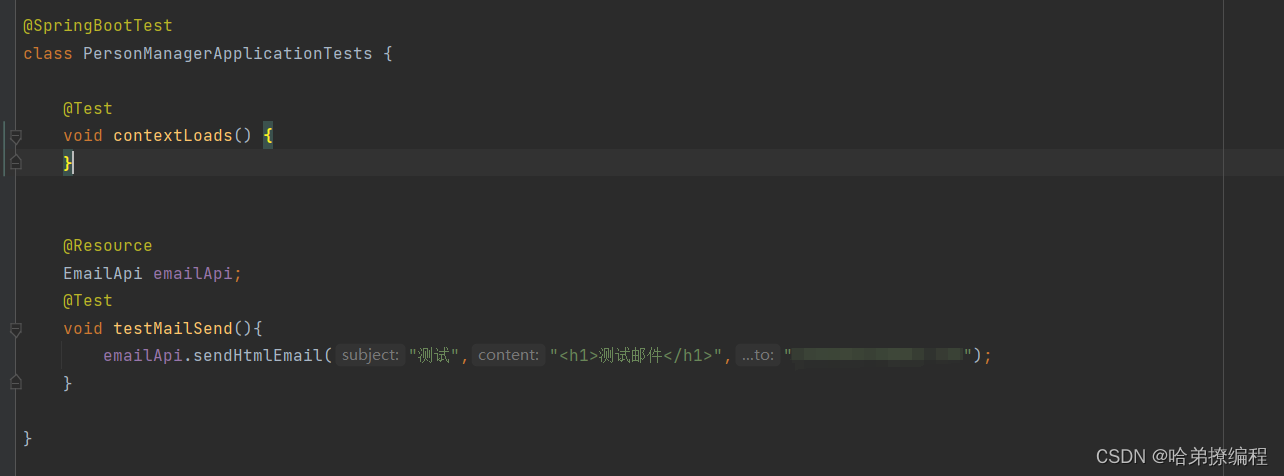
看看结果,成功的发过来了。
接下来就要进行登录注册功能的开发了。
三、注册功能实现邮箱验证
1 创建user实体类
@data
@equalsandhashcode(callsuper = false)
public class user implements serializable {
    private static final long serialversionuid = 1l;
    @tableid(value = "id", type = idtype.auto)
    private integer id;
    private string account;
    private string password;
}
2 创建userparam
@data
@equalsandhashcode(callsuper = false)
public class userparam implements serializable {
    private static final long serialversionuid = 1l;
    @tableid(value = "id", type = idtype.auto)
    private integer id;
    private string account;
    private string password;
    private string emailcode;
    private string email;
}
3 创建captchaservice
public interface captchaservice {
    boolean sendcaptcha(string email);
}
4 创建emailtemplateenum
这一步我没有选择创建captchaserviceimpl,因为这个类中涉及到了一些核心的代码,而我们一些类还没有创建完,我们先创建这样的一个枚举类,这个枚举类的作用就是定义我们发送邮件的一个模板,我们在发送邮件的时候,直接向模板内插入内容就可以了。
ublic enum emailtemplateenum {
    // 验证码邮件
    verification_code_email_html("<html><body>用户你好,你的验证码是:<h1>%s</h1>请在五分钟内完成注册</body></html>","登录验证"),
    // 用户被封禁邮件通知
    user_banned_email("用户你好,你已经被管理员封禁,封禁原因:%s", "封禁通知");
    private final string template;
    private final string subject;
    emailtemplateenum(string template, string subject) {
        this.template = template;
        this.subject = subject;
    }
    public string gettemplate(){
        return this.template;
    }
    public string set(string captcha) {
        return string.format(this.template, captcha);
    }
    public string getsubject() {
        return this.subject;
    }
}
5 创建captchaserviceimpl
首先把我们前端传过来的邮箱加一个前缀,用于redis中的存储,因为我们不仅可以有邮箱认证还可以有手机认证。
 @resource
    stringredistemplate stringredistemplate;
    @resource
    emailapi emailapi;
    @override
    public boolean sendcaptcha(string email) {
        sendmailcaptcha("login:email:captcha:"+email);
        return true;
    }
在redis当中,验证码的存储使用的是hash结构,hash存储了验证码,验证次数,还有上一次的发送时间,因为我们要限制一分钟发送的次数。一分钟内我们只能发一条短信,验证码在redis中的过期时间为五分钟,在验证码未过期之前发送的认证,都会让这个发送次数加一,倘若发送的次数达到了5次还要发送,那么就封禁一天不让发送短信。
例如,在3:30:30的时候发送了一次短信,一分钟后,3:31:30的时候又发送了短信,直到3:35:30的时候又发了一次,此时的发送次数已经达到了5,这时候就会封一天,因为每次发送验证码的时候,redis都存储着上一次还没过期的验证码,所以发送次数会增加。
下边讲一下代码。
先从redis中找到这个hash结构,如果hash结构的值不为空并且达到了发送次数上限,就封禁一天,否则的话看一下上一次的发送时间是否存在,如果存在的话,判断一下当前时间和上一次的发送时间间隔是否大于60秒,如果小于60秒那么不让发送。如果正常发送短信,那么就把发送的次数加1,然后用随机数生成一个六位数的验证码,发送验证码,并且向redis中保存刚才的hash结构。
  private boolean sendmailcaptcha(string key){
        boundhashoperations<string, string, string> hashops = stringredistemplate.boundhashops(key);
        // 初始检查
        string lastsendtimestamp = hashops.get("lastsendtimestamp");
        string sendcount = hashops.get("sendcount");
        if(stringutils.isnotblank(sendcount)&&integer.parseint(sendcount)>=5){
            hashops.expire(24, timeunit.hours);
            throw new  runtimeexception("验证码发送过于频繁");
        }
        if(stringutils.isnotblank(lastsendtimestamp)){
            long lastsendtime = long.parselong(lastsendtimestamp);
            long currenttime = system.currenttimemillis();
            long elapsedtime = currenttime - lastsendtime;
            if(elapsedtime < 60 * 1000){
                throw new  runtimeexception("验证码发送过于频繁");
            }
        }
        int newsendcount = stringutils.isnotblank(sendcount) ? integer.parseint(sendcount) + 1 : 1;
        string captcha = randomstringutils.randomnumeric(6);
        try {
            sendcaptcha(key,captcha);
        } catch (exception e) {
            return false;
        }
        hashops.put("captcha", captcha);
        hashops.put("lastsendtimestamp", string.valueof(system.currenttimemillis()));
        hashops.put("sendcount", string.valueof(newsendcount));
        hashops.expire(5, timeunit.minutes); // 设置过期时间为5分钟
        return true;
    }
发送验证码调用的是下边的函数。
 private void sendcaptcha(string hashkey, string captcha) thorw exception{
        // 根据hashkey判断是发送邮件还是短信,然后调用相应的发送方法
        if("email".equals(hashkey.split(":")[1])){
            if (!emailapi.sendhtmlemail(emailtemplateenum.verification_code_email_html.getsubject(),
                    emailtemplateenum.verification_code_email_html.set(captcha),hashkey.split(":")[3])) {
                throw new runtimeexception("发送邮件失败");
            }
        }
    }
6 创建captchacontroller
@restcontroller
@requestmapping("/captcha")
public class captchacontroller {
    @resource
    captchaservice captchaservice;
    @resource
    emailapi emailapi;
    @requestmapping("/getcaptcha")
    public result sendcaptcha(string email){
        boolean res = captchaservice.sendcaptcha(email);
        if(res){
            return new result("发送成功",200,null);
        }
        return new result("发送失败",500,null);
    }
}
7 创建logincontroller
usersevice的东西都很简单,都是mybatisplus的内容,如果不太了解可以看我这篇文章【spring】springboot整合mybatisplus的基本应用_简单的springboot+mybatisplus的应用程序
我这里并没有用userservice封装认证的过程,直接写到controller中了,大家能看懂就好。仅供学习使用。
@controller
public class logincontroller {
    @autowired
    userservice userservice;
    @autowired
    stringredistemplate stringredistemplate;
    @getmapping("/")
    public string login(){
        return "redirect:/pages/login.html";
    }
    @requestmapping("/register")
    @responsebody
    public result registeruser( userparam user ){
        string email = user.getemail();
        string emailcode = user.getemailcode();
        boundhashoperations<string, string, string> hashops = stringredistemplate.boundhashops("login:email:captcha:"+email);
        string code = hashops.get("captcha");
        if(!objects.equals(code, emailcode)){
            return new result("验证码错误",400,null);
        }
        user user1 = userservice.getone(new lambdaquerywrapper<user>()
                .eq(user::getaccount,user.getaccount()));
        //如果有这个用户的信息要拒绝注册
        if(user1!=null){
            return new result("",100,null);
        }
        user saveuser = new user();
        beanutils.copyproperties(user,saveuser);
        system.out.println(user);
        system.out.println(saveuser);
        boolean save = userservice.save(saveuser);
        if(!save){
            return new result("注册失败",300,null);
        }
        return new result("注册成功",200,null);
    }
}
到此为止,验证码的注册功能就已经实现完成了。
我们现在要做一个前端页面。
四、创建登陆页面
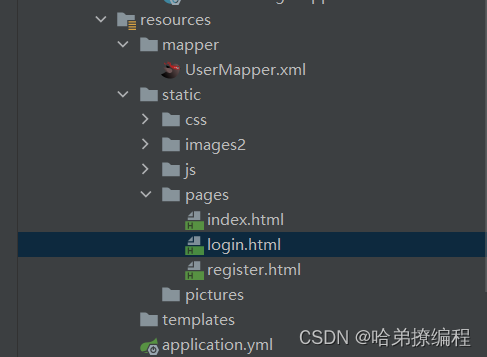
在resources目录下创建static文件夹。在pages目录下添加login.html和register.html。至于jquery呢就要大家自己去找了。
1 login.html
<!doctype html>
<html lang="en">
<head>
    <meta charset="utf-8">
    <meta name="viewport" content="width=device-width, initial-scale=1.0">
    <title>document</title>
    <script src="../js/jquery.min.js"></script>
    <script>
        $(function() {
            $(".btn").on("click", function () {
                var account = $(".account").val()
                var password = $(".password").val()
                console.log(account)
                console.log(password)
                $.ajax({
                    type: "get",
                    url: "/login?&account=" + account + "&password=" + password,
                    success: function (data) {
                        if (data.code === 200) {
                            window.location.href = "../pages/index.html"
                        }else{
                            alert("登陆失败,请检查账号或者密码")
                        }
                    }
                })
            })
        });
    </script>
    <style>
        *{
            padding: 0;
            margin: 0px;
            text-decoration: none;
        }
        body {
            background-image: url(../images2/1.jpg);
            background-size:cover;
            background-attachment:fixed;
        }
        .loginbox {
            height: 280px;
            width: 26%;
            margin: 340px auto;
            background-color: rgb(158, 151, 158);
            opacity: 0.7;
            text-align: center;
        }
        .loginbox .top {
            display: block;
            height: 42px;
            background: linear-gradient(90deg,pink,red,pink,yellow,red);
            padding-top: 15px;
            font-size: 20px;
            font-weight: 600;
            color: black;
        }
        .loginbox span {
            color: black;
            font-weight: 500;
            font-size: 18px;
        }
        .loginbox input[type=text],
        .loginbox input[type=password] {
            height: 20px;
            border: none;
            border-radius: 4px;
            outline: none;
        }
        .loginbox input[type=button] {
            width: 40%;
            height: 24px;
            border: none;
            border-radius: 4px;
            margin: 0 auto;
            outline: none;
        }
        .loginbox .a {
            display: flex;
            margin: 20px auto;
            width: 45%;
            justify-content: space-between;
        }
        .loginbox .a a {
            color: white;
        }
        .loginbox .a a:hover {
            color: rgb(228, 221, 228);
        }
    </style>
</head>
<body>
    <div class="loginbox">
        <span class="top">邮箱简易发送系统</span><br>
        <span>账号:</span>
        <input type="text" placeholder="请输入账号" class="account"><br><br>
        <span>密码:</span>
        <input type="password" placeholder="请输入密码" class="password"><br><br>
        <input type="button" value="登录" class="btn">
        <div class="a">
            <a href="register.html" rel="external nofollow" >注册</a>
            <a href="">忘记密码</a>
        </div>
    </div>
</body>
</html>
2 register.html
<!doctype html>
<html lang="en">
<head>
    <meta charset="utf-8">
    <meta name="viewport" content="width=device-width, initial-scale=1.0">
    <title>document</title>
    <link rel="stylesheet" href="../css/register.css" rel="external nofollow" >
    <script src="../js/jquery.min.js"></script>
    <script>
        $(function(){
            // 注册按钮点击事件
            $(".btn").on("click",function(){
                var account = $(".account").val().trim();
                var password = $(".password").val().trim();
                var emailcode = $(".emailcode").val().trim();
                var email = $(".email").val().trim();
                $.ajax({
                    type:"post",
                    url:"/register",
                    data:{"account":account,"password":password,"emailcode":emailcode,"email":email},
                    success:function(data){
                        if(data.code=== 100){
                            alert("该账号已存在");
                        }else if(data.code === 300){
                            alert("账号注册失败");
                        }else if(data.code === 400){
                            alert("验证码错误");
                        }else{
                            alert("账号注册成功");
                            window.location.href="../pages/login.html" rel="external nofollow" ;
                        }
                    }
                });
            });
            // 发送验证码按钮点击事件
            $(".sendcode").on("click", function(){
                var email = $(".email").val().trim();
                if(email === "") {
                    alert("请输入邮箱");
                    return;
                }
                // 发送验证码请求
                $.ajax({
                    type:"get",
                    url:"/captcha/getcaptcha?email="+email,
                    success:function(data){
                        console.log(data)
                        if(data.code === 200){
                            alert("验证码已发送到邮箱");
                            // 启动倒计时
                            startcountdown(60);
                        } else {
                            alert("验证码发送失败,请重试");
                        }
                    }
                });
            });
            // 启动倒计时函数
            function startcountdown(seconds) {
                var timer = seconds;
                $(".sendcode").prop("disabled", true);
                var countdown = setinterval(function() {
                    $(".sendcode").val(timer + "秒后可重新发送");
                    timer--;
                    if (timer < 0) {
                        clearinterval(countdown);
                        $(".sendcode").prop("disabled", false);
                        $(".sendcode").val("发送验证码");
                    }
                }, 1000);
            }
        });
    </script>
    <style>
        *{
            padding: 0;
            margin: 0px;
            text-decoration: none;
        }
        body {
            background-image: url(../images2/1.jpg);
            background-size: cover;
            background-attachment: fixed;
        }
        .loginbox {
            height: 380px; /* 调整高度以适应新字段 */
            width: 26%;
            margin: 340px auto;
            background-color: rgb(158, 151, 158);
            opacity: 0.7;
            text-align: center;
        }
        .loginbox .top {
            display: block;
            height: 42px;
            background: linear-gradient(90deg, pink, red, pink, yellow, red);
            padding-top: 15px;
            font-size: 20px;
            font-weight: 600;
            color: black;
        }
        .loginbox span {
            color: black;
            font-weight: 500;
            font-size: 18px;
        }
        .loginbox input[type=text],
        .loginbox input[type=password] {
            height: 20px;
            border: none;
            border-radius: 4px;
            outline: none;
        }
        .loginbox input[type=button] {
            width: 40%;
            height: 24px;
            border: none;
            border-radius: 4px;
            margin: 0 auto;
            outline: none;
        }
        .loginbox .a {
            display: flex;
            margin: 20px auto;
            width: 45%;
            justify-content: space-between;
        }
        .loginbox .a a {
            color: white;
        }
        .loginbox .a a:hover {
            color: rgb(228, 221, 228);
        }
    </style>
</head>
<body>
<div class="loginbox">
    <span class="top">邮箱简易发送系统</span><br>
    <span>账号:</span>
    <input type="text" placeholder="请输入账号" class="account"><br><br>
    <span>密码:</span>
    <input type="password" placeholder="请输入密码" class="password"><br><br>
    <span>邮箱:</span>
    <input type="text" placeholder="请输入邮箱" class="email"><br><br>
    <input type="button" value="发送验证码" class="sendcode"><br><br>
    <span>验证码:</span>
    <input type="text" placeholder="请输入验证码" class="emailcode"><br><br>
    <input type="button" value="注册" class="btn">
    <div class="a">
        <a href="login.html" rel="external nofollow" >返回</a>
    </div>
</div>
</body>
</html>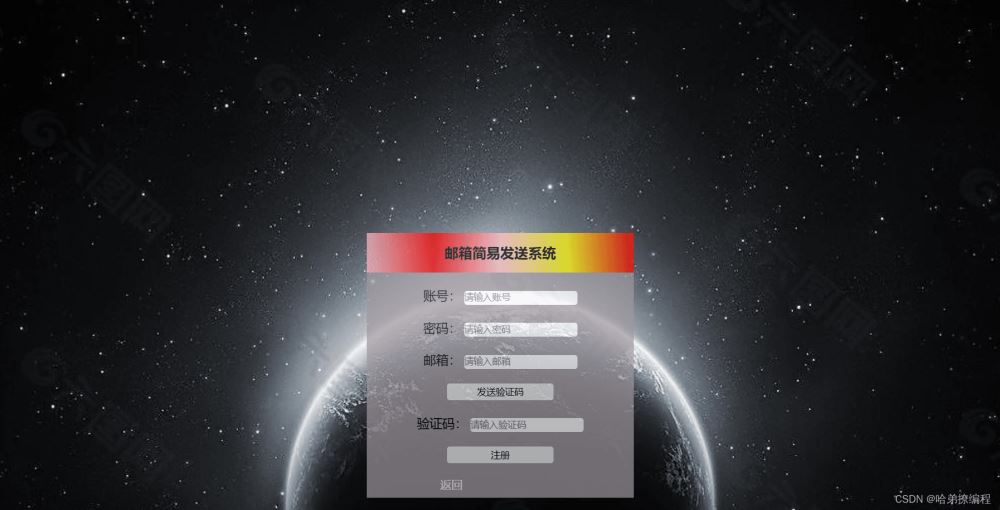
到此这篇关于springboot使用mail实现登录邮箱验证的文章就介绍到这了,更多相关springboot登录邮箱验证内容请搜索代码网以前的文章或继续浏览下面的相关文章希望大家以后多多支持代码网!


发表评论