一、存放位置分类
- 1.当前项目根目录下的config目录下
- 2.当前项目的根目录下
- 3.resources目录下的config目录下
- 4.resources目录下
按照这上面的顺序,4个配置文件的优先级依次降低。

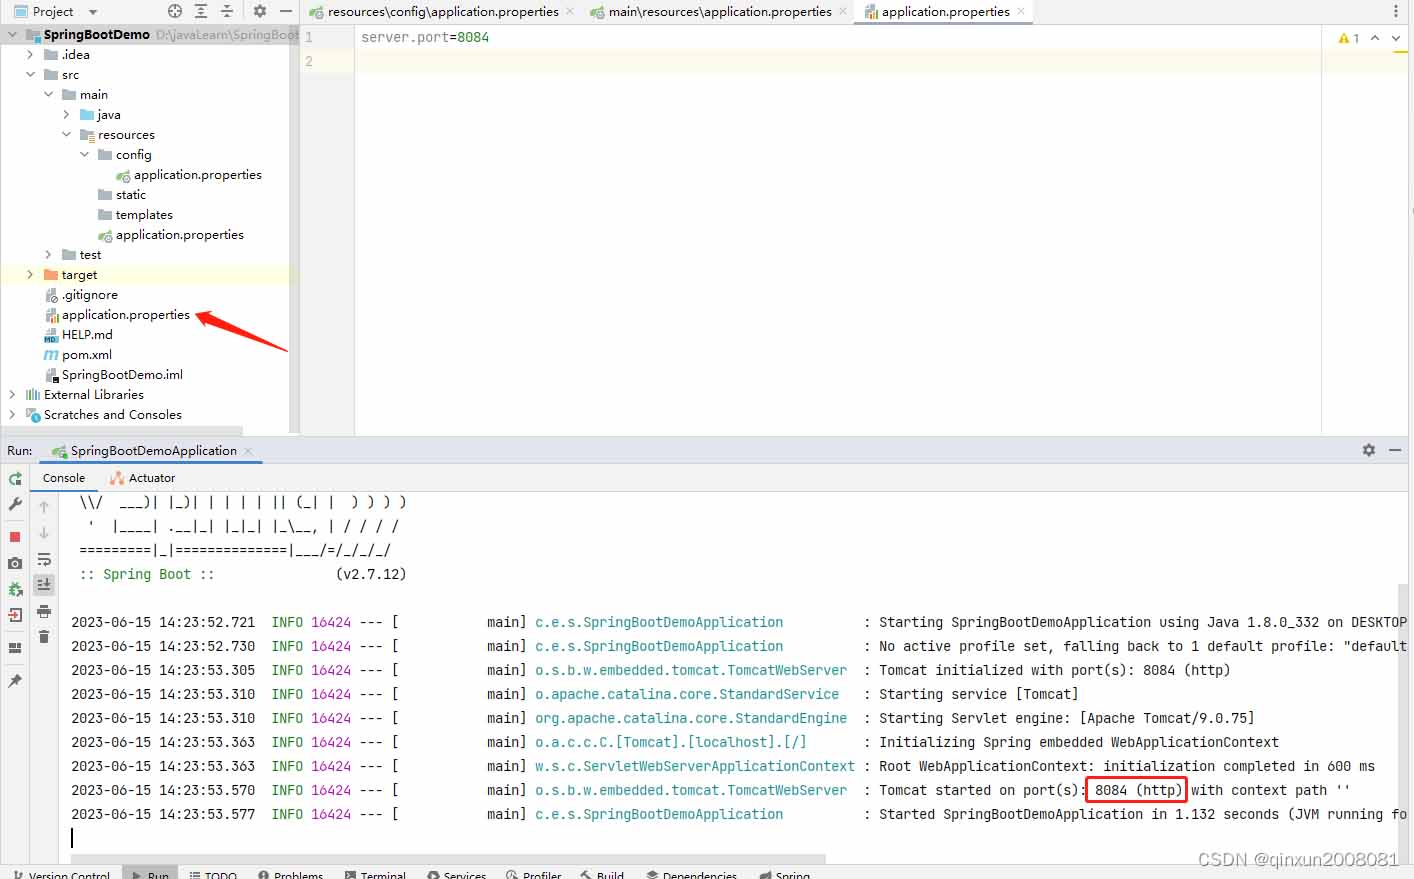
我们在项目里面4个位置分别设置了各种的application.properties文件。
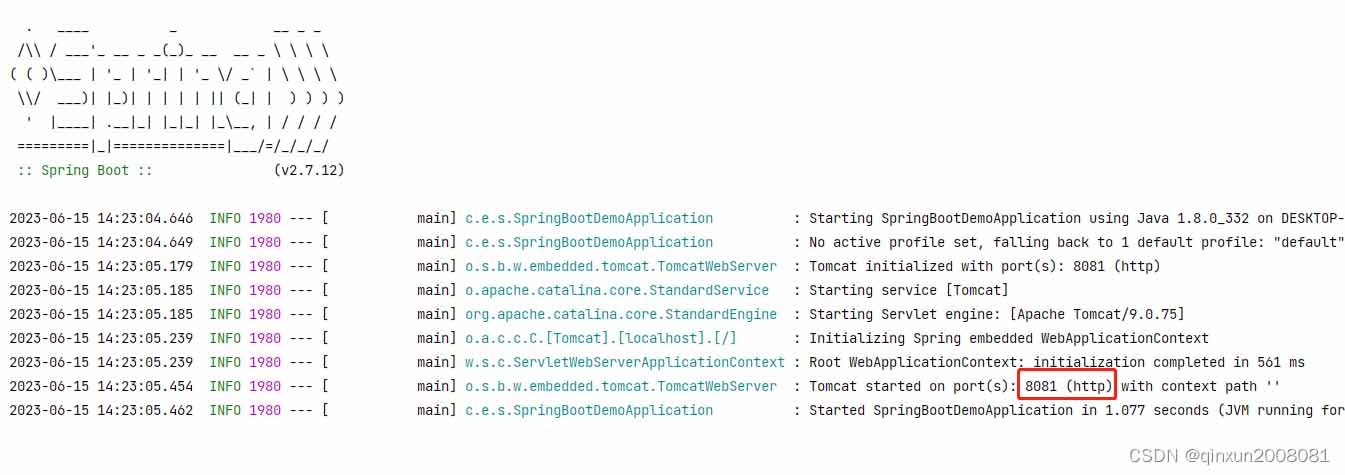
每个文件都设置了各种的端口号,我们启动项目看到我们当前使用的端口号是优先级最高的项目根目录下config里面的配置。
我们删除掉项目根目录下的config目录,现在项目使用的端口是项目根目录下的application.properties。
二、自定义存放位置
如果我们不在这4个位置也想加载我们的配置文件的话,我们可以在resources目录下创建一个新目录命名为myconfig,目录下存放一个application.properties文件。
我们可以在打包成jar的情况下在启动命令中加入配置文件的参数,就可以启动自定义的配置。
java -jar xx.jar --spring.config.location=classpath:/myconfig/
三、自定义文件名
我们的application.properties文件名称也可以修改,比如修改成app.properties。
我们可以在打成jar包的情况下在启动命令下加入配置文件名的参数,就可以使用自定义配置文件名。

java -jar springbootdemo-0.0.1-snapshot.jar --spring.config.name=app
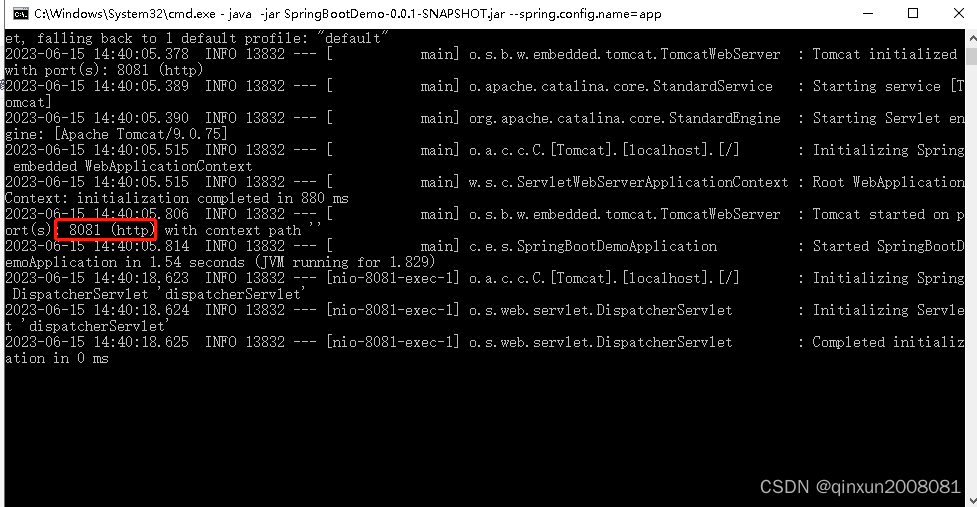
我们看到现在项目使用的端口是app.properties文件下的8081端口了。
四、属性注入
我们在application.properties文件中定义属性:
student.name=zhangsan
student.age=20
我们通过@value注解把这些属性注入到我们的student对象中:
示例代码如下:
import org.springframework.beans.factory.annotation.value;
import org.springframework.stereotype.component;

/**
 * @author qinxun
 * @date 2023-06-15
 * @descripion: 学生实体类
 */
@component
public class student {

    @value("${student.name}")
    private string name;

    @value("${student.age}")
    private integer age;


    @override
    public string tostring() {
        return "student{" +
                "name='" + name + '\'' +
                ", age=" + age +
                '}';
    }
}
测试:
import com.example.springbootdemo.bean.student;
import org.junit.jupiter.api.test;
import org.springframework.beans.factory.annotation.autowired;
import org.springframework.boot.test.context.springboottest;

@springboottest
class springbootdemoapplicationtests {

    @autowired
    private student student;

    @test
    void contextloads() {
        // 输出 student{name='zhangsan', age=20}
        system.out.println(student);
    }

}
五、类型安全的属性注入
示例代码如下:
import org.springframework.boot.context.properties.configurationproperties;
import org.springframework.stereotype.component;

/**
 * @author qinxun
 * @date 2023-06-15
 * @descripion: 学生实体类
 */
@component
@configurationproperties(prefix = "student")
public class student {

    private string name;

    private integer age;

    public string getname() {
        return name;
    }

    public void setname(string name) {
        this.name = name;
    }

    public integer getage() {
        return age;
    }

    public void setage(integer age) {
        this.age = age;
    }

    @override
    public string tostring() {
        return "student{" +
                "name='" + name + '\'' +
                ", age=" + age +
                '}';
    }
}
这里我们主要引入@configurationproperties(prefix="student")注解,并且配置了属性的前缀,此时自动将spring容器中对应的数据注入到对象对应的属性中,不用通过@value注解一个个注入。
配置文件:
student.name=lisi
student.age=20
测试:
import com.example.springbootdemo.bean.student;
import org.junit.jupiter.api.test;
import org.springframework.beans.factory.annotation.autowired;
import org.springframework.boot.test.context.springboottest;

@springboottest
class springbootdemoapplicationtests {

    @autowired
    private student student;

    @test
    void contextloads() {
        // 输出 student{name='lisi', age=20}
        system.out.println(student);
    }

}
总结
以上为个人经验,希望能给大家一个参考,也希望大家多多支持代码网。


发表评论