前言
甲方爹:bs=>cs?
我方领导:ojbk。
项目是普普通通的vue项目,要求封装成arm64的linux可执行程序。
提示:以下是本篇文章正文内容,下面案例可供参考
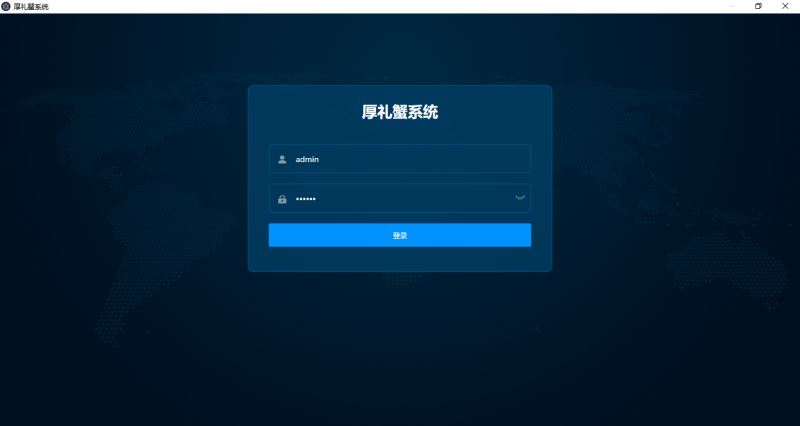
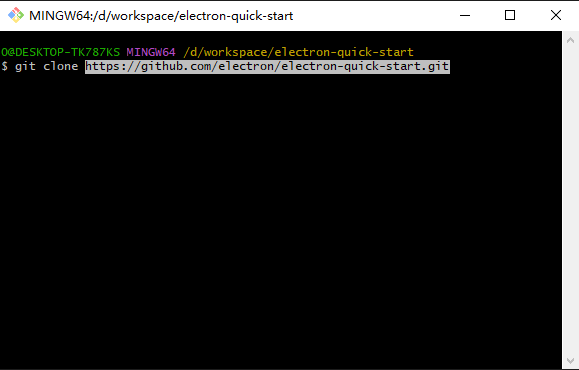
一、直接看效果
二、实现步骤
1.准备dist文件夹
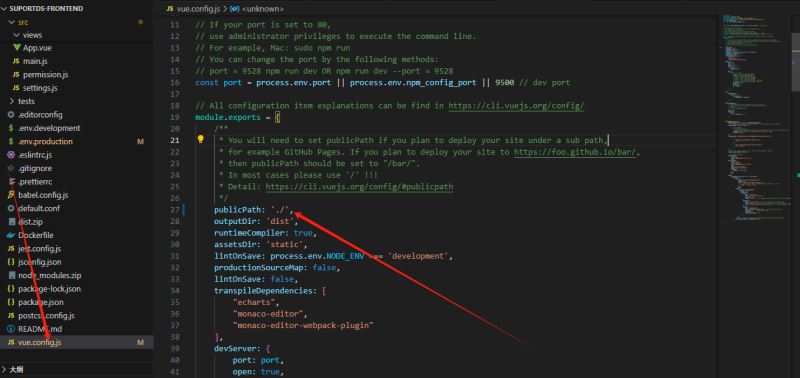
publicpath得是./,不然打包出来的dist跑起来是空白的,双击index.html能在浏览器中看到页面。
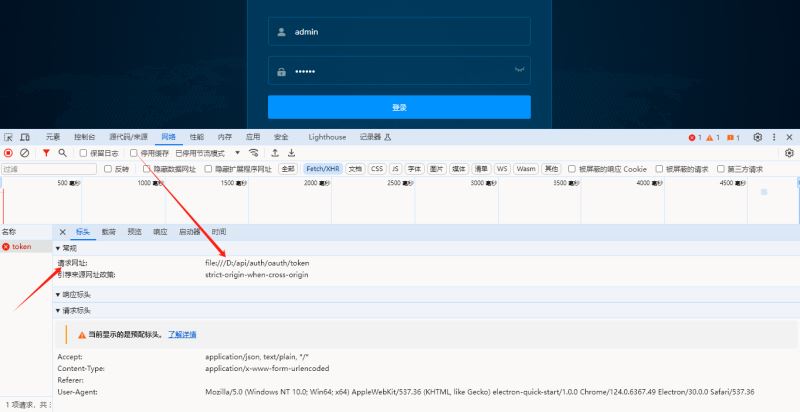
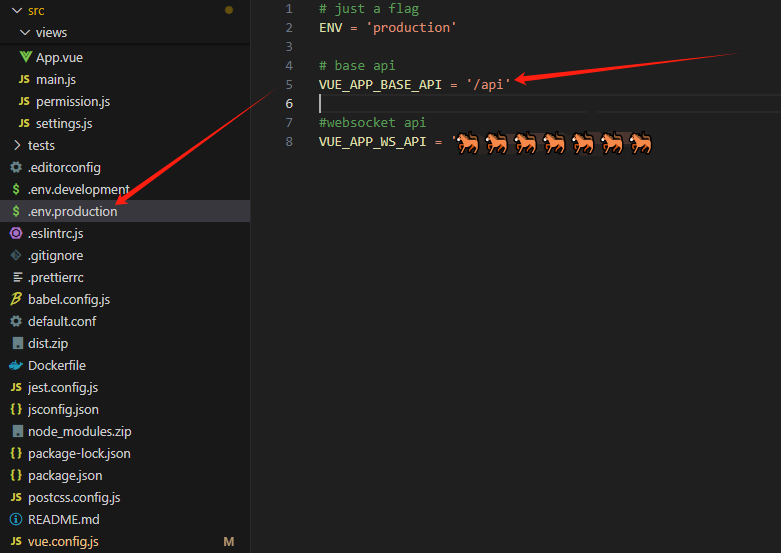
2.修改接口映射
接口请求映射关系修改,如果不修改映射关系,接口请求会变成通过file:///协议访问。我看有的人说把项目里面的接口都替换写死,wo...
修改一下.env.production 生产环境配置文件中vue_app_base_api的值为你的生产环境要访问的接口就行,格式为:http://ip地址:端口号。这里是vue.config.js的proxy和request.js的请求配置的变量配置。
3.nvm管理node版本
项目框架比较成熟,electron-quick-start比较新,中间遇到版本不兼容,一个16一个20。所以需要用nvm管理node版本,执行构建命令的时候切一下。
注意:通过nvm install的node不能直接切,需要把之前安装的node卸载了并且删除类似npmrc这样的文件或者文件夹,网上一搜一大把的说明文档。
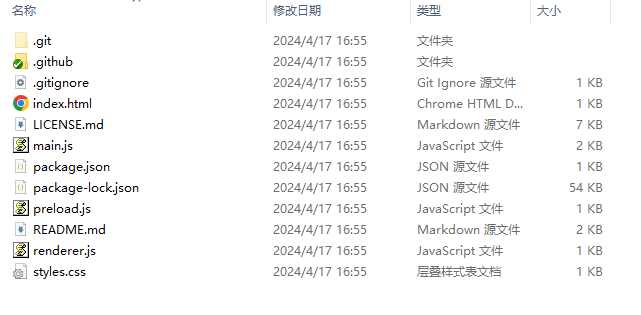
4.准备electron容器并npm run start

下载下来后是这样的。
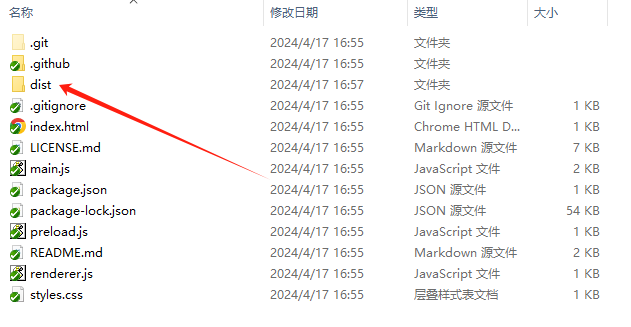
把前面准备的dist文件夹复制到根目录中来,像下面这样。
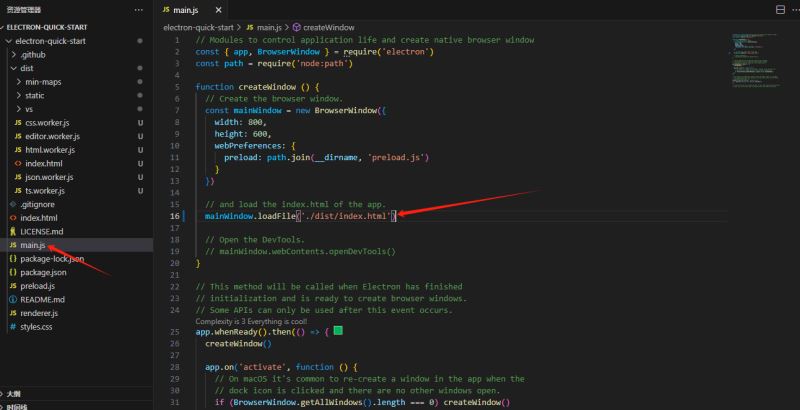
修改main.js的load路径。
修改完执行npm run start就能看到打包后的效果了,需要屏蔽操作栏或者默认最大化之类的可以看看官方手册的browserwindow配置内容。
官方手册:browserwindow
下面贴一下我自己的。
// modules to control application life and create native browser window
const { app, browserwindow,menu } = require('electron')
const path = require('node:path')

function createwindow () {
  // create the browser window.
  const mainwindow = new browserwindow({
    width: 800,
    height: 600,
    webpreferences: {
      preload: path.join(__dirname, 'preload.js')
    },
    minimizable: false,//窗口是否可最小化
    fullscreen: false,//是否全屏展示:没有窗口
  })
  mainwindow.maximize();//窗口最大化展示
  // and load the index.html of the app.
  mainwindow.loadfile('./dist/index.html')
  menu.setapplicationmenu(null);//去掉默认的操作栏
  // open the devtools.开发者工具是否打开
  // mainwindow.webcontents.opendevtools()
}

// this method will be called when electron has finished
// initialization and is ready to create browser windows.
// some apis can only be used after this event occurs.
app.whenready().then(() => {
  createwindow()

  app.on('activate', function () {
    // on macos it's common to re-create a window in the app when the
    // dock icon is clicked and there are no other windows open.
    if (browserwindow.getallwindows().length === 0) createwindow()
  })
})

// quit when all windows are closed, except on macos. there, it's common
// for applications and their menu bar to stay active until the user quits
// explicitly with cmd + q.
app.on('window-all-closed', function () {
  if (process.platform !== 'darwin') app.quit()
})

// in this file you can include the rest of your app's specific main process
// code. you can also put them in separate files and require them here.
5.封装成可执行程序
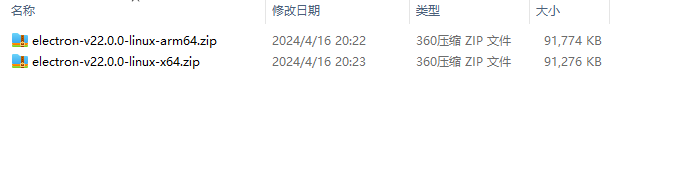
5.1.手动下载electron对应版本的zip文件,解决打包缓慢问题
下载地址:electron zip文件
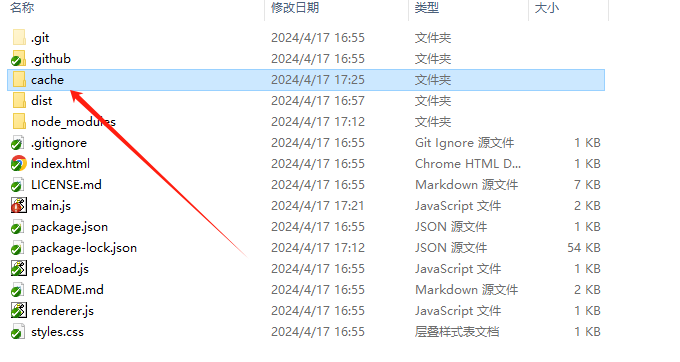
新建cache文件夹,把压缩包放进去,如下。
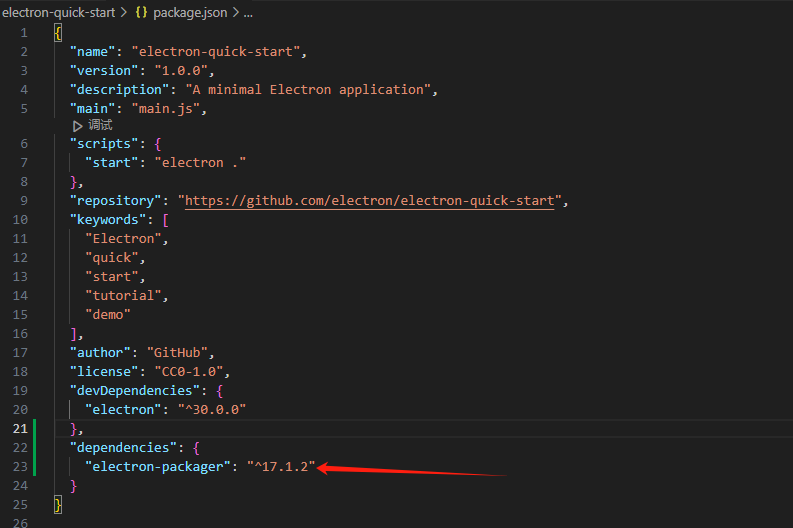
5.2.安装packager
npm install electron-packager
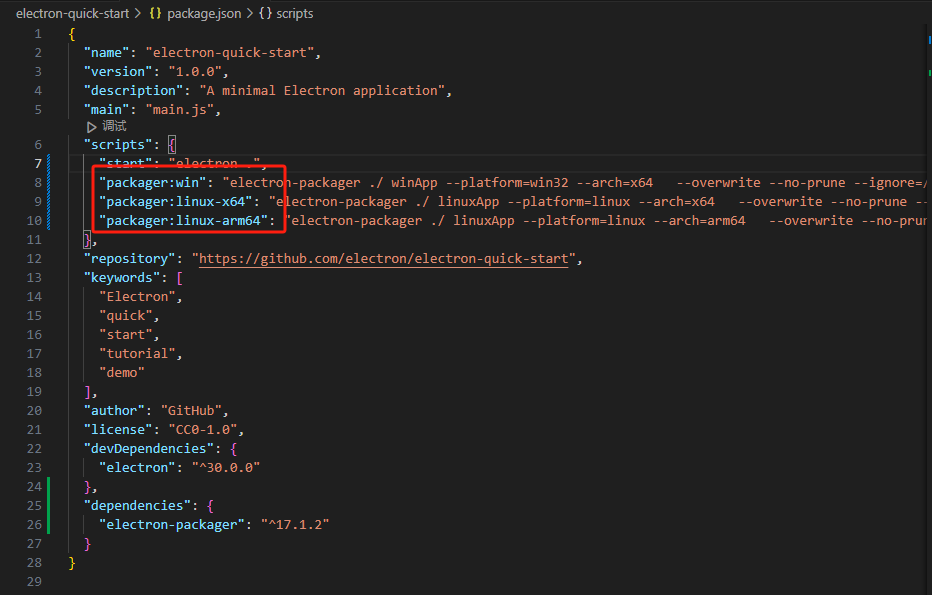
5.3.配置打包命令执行内容
"scripts": {
    "packager:win": "electron-packager ./ winapp --platform=win32 --arch=x64   --overwrite --no-prune --ignore=/node_modules",
    "packager:linux-x64": "electron-packager ./ linuxapp --platform=linux --arch=x64   --overwrite --no-prune --ignore=/node_modules",
    "packager:linux-arm64": "electron-packager ./ linuxapp --platform=linux --arch=arm64   --overwrite --no-prune --ignore=/node_modules"
  },
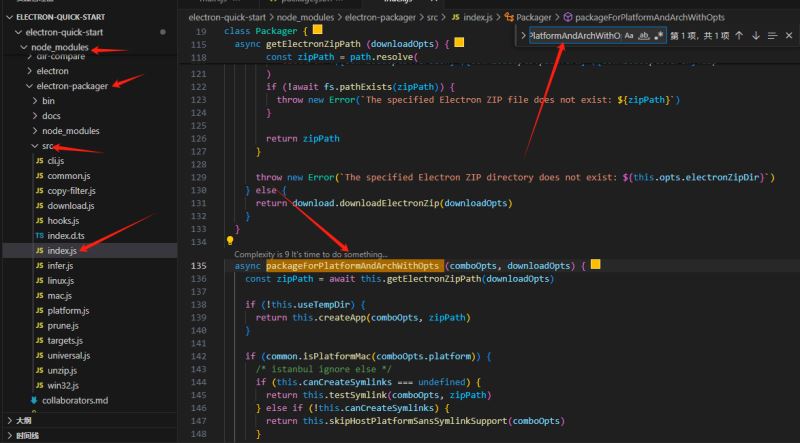
5.4.修改electron-packager源码
找到electron-packager的src文件夹下面的index.js搜一下packageforplatformandarchwithopts方法,替换为下面代码块的内容。
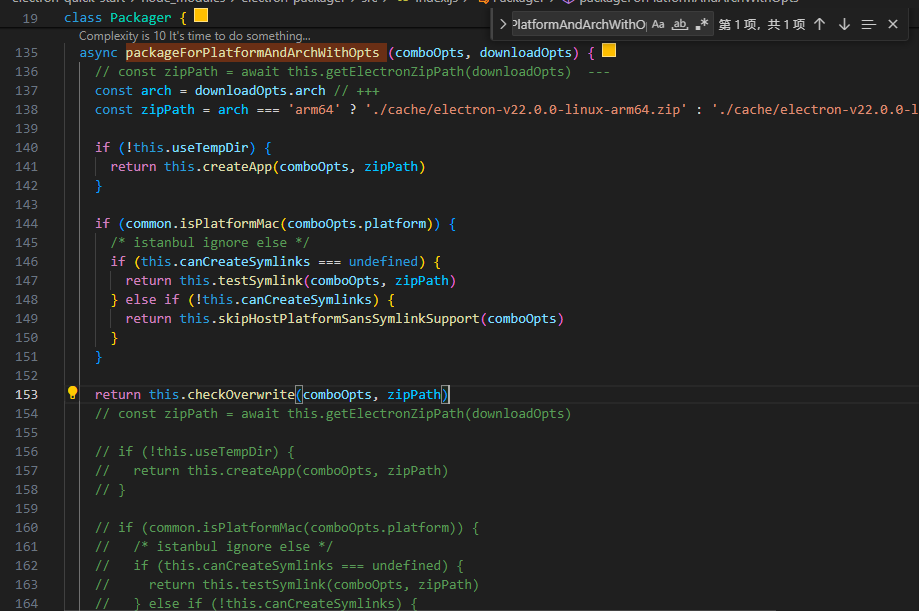
async packageforplatformandarchwithopts (comboopts, downloadopts) {
    // const zippath = await this.getelectronzippath(downloadopts)  ---
    const arch = downloadopts.arch // +++
    const zippath = arch === 'arm64' ? './cache/electron-v22.0.0-linux-arm64.zip' : './cache/electron-v22.0.0-linux-x64.zip' // +++

    if (!this.usetempdir) {
      return this.createapp(comboopts, zippath)
    }

    if (common.isplatformmac(comboopts.platform)) {
      /* istanbul ignore else */
      if (this.cancreatesymlinks === undefined) {
        return this.testsymlink(comboopts, zippath)
      } else if (!this.cancreatesymlinks) {
        return this.skiphostplatformsanssymlinksupport(comboopts)
      }
    }

    return this.checkoverwrite(comboopts, zippath)
}
替换:
5.5.执行打包命令
npm run packager:linux-arm64
总结
以上就是electron打包dist为可执行程序的实现步骤的详细内容,更多关于electron打包dist的资料请关注代码网其它相关文章!


发表评论