mysql
centos7为例
name="centos linux"
version="7 (core)"
id="centos"
id_like="rhel fedora"
version_id="7"
pretty_name="centos linux 7 (core)"
ansi_color="0;31"
cpe_name="cpe:/o:centos:centos:7"
home_url="https://www.centos.org/"
bug_report_url="https://bugs.centos.org/"
centos_mantisbt_project="centos-7"
centos_mantisbt_project_version="7"
redhat_support_product="centos"
redhat_support_product_version="7"
1.安装docker环境
联网环境在线yum
yum update
yum install -y yum-utils device-mapper-persistent-data lvm2

yum-config-manager --add-repo https://download.docker.com/linux/centos/docker-ce.repo
yum install -y docker-ce docker-ce-cli containerd.io
systemctl start docker
systemctl enable docker
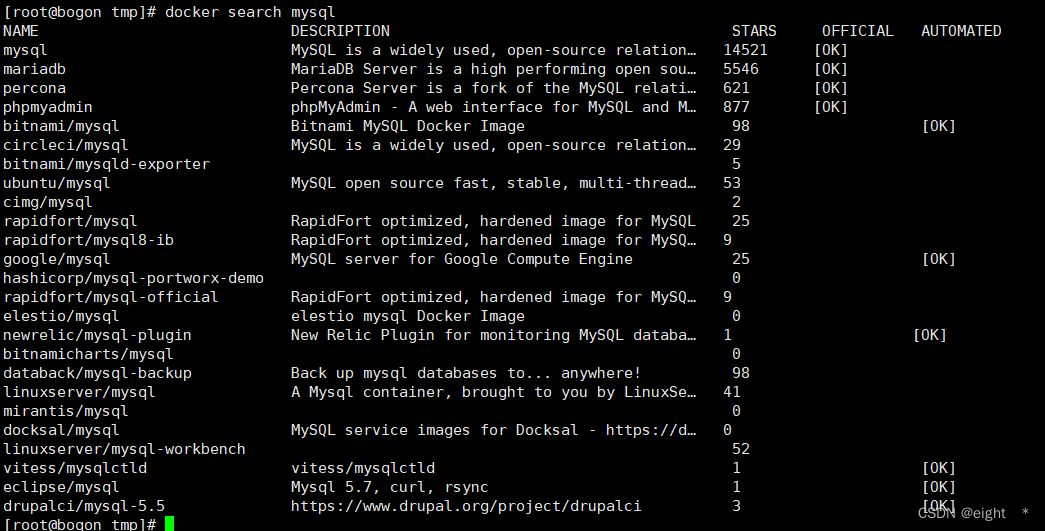
2.search下mysql镜像
3.下载一个5.7的镜像,默认为latest
docker pull mysql:5.7

4.创建mysql容器
使用mysql:5.7的镜像创建一个名字为mysql-container的容器,并设置了mysql的root密码的环境变量及映射端口为3306
docker run -d --name mysql-container -e mysql_root_password=123456 -p 3306:3306 mysql:5.7
- -d: 指定容器应该在后台运行。
- -it: 让容器能够与终端进行交互。
- –name: 指定容器的名称。
- -p: 将容器端口映射到主机上的端口。
- -v: 指定卷并将其挂载到容器中。
5.查看容器进程
docker ps | grep mysql

6.进入容器
docker exec -it mysql-container /bin/bash
7.创建数据库及表
create database docker
use docker
create table dockerimages(images_id int not null primary key, images_name varchar(20), create_time timestamp);
insert into dockerimages(id,images_name,create_time)values('1','mysql','2023-10-17 16:00:00');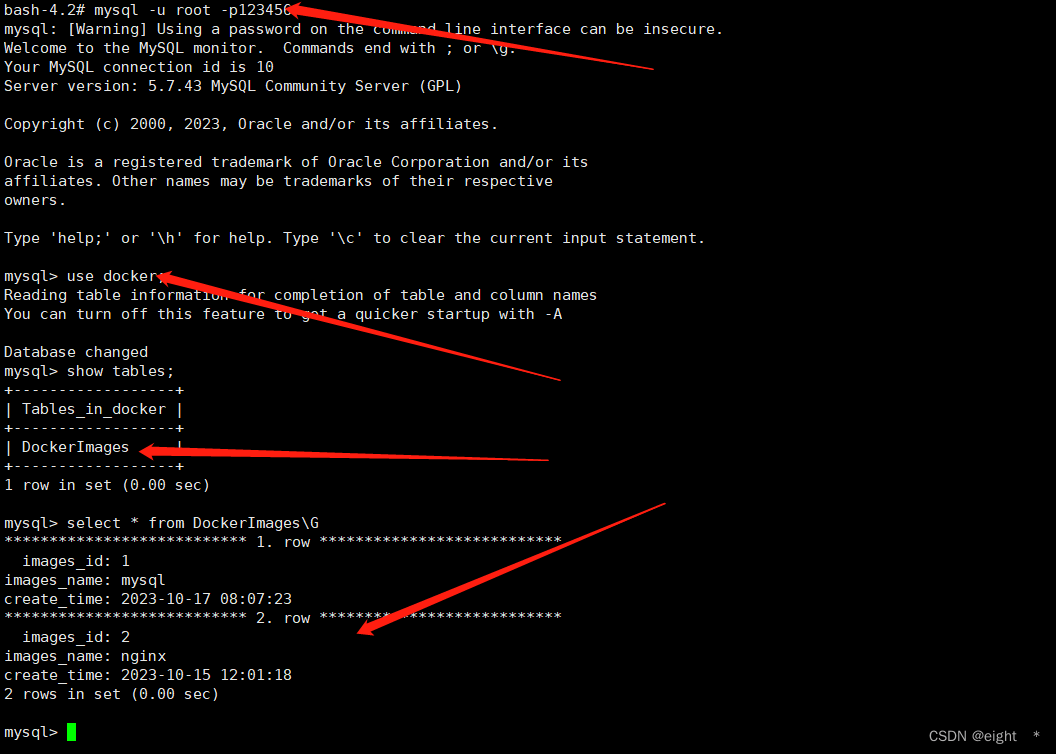
8.退出容器,在宿主机上执行命令测试

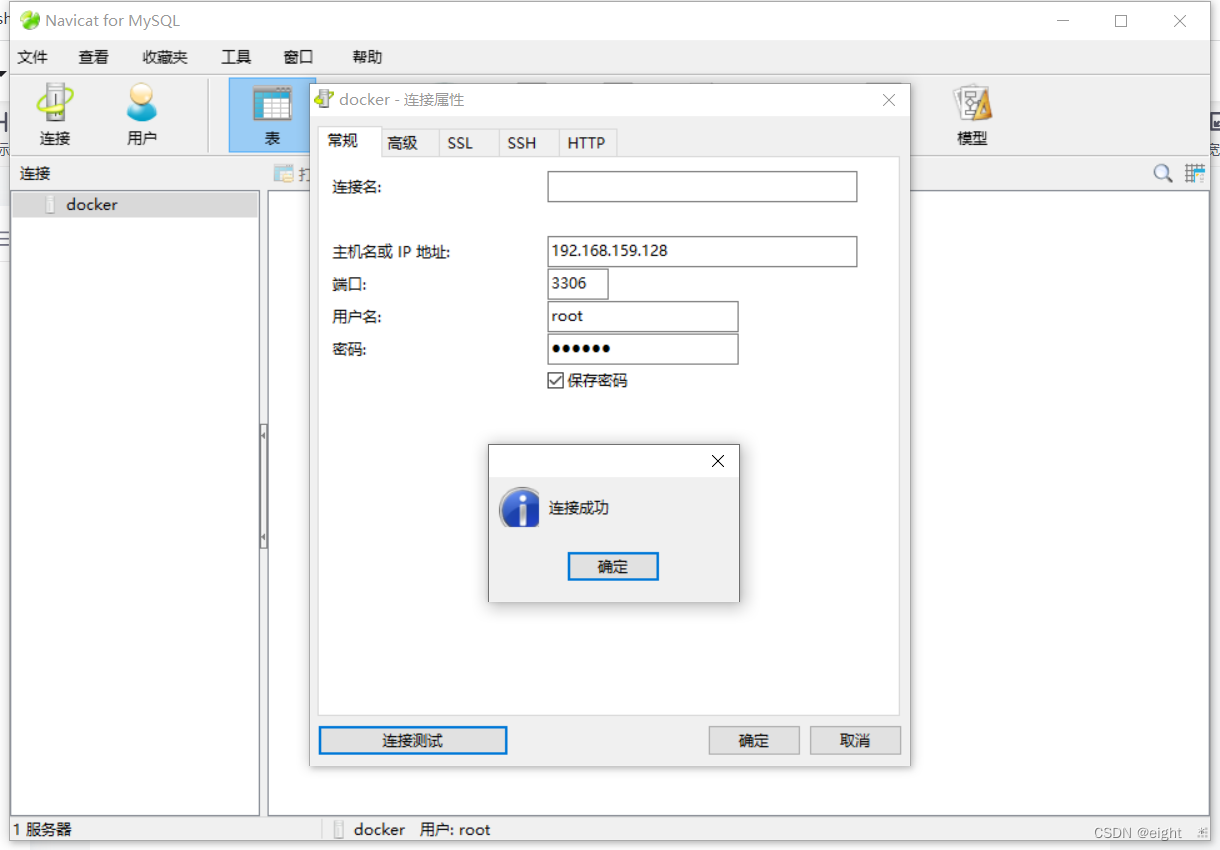
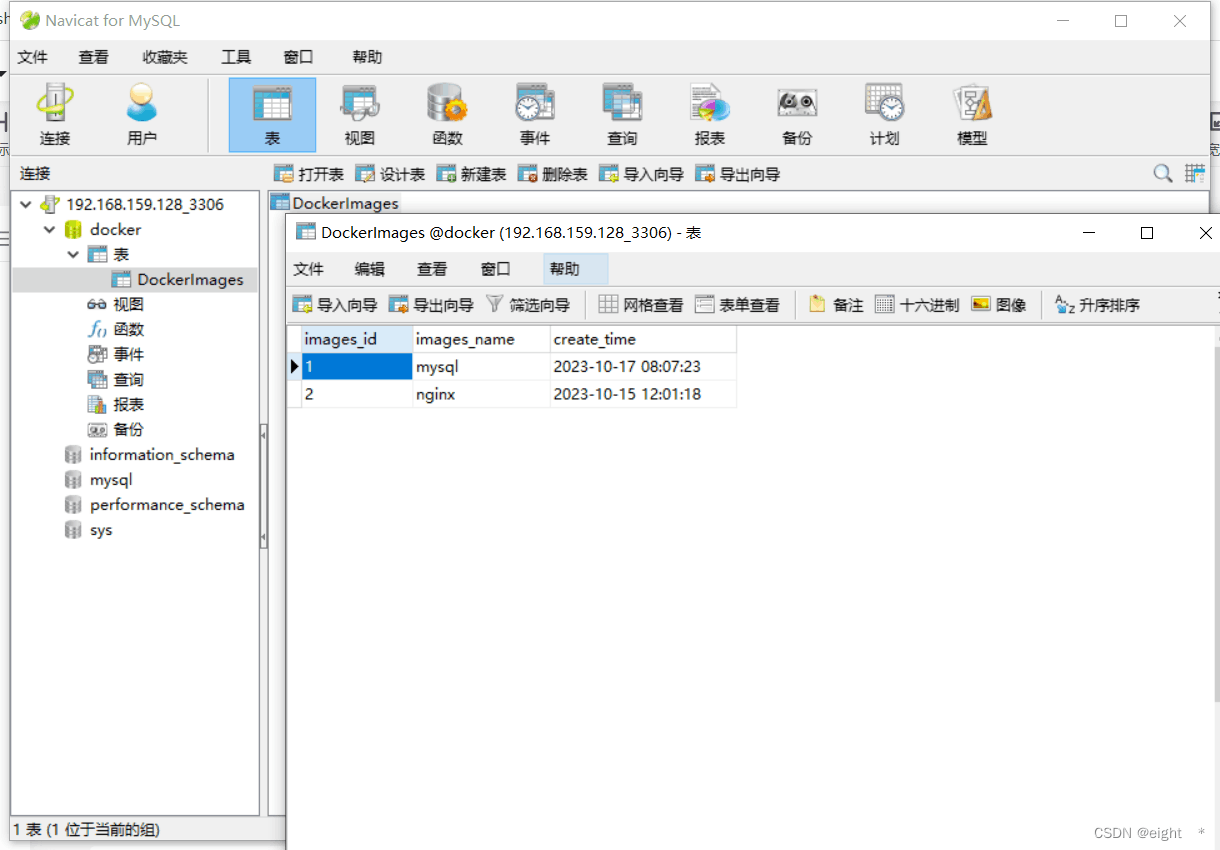
9.使用navicat连接mysql测试
nginx
1.先下载镜像
docker pull nginx

2.宿主机上创建index.html
mkdir -p /usr/share/nginx/html/index.html
复制如下内容:
<!doctype html>
<html>
<head>
<title>welcome to nginx!</title>
<style>
html { color-scheme: light dark; }
body { width: 35em; margin: 0 auto;
font-family: tahoma, verdana, arial, sans-serif; }
</style>
</head>
<body>
<h1>hahahhahahahaha</h1>
<p>if you see this page, the nginx web server is successfully installed and
working. further configuration is required.</p>

<p>for online documentation and support please refer to
.<br/>
commercial support is available at
.</p>

<p><em>thank you for using nginx.</em></p>
</body>
</html>
3.创建容器
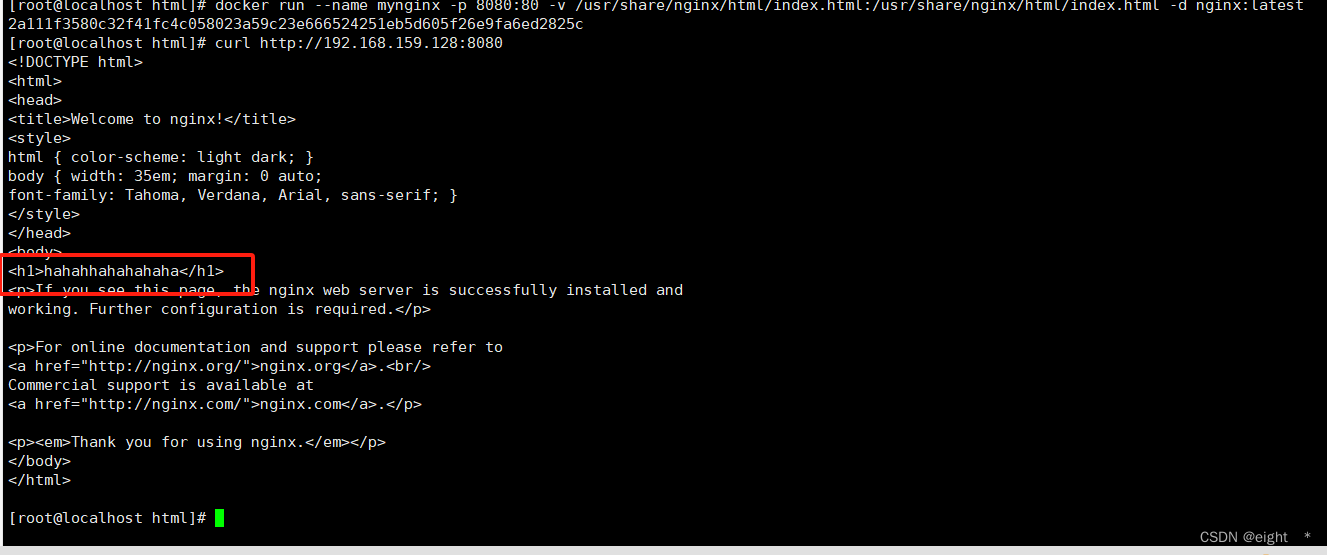
docker run --name mynginx -p 8080:80 -v /usr/share/nginx/html/index.html:/usr/share/nginx/html/index.html -d nginx:latest
映射目录是为了数据持久化,否则容器内修改的任何数据在重启容器后,数据将恢复原样
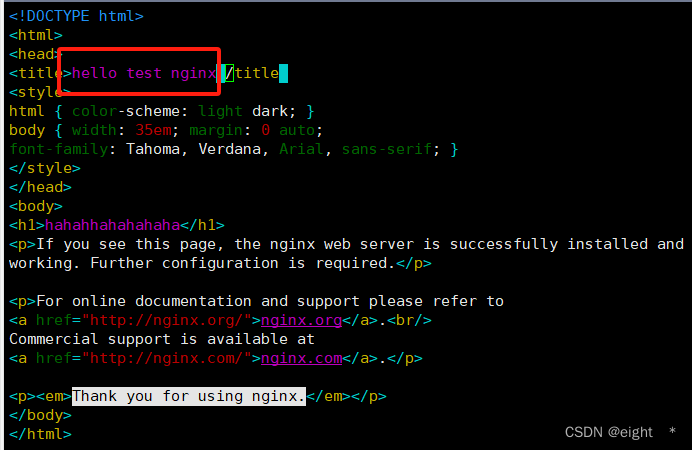
4.修改title
5.重启nginx容器
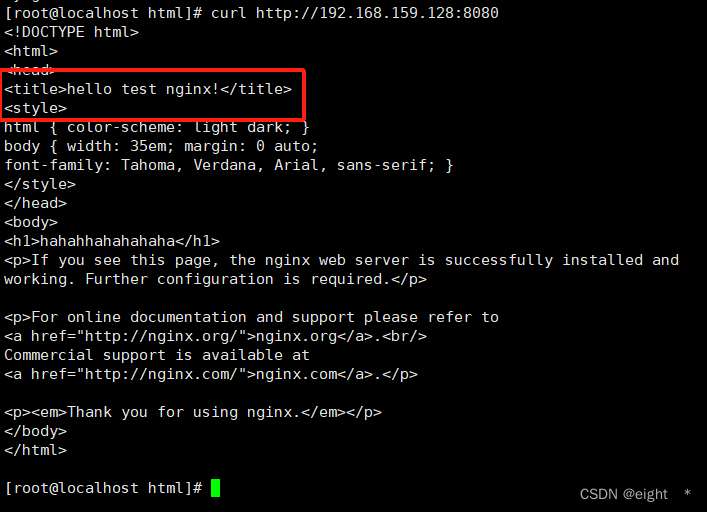
docker restart mynginx
6.访问nginx
以上就是docker部署mysql和nginx服务的示例详解的详细内容,更多关于docker部署mysql和nginx的资料请关注代码网其它相关文章!

发表评论