小伙伴们,你们好,我是老寇,我又回来辣,几个月不见甚是想念啊!!!
因云平台需要改造,es7升级为es8,所以记录一下,es8需要开启ssl认证,需要配置证书,全本带你用docker安装,便于后面es8的学习
准备工作
ik分词
pinyin分词
生成证书
bin目录下执行如下命令
./elasticsearch-certutil cert --ca config/certs/elastic-certificates.p12
配置文件(elasticsearch.yml)
http.cors.enabled: true
http.cors.allow-origin: "*"
network.host: 0.0.0.0
cluster.name: laokou-elasticsearch #可自定义
node.name: node-elasticsearch #可自定义
http.port: 9200
# 单节点
discovery.type: single-node
# 内存交换的选项,官网建议为true
bootstrap.memory_lock: true
xpack.security.enabled: true
xpack.security.transport.ssl.enabled: true
xpack.security.transport.ssl.keystore.type: pkcs12
xpack.security.transport.ssl.verification_mode: certificate
xpack.security.transport.ssl.keystore.path: certs/elastic-certificates.p12
xpack.security.transport.ssl.truststore.path: certs/elastic-certificates.p12
xpack.security.transport.ssl.truststore.type: pkcs12
xpack.security.http.ssl.enabled: true
xpack.security.http.ssl.keystore.type: pkcs12
xpack.security.http.ssl.keystore.path: certs/elastic-certificates.p12
xpack.security.http.ssl.truststore.path:  certs/elastic-certificates.p12
xpack.security.http.ssl.verification_mode: certificate
xpack.security.http.ssl.truststore.type: pkcs12
http.cors.allow-headers: authorization
文件划分

配置编排
version: '3.8'
services:
  elasticsearch:
    image: elasticsearch:8.12.2
    container_name: elasticsearch
    # 保持容器在没有守护程序的情况下运行
    tty: true
    restart: always
    privileged: true
    ports:
      - "9200:9200"
      - "9300:9300"
    volumes:
      - ./elasticsearch8/config/elasticsearch.yml:/usr/share/elasticsearch/config/elasticsearch.yml
      # 请手动授予rw权限,不然无法写入文件
      - ./elasticsearch8/data:/usr/share/elasticsearch/data
      - ./elasticsearch8/logs:/usr/share/elasticsearch/logs
      - ./elasticsearch8/plugins:/usr/share/elasticsearch/plugins
      - ./elasticsearch8/config/certs/elastic-certificates.p12:/usr/share/elasticsearch/config/certs/elastic-certificates.p12
    environment:
      - tz=asia/shanghai
      - es_java_opts=-xmx512m -xms512m
      - elastic_password=laokou123
    network_mode: bridge
    ulimits:
      memlock:
        soft: -1
        hard: -1
docker-compose up -d
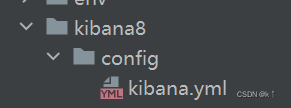
配置文件(kibana.yml)
server.name: kibana
server.host: 0.0.0.0
server.port: 5601
server.ssl.enabled: false
elasticsearch.hosts: [ "https://elasticsearch.laokou.org:9200" ]
xpack.monitoring.ui.container.elasticsearch.enabled: true
elasticsearch.ssl.verificationmode: none
elasticsearch.username: "kibana_system"
elasticsearch.password: "laokou123"
i18n.locale: zh-cn
配置编排
  kibana:
    image: kibana:8.12.2
    container_name: kibana
    # 保持容器在没有守护程序的情况下运行
    tty: true
    restart: always
    privileged: true
    environment:
      - tz=asia/shanghai
    ports:
      - "5601:5601"
    volumes:
      - ./kibana8/config/kibana.yml:/usr/share/kibana/config/kibana.yml
    depends_on:
      - elasticsearch
    extra_hosts:
      - "elasticsearch.laokou.org:127.0.0.1"
    deploy:
      resources:
        limits:
          cpus: '0.50'
          memory: 1g
创建密码
docker exec -it elasticsearch /bin/bash
curl -s -x post https://elasticsearch.laokou.org:9200/_security/user/kibana_system/_password -d "{\"password\":\"laokou123\"}"
启动编排
docker-compose up -d
github地址:docker-compose启动es8
到此这篇关于docker compose安装es+kibana 8.12.2的文章就介绍到这了,更多相关docker compose安装es内容请搜索代码网以前的文章或继续浏览下面的相关文章希望大家以后多多支持代码网!


发表评论